Thanks, Dorothy! It was an inspiration to change the color of the dsp.
Sue
Monthly Archives: September 2012
Downtown Grunge DSP Recolored
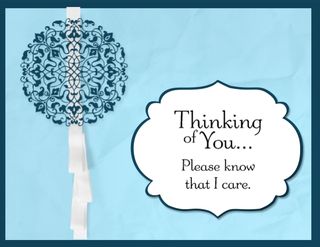 Supplies: MDS2+ (130646), MDS2 (130644), MDS2 upgrade (130650), or 30-day FREE trial of MDS2 (130910); Background Card Stock/Midnight Muse; Embellishments Timeless Taffeta Trimmings – ruffle bow whisper white (131329); Stamps Vintage Overlays – texture 1(121061), Artistic Etching – large flourish (124013),Thoughts & Prayers – thinking of you (comes with the software); Punches Convention 2012 – curvy frame from Convention 2012 Photobook Template (130971); Downtown Grunge Designer Kit, designer series paper – 4 (126056)
I love the wrinkled designer series paper from the Downtown Grunge Designer Kit but have wished it came in other colors besides Crumb Cake. Now thanks to MDS2, I can recolor that dsp to my heart's content. Today I gave it a Pacific Point color. Since recoloring has to deal with the original color of the dsp, the outcome will not be exactly the same as a card stock color, but I am very happy with the color I got. I also used the new Timeless Taffeta Trimmings download as an embellishment. Since the file was created for a 12 x 12 scrapbook page, I used a new feature of MDS2 to crop off the ends of the ribbon, a great new feature! The effect of the Vintage Overlay stamp is very subtle as I reduced the opacity to about 15%. I just wanted a hint of "dirt" around the upper left-hand corner rather than heavy stippling.
I hope you like this card and that it inspires you to play with the cropping and recoloring tools of the new MDS2 software. If you haven't made the plunge yet in ordering MDS2, how about dappling your toes in it by ordering the 30-day Free Trial? Just click here to order it and get started. I am always here to help you and there is a wealth of information on www.mydigitalstudio.net.
Until next time…blessings,
Sue
sue@soggystamper.com
Bootiful Occasions Stamp Set
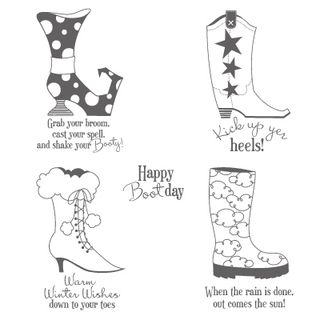 This week on The Soggy Stamper, I am going to feature this Bootiful Occasions Stamp Set. Each day I will post a card made with the set to give you ideas of what can be done with it. What attracted me to the set originally is the rain boot. The saying "After the rain, comes the sun" is only true sometimes here in SE Alaska. So often it is "After the rain, comes MORE rain!" But, I still love the set. So here is my first card, the rain boot one.
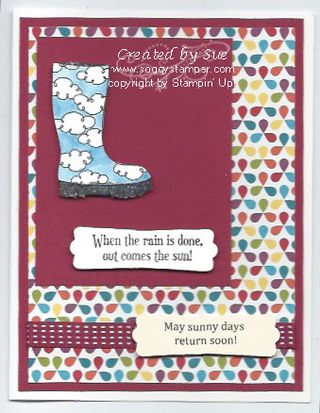 Supplies: Bootiful Occasions (c-126597, w-126595), Watercolor paper (122959), Raspberry Ripple and Very Vanilla card stock, Summer Smooches Designer Series Paper (125409), Raspberry Ripple 3/8" stitched satin ribbon (126845)
I used the Pacific Point crayon from the Watercolor Wonder Crayons – Brights (119804) to color in the image after stamping it on watercolor paper with black Stazon ink. Then I cut the boot out and punched the sentiment out with the Modern Label punch. The rest of the sentiment was computer generated, printed out on Very Vanilla card stock, and punched out with the Modern Label punch as well. After wrapping Raspberry Ripple 3/8" stitched satin ribbon around the dsp layer, I adhered the label with Stampin' Dimensionals.
You can order any of the supplies you need by clicking on their names or by visiting my demonstrator online store. Remember that for every $40 of product you order, you can choose a FREE roll of the 3/8" stitched satin ribbon. There is only a little over one week left in this offer so place your order now!
Thanks for coming to visit today. Come back tomorrow to see what else I have created with this stamp set.
Until next time…blessings,
Sue
sue@soggystamper.com
A Wicked Cool Card on Terrific Tuesday
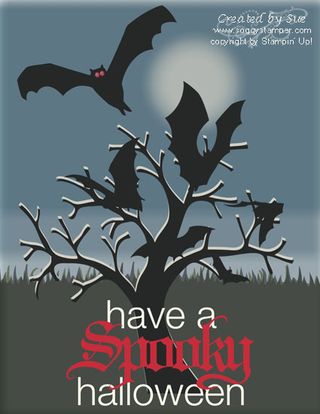 Supplies: MDS2+ (130646), MDS2 (130644), MDS2 upgrade (130650), or 30-day FREE trial of MDS2 (130910); Wicked Fun Designer Kit (127609), Spook Central Ensemble (127589)
Welcome to Terrific Tuesday here in My Digital Craft Corner. The new downloads can be seen here on the right hand side of the screen. I love using the taffeta ribbon on my traditional cards because it ties into such beautiful bows. I am happy that Timeless Taffeta Trimmings is one of the new downloads. For less than the cost of a roll of taffeta ribbon, you get the digital version of 11 colors of ribbon plus three different ties of each, 50 embellishments in all. And…you don't have to fuss with the bow. It is done perfectly for you each time you use the embellishment. :o)
I did order that download today, but I was in a Halloween card mood so I downloaded a couple of older Halloween downloads, Wicked Fun Designer Kit for the bats and the greeting, and Spooks Central Designer Ensemble for the tree. The grass is the grass punch. To get a really dark green, I copied the punch and filled one with Always Artichoke color and the other with Basic Black with an opacity of 65%. Then I layered them. The moon and the background are a series of punches where I used just the drop shadows. To get the greeting, I cropped the 'have a' and 'halloween' from the 'have a wicked halloween' stamp and then added 'spooky' in between the two lines. I love the new feature in MDS2 that allows us to crop stamps and embellishments now.
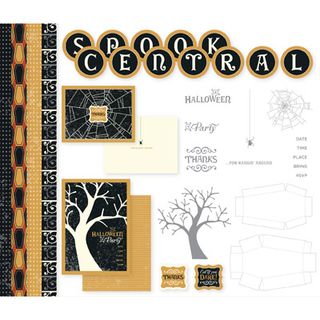
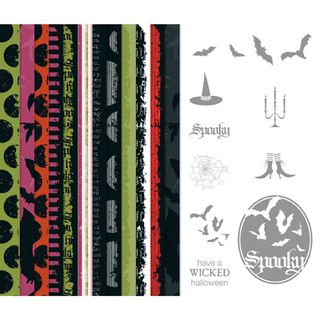
Here are the indexes of the two kits I used:
Spook Central Wicked Fun
To order either of these digital kits, just click on their name in the supplies list or visit my demonstrator online store here. Thanks for coming to visit. I'll see you tomorrow?
Until next time…blessings,
Sue
sue@soggystamper.com
My Digital Studio Monday – Fantabulous You
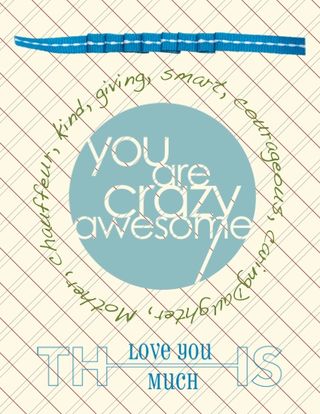 Supplies: MDS2+ (130646), MDS2 (130644), MDS2 upgrade (130650), or 30-day FREE trial of MDS2 (130910); Knots and Ties (131211), Fantabulous You (129920), Day in the Life Digital Kit (128876) Designer Series Paper 9
The other day a question was asked on one of my online groups how to get words printed in a circle using MDS2. It was suggested that perhaps attaching the text to a circular line would work. So….I decided to play around with that and see if I could do it. While my circle is not quite round, I am pleased with the results. Yep…you can write text in a circle! Hmmm….talking in circles am I? I created this card to email to our younger daughter to encourage her. She has a lot on her plate as many mothers with young families do. I felt the Fabulous You stamp brush set expressed my sentiments pretty well. After creating the circular text and the sentiment, I searched through my designer series papers on my computer for one that would make a good background. This one from the Day in the Life Digital Kit works well.
Thanks for coming to visit. If you give creating a circular text a try, email me your sample and I'll be happy to share it on my blog.
Until tomorrow…blessings,
Sue
sue@soggystamper.com
My Digital Studio Monday – Fantabulous You
 Supplies: MDS2+ (130646), MDS2 (130644), MDS2 upgrade (130650), or 30-day FREE trial of MDS2 (130910); Knots and Ties (131211), Fantabulous You (129920), Day in the Life Digital Kit (128876) Designer Series Paper 9
The other day a question was asked on one of my online groups how to get words printed in a circle using MDS2. It was suggested that perhaps attaching the text to a circular line would work. So….I decided to play around with that and see if I could do it. While my circle is not quite round, I am pleased with the results. Yep…you can write text in a circle! Hmmm….talking in circles am I? I created this card to email to our younger daughter to encourage her. She has a lot on her plate as many mothers with young families do. I felt the Fabulous You stamp brush set expressed my sentiments pretty well. After creating the circular text and the sentiment, I searched through my designer series papers on my computer for one that would make a good background. This one from the Day in the Life Digital Kit works well.
Thanks for coming to visit. If you give creating a circular text a try, email me your sample and I'll be happy to share it on my blog.
Until tomorrow…blessings,
Sue
sue@soggystamper.com
Scentsational Season Gingerbread Boy
Supplies: Scentsational Season Stamp Set (c-121190, w-129945), Holiday Collection Framelits (127814), or Scentsational Season Bundle (c-129946, w-129945), Snow Festival Designer Series Paper (129831), Vanilla Scented Embossing Powder (retired)
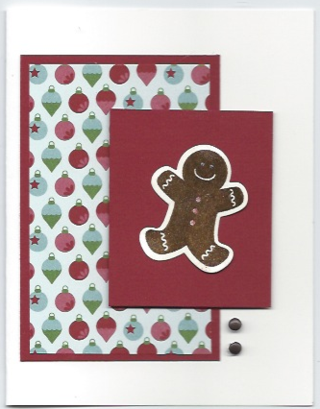
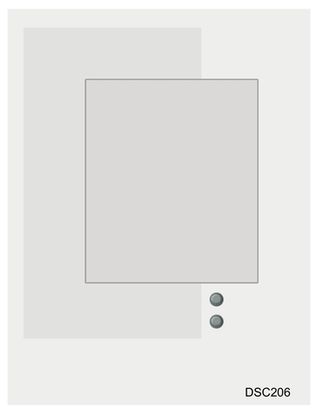
This is my version of the Utah Divas International weekend sketch challenge for this weekend. I love the little gingerbread boy from the Scentsational Season stamp set and embossed him with the Vanilla scented embossing powder. I wish you could smell it! It smells soooo delicious! But I goofed. I should have embossed him with the Sugar and Spice embossing powder (127829)which is in the current Holiday mini catalog. Cutting him out was quick and easy with his shape in the Holiday Collection Framelits. Don't you love when you get a bargain? This holiday season, Stampin' Up! is offering bundles at a 15% savings. So…order both the stamp set and the corresponding Framelits. This is the sketch. It is a very quick and easy one. Keep it in your sketch folder for when you need a quick inspiration.
 Thanks for coming to visit. If you need any of the products I used to make this card, just click on the links or visit my demonstrator online store.
Until next time…blessings,
Sue
sue@soggystamper.com
Decorative Overlays – Starburst Again
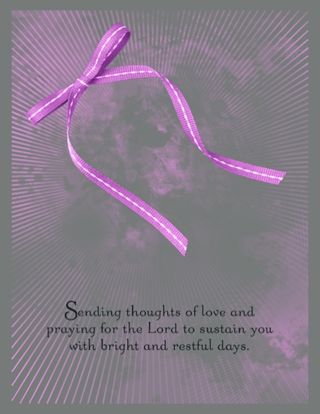 Supplies: MDS2+ (130646), MDS2 (130644), MDS2 upgrade (130650), or 30-day FREE trial of MDS2 (130910); Decorative Overlays stamp brush set – starburst (129880), Knots and Ties (131211), Thoughts and Prayers stamp brush set (comes with software program)
Welcome! Yesterday I posted a scrapbook page using the Decorative Overlays as a background for my photos. I was intrigued by the starburst overlay as it reminds me of sun breaking through a layer of clouds. I tried to get that brilliant, dazzling color for the stamp brush but just couldn't achieve the look I wanted. So I chose to use Pixie Pink which I often see in sunrises or sunsets. This overlay has such an appeal to me that I didn't want to clutter it up so I added just a sentiment and a bow. I recolored the bow with Pixie Pink trying all the colors that the Knots and Ties come with as the starting point. Surprisingly, the Pacific Point bow was the one that actually gave me the Pixie Pink color. The rest of them were too light and only the shadowed areas turned decidedly pink. Lesson learned…when using the recoloring function of MDS2, keep trying options until you get as near the result you want as possible! Oh, yes, I tried several different card stock colors for the background and found that Basic Grey gave the best effect.
Have you tried MDS2 yet? If not, what are you waiting for???? Order the 30-day Free Trial of MDS2 and start playing. I am here to help you and I know once you get started, you will be hooked and will want to order the full program. The benefits of digital crafting are
- No mess to get out or clean up
- Photos are already on your computer so you don't have to print them out first
- If you change your mind about a project, you just delete what you have added and add something else….no wasted paper or ink
- You have accessibility to stamp supplies that are almost limitless without it taking up more space than the footprint of your computer
- You have printing options. Either print your projects out yourself at home or send them to Stampin' Up!'s professional printer. The professional printer calibrates their inks to be exactly the same RGB values as Stampin' Up!'s ink pads.
- You can easily be creating beautiful scrapbook pages and cards while traveling and not have to carry along supplies.
Click on the links under the picture or visit my demonstrator online store by clicking here and place your order You will be happy you did.
Until next time…blessings,
Sue
sue@soggystamper.com
Cute Halloween Treat Cups
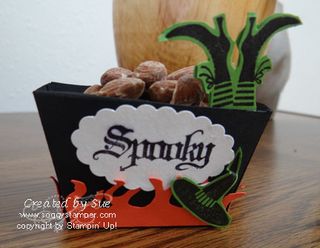 Halloween samples are coming to The Soggy Stamper at last. Can you guess what die I used to die cut this treat cup? No? Well…it is the Petite Purse die. Yep! I cut the rounded top of the sides and glued the purse flap to the inside of the purse. Then I cut the bottom in half and folded the flaps in. I hand cut the flames from Tangerine Tango card stock. It cracks me up that the witch fell into her own brew. Maybe it actually is really delicious instead of gross!
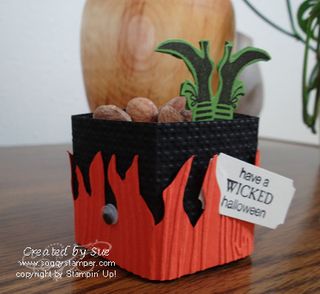 Now this treat cup was made from the mini milk carton die. I cut two of them out but only used five sides. I also cut off the top. For texture on the cauldron, I ran the card stock through the Big Shot with the square trellis embossing folder. I cut a long strip of Tangerine Tango card stock and ran it through the Big Shot with the Woodgrain embossing folder so the grain ran perpendicular to the length of the strip. I hand cut the flames, then wrapped the strip around the base of the treat cup. Again I have the witch's feet from the Wicked Cool stamp set poking out of the treat cup. I had placed the glue dots holding the Tangerine Tango strip on too high and one of them showed above the flame. I covered it with a googly eye. That one-eyed spook can withstand the heat…LOL! We are going to make one of these treat cups at the September stamping get together here in Craig. If you want in on this, contact me by email or give me a call so I am sure to have the materials cut for you.
Supplies: Stamp Set – Wicked Cool (w-118738, c-120600); card stock- Tangerine Tango, Basic Black, Gumball Green; Ink-Basic Black; other-Big Shot Die-Cutting Machine (113439), Woodgrain embossing folder (127821, Square Lattice embossing folder (119976), Mini Milk Carton Bigz die (117310), Petite Purse Bigz L Die (125606)
If you need any of the supplies used so you can make your own treat cups, either click on the links or visit my demonstrator online store.
Until next time…blessings,
Sue
sue@soggystamper.com
10+ Photos Challenge on www.mydigitalstudio.net
 Supplies: MDS2+ (130646), MDS2 (130644), MDS2 upgrade (130650), or 30-day FREE trial of MDS2 (130910); Decorative Overlays stamp brush set – starburst (129880)
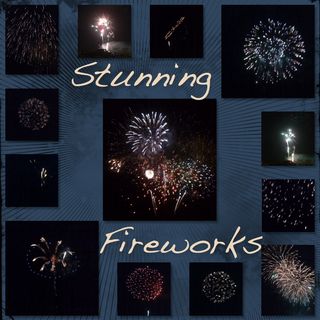
Welcome to My Digital Craft Corner. This is my entry into the www.mydigitalstudio.net weekly challenge. The challenge is to use 10 or more photos on a page. I have a Baker's Dozen. I was so delighted that my cell phone took such great pictures of these fireworks. It was all I had with me at the time. It was also hard to choose which ones to use that would show up in small sized photos. If you like this scrapbook page, please leave a comment below and go 'like' it at www.mydigitalstudio.net. While you are there, I'd love for you to take time so view my samples. Thanks so much for coming to visit.
Until next time…blessings,
Sue
sue@soggystamper.com
Moving Forward Birthday Card
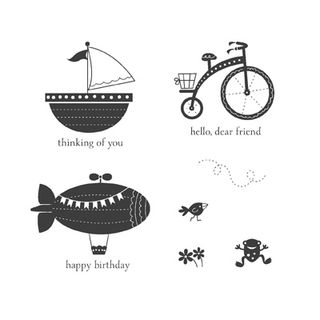
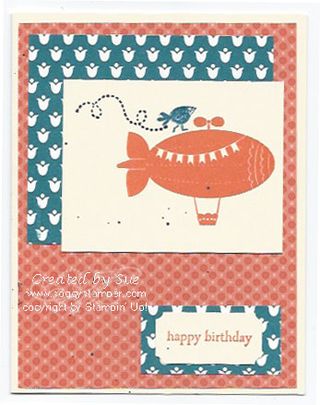 Each year, Stampin' Up! designs a stamp set specifically as a fund-raiser for the Ronald McDonald House Charities. This year's stamp set is this darling Moving Forward (w-126320, c-126322). For each set purchased, Stampin' Up! will donate $3 to this charity. I used the bird and the blimp to create this birthday card for our grandson's 10th birthday. The background papers are Summer Smooches Designer Series Papers (125409). I used the new Duo Ticket Punch (126883). Order this darling stamp set and give to Ronald McDonald Charities through Stampin' Up!
Moving Forward
A Family with Spice…Autumn Spice!
Supplies: MDS2+ (130646), MDS2 (130644), MDS2 upgrade (130650), or 30-day FREE trial of MDS2 (130910); Autumn Spice Digital Kit /Autumn Spice Designer Series Paper – pattern 6 (122175)
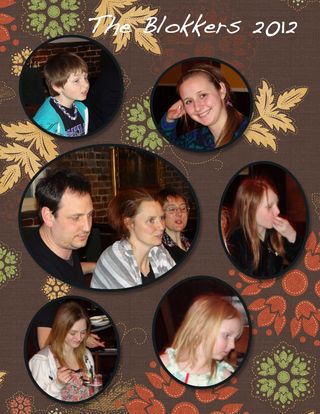
Welcome to My Digital Craft Corner today. I created this scrapbook page of our younger daughter's family for Ron's sister. Since the background has such strong images, I added no other embellishments. One of the new features of MDS2 is the ability to drag a picture onto your canvas, then click a button and have the picture cropped into a circle. Then you can double click on the photo and change the size and shape of the circle. That made creating this page quick and easy.
Did you know that you can get a free roll of the In Color stitched 5/8" satin ribbon for every $40 you spend during September? This ribbon is high quality ribbon and is perfect not only for embellishing paper crafts but also clothing or for gift wrapping. You get 10 yards per roll. What a bargain….FREE! Visit my demonstrator online store to place your order.
If you want a copy of the 2012-2013 Annual Catalog or the Holiday mini catalog, email me with your phone number. I'll give you a call to discuss how you can get the catalogs totally FREE.
Until next time…blessings,
Sue
sue@soggystamper.com
Christmas is Coming…Need Extra Money?
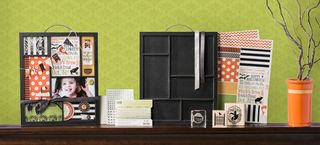
Have you started making your Christmas gift list yet? Worried that you have too many gifts and not enough money? Then I have the solution for you. Start your own paper crafting business by joining my team of Stampin' Up! demonstrators. The process is easy and you can begin earning that extra money by holding stamping workshops and classes right away. Here are some answers to questions you may have:
- I work a day job, how can this work given family responsibilities as well? You set your own schedule. You determine how many hours a week you can give to your business and schedule that time around your work and family responsibilities.
- How much money can I earn? You get an instant income of 20% of the total amount of product sold plus you can earn money based on your monthly volume and volume of any people you recruit under you. You also can earn money by holding classes with a fee for the class.
- But I'm not that crafty. I can't even draw a good stick figure! You know, that is why I love rubber stamping and this business, I can't draw either. Stampin' Up! offers a wealth of creative ideas and instruction. I am always happy to help you and love sharing creative ideas with my customers and recruits. When you join Stampin' Up! as a demonstrator, you join a supportive family that graciously shares ideas and skills.
- So…how much do I have to pay to get started with my own business? The good news is that this wonderful opportunity is yours for just $99! Sign up by Sept. 16th and you also receive the Halloween printer's tray project pictured above for FREE!
- What do I have to do to join? It is so easy, just go to my Stampin' Up! business website by clicking here. You will find more information about being a demonstrator there. Then click on the 'Join now' button. You will need to have your credit card handy as well as your social security number. If you have further questions, give me a call at 907-401-0192 or email me.
Don't wait. Do it now! Click here!
Hope to get to know you as part of my team,
Sue Erickson
sue@soggystamper.com

Have you started making your Christmas gift list yet? Worried that you have too many gifts and not enough money? Then I have the solution for you. Start your own paper crafting business by joining my team of Stampin' Up! demonstrators. The process is easy and you can begin earning that extra money by holding stamping workshops and classes right away. Here are some answers to questions you may have:
- I work a day job, how can this work given family responsibilities as well? You set your own schedule. You determine how many hours a week you can give to your business and schedule that time around your work and family responsibilities.
- How much money can I earn? You get an instant income of 20% of the total amount of product sold plus you can earn money based on your monthly volume and volume of any people you recruit under you. You also can earn money by holding classes with a fee for the class.
- But I'm not that crafty. I can't even draw a good stick figure! You know, that is why I love rubber stamping and this business. I can't draw either. Stampin' Up! offers a wealth of creative ideas and instruction. I am always happy to help you too and love sharing creative ideas with my customers and recruits. When you join Stampin' Up! as a demonstrator, you join a supportive family that graciously shares ideas and skills.
- So…how much do I have to pay to get started with my own business? The good news is that this wonderful opportunity is yours for just $99! Sign up by Sept. 16th and you also receive the Halloween printer's tray project pictured above for FREE!
- What do I have to do to join? It is so easy, just go to my Stampin' Up! business website by clicking here. You will find more information about being a demonstrator there. Then click on the 'Join now' button. You will need to have your credit card handy as well as your social security number. If you have further questions, give me a call at 907-401-0192 or email me.
Don't wait. Do it now! Click here!
Hope to get to know you as part of my team,
Sue Erickson
sue@soggystamper.com
International Bazaar Birthday Card
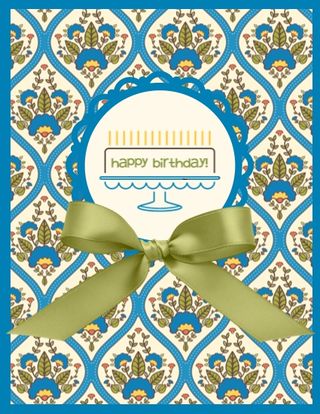 Supplies: MDS2+ (130646), MDS2 (130644), MDS2 upgrade (130650), or 30-day FREE trial of MDS2 (130910); International Bazaar Designer Series Paper from International Bazaar Photobook Template (130875); Bring on the Cake stamp brush set (124015); Perfect Pennants Circle Punch – 1 (127353); 1.25 circle and square punches from Punch Shapes (118853); Satin Ribbon Bow (121063)
Welcome to My Digital Craft Corner today! I Iove this pattern of the International Bazaar Designer Series Paper. I am really partial to blues and this blue in particular. I had fun using the coloring tool to color the stamp with different colors. Since the background is so strong, I kept the embellishments and other details of the card to a minimum. To order any of the supplies I used, just click on the links or click here to enter my demonstrator online store.
Have you started using MDS2 yet? If not, order the free 30-day trial. It has all the software of MDS2 and a small amount of digital content to get you started creating. I am here to give you help should you have questions.
Thanks for coming by to visit. If you like what you see on this blog, please do two things. First, subscribe to my News from My Digital Craft Corner newsletter. The sign-up box is to the right. Then, tell your friends to visit my blog and like my Facebook business page.
Until next time…blessings,
Sue
sue@soggystamper.com

