Monthly Archives: October 2012

Sponging with Splatter Tool

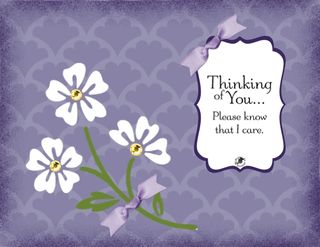
Faux Sponging-001
Supplies: MDS2+ (130646), MDS2 (130644), MDS2 upgrade (130650), or 30-day FREE trial of MDS2 (130910); Live Your Dreams Stamp Brush Set from Afternoon Tea II Digital Kit(129928); Thoughts and Prayers Stamp Brush Set (comes with MDS); Fancy Fan Stamp Brush Set (127348); Ink Splatters -6 (a feature of MDS2); Decorative Label Punch (123951); Timeless Taffeta Trimmings -knot recolored (131329)

A few days ago there was a post and sample where the edges of a card were sponged using the splatter tool of MDS2. I was inspired by that card to try it myself. When I applied the splatter, it covered my whole card with big splatters…not what I was looking for. So I reduced the size of the splatter immensely and then cropped just the part I wanted to use. I gave it Concord Grape color and copied and pasted it a couple of times. Then I grouped the three splatters so more of the edges could be covered in one copying and pasting. This was time consuming but what better way to spend a stormy afternoon then playing with MDS2!

The background also gave me fits. Normally I can change the drop shadow to a slightly darker color than the card stock and change the opacity of the actual stamp to 0. This gives the impressions that the card stock has been embossed. For some reason that didn't work this time. So I just changed the opacity to about 30 and I like the results.

I chose the Living Your Dreams stamp brush because it is a good candidate for using the coloring tool. I'm sorry I can't tell you where to order it. I haven't been able to find out with what download it arrived on my computer.

I created this card for a customer who was in a serious car accident this week. I am going to print it out and mail it off to her.

Thanks for coming by to visit me in My Digital Craft Corner. Do come back again soon.

Until next time…blessings,
Sue
sue@soggystamper.com

After posting this, I got my answer where I got Live Your Dreams. It is part of the Afternoon ea II Digital Kit. I have added the number in the supply list.

Pumpkins Galore!

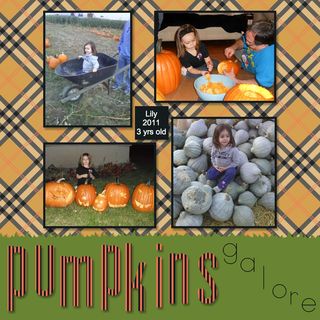
Pumpkin time-001
Supplies: MDS2+ (130646), MDS2 (130644), MDS2 upgrade (130650), or 30-day FREE trial of MDS2 (130910); ABC Alphabet Lower  stamp brush set (118823); Howlstooth and Scaringbone Designer Series Paper (129827); Grass Punch from Celebrate Any Day Greeting Card Templates (127757); Alphabet Soup Punches (129015)

I love Facebook for the reason I can get photos of our grandkids and great-granddaughters that their parents share on Facebook but don't mail to us. This scrapbook page features our great-granddaughter last year at Halloween time. This page was fun as much fun to create as Lillie had going to the pumpkin farm and carving her pumpkin. The grass is a punch that comes with the Celebrate Any Day Greeting Card Templates download. You may not want that download for the cards (although they are really cute!), but you will love all the individual parts like this punch and the Any Day punch that I use a lot in my creations.

Thanks for stopping by My Digital Craft Corner today. Do stay and enjoy a virtual (or real) cup of tea or coffee and browse through my projects I have shared here. If you like what you see, then visit my Facebook page at www.facebook.com/mydigitalcraftcorner and 'like' me. Also sign up for my monthly newsletter by filling in the subscription form to the right. I'd love to be sending you my newsletter each month.

Until next time…blessings,
Sue
sue@soggystamper.com

Serene Silhouettes Thank You

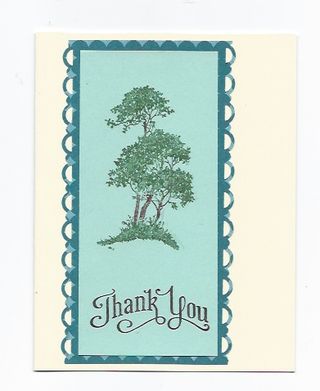
Serene Silhouettes TY cardSupplies: Serene Silhouettes stamp set (w-127322, c-127324), Perfectly Penned stamp set (w-122890, c-122892), Scallop Trim Border Punch (118402), Summer Smooches Designer Series Paper (125409), Very Vanilla and Pool Party card stock

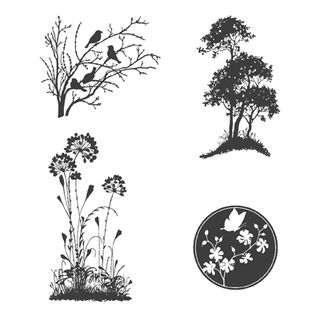
Welcome to The Soggy Stamper blog this Wednesday evening. Today I am going to start a series of cards using the Serene Silhouettes stamp set. Here is the index showing all the stamps in the set:

Serene Silhouettes indexI used Perfectly Penned for the greeting on this card. It just happens that Stampin' Up! is doing a test market of offering individual stamps from selected greeting sets between now and Jan 3. Perfectly Penned is one of those sets. Click on this link SSF_Perfectly_Penned-2 to see the individual price for each stamp in the set and the recommended clear block size to use with the stamp. Seasonal Sayings is the second set in this promotion. Here is the link for that set  SSF_Seasonal_Sayings-1 and the third set is Word Play, SSF_Word_Play. What do you think of the idea? I can see an advantage of being to purchase just the one stamp you like from a set but I rather like getting all the sayings in a set. That way I have an appropriate stamp when I need it and don't have to buy them one at a time.

Thanks for coming by to visit today. Come back tomorrow for another sample using this stamp set.

Until next time…blessings,
Sue
sue@soggystamper.com

Deborah’s Birthday Card

Deborah's BD Card-001 copy
Supplies: MDS2+ (130646), MDS2 (130644), MDS2 upgrade (130650), or 30-day FREE trial of MDS2 (130910); Perfectly Penned stamp brush set (130167); Textured stamp brush set (comes with the software for MDS2), Fan Fair Designer Series Paper (127200); Get It Done Punch 1 from the Get It Done Kit (129924)

Welcome to My Digital Craft Corner today! I love the Fan Fair Designer Series Paper in the traditional form and am delighted that it is also available digitally. I also love adding designer series papers to punches. I think this punch from the Get It Done Kit is the perfect punch for this particular dsp and, of course, I love layering punches to make frames around the image.

Today is my downline's birthday and like the excellent procrastinator I am, I didn't get a card stamped and mailed to her. MDS2 to the rescue!!!! I created this card and emailed it to her so she would get it on her special day. With MDS2, we don't need to use the commercial e-card companies and our friends and relatives can be sure that a virus isn't accompanying the card.

Have you tried MDS2 yet? Why not? Stampin' Up! offers a 30-day free trial and I am here to help you get started. So go click this link now to sign up for the free trial. You have nothing to lose.

Until next time…blessings,
Sue
sue@soggystamper.com

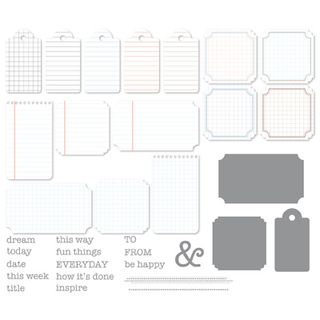
                                           Get It Done Digital Kit

Get It Done index

Terrific Tuesday – Fancy Frames

Happy Birthday Katie-001
Supplies: MDS2+ (130646), MDS2 (130644), MDS2 upgrade (130650), or 30-day FREE trial of MDS2 (130910); Everything Eleanor stamp brush set – flourish (130859); Fancy Frames (131330); Everything Easter Ensemble (129363); Petite Pennants Scallop punch (127352); Beautiful Butterfly Shapes – 1 (125512)

Today is Terrific Tuesday because today, Stampin' Up! releases new digital downloads to sauge our hunger for new content. Click here to see today's downloads and place your order for those you want. You will find them on the right-hand side of my demonstrator online store front. I did not order any today because I haven't even shown you some of the ones I got last week. I initially passed on the Fancy Frame download because I didn't like the bold colors of the frames. Then I remembered that now we can recolor them with the new MDS2 update so I got them. I recolored this frame Regal Rose and think this is the perfect frame for our littlest great-grandaughter's picture. I wanted to create a banner with the pennants and attach the title to the top of the banner. I did it a hard way with a lot of fussing and then applied a drop shadow to all the punches on the page. Guess what…I ended up with a drop shadow from the curved line up to where the line would have been if it had been straight! Ugh! Guess what else…they really mean it when the little warning comes up that applying a drop shadow to the whole page can't be undone. :o( I had to group the pennants so their alignment wouldn't be ruined and move them out of the way. Then I deleted the line and the text and started over on that part.

After several times of attaching the text to the line, I decided that the text would always be attached at the beginning of the line and would always have a little tail of line extra at the end. So I made the line invisible by making the opacity 0% and added the drop shadow to the text at this point.

Then I created a new line and colored it Crumb Cake and curved it to match the curve of the pennants. I also learned that you can adjust the curve of the line by pulling down the bottom gray squares and leaving the width the same. This avoids having to double click on the line each time you adjust it. Finally I moved the title line in place adjusting the curve to fit. It was a bit of a hassle but I am quite pleased with the end results.

Have you visited my facebook page at www.facebook.com/mydigitalcraftcorner and 'liked' it yet? I'd love it if you would go do that. Also, have you signed up for my newsletter yet? It is easy to do, just fill out the subscribe form on the right. Be sure to respond to the followup email I send you to confirm your subscription.

Until next time…blessings,
Sue Erickson
sue@soggystamper.com

My Digital Studio Monday – Stepping It Up

Inspired by Nature card
Supplies: MDS2+ (130646), MDS2 (130644), MDS2 upgrade (130650), or 30-day FREE trial of MDS2 (130910); Inspired by Nature Stamp Brush Set (124473); Textured Stamp Brush Set (comes with MDS and MDS2), Convention 2012 Curvy Frame Punch from Convention 2012 Photobook Template (130971); Timeless Taffeta Trimmings long bow (131329)

Welcome to My Digital Craft Corner this evening. I wanted to show you tonight how much just a little adjustments to a good design will make a project into an outstanding design. The card above is nice enough. I colored the stamp set with the coloring tool which upped the appeal a notch from the sold black image. However, the background of Raspberry Ripple looks a little blank to me. So I added the texture stamp with an opacity of 50% and resized to fit the card. That helped. Then I decided to add a Basic Gray mat to the punch. Now the card looks GREAT!

Inspired by Nature card 2
By adding just two more simple features to the card, I made it stand out. If you need the supplies to create this card yourself, either click on the links or visit my online store to order them.

Thanks for coming by to visit my blog. Come back tomorrow to see what goodies Stampin' Up! brings us on Terrific Tuesday.

Until next time…blessings,
Sue
sue@soggystamper.com

Thanks Maria and my mystery commentpr! I wish I knew how to answer you about the logging in thing. The next time I post to someone else's blog, I will pay more attention to what I do so I can help you.

How Do You Fix an Oops?

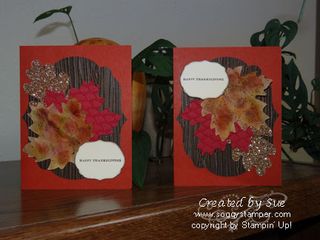
Fall leaves card doubleSupplies: stamp set Teeny Tiny Wishes (c-127802, w-115370), Autumn Accents Bigz die (127812), Labels Collection Framelits (125598), Champagne Glimmer Paper (127885), Woodgrain Textured Impressions embossing folder (127821), Fancy Fan Textured Impressions embossing folder (127751),Early Espresso Core'dinations card stock (127848); Cajun Craze, Very Vanilla, and Rich Razzleberry card stock; Daffodil Delight, Rich Razzleberry, and Old Olive inks; sponge daubers, brown Stampin' Up! packing paper

Sandi Dailey has created some wonderful fall leaves by sponging color onto the brown packing paper that comes with our Stampin' Up! orders. I think this makes much more realistic leaves than using card stock and gave it a try. The card is similar to one I posted here. I was making a bunch for a swap. When I got to the last card, after adhering all the elements except for the greeting label, I noticed that the fold was on the right instead of the left. Oooppps! What to do? I turned it upside down and have the leaves hanging down and put the label in the upper left-hand corner. I think I kinda like that one better. :o]

Thanks for coming by to visit my blog. Do come back again real soon! Remember, you can order any supplies by either clicking on the links in the supply list or visiting my online store.

Until next time…blessings,
Sue Erickson
sue@soggystamper.com

Seasonal Sayings Frameable Art

Seasonal Greetings Wall Art-001 copy
Supplies: MDS2+ (130646), MDS2 (130644), MDS2 upgrade (130650), or 30-day FREE trial of MDS2 (130910); Seasonal Sayings Stamp Brush Set (121217) and Ink Splatters 4 (part of the MDS2 content); Candy Cane Lane Photocard Designer Template (122177) Candy Cane Lane Designer Series Paper pattern 3; 1.25 Square punch (comes with MDS2) and Any Day Punch from Celebrate Any Day Greeting Card Templates (127757); Timeless Taffeta Trimmings – Long Bow (131329)

Today while I was downloading the flyer for the Single Stamp promotion of the Seasonal Sayings Stamp set, it hit me that this would make a great frameable wall art. However, the image you get with a stamp would not be big enough to make good wall art. So….MDS2 to the rescue. I have the Seasonal Sayings stamp brush set in MDS2 and with the new program it is scaleable! Here is the end result of my inspiration.

Since we are living in school housing and will be traveling next year, I don't want to purchase pictures to decorate the walls of the trailer. But…I can create wall art and hang it up for very little expense. I recolored the Timeless Trimmings bow from Basic Grey to Real Red. If I had started with a Whisper White bow, the recolor would have been too light so I chose a dark color to start with. I really liked the color when I recolored with Raspberry Ripple but it was darker than I wanted.

Thank you for coming to visit today. I am trying toincrease the number of 'likes' on my facebook page so if you like my samples, would you please go to https://www.facebook.com/mydigitalcraftcorner and 'like' the page.

Until next time…blessings,
Sue Erickson
sue@soggystamper.com

Ribbon Sunflower Card

Ribbon Sunflower 1
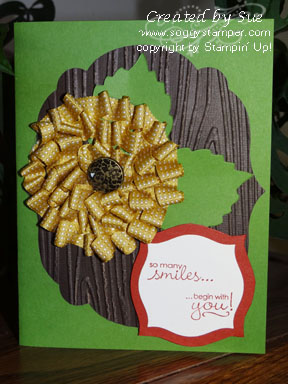
A customer asked me the other day what the Jumbo Sticky Rounds in the Holiday Mini catalog were for. So this sample using a Jumbo Sticky Round (127852), Summer Starfish 3/8" Stitched Satin Ribbon (126846) is for you Dina. :o) You take one of the rounds off the paper they come on and lay it sticky side up on your work space. Then you start sticking the ribbon on right from the roll beginning at the outside edge of the round. Pleat it as you stick it down. Spiral around until you get to the middle and cut the ribbon. You can finish off the center in a variety of ways. I chose to add an Antique Brad (117273) which I cut the legs off and adhered with a stack of several Stampin' Dimensionals. The base of the card is Gumball Green card stock. I cut a label from Early Espress Core'dinations card stock (127848) which I cut out with a Labels Collection Framelits (125598) and ran it through the Big Shot using the Woodgrain Textured Impressions Embossing Folder (127821). I cut two leaves from Gumball Green card stock using the Autumn Accents Bigz Die (127812) and curled them along the edges with my fingers. Next I adhered the Early Espresso label to the card base, the two leaves to the label and the sunflower onto the leaves. I have quickly learned that if you use Snail to adhere Core'dinations card stock, you MUST gently  break off the adhesive to the side instead of pulling straight back. Otherwise, you end up ripping the back layer of the card stock. The last step of the card is to stamp the greeting from Petite Pairs stamp set (w-122495, c-122497) with Cajun Craze ink on Very Vanilla card stock and cut it out with the squarish Apothecary Accents Framelits (127003). I traced around that framelit onto Cajun Craze card stock and hand cut it out to layer the Very Vanilla. I mounted both of the Petite Pairs stamps on the same clear block, an advantage of the clear mount over the wood mount stamps. If you need the supplies to create this card, either click on the links or visit my online store. I appreciate your business.

Thanks for coming by to visit today. Please enjoy a cup of virtual coffee or tea with me while you browse my blog. Then go to my Facebook page www.facebook.com/TheSoggyStamper and like my page. While you are signing up for things, consider subscribing to my newsletter. The subscription box is to the right. Each month you will receive a newsletter in your email inbox.

Until next time…blessings,
Sue Erickson
sue@soggystamper.com

Rip Photo Edges Again!

Distressed edge card-001Supplies: MDS2+ (130646), MDS2 (130644), MDS2 upgrade (130650), or 30-day FREE trial of MDS2 (130910); Stamp brush sets – Forever Young (123145) and Elementary Elegance from a Sale-a-Bration CD for the saying; Springtime Vintage Designer Series Paper pattern 6 (122172); Convention 2012 curvy frame punch from the Convention 2012 Photobook Template (130971)

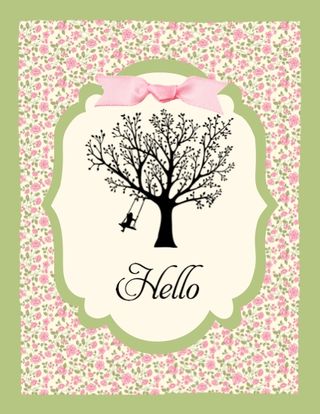
I learned about the new Rip Photo Edge option in MDS2 this week and created this Halloween scrapbook page in this post. Then I got to wondering if I could use that feature to distress the edge of a layer of dsp. I decreased the width of the tear to 30 which resulted in a very subtle irregular edge on the layer. I might have needed to increase it a little more to realy make the distressing more noticeable. However, I do like the end result. The 'Hello' comes from the Elementary Elegance stamp brush set which is on one of the Sale-a-bration CDs. I think it was last year's. I didn't realize it wasn't available online or I would have used a different greeting. Sorry! :o(

If you haven't played with the Rip Photo Edges feature yet, I challenge you to do so and then share with me your creation. I'll share it online with you as a guest artist! Have a great weekend.

Until next time…blessings,
Sue Erickson
sue@soggystamper.com

Joyous Celebrations Faux Patina Christmas card

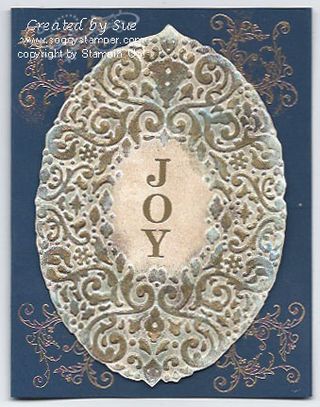
Joyous Celebration card 1Supplies: Stamp sets- Joyous Celebrations (w-128066, c-128069), Pines and Poinsettias (retired); Card stock – Night of Navy, Whisper White; Inks – Versamark (102283), Crumb Cake, Marina Mist, Always Artichoke, and Early Espresso; Other – Holiday Frame Textured Impressions Embossing Folder (127820), Gold Stampin' Emboss Powder (109129), Big Shot Die-Cutting Machine (113439)

Welcome to The Soggy Stamper blog this Wednesday afternoon. Yesterday I showed you a card with the Faux Gold Leaf technique. Today my card was made with all the steps in the Faux Patina technique. This is the Christmas card I am making for all the school staff. The technique is easy and fairly quick so making 80+ cards will not be too much of a chore.

To do the technique, first brayer Crumb Cake ink on the flat side of the embossing folder. This will put color in the flat places of the embossing. If you wanted color on the raised part, just brayer on the other side. Then put the Whisper White card stock in the folder and run it through the Big Shot. Next sponge Marina Mist ink randomly on the raised part of the embossing. Then sponge Always Artichoke and Early Espresso on. Allow the inks to dry, then lightly pat an Embossing Buddy on the card stock. Pat a Versamark pad on the raised part of your card stock with a light hand. You don't want the gold embossing powder to cover the whole area. If you get too much on a place, use a dry paint brush to remove some of the powder. Heat emboss the powder. If an area doesn't have enough powder, just pat the Versamark on that area, add embossing powder, and heat again. Once the Holiday Frame was embossed, I stamped the JOY stamp in Versamark and stamped it in the middle. Using a clear mount stamp made placing the saying easy.

So this is the technique I used. Play around with using different colors and embossing powder but aways start with the lightest color. If you need any of the supplies to make this project, just click on the links in the supply list or visit my online store to place your order. I appreciate your business. If you do give this technique a try, I'd love to share your card on my blog. Just email a photo of it to me.

Until next time…blessings,
Sue Erickson
sue@soggystamper.com

Heart of Christmas Holiday Frame card

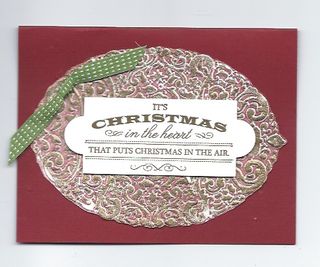
Holiday Frame Heart of ChristmasSupplies: Heart of Christmas stamp (128129), Holiday Frame Textured Impressions Embossing Folder (127820), Gumball Green 3/8" Stitched Satin Ribbon (126848), Gold Stampin' Emboss Powder (109129), Versamark Ink (102283), Big Shot Die-Cutting Machine (113439), Cherry Cobbler ink and card stock, Whisper White card stock

If you had come to Joy Weber's workshop on Sunday, you would have made this Christmas card. I called the technique Faux Gold Leaf. I brayered the flat side of the Holiday Frame embossing folder with Cherry Cobbler ink, placed Whisper White card stock in the folder and ran it through the Big Shot. I cut out the frame and sparingly patted it with the Versamark pad. I then embossed the frame with Gold embossing powder. The greeting is also embossed with Gold powder. This technique is similar to the Faux Patina technique Kelly Acheson shared recently. Tomorrow I will post the Christmas card I will be making for the school staff this year. It uses the full Faux Patina technique.

To order the supplies needed for this project, either click on the links in the supply list or visit my demonstrator online store.

Until next time…blessings,
Sue Erickson
sue@soggystamper.com

Terrific Tuesday – Oh What Fun Overlays

Naughty or Nice-001 copy

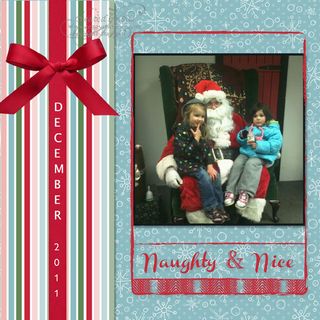
Supplies: MDS2+ (130646), MDS2 (130644), MDS2 upgrade (130650), or 30-day FREE trial of MDS2 (130910); Oh What Fun Overlays Stamp Brush Set (132568), Candy Cane Lane Photocard Designer Template (122177), Satin Ribbon (121063)

Welcome to My Digital Craft Corner and Terrific Tuesday. Today's downloads include two Halloween and two Christmas downloads. Click here to view and order them in my demonstrator online store.

I created this scrapbook page of a couple of our darling great-granddaughters visiting Santa last Christmas. I'm sure their mothers would second that they are Naughty and Nice. This Oh What Fun Overlays stamp brush set will be such fun to use.

Have you tried MDS2 yet? There are so many very cool features to this upgraded program. You have nothing to lose by signing up for the Free 30-day trial of MDS2. Now MDS2 has only a minimum of content and the software program. You can order print products and new downloads during the 30 days of free program to expand the content. Click here to sign up for it. I am just a few keystrokes away if you need help.

Until next time…blessings,
Sue Erickson
sue@soggystamper.com


My Digital Studio Monday – Spooky Halloween Scrapbook Page

Ripped paper option sb page-001 copy
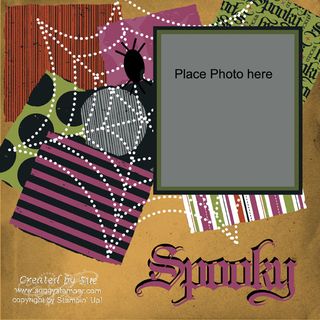
Supplies: MDS2+ (130646), MDS2 (130644), MDS2 upgrade (130650), or 30-day FREE trial of MDS2 (130910); Vintage Overlay stamp brush set (121061); Wicked Cool – spooky stamp brush set from Wicked Fun Designer Kit (127609); Spooky Bingo Bits – spider web stamp brush set (127616); 1.25 Square Punch comes with MDS2 and Punch Shapes (118853)

Sorry I have been lax in posting to my blog the last few days. I am back! I learned on www.mydigitalstudio.net that MDS2 now has a Rip Photo Edges feature that is so cool.

You have to add your designer series paper as a page layer or add a photo frame from the Design Center and drag the dsp into the photo frame. If you add it to the photo frame, you can resize the photo frame without possible pixilation of the dsp. When the dsp is added as a page layer, you will get the pixilation warning if you try to enlarge the frame. Whether you add the dsp as a page layer or in a photo frame, double click on the frame and you will find the Rip Photo Edges feature about half-way down. Clicking on this opens a Rip Photo window. You can click on the boxes to select which side to rip…I did all 4…and you can choose the rip width. I used a width of 50. Then I played with changing the dimensions of the square until I got a torn shape I liked. The resulting piece reminded me of the little pieces of paper you tear when you are doing paper machet.

Let's just say that I had a ripping good time creating this scrapbook page. Since I don't dress up for Halloween and since our grandkids don't send pictures of themselves at Halloween, I didn't add a picture. Or maybe I was the incredible invisible woman last Halloween and you just can't see the picture…LOL!

If you haven't ordered the Wicked Fun Digital Kit and the Spooky Bingo Bits stamp brush set yet, just click on their names in the supply list to be taken directly to those items in my demonstrator online store or visit my store by clicking here. I have really gotten a lot of use from these sets and they will never retire!

Thanks for coming by to visit today. Tomorrow is Terrific Tuesday so come back to see what I do with some of the new downloads.

Until next time…blessings,
Sue Erickson
sue@soggystamper.com