Category Archives: digital design

Posts in this category contain information, techniques, and projects incorporating MDS (My Digital Studio)

Family Reunion Page

Project Life Family Reunion Page

Pocket card using Something Borrowed designer series paper and So You stamp set

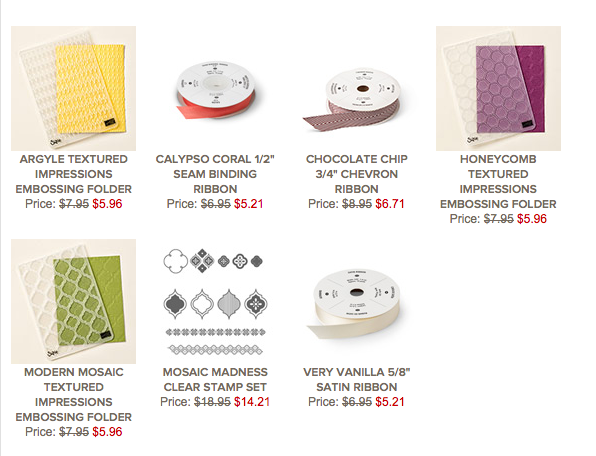
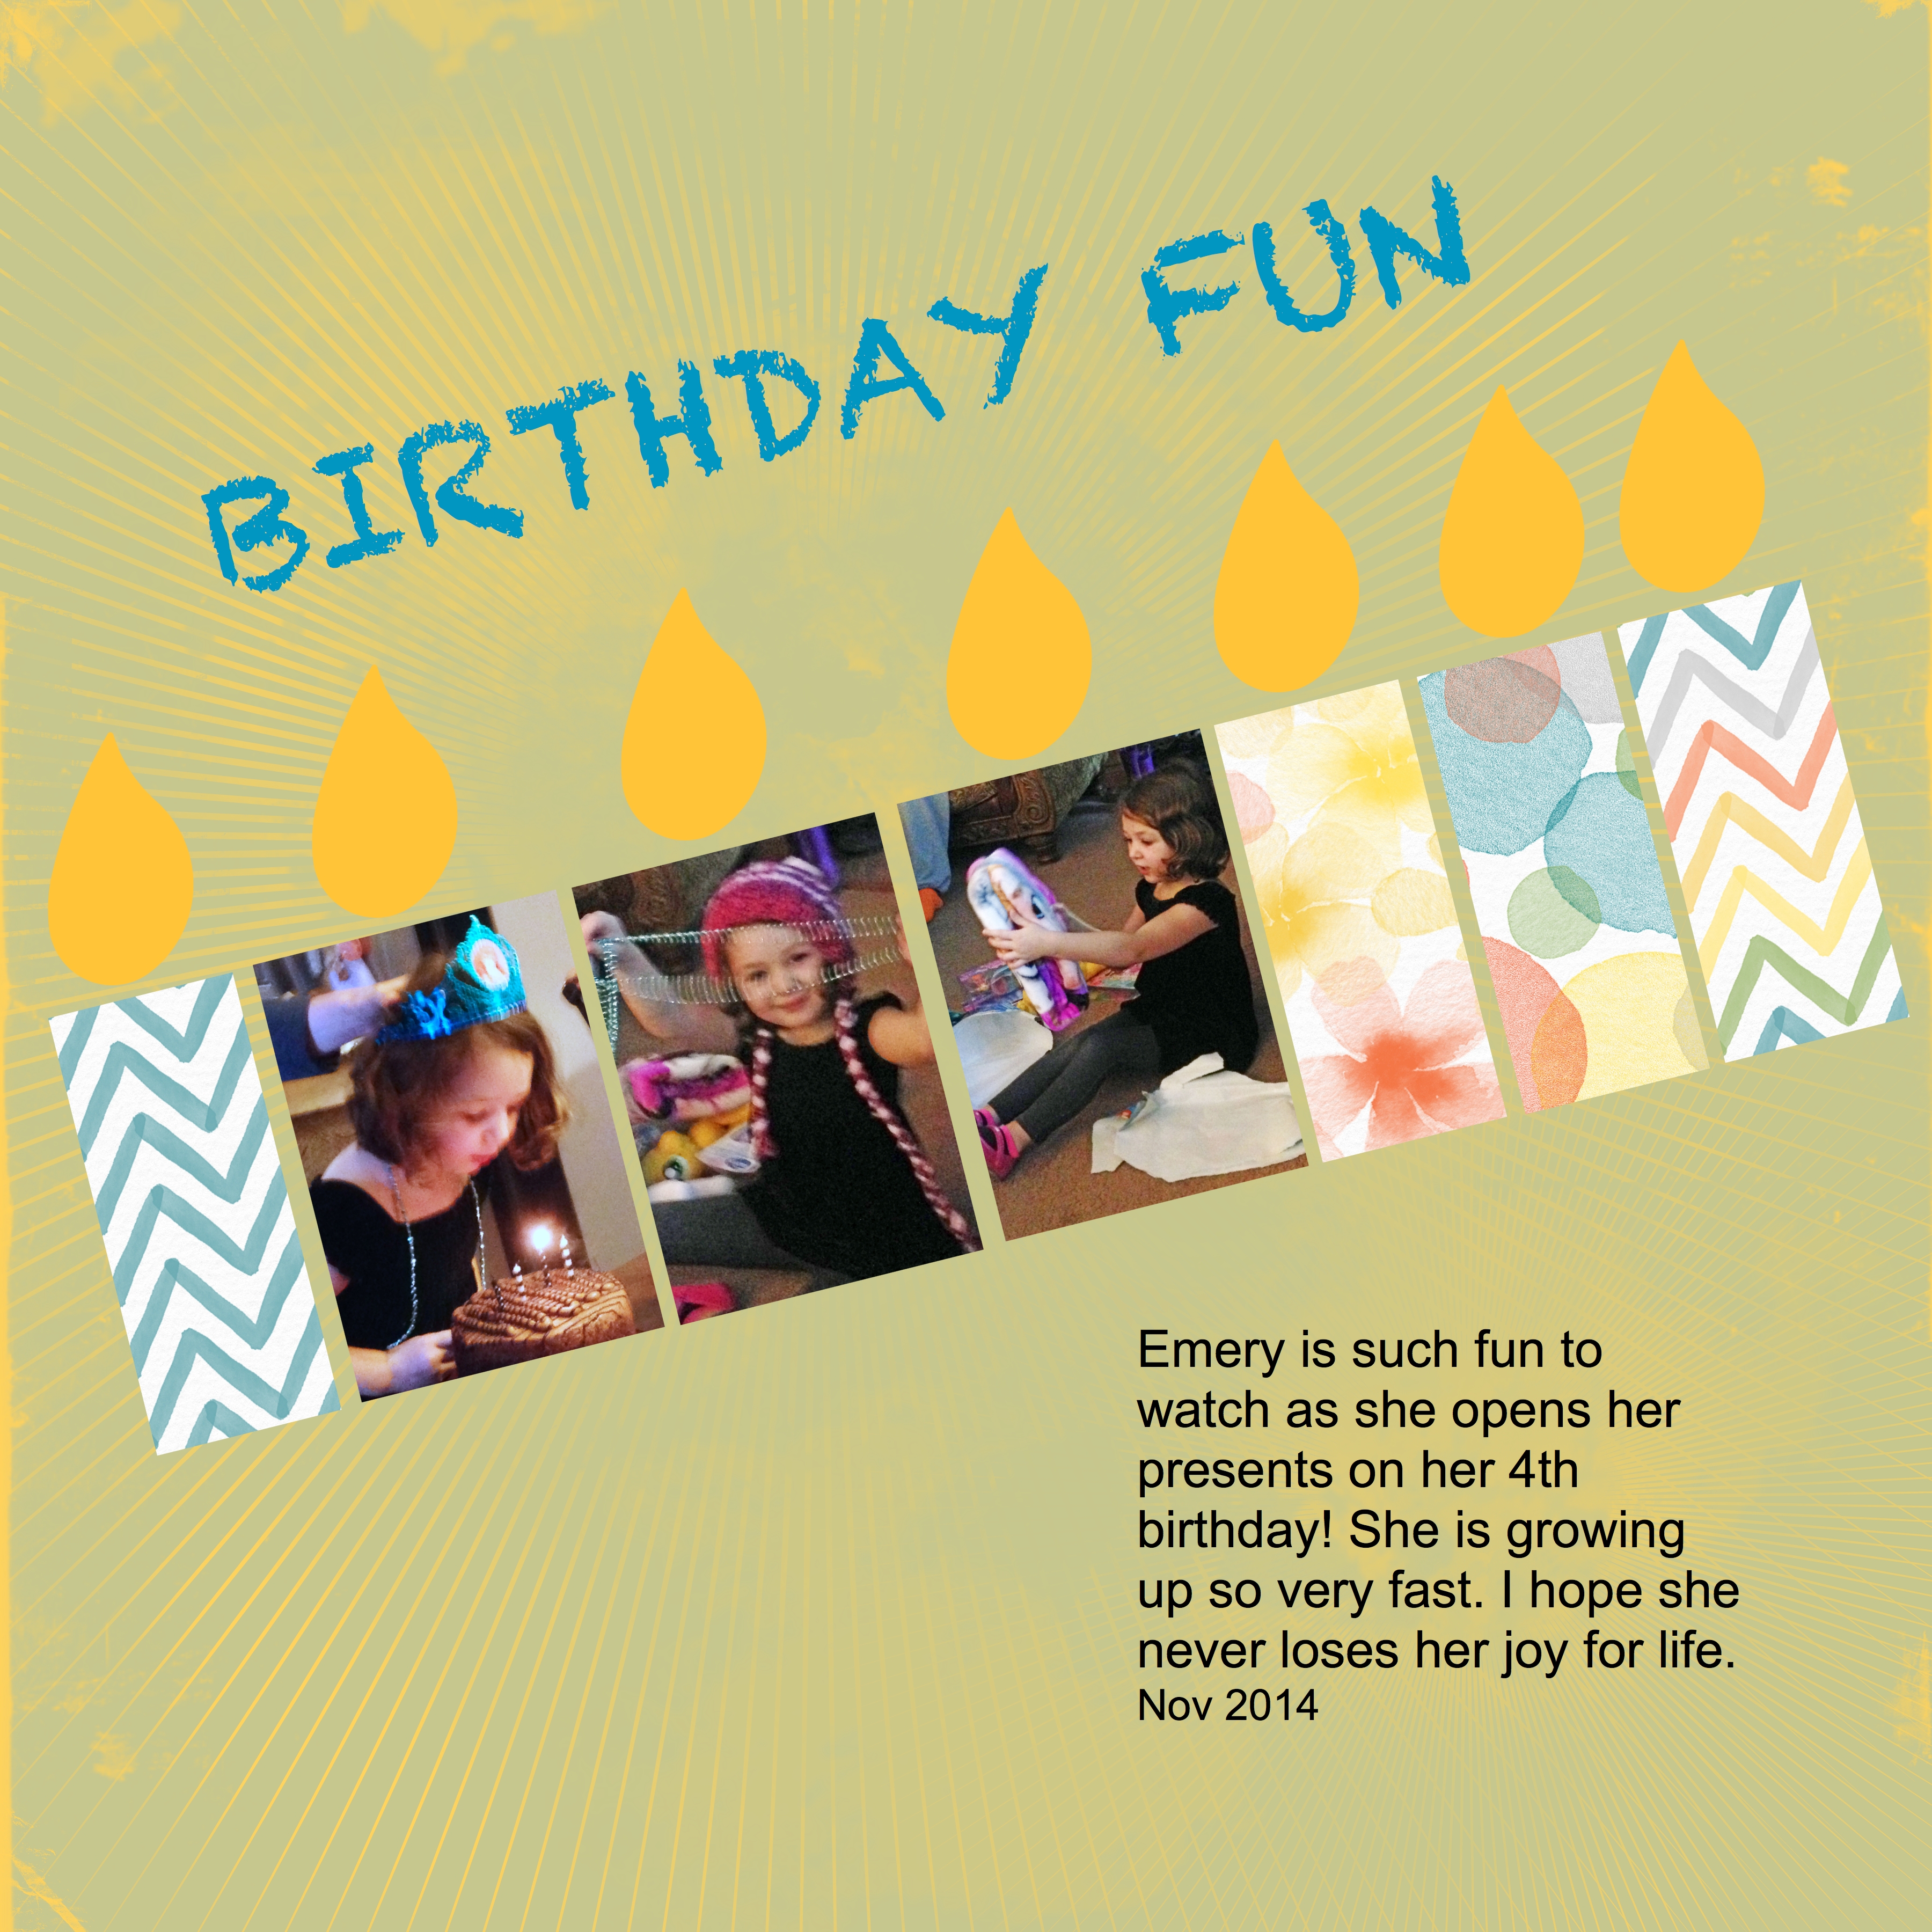
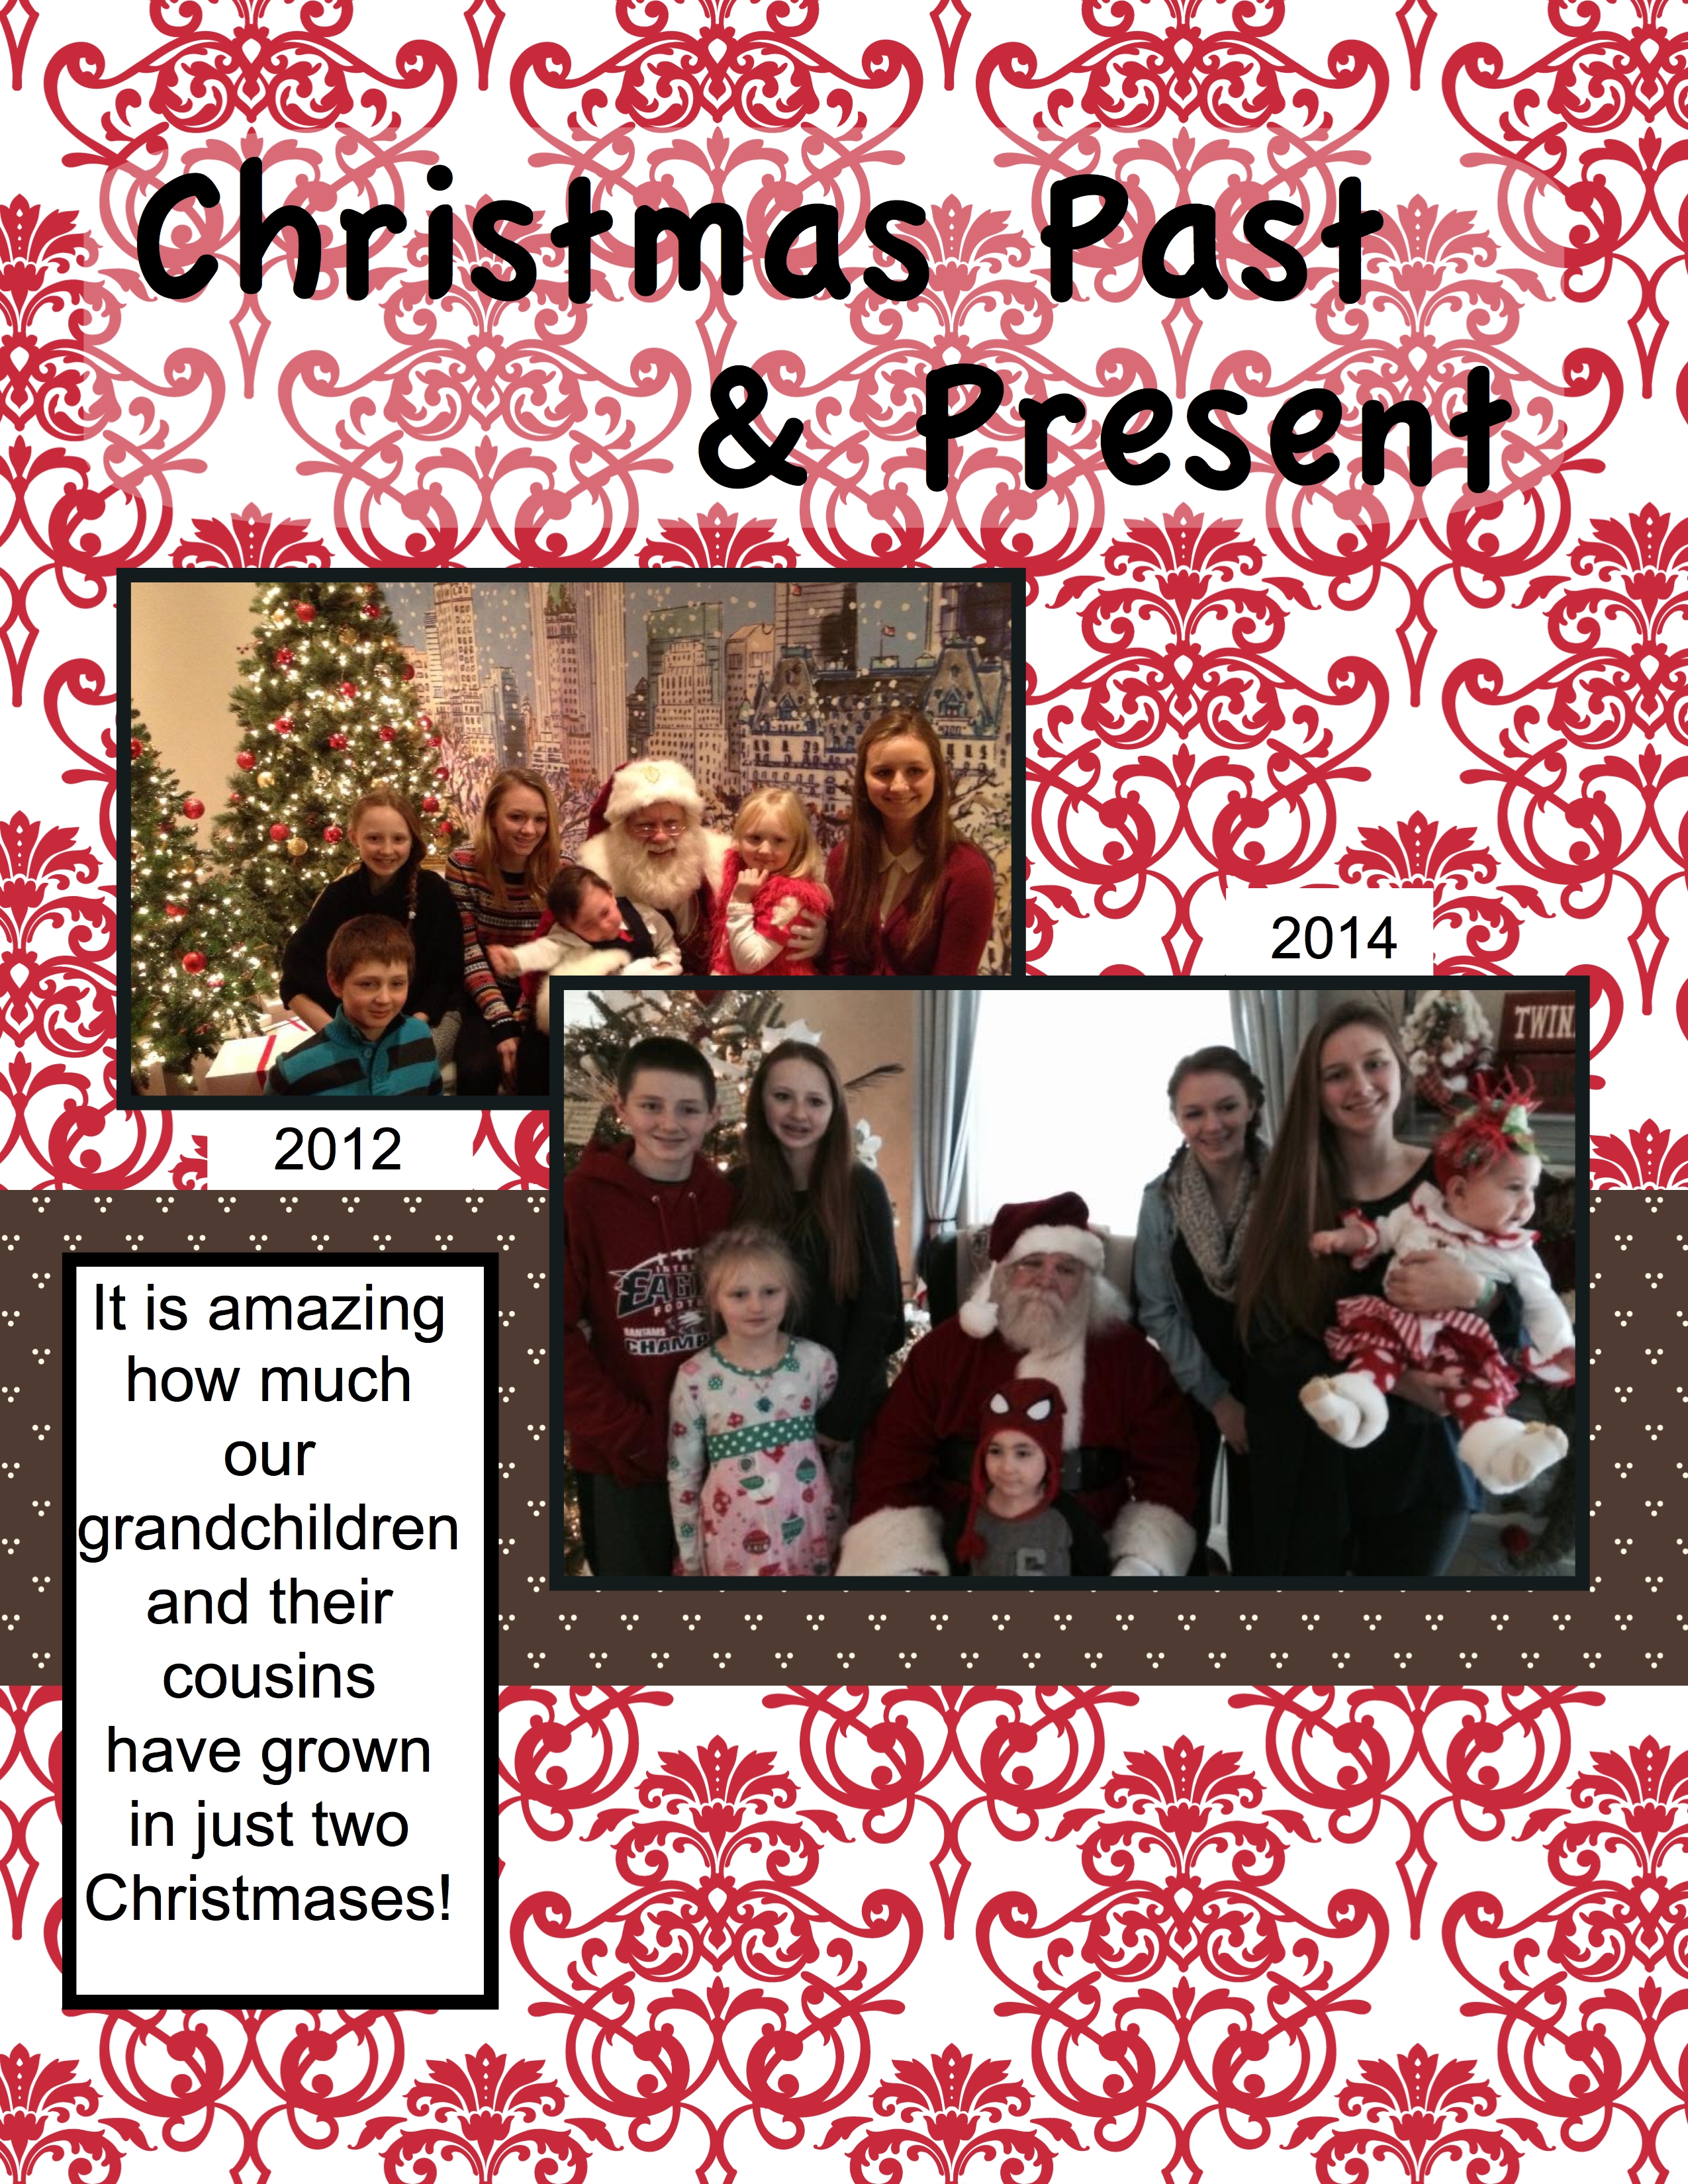
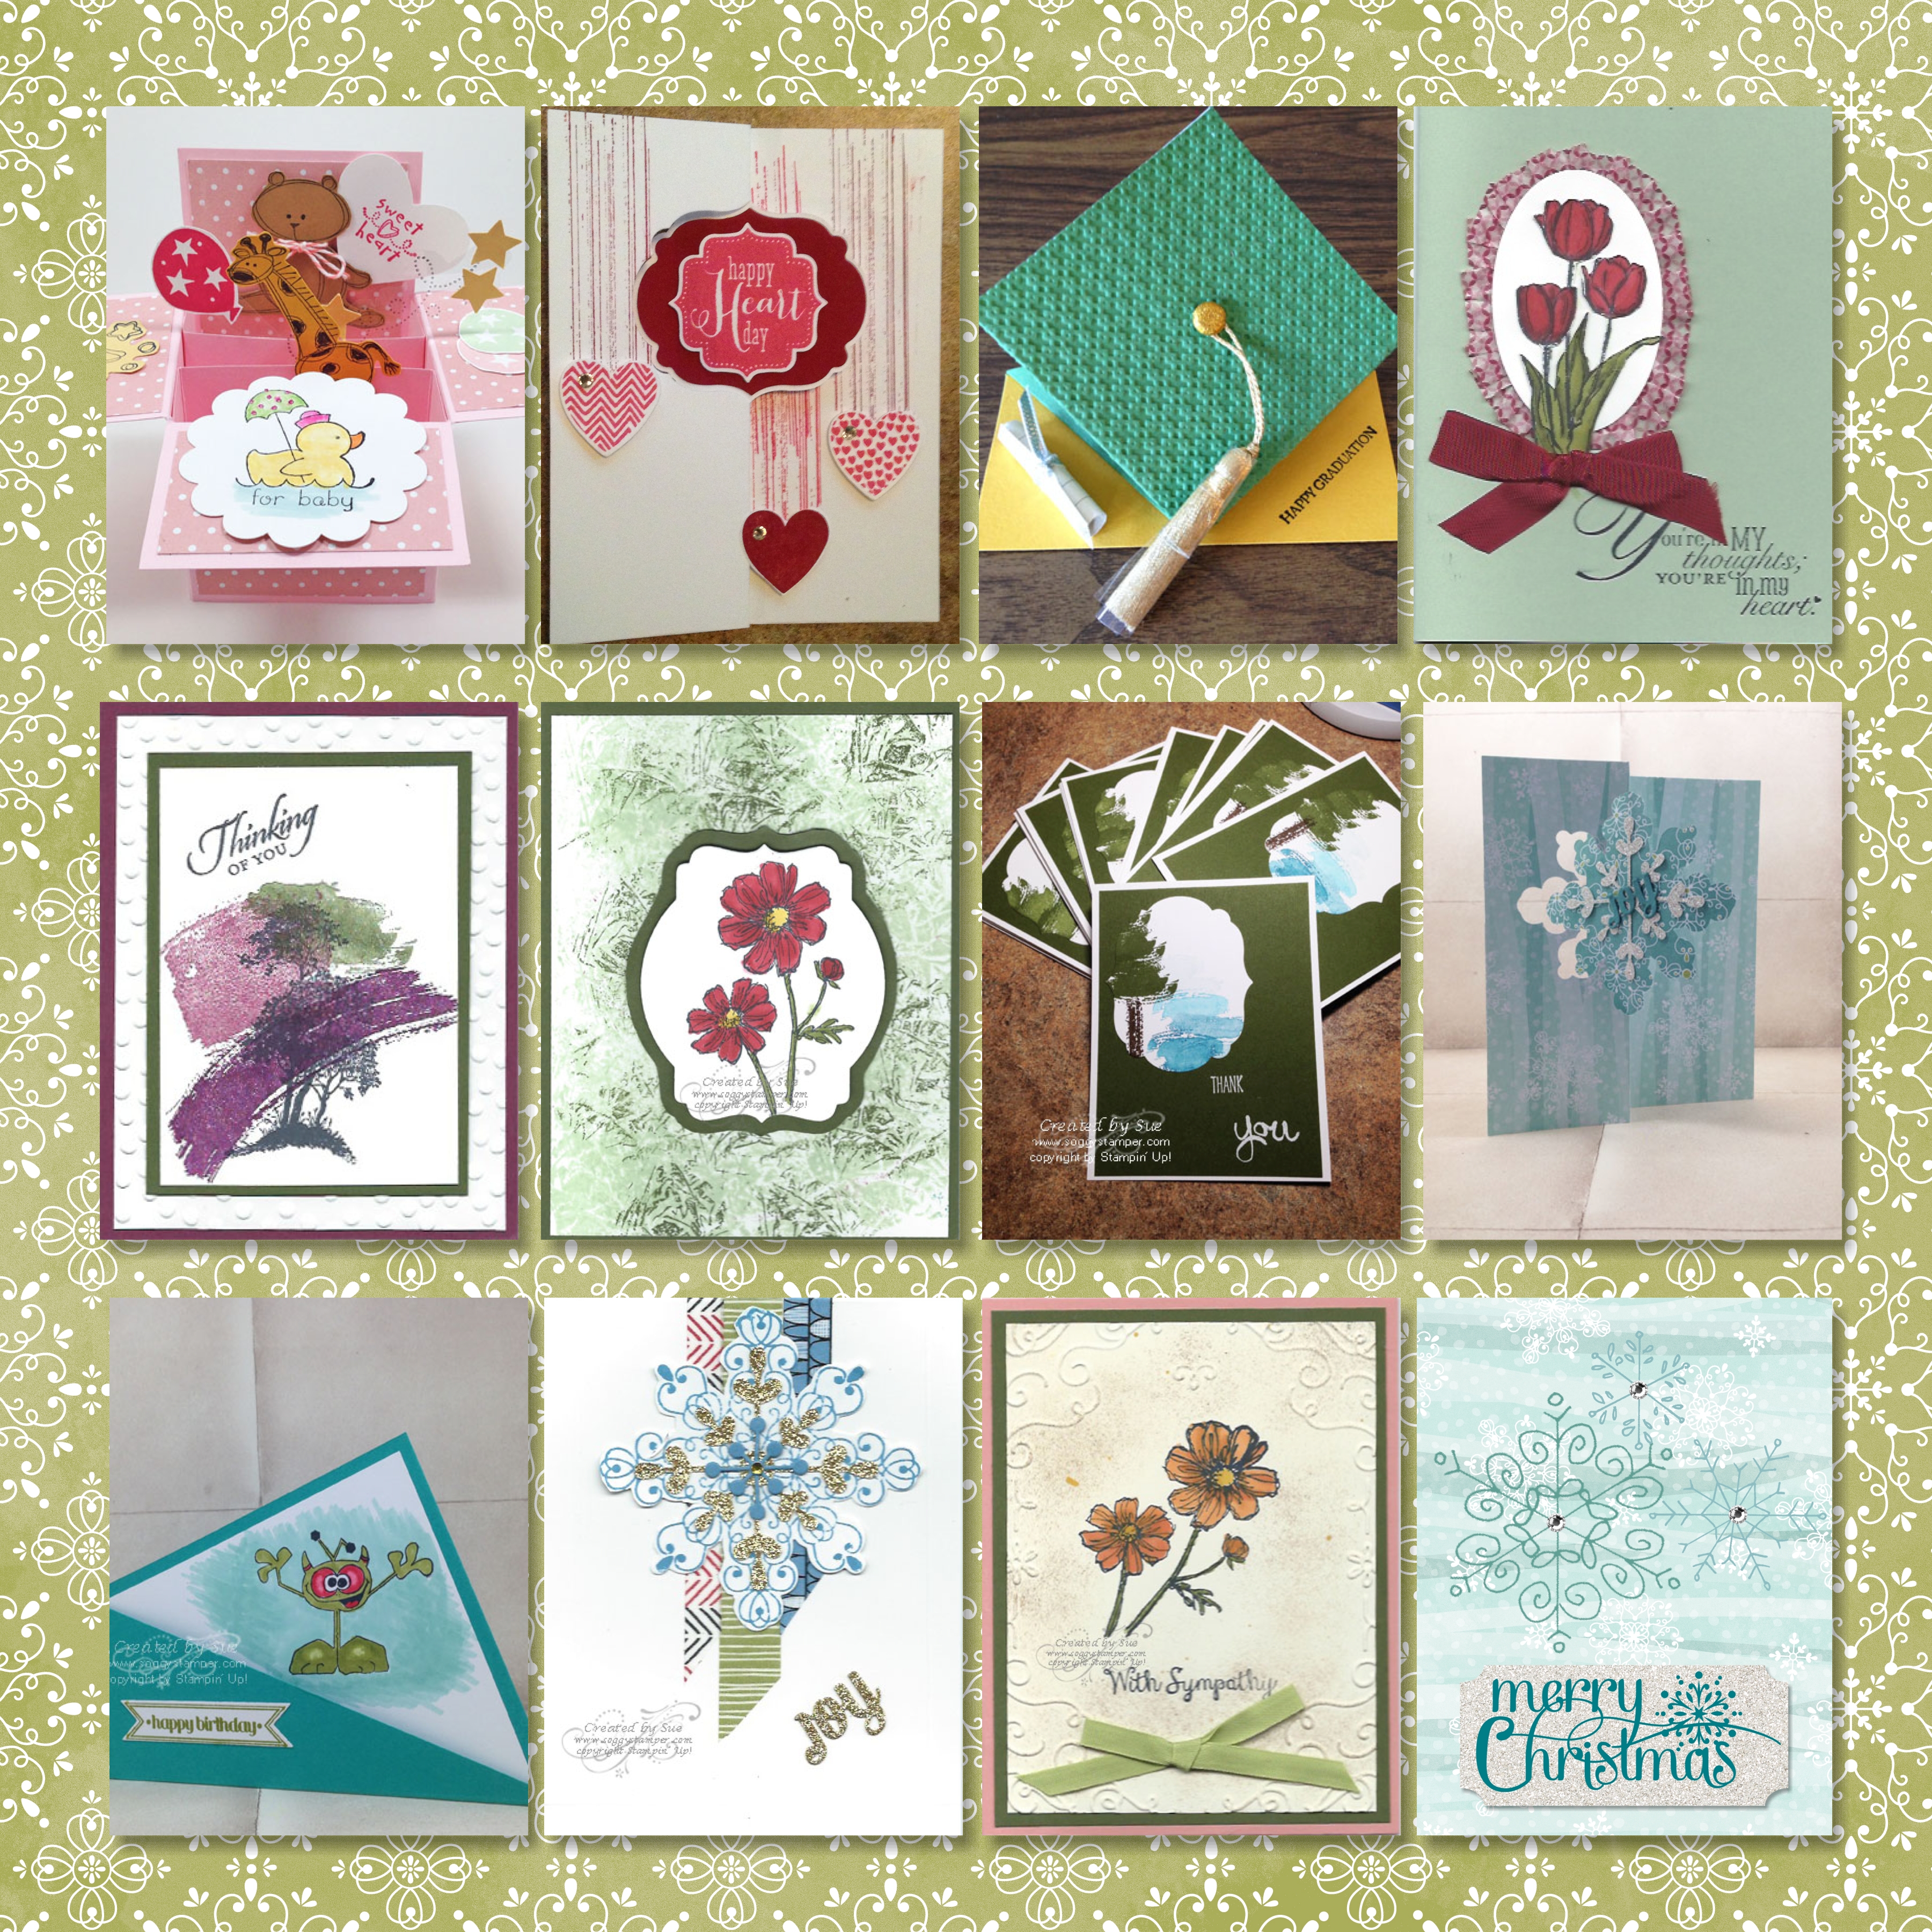
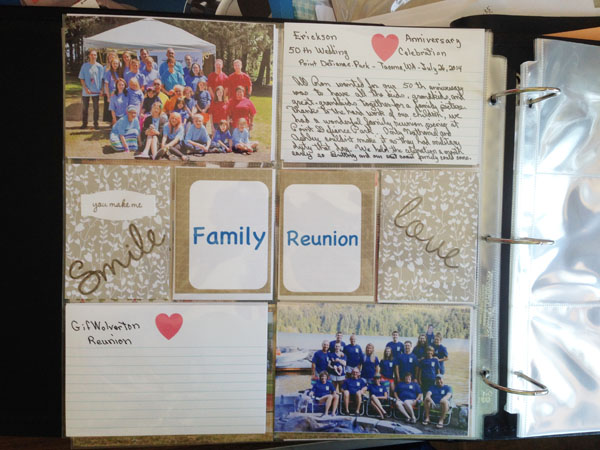
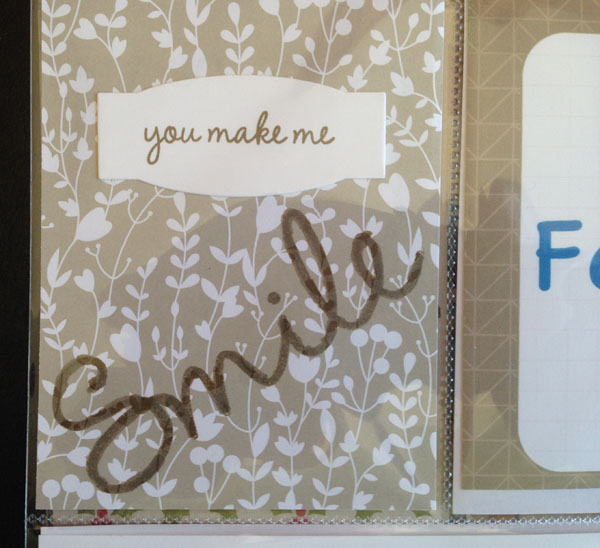
I’m finally getting some scrapbooking done, Project Life by Stampin’ Up! style. This style scrapbooking can be as easy as just putting pictures into pockets on the page and choosing pocket cards to add to the page but….it can be not so easy when you have both landscape and portrait style pictures of a single event. In the event above, I did not have any pictures that could be cropped to fit into the small rectangles so I created pocket cards to go in there. The card that says ”you make me smile” and the one saying ”love” are pieces of the soon to be retired Something Borrowed Designer Series Paper (137785). I used stamps from the also retiring  So You stamp set (137165). Unfortunately both the designer series paper and the stamp set are already sold out.

The two cards saying “Family Reunion” were created with MDS. You can still get downloads through June 2 and even the MDS program itself. After that, the program and your downloads will still work. What you won’t have is print services through Stampin’ Up! and tech support from them. I discussed alternatives in this post.

The Project Life card set Everyday Adventure had only one of the 4X6 journaling  cards with the heart on it. I wanted to use that card for both of the journaling pockets so I printed one out with MDS as I had purchased the Everyday Adventure digital download. I highly recommend you purchase all the Project Life digital downloads while they are still available from Stampin’ Up!. After June 2, you will be able to get the existing Project Life by Stampin’ Up! pocket card digital downloads through Becky Higgins here.

Here are some reasons for having all the available digital downloads of Project Life cards:

  • You can print multiples of a particular card you like without having to purchase another set of cards.
  • You can add text to your digital cards before printing them out. This allows you to choose the font you want to use. This is particularly useful if you aren’t able to hand letter a variety of fonts. :o)
  • You can change the color of the card and edit some of the elements of the card.

By the way, you don’t have to have MDS to use the digital downloads. When you download them, choose ‘other applications’. They will work with any program that uses layers and .jpg and .png files. An example of such a program is Adobe Photoshop Elements. There are many more. You have just a couple more days to order digital downloads so go check out and download the ones you want but don’t have, especially Project Life downloads, here.

Stampin’ Up! Dropping MDS But…

Yes, Stampin’ Up! is no longer going to carry and support MDS. This is their latest update:

New Dates

To accommodate the Retired List promotion timeline, we have extended the availability date for MyDigitalStudio.net, the digital download manager, and our MDS YouTube, Facebook, and Pinterest pages through midnight (MT), June 9, 2015. Demonstrators and customers may call Demonstrator Support for assistance with MDS until Demonstrator Support closes at 7:00 PM (MT) on Tuesday, June 9. If you need assistance with backing up your digital downloads, we recommend that you visit MyDigitalStudio.net/backup.
Project Life

The Let’s Get Away Digital Project Life Card Collection by Stampin’ Up! from the occasions catalog posted on the ProjectLife.com website yesterday and is currently available for 20 percent off. For the foreseeable future, all Digital Project Life card collections will be made available through the ProjectLife.com store.
Future Updates

While Stampin’ Up! will not sell MDS or any of its associated products after June 2, 2015 or offer support for these products after June 9, 2015, we are working on a solution for you to continue to be able to use your digital downloads and order print products. Stay tuned for updates.

This is a very sad thing for many who have loved MDS and digital design. However this is not the end! As long as your computer does not crash, you can still use MDS for digital crafting. You just can’t purchase new downloads or order digital prints from Stampin’ Up! You can order prints from other places like Snapfish, Office Depot to name a couple. Of course, you can still print your project out on your own printer. What will be missing is tech support if you have problems with the program or your computer crashes and you need to reinstall the program.

Here are some options to provide for these scenarios:

  • Back up your files to an external drive. Click here for discussion in mydigitalstudio.net on how to do this. The link will be valid only through midnight on June 9th when everything connected with MDS comes down at Stampin’ Up!
  • Download all your purchases also in the ‘other applications format’ so you can use them with any image application that uses layers and either .jpg or .png formats. Save these downloads on an external drive or disc.
  • MDS was created by StoryRock. StoryRock has another program, My Memories Suite, that is compatible with all the MDS files. StoryRock will even let you have MMS version 5 for free and help you transfer all your MDS files over to MMS. Go here for more information. You can still keep MDS and copy, not transfer, your files to MMS. Then you will be able to use both programs with MMS being a back up for MDS. There are a couple of differences like MMS does not have the capabilities of you printing cards at home and their commercial print options are a little different than MDS ones.

Remember that all the digital downloads including MDS are discounted 30% through June 2! Check them out here and round out your library while you can.

So Much To Share

This is Terrific Tuesday and there is so much to share!

There are new digital downloads. I created this digital card with two of them, So Very You (138156) and Kinda Eclectic (138154).

Digital greeting card created with Kinda Eclectic and So Very You digital downloadsYou can see all the new downloads here. Click on the images for more details and to order them.

Just In Time…

With this week’s Weekly Deals, you will be set for St. Patrick’s Day and Easter treat giving. The new deals include several ways to wrap up and package treats. You can use the packaging as is or embellish them to your heart’s desire. And just look at the digital download! The Lucky You Ensemble has everything you need to decorate and entertain on St. Patty’s Day. You can get more details and order these Weekly Deals by clicking on the photo. Do it now since these prices are only good through Monday night.

Screenshot of the Weekly Deals for week of 3-3-15

There are also new digital downloads for MDS. They come out the first Tuesday of each month. I chose to order the Birthday Bash Designer Series Paper and the Balloon Bash stamp brush set and created this card just for you. If your birthday is today, that is. :op

Digital birthday card using the new Birthday Bash designer series paper and Balloon Bash stamp brush setWhat really attracted me to the Balloon Bash stamp set are the flourishes in the images. I Used the color picker to color the greeting to match the color in the background. Then I double clicked on the image and used the color tool to color the flowers Melon Mambo and the leaves Pear Pizzazz. Click on the supplies to order the ones you need to make this card.

Amped Up for Terrific Tuesday

Digital Birthday Card using the Amped Up Ampersands Kit digital downloadTuesdays are terrific because we get new Weekly Deals and this week’s deals are exciting! One of the items on sale is the Amped Up Ampersands Kit digital download (1348440). I used it to create this card. Click on the images below for more details on the supplies I used and to order them.

But there are many more wonderful deals for you this week. Check them out!

Screenshot of Weekly Deals for week of 2-17-15

On the Tilt – MDSM101


Digital birthday scrapbook page with Watercolor Wonder Designer Series Paper

Today I have for you a scrapbook page I created of our great-granddaughter’s 4th birthday party for the MDS Monday challenge 101. The challenge is to put the elements on an angle. You can see the sketch here.

The sketch suggested birthday candles but upside down so I went with that theme. I created a photo frame and then copied and pasted it 6 times, narrowing the width of four of them so all seven would fit on the page. Then I discovered I couldn’t fill them with designer paper so deleted 4 and created rectangle punches which I filled with various patterns of Watercolor Wonder Designer Series Paper (137077). I grouped the rectangles, photo frames, and candle flames together and then rotated the group -14 degrees. So where did I get the candle flames? They are the wing of the Extra Large-Two Step Bird Punch (122131).

I wanted to use Pear Pizzazz for the background but it was too strong a color and overpowered the rest of the layout. So I made the background Whisper White. Then I applied a 12″ square punch over the Whisper White and filled it with Pear Pizzazz and reduced the opacity to about 65% opacity. Of course, I don’t like flat backgrounds so I added the Decorative Overlays Stamp Brush Set (129880) – starburst and colored it with Daffodil Delight. I love the way it brightens the page.

I discovered something today that I have overlooked ever since the MDS2 came out. In the Resource Palette is a tab for layers. It shows all the layers you have on your project. You can click on a particular layer and it will allow you to work with that layer without bringing it to the front! How did I miss that? Think of all the time I could have saved by just clicking on a layer I wanted to adjust. Maybe the rest of you already knew that and I am just a little slow but this discovery excites me. :o)

So I challenge you to take part in this MDSM101 sketch and post it to the MDS Monday website. Let’s see what you come up with.


MDS Monday – Filling Punches with Photos

Digital Scrapbook Page with photo in Thought Bubble Punch

I’m back with another MDS Monday challenge. This time the challenge was to use punches on our project, especially to fill a punch with a photo.

To do this, add a punch to your project and size it as desired. Then click on the  Photo Fill button in the Design Center. Sometimes the photo fits perfectly in the punch but other times the photo is too small like on my page. I might have been able to enlarge the photo so it filled the whole punch but the dots would have looked funny and much of my gret-granddaughter’s face would have been missing.

So what I did was to shrink the photo until it was all displayed by double clicking on the punch once the photo has been added and clicking on the negative magnifying glass. Now there were blank spaces on either side of the photo in the punch. To fix this, I added another Thought Bubble punch and filled it with Beautiful Today Designer Series Paper pattern 6 found in the My Digital Class Beautiful Today  Kit (135913). I shrank the scale of pattern as small as I could and aligned this punch behind the punch with my photo. Be sure to group them when you have them aligned properly. I added two Sprinkled Expressions – heart rows to finish off the page.

Click here to see the challenge sketch and the particulars of the challenge. Then create a project to meet the challenge and post it to the MDS Monday blog. Have fun with adding photos to your punches.

Terrific Tuesday – Watercolored Winter

Digital birthday card with Watercolored Winter KitI used the Watercolored Winter Kit digital download (136678) to create this beautiful card for today’s Terrific Tuesday. Why is it a terrific Tuesday? Because on Tuesdays we get new Weekly Deals and this wonderful kit is on sale this week. The only part of this card that is not from this wonderful kit is the Happy Birthday banner. It is from the Sketched Birthday stamp brush set (136833), I colored the greeting and the stag Soft Suede and the snowflakes Saraha Sand. I love the soft colors of this card and yet it masculine. For more details on the stampbrush sets and to order them for yourself, click on the images below.

Creative Blog Hop

Welcome to the Creative Blog Hop. Margaret Raburn nominated me. I am to share one or two projects, anwer four questions about my creativity and then nominate two others to participate.

As Margaret mentioned in her blog post, I do love creating with MDS, Stampin’ Up!’s digital crafting software. So I have created this digital card for you.

Digital greeting card created with Painted Petals stamp brush setI love it when Stampin’ Up! creates a digital version of a traditional stamp set. This card is made with the Painted Petals stamp brush set (138139) which is one of the January new downloads. The traditional Painted Petals stamp set (w 138819, c 138822, photopolymer 137146) is in the new Occasions catalog.  I don’t like leaving the background without texture so I added the Spring Shades Designer Series Paper (120172) – pattern 4 to a square punch. I used the paint tool to color the flowers and leaves.

I am as addicted to traditional stamping as I am to digital design and I absolutely love all the new stamps, papers, and accessories in the new Occasions catalog. It is so difficult for me to be frugal in my purchases when a new catalog comes out and then, once I see what others have created with a stamp set, I often just ‘have to have’ that set too.

hand-stamped greeting card using the Sheltering Tree stamp set

One of my favorite sets from this catalog is the Sheltering Tree set which only comes in photopolymer. Not only is the tree in this set graceful but the set also has a lot of additional things to add to the scene. In this card I cut out my image with a Labels Collection Framelit (125598). The pink floral strip of designer series paper under the greeting is one of the beautiful Irresistibly Yours Specialty Designer Series Paper (138635) which you can get for free when you make a $50 of products from me during Sale-a-Bration. I sponged or rather burnished Strawberry Slush ink into the paper. Click on the image below to see all the parts of this wonderful stamp set and order it for yourself.

Now on to the questions about my creativity.
1.  What are you working on now?
This year I decided to go to Stampin’ Up!’s Leadership so I have been working on a swap I joined with the SUDSOL group. I love the new Butterflies Thinlits Dies and am using them on the card. I’m finding that gluing them down on 40 cards is rather time consuming!

2.  How does your work differ from others in your genre?
    I find that my style is mostly simple and elegant. While I can create a fussy card, I prefer cards that highlight an image with minimal embellishments. My go-to embellishment is ribbon. I also love cards that are interactive, that are pop-ups, cards in a box, etc.

3.  Why do you create what you do?
     I find that I am usually creating at the last minute for a specific person. While I know that when I buy a Hallmark card, it wasn’t created for a specific person but when I stamp a card, I want to stamp a new card for each person. I also love to knit but stamping gives me the instant gratification I desire. I love seeing the results of my creativity in a matter of minutes.

4.  How does your creative process work?
     I start with a specific need like maybe a birthday card or sympathy card or to join a challenge. Then I choose a stamp set that works with that need and choose the colors I will use. Sometimes the colors are determined by the colors in the designer series paper I am using. Since the process is a creative one, it often evolves as I go along and the end result is different than what I initially imagined. Once in a while the end result is God inspired.

To continue the fun and creativity of this blog hop going, I have nominated Donna Bagwell and Leonie Schroeder!  I met Donna when we went to the Occasions and Sale-A-Bration Catalog Reveals together. Donna is from Sand Point, Idaho, and drove over with her husband. Ron drove me down to Seattle to the reveal and we shared dinner with Donna and John after the event. I have known Leonie through a couple of online demonstrator groups and hope to meet her in person some day. She lives in Australia and I think it is so cool to have international friends. Donna and Leonie will be posting their blog hop post on Monday, January 19 but you can see their blogs now by clicking on their full names above. Thanks ladies for agreeing to participate.

Terrific Tuesday – Painted Petals

Digital Greeting Card created with Painted Petals stamp brush setPainted Petals stamp brush set (138139) is one of the three January new downloads. I absolutely love this set and have been debating ordering it from the new Occasions catalog. So I am really excited that Stampin’ Up! gave us a digital version of the stamp. The cool thing about using MDS and digital crafting is that there is instant gratification. I ordered this download this afternoon along with a traditional order. I was able to download this file and create my card immediately. Whoohoo! If you haven’t given MDS a try, I encourage you to do so. I’m here to help you along the way. Just click on the links below to see the downloads I used and order them.

O Come Let Us Adore Him – Come to Bethlehem

Come to Bethlehem  digital Christmas Card

Merry Christmas! I hope you are spending this holiday surrounded by those you love. Here is a big hug for those of you who are grieving the loss of someone dear to you. May brighter days be ahead for you.

I created this card using MDS to help bring our focus onto the birth of the Christ child who came to bring love and hope to the world. No matter what circumstance you are in today, may the peace, hope and love of God be with you!

Supplies:

MDS Digital download (130646)

Background
Glimmer Designer Series Paper (132917) – gold

Stamps
Come to Bethlehem  (123963)- come let us adore him, Color = 219,192,169 and camels city and star, Color = BASIC BLACK 19,27,29

Punches
Basics/1.25 Square Punch, Fill Color = NIGHT OF NAVY

Terrific Tuesday – Candlelight Christmas

MDSM95 challenge using Candlelight Christmas digital Designer Series PaperHey, it is Terrific Tuesday! I haven’t posted much lately as I have been really busy making Christmas presents. Our family decided this year to make as many presents by hand as possible. Therefore I have been knitting 8 hats, 4 scarves and one pair of fingerless gloves plus umpteen batches of fudge. But I did want to take time out to do this challenge on the MDS Monday blog.

The sketch for this challenge is an easy sketch that takes no time at all.

All I needed to do to highlight the two pictures of our grandkids with Santa is to choose a Christmas designer paper for the background and the strip under the photos. I love the Candlelight Christmas Designer Series Papers (129829) for the rich colors and designs. The physical Candlelight Christmas Designer Series Paper has been retired for several years but it is still available to order as a digital download. That is the beauty of using MDS for your creative needs, the supplies never retire and never run out. 🙂 You can check out all the different designs and place an order through my online store by clicking on the image below.

Don’t forget, Tuesdays are also terrific since we get new Weekly Deals. Check them out and click on the photo to be taken to my online store.
Weekly Deals for 12-23-14
Finally, I can’t believe it! Still more new items have been added to the Year End Closeout sale. There is even product from the Holiday catalog on the sale. You must check it out! Some items have already sold out. Go here now!

Happy 12-13-14 Day!

In honor of this remarkable day, I am doing a post of 12 cards I have shared this past year, 13 little tips, and 14 stamping tools to help your creativity.

12 Cards

I couldn’t figure out how to share 12 thumbprints of cards with links to the full size without taking up a lot of space. Instead, I created this scrapbook page with MDS. I went back through my posts this year and chose a card I had posted from each month. Here is the page.

Digital scrapbook page featuring 12 cards I have shared in 2014

13 Stamping Tips

  1. Store your cardstock scraps in our 6″ x 8″ cello bags, one bag for each color. Write the color on the front with a marker and store the scraps in the same place you store the full-size cardstock. If the scrap is too big for the bag, trim it down to 8 1/2″ x 5 1/2″ for a card base.
  2. When tying a ribbon around a card front, place a glue dot on the card where the knot will be. Tie the first part of the knot and push it onto the glue dot. This will keep the knot tight while you tie the rest of the bow.
  3. When cutting out cardstock with finely detailed thinlits, place either waxed paper between the cardstock and the die or put about 6 layers of used dryer sheets between the cardstock and the die. This will help you get the cardstock out.
  4. When removing a cap off a Blendabilities, especially the brush end, hold the marker away from your work. This will help prevent splatters on your work. I learned this the hard way. 😛
  5. Be sure to store all markers horizontally so the ink doesn’t run to one end.
  6. Roll baker’s twine around the core of an empty ribbon spool that is no wider then 5/8″ and store in an empty embellishment container.
  7. Place a sheet of magnetic material in the lid of a stamp box and store the coordinating framelits/thinlits in with the stamp set.
  8. When you purchase a stamp set, write the name of the catalog it appears in, the date you bought it, and the purchase price on the cover. This will help if you decide to sell the set leter.
  9. Seal your wood blocks with varathane before mounting the stamp. This helps prevent the wood staining.
  10. Put a couple of glue dots on your clear mount stamps to help them stay on the blocks.
  11. When cleaning clear mount stamps, twist them on the cleaning pad instead of scrubbing them back and forth. The scrubbing back and forth breaks the static cling seal.
  12. Always stamp an image first then cut it out with a punch or die. This eliminates worrying about stamping it straight. Whenever possible stamp greetings on a separate layer and punch them out instead of directly on the card base for the same reason.
  13. When you fold a card base in half and the two sides are slightly off, just trim the edges a little.

14 Tools to Make Stamping Creativity Easier

  1. Big Shot Die-Cutting Machine (113439) – There is so much you can do with this machine. When Stampin’ Up! first started selling them, I wasn’t sure I would get much use from the Big Shot because I thought it was strictly for scrapbooking. I rarely do traditional scrapbooking. However, I soon learned of all the possibilities of the Big Shot for card making.
  2. Embossing folders – I love dry embossing and did some using a stylus and light box (but usually against a window). This was a rather tedious process. With embossing folders a quick turn through the Big Shot and you have a wonderful dry embossed card front.
  3. Dies, thinlits and framelits – Oh my goodness how much these reduce ‘fussy cutting’! And now more and more stamp sets have matching thinlits. Yay!
  4. Simply Scored (122334)- This scoring tool is great when you have to score a lot of card bases or want perfectly parallel lines.
  5. Gift Box Punch Board (135863) – What an easy way to make gift boxes from cardstock or designer series paper. You can make a variety of sizes, the largest being a 4″ cube, in a matter of minutes. No adhesive is needed. I am able to get a knitted stocking cap into the 4″ cube box.
  6. Transfer Adhesive Sheets (133722) – These sheets are especially perfect for adhering detailed die-cuts to your work. You lift up the top covering, place your die cut onto the sticky surface which is a layer of very tiny adhesive dots, Replace the cover, and rub well. Then you can peel off the die cut. The adhesive is on the back. These transfer sheets can be used repeatedly as only the adhesive dots actually used by the die cut are removed.
  7. Adhesive Remover (103684) – This eraser-like piece of rubber removes adhesive that ends up in the wrong place.
  8. Dental floss – Dental floss on a stamping table??? Yes! You have just put down a layer of cardstock using SNAIL adhesive and discover that it isn’t as straight as you thought it was. Instead of using your fingers to lift the layer, slide floss under the layer and neatly pull it down to break the adhesive seal without ruining your layers.
  9. Reinkers – Reinkers are not just for reinking your stamp pads. They can be used to die ribbons, color glimmer paper, color the Simply Pressed Clay, and are used in a variety of thechniques.
  10. Embossing Buddy (103083) – The embossing buddy is essential to keep stray grains of embossing powder at bay but can be also used to reduce stickiness when Snail adhesive sneaks over the edge of ribbons when you use SNAIL to adhere your ribbon.
  11. Heat & Stick Powder (100625) – This powder works like embossing powder but stays sticky on the surface so you can adhere glitter to a stamped image.
  12. MDS (130646) – MDS is Stampin’ Up’s digital design program. With this program, you can create cards, scrapbook pages, and 3-D items without having to haul out stamps, paper, and inks. You can email the card directly to the recipient or print it out to mail. The images and paper downloads do not retire so they are always available for your use. If you like only certain designs of a designer series paper, you can print out multiple copies of that pattern and not be having to order several packages of a dsp just to get enough of the design you like. The thing I like most about MDS is that there is not clean up when you have to stop creating. You just save your project and close down your computer. :o)
  13. Silicone Craft Sheet (127853) – This 6″ x 6″ Silicone Craft sheet is a must if you are working with hot glue but also is great when you are running SNAIL along the back of a ribbon to adhere it to your project. The SNAIL that hangs over the narrow ribbon is easily rubbed off the craft sheet. The size of the craft sheet is perfect for the limited space most stampers have on their stamping space.
  14. Stampin’ Pierce Mat (126199) – Maybe you aren’t into paper piercing on your projects but this mat is a necessity when stamping with the new photopolymer stamps. It provides the cushioning needed for good images with the photopolymer stamps that don’t have foam cushions.

There you have it! I’m sure you could add to both my tip list and my great tools list. I’d love to hear any additions you can think of. Post them in a comment below.


Terrific Tuesday – Home for the Holidays

Digital Christmas Card featuring Home for the Holidays EnsembleHome for the Holidays Ensemble digital download  (128885) is one of this week’s Weekly Deals. I created this digital Christmas card so you could see one of the great stamp brushes in this ensemble. Click the link to see what all is included in the download. All I did for this card is to add a square punch resized to 4″ x 5 1/4″, fill it with Very Vanilla Textured card stock, and added the stamp. I added a basic rhinestone recolored with Daffodil Delight to the top of the tree and a Timeless Taffeta Trimmings Real Red bow recolored with Cherry Cobbler. The background is red Glimmer Designer Series Paper (132917).

This card was quick to make and all I need to do is print it out and send it. To make it a hybrid card, I would leave off the rhinestone and bow. After I printed it,, I would trim off the glimmer part and mount the remaining layer on a piece of 4 1/8″ x 5 3/8″ red glimmer paper. Then mount it on a Very Vanilla card base.

Check out the rest of the Weekly Deals by clicking on the photo:

Weekly Deals for 12-9-14

While you are visiting my online store, take time to look at the Year End Closeouts. The items are up to 80% off and some of the items have already sold out.