Category Archives: Special Occasion cards

Last Chance Products Time

image is of the Last Chance Products Time

Last Chance Products Time has come. It’s necessary to move out the old to make room for the new products coming in the Jan – April 2024 Mini Catalog. Now is the time to order those stamps, bundles, papers, and accessories you have been eyeing in the fall mini catalog. A few items are carrying over to next year but most will retire. Most importantly, even those stamps and dies that carry over into the next catalog sales period will no longer be bundled together. Now is the time to order the bundles and save 10%.

Since items will sell out quickly, the best policy is to shop now while there is still inventory. You can access the Carryover list here and the Last Chance items list here. Then go over to my online store to order. That way you will know if something is still available.

My Favorite Products are Going Away During Last Chance Products Time

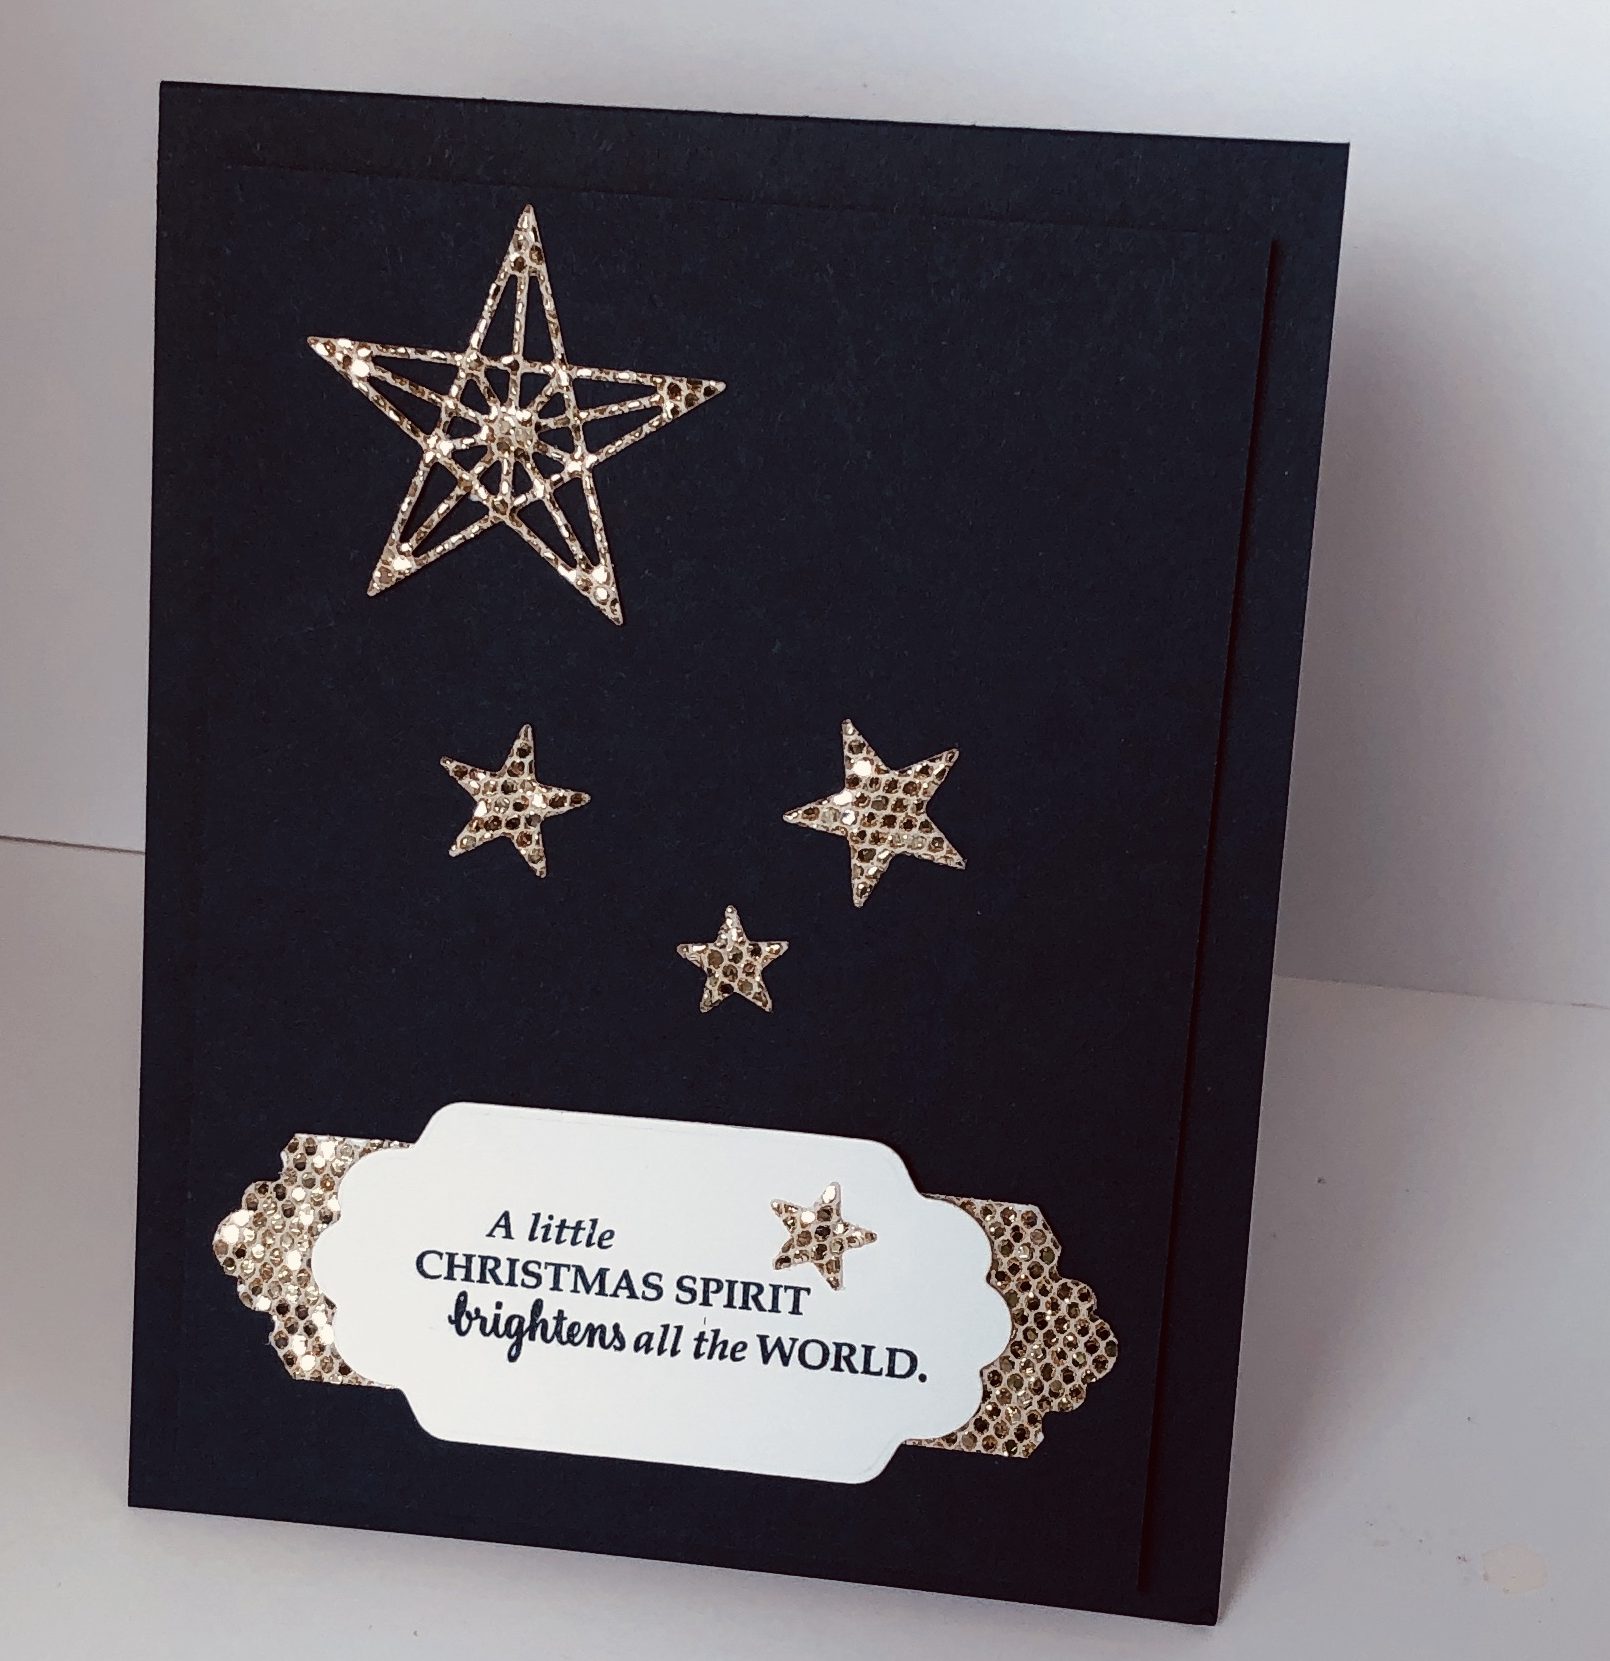
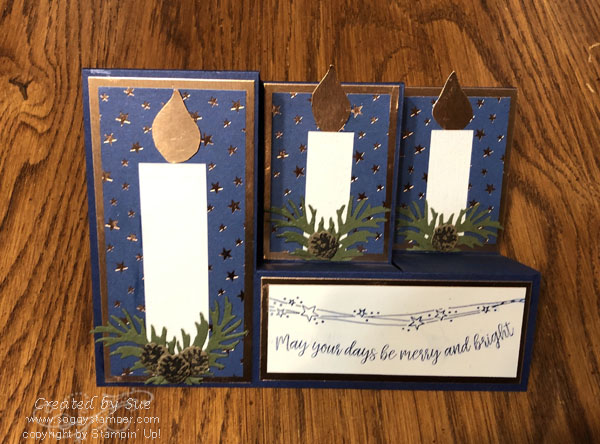
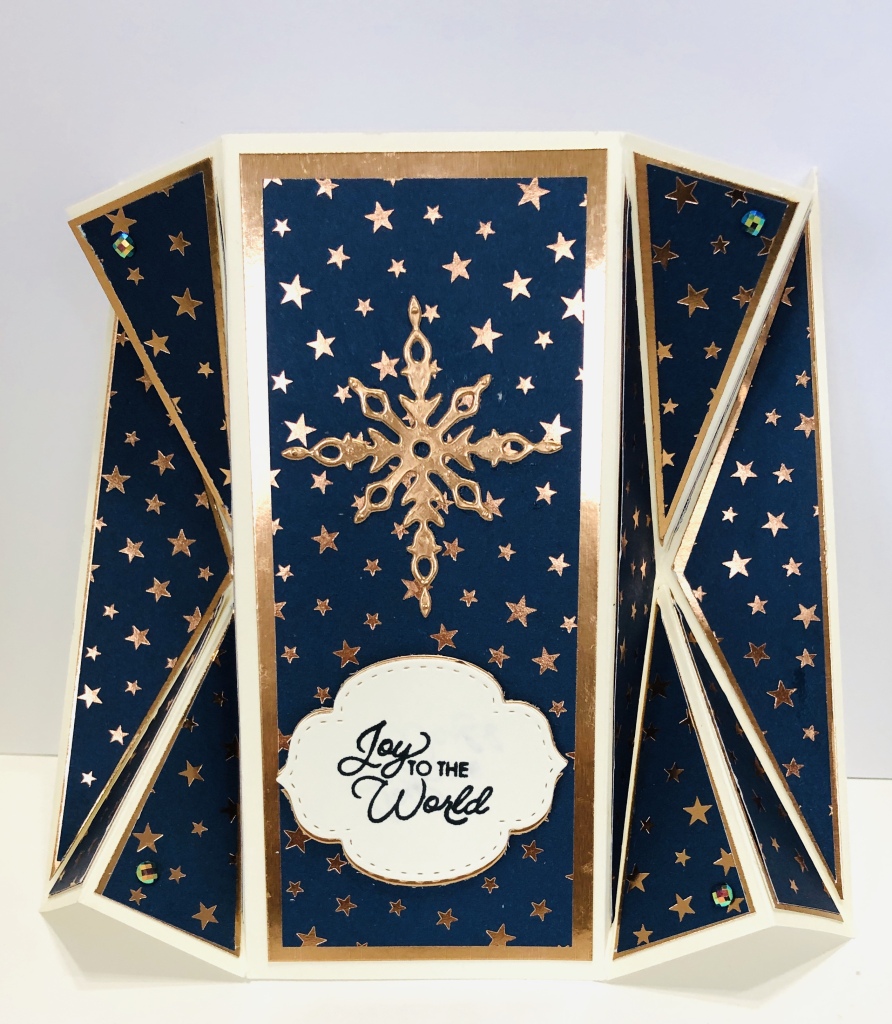
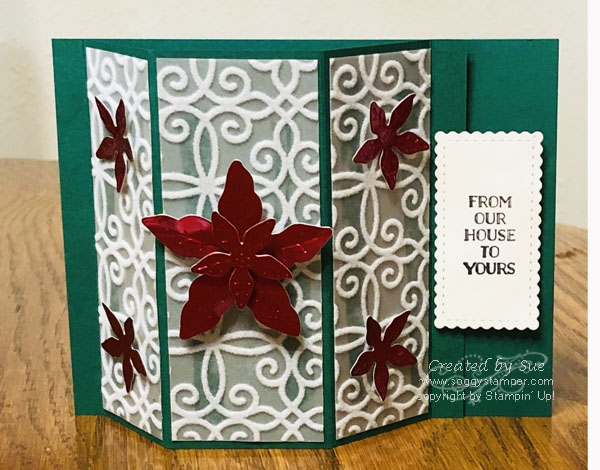
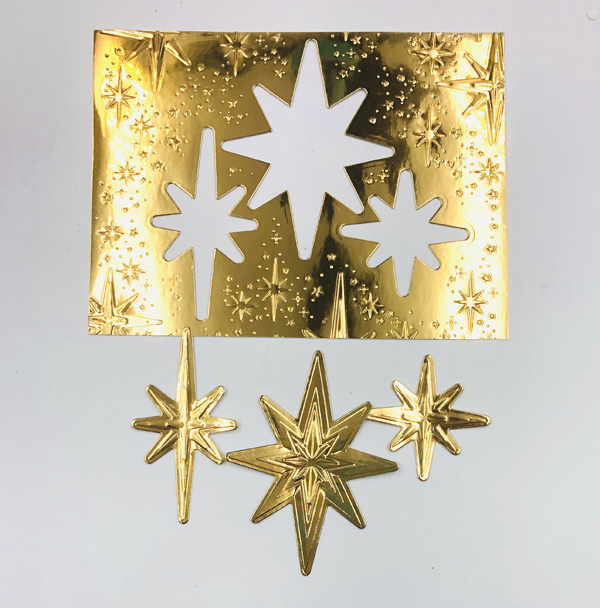
Stars at Night Hybrid Embossing Folder and Dies (162996)

image shows gold foil embossed and die-cut with Stars at Night Hybrid embossing folder

Divine Night Bundle (161997)

Two Christmas cards created with the Night Divine Bundle

and of course all the beautiful designer series papers in the catalog. The only one carrying over is the Winter Meadow Designer Series Paper (162133).

What is your favorite item from the catalog that is retiring during the Last Chance Products Time? Leave your answer in a comment below.

Scary Cute Pop-upCard

photo is of a Halloween Scary Cute Pop-up Card

This scary cute pop-up card is such fun to play with. What you are seeing is the card in the closed. The magic happens when you open the card. The photo shows the card flattened open but it is 3 dimensional otherwise. I love how the black cat pops up! I can play with it for minutes at a time. 🙂

Halloween Scary Cute Pop-up card opened

The images of the children do not have a corresponding die so I fussy cut them out. The tricky part of the card is getting the pop-up feature to work properly without any of the cat showing out the bottom of the card when it is closed. The fence is cut out with part of a Split Card Textures die

Supplies Used for Scary Cute Pop-up Card

  • Scary Cute Bundle (159852)
  • Starry Sky Cardstock (159263) 8 1/2″ x 4 1/4″ scored at 5 1/2″ and 7″, 1 1/2″ x 1 1/4″ for pop-up
  • Evening Evergreen Cardstock (155574) 8 1/2″ x 2″ scored at 5 1/2″ and 7″, 3 7/8″ x 2″
  • Basic Black Cardstock (121045) scraps for cat, haunted houses and bats
  • Gray Granite Cardstock (146983) 4 3/4″ x 1″ for fence
  • Basic White Cardstock (159276) scrap for tag, scrap to stamp children on
  • Mango Melody Cardstock (146989) scrap for moon
  • Tuxedo Black Memento Ink (132708) and Dark Mango Melody Stampin’ Blend (retired) use marker instead
  • Split Card Textures Dies (159162)
  • 1″ Circle Punch – retired
  • Paper Snips (103579)
  • Paper Trimmer (152392)
  • Stampin’ Cut & Emboss Machine (149653)
  • adhesives of choice
  • you can find these supplies in a shopping cart in my online store for your convenience. Click here.

Once you have gathered your supplies, watch this FaceBook Live I did to see how to put the card together.

For other samples of cards using this Scary Cute bundle, click here and here.

Scary Cute W-Fold Card

photo shows the front of a Scary Cute W-fold Card

I am delighted to share this Scary Cute W Fold card with you. My Bundle of the Month is the Scary Cute Bundle (159852). When you purchase this bundle from me during September, I will send you a free bundle of 5 tutorials to make cards and a treat holder using this bundle. I shared another card using this Scary Cute bundle in this post.

While the card front is cute, look at the inside! This is where the cuteness explodes.

image is of the Scary Cute W Fold card opened

Imagine the kids out Trick-0r-Treating on a dark night with the light of street lights lighting their way. Here are the supplies I used to make this darling card.

Supplies Used

  • Scary Cute Bundle (159852)
  • Beauty of Friendship stamp set (154983)
  • Deckled Rectangle Dies (159173)
  • Cajun Craze Cardstock (119684) 11″ x 4 1/4″ scored and folded at 5 1/2″
  • Basic Gray Cardstock (121044) 2 – 5 1/4″ x 4″
  • Mango Melody Cardstock (146989) 8 1/2″ x 5 1/2″, 5″ x 4″
  • Basic Black Cardstock (121045) 8 1/2″ x 5 1/2″; 11″ x 1 3/4″ scored at 2 3/4″, 5 1/2″ and 8 1/4″; scraps
  • Basic White Cardstock (159276) Scrap
  • Tuxedo Black Memento Stamp Pad (132708)
  • Multipurpose Liquid Glue (110755)
  • Stampin’ Seal (152813)
  • Stampin’ Cut & Emboss Machine (149653)
  • These items are in a shopping cart for your convenience. You can delete items you already have from the cart.

Once you have the supplies ready, watch this video of my Friday Facebook Live and stamp long with me to make this Scary Cute W Fold Halloween Card.

Sparkle of the Season Thanksgiving

handmade Thanksgiving card using the Sparkle of the Season bundle

I created this Sparkle of the Season Thanksgiving card for the people on our church’s Care Call list. The details were a little fussy for making 15 cards but I did get them all done this weekend along with having a wonderful time at OnStage at Home.

To save time and avoid getting adhesive on my hands, I used our adhesive sheets until I ran out. Then I had the bright idea of running the wreaths through the Xyron machine to put adhesive on the back of them. Big mistake!!! Oh boy was that a big mistake. When I pulled them off the sheet with the adhesive, they got all out of shape and the adhesive caused parts to stick to each other. What a mess. I pushed through and did get them down onto the card fronts with a fair semblance of a round wreath. However there was adhesive everywhere! On my fingers and on the cardstock between the parts of the wreath. I solved the problem by spraying alcohol on the wreath and wiping the excess adhesive off with a paper towel. Yes…you can do that. The alcohol evaporates and leaves no mark.

In addition to the dies in the Sparkle of the Season bundle, I used the wheat die from the Harvest dies, a label from the Seasonal Labels dies, and the Stitched Greenery die for the background.

Supplies Used for the Sparkle of the Season Thanksgiving

  • Mossy Meadow Cardstock 8 1/2″ x 5 1/2″
  • Crumb Cake Cardstock 3 1/2″ x 3 1/2″
  • Basic White Cardstock 5 1ç4: x 4: for inside of card, scrap for label
  • Cardstock Scraps of Cinnamon Cider, Cajun Craze, Cherry Cobbler, Pumpkin Pie, Real Red, and Crushed Curry
  • Sparkle of the Season Bundle
  • A Wish for Everything stamp set for greeting
  • Stitched Greenery Die
  • Seasonal Labels Die
  • Crumb Cake Baker’s Twine (retired)
  • Order the supplies to make this card here. You can delete product you already have from the shopping cart.

This Sparkle fo the Season Thanksgiving card uses a lot of different colors of cardstock. Luckily for you, Stampin; Up¡ is having a big Seasonal Sale on inks, cardstock and dies November 16 – 18. The cardstock is 10% off, the ink pads are 15% off and the dies are 20% off. This is a great time to stock up. To order, just click on the Shop Now button in the upper right corner.

Clever Cats Slide & Lock Card

handmade Clever Cats Slide & Lock Halloween card created with the Clever Cats stamp set

If you have been following me, you know that I love fancy fold cards and this Clever Cats Slide & Lock card is one of my favorites. I love the Clever Cats stamp set (156490) found in the July – December mini catalog. The fancy fold part of this card is that the label slides out to allow the recipient to open the gatefold card.

Clever Cats Slide & Lock card showing the slide part of the card being removed

And then when the slide is removed, this is what the Slide & Lock Clever Cats card looks like.

This photo shows the Slide & Lock Clever Cats card fully opened.

SUPPLIES USED

  • Stamp set – Clever Cats
  • Inks – Pumpkin Pie Refill, Memento Ink
  • Paper including cutting measurements – Smoky Slate (11″ x 4 1/4″plus 2 scraps1 1/2″ square), Basic White (scraps), Cute Halloween 6″ x 6″ Designer Series Paper (5 1/4″ x 4″ plus 2 scraps 1 1/2″ square), Glimmer Paper – retired (scrap)
  • Scalloped Contours dies
  • Halloween Magic Dies – retired
  • Stampin’ Spritzers
  • Tear & Tape, Stampin’ Seal
  • Order these supplies here. You can delete from the shopping cart what you already have.

I encourage you to give this fancy fold a try. If you do, I’d love to see what you come up with. Please email me a photo of it and if you have any questions or need clarification of some of the steps, be sure to contact me at sue@soggystamper.com.

From ‘Meh’ to ‘Wow!’

Sometimes, when designing a card, the littlest detail can change a card from ‘meh’ to ‘wow!’ Today I was playing around with the Be Dazzling 6″ x 6″ Specialty Designer Series paper that will be a free item during Sale-A-Bration. I used the dies from the Stitched Stars die set to cut out stars with this creation in mind.

Handmade Christmas card created with the Stitched Stars Dies that went from meh to wow!

However, I felt this card looked a little meh. It didn’t dazzle me. So I trimmed the card front down to 5″ x 3 3/4″ and layered it on top of a 5 1/4″ x 4″ piece of the Be Dazzled designer series paper. Now the card goes from meh to wow! Take a look!

photo shows a card that went from meh to wow! with the addition of a single layer of Be Dazzling Specialty Designer Series Paper

Sale-A-Bration begins August 3 and runs through the end of September. During this time, for each $50 you spend you get to choose a free product from the Sale-A-Bration brochure. These items are exclusive and only available during Sale-A-Bration. The July-December mini catalog also becomes live August 3 and is full of wonderful holiday and Fall designs. If you don’t currently have a demonstrator, I’d love to be yours and am happy to send you both the new mini catalog and the Sale-A-Bration brochure. Just contact me, sue@soggystamper.com with your phone number and mailing address.

Supplies Used for this From Meh to Wow card

  • Night of Navy Cardstock 11″ x 4 1/4″ scored and folded at 5 1/5″ for card base, 5″ x 3 3/4″
  • Be Dazzling Specialty Designer Series Paper 5 1/4″ x 4″, scrap for banner – Free during Sale-A-Bration
  • Basic White Cardstock – scrap
  • Night of Navy Classic Stampin’ Ink Pad
  • Stitched Stars Dies
  • Seasonal Seasonal Labels Dies – in July – December mini catalog
  • Lovely Labels Pick A Punch
  • Mini Glue Dots
  • Stampin’ Seal
  • Paper Snips
  • Stampin’ Cut & Emboss Machine

While the Be Dazzling paper and the Seasonal Labels Dies are not available until Aug. 3, you can order the rest of the supplies used. Contact me by email or visit my online store by clicking on the ‘Shop Now” button in the upper right corner of this page.

Thanks for dropping by to visit my blog. Grab a cup of tea and take a break and browse through some of my other blog posts. And sign my ‘guest book’ by leaving a comment below.

Hot Dog Floating Gatefold Card

photo is of a handmade birthday card with various dogs on the front
photo shows handmade birthday card using Hot Dog stamp set with the card opened

I’m excited to share with you this Hot Dog Floating Gatefold Card today! Our granddaughter was just given two long-haired mini dachshunds for her birthday and I knew this would be the perfect card for her. We also share our home with a couple of very spoiled mini dachshunds so when the Hot Dog stamp set became available in the Stampin’ Up! January to June mini catalog, I jumped on buying it.

I used the following materials to make this Hot Dog Floating Gatefold Card

  • Stamp set – Hot Dog
  • Inks – Memento, Real Red, Lt Cinnamon Cider Blend, Lt Basic Black Blend
  • Basic White Cardstock – 8 1/5″ x 5 1/2″ scored at 2 1/8 ” on both ends for card base, scraps of Basic White, and two strips 3″ x 1/4″ scored at 1/4″, 1 7/8″ and 2 3/8″
  • Real Red Cardstock – scrap
  • Playful Pets Designer Series Paper – 5″ x 3 3/4″, 2 pieces 5 1/4″ x 17/8″
  • Accessories – Stitched So Sweetly Dies, Retired Large Letters Framelits Dies, Stampin’ Cut & Emboss Machine, Multipurpose Liquid Glue, Stampin’ Seal

To Make Card

  • fold card base on score lines. Then adhere dsp to card base.
  • cut H and B from Real Red cardstock and adhere to front of card
  • stamp greeting with Real Red ink on white scrap. Cut out with a Stitched So Sweetly rectangle die. Adhere to inside center of card.
  • stamp the dogs on Basic White cardstock scraps and color with Stampin’ Blends. Fussy-cut them out.
  • Bend score lines on narrow strips of cardstock into a C shape. Adhere the 5/8″ end inside near bottom of right card front near the fold. Glue the dog to the strip being sure it doesn’t show below the closed card. Apply glue just to 1/4″ section and fold the strip back under the dog. Close card and press on the 1/4″ tab. Open card to be sure only the 1/4″ tab is glued down.
  • Repeat this process in the upper left side of the card gluing the 5/8″ section to the inside of the left card front.

To order the supplies used in this card just click here. I appreciate your business.

Joy of Sharing Kit = Great Value

photo shows cards made with the Joy of Sharing Card Kit

Check this out. Joy of Sharing Kit = great value! This card kit includes a set of 7 photopolymer stamps, a clear stamp block, Mossy Meadow Classic Stampin’ Spot, 15 printed card bases, 15 envelopes, printed die-cut images and label pieces, die-cut accent pieces, Laser-cut foil frames, adhesive-backed glitter dots, Stampin’ Dimensionals and adhesive dots. You also get complete instructions to create the cards and a couple of alternative card ideas.

I put together all 15 cards. Some were photo cards and the rest were beautiful Christmas cards. But I had a lot of pieces left over. So I used the Wonders of the Season Memories & More Cards and Envelopes package to make 20 more cards using some of the extra pieces from the Joy of Sharing Card Kit. Now I had 35 cards from the pieces of the Joy of Sharing card kit.

Photo of the Wonder of the Season Memories & More Cards and Envelopes

Check out some of the cards I made combining the two kits.

Cards made with the Joy of Sharing card kit and Wonder of the Season Memories & More Cards & Envelopes

14 More Cards!

I still had lots of die-cuts and labels left so I cut card bases from Thick Whisper White cardstock and carried on. I trimmed the centers of the gold foil laser-cut frames down to fit the card bases I had just made and trimmed off some of the pointy parts a little bit. These were adhered with Stampin” Seal to the centers of the card fronts. Then I covered the irregular parts with die-cut poinsettias and pine cone clusters from the Joy of Sharing kit. I got 14 more cards from that kit for a total of 49 cards.

Photo shows an additional 14 cards created with Joy of Sharing Card Kit elements.

And look how much more is left over for future use!

Left over elements of the Joy of Sharing Card Kit after making 49 cards!

I think you will agree that the Joy of Sharing kit = Great Value! The kit and the Wonder of the Season Memories & More Cards & Envelopes are retiring the 4th of January and are on Stampin’ Up!’s Year-End Close Out Sale. Yep…they are on sale and there is still inventory left. Hustle on over and purchase these two items now! You will have a headstart on next years Christmas cards. When you order, use the December host code and receive a small thank you gift from me.

Arrow Fold Christmas Card

Handmade Arrow Fold Christmas Card using In the Woods Dies

I got the idea of this fun arrow fold Christmas card from a tutorial I saw online. I loved the idea of turning the card with the point up. A Christmas tree fits in the arrow perfectly.

Supplies Used for this Arrow Fold Christmas card

  • Snow Front stamp set – little birds stamps
  • Itty Bitty Christmas – Season’s Greetings die
  • Whisper White cardstock 11″ x 4 1/4″ and scrap for pine tree die
  • Classic Christmas 6″ x 6″ Designer Series Paper green pine tree pattern 2 pieces 5 1/4″ x 4″
  • Real Red Classic Stampin’ Pad
  • In the Woods Dies
  • All the Trimmings Combo Pack – red ribbon
  • Multipurpose Liquid Glue

To order the supplies used to make this project click on this link https://s.tamp.in/07LoGX. The templates for scoring both a 11″ x 4 1/4″ and an 8 1/2″ x 5 1/2″ card base are below.

Template showing the scoring measurements for both a top fold and side fold A2 card
Template for Arrow Fold cards giving scoring measurements

I did a Facebook Live presentation a couple of weeks ago showing how to make this card. Then I uploaded it to my YouTube channel. You can watch the video below to help you with the folding.

If you decide to try this type fold, please send me a photo of your card. I’d love to share it here on my blog.

Easy and Quick Shaker Card

Easy and quick shaker card using the  Poinsettia Place designer series paper, Gift Wrapped stamp set, Christmas Gleaming stamp set, and Poinsettia Petals stamp set

One of the demonstrators presenting at OnStage@home this year shared a easy and quick shaker card. It is so easy that I want to share the technique with you.

To make this easy and quick shaker card you need

  • Poinsettia Petals stamp set – Merry Christmas greeting
  • Gift Wrapped stamp set – plaid bow
  • Christmas Gleaming stamp set – holly cluster
  • Real Red cardstock 8 1/2″ x 5 1/2″ scored at 4 1/4″ and folded for card base, scrap
  • Whisper White cardstock scrap
  • Poinsettia Place designer series paper – holly design 5 1/4″ x 4″
  • Inks – Memento, Cherry Cobbler, Stampin’ Blends – Old Olive, Mossy Meadow, Real Red, and Cherry Cobbler
  • Accessories – Bow Builder Punch, Holiday Rhinestone Basic Jewels, Tear & Tape, Stampin’ Seal, Clear medium envelope, Scotch Tape, Stampin’ Trimmer, Paper Snips

Click on this link to add these products to your shopping cart.Check out my Facebook Live presentation of how to make this card.

This technique is so versatile that you can create the card to fit any occasion, wedding, birthday, Thinking of You, etc. All you have to do is change out the designer series paper design and add coordinating images/embellishments to the front of the card. Here is another sample I have made with this technique. In this sample I used Feels Like Frost Specialty Designer Series Paper (153512), Snowflake Sequins (150443), Peaceful Boughs stamp set (150541) and Beautiful Boughs Dies (150661). You can add these supplies to your shopping cart here.

Photo shows an easy and quick shaker card using Feels Like Frost Specialty Designer Series Paper

Candle Triple Side-step Card

Handmade Christmas Card using the Curvy Cgleaming Specialty Designer Series Paperhristmas stamp set and Brightly

I’m very excited to share with you this Candle Triple Side-step card! Last Saturday, I shared another Triple Side-fold Christmas card here and told you the design suggested to me a row of candles. Ta daa! Here is the creation.

I used the same Night of Navy cardstock for the base but changed the dsp to another Brightly Gleaming Specialty Designer Series paper design. This time I used copper foil sheets as a layer under the dsp. The smaller of the Gleaming Ornaments Punch Pack was used to punch out the copper foil and then I hand-cut the shape of the flames. I happened to have a piece of Very Vanilla cardstock that had been embossed with the Subtle embossing folder. That was perfect for the candles.

I cut branches from Mossy Meadow cardstock using the Beautiful Boughs dies. I stamped the little pine cones from the In the Woods stamp set on Soft Suede cardstock using Early Espresso ink. Then I used the little pinecone die from the In The Woods Dies to cut them out. The greeting and swoosh of stars were stamped on Very Vanilla with Night of Navy ink using stamps from the Curvy Christmas stamp set. The Curvy Christmas stamp set is part of the Quite Curvy Variety Bundle special starting November 3.

Supplies for Candle Triple Side-step Card

  • Night of Navy Cardstock – 10″ x 7″
  • Very Vanilla Cardstock – 4″ x 1 1/2″, 6 3/4″ x 2 3/4″ for inside, 1″ x 3″, 2 pieces 2″ x 3/4″
  • Mossy Meadow Cardstock – scrap
  • Soft Suede Cardstock – scrap
  • Copper Foil Sheets – 4 3/4″ x 2 3/8″, 4 1/4 x 1 3/4″, 2 pieces 2 7/8″ x 2 1/8″, scrap
  • Brightly Gleaming Specialty DSP – 2 pieces 2 5/8 ” x 1 7/8″, 2 1/8″ x 4 1/2″
  • Night of Navy and Early Espresso Ink
  • Curvy Christmas stamp set – available Nov 3
  • Winter Woods stamp set – pine cone
  • Beautiful Boughs and In the Woods dies
  • Paper Trimmer
  • Stampin’ Cut Emboss Machine
  • Multipurpose Liquid Glue

You can order the supplies for this card here.

Triple Side-step Christmas Card

Handmade Christmas Triple Side-step card

Check out this beautiful triple side-step Christmas card! I love the way there are three levels to the card. I created it with the gorgeous Brightly Gleaming Specialty Designer Series Paper (150429) , Gold Foil Sheets (132622) and the Poinsettia Petals Bundle (155148).

Supplies Used for Triple Side-step Christmas Card

  • Night of Navy Cardstock – 10″ x 7″
  • Very Vanilla Cardstock – 1 piece 2 3/4″ x 2 1/4″, 2 pieces 2 3/4″ x 2″, 1 piece 6 3/4″ x1 3/4″, 1 piece 6 3/4″ x 2 3/4″ for inside
  • Mossy Meadow – scrap for leaves
  • Gold Foil Sheets – 2 7/8″ x 2 3/8″, 2 pieces 2 7/8″ x 2 1/8″, 1 piece 6 7/8″ x 1 7/8″, 1 piece 6″ x 5″ for poinsettia petals
  • Brightly Gleaming DSP – 1 piece 2 5/8″ x 2 1/8″, 2 pieces 2 5/8″ x 1 7/8″
  • Poinsettia Petals Bundle
  • Stampin’ Trimmer
  • Stampin’ Cut Emboss Machine
  • Multipurpose Liquid Glue

To order these supplies to make this card, click here.
I want to thank Karen Eagan of Crafty Karen Designs for her great tutorial I used to make this card. You can find my tutorial here and my Facebook Live video of this card here.

The design of this card makes me think of Christmas candles. I’m mentally designing another card with this fold. Come back in the next couple of days to see what evolves. While Karen’s card was the inspiration for this card, my next card will be an inspiration from God.

Stunning Shimmery Halloween Card

Handmade stunning shimmery Halloween card

This stunning shimmery Halloween card is easy to make using the split-circle technique. I designed this card for an Facebook Groups class I’m holding Sunday afternoon. Due to copyright laws, we aren’t allowed to include stamped images in card kits. Therefore I used a collection of dies to make this card.

The split-circle technique gives that swoop of color in the center of the card. You cut out four circles in increasing size using alternating colors/designs of cardstock/designer series papers. In this case I used the Rainbow Glimmer paper on the purple to yellow side of the sheet. I used the layering circle dies starting with the smallest circle. I labeled the dies in increasing size starting with the smallest being one and the largest being 8. I used #1 – #4 dies for the circles. Then cut the circles in half and adhere together as shown. For your convenience I have listed the place to position each circle on your paper trimmer to have them cut in half. Notice that each die goes up exactly 1/8″ plus the 1/16″. I could have given the measurements all in sixteenths but I found it easier to find the eights on the ruler and then add the 1/16″.

  • #1 4/8″ + 1/16″
  • #2 5/8″ + 1/16+
  • #3 6/8″ + 1/16″
  • #4 7/8″ + 1/16″

I used the next to the largest stitched rectangle to cut the Basic Black background. The frame was cut from the Rainbow Glimmer paper by nesting the third largest die inside the next larger die. I placed #2 and #4 circle dies inside the rectangles to conserve paper.

Supplies Used for the Stunning Shimmery Halloween Card

  • Mango Melody Cardstock – 8 1/2″ x 5 1/2″ scored at 4 1/4″ and folded for card base
  • Basic Black Cardstock – 4 3/4″ x 3 1/2″
  • Rainbow Glimmer Paper – purple to yellow edge of sheet 5 1/2″ x 5″
  • Black Glitter Paper – 4″ x 2″
  • Layering Circles Dies
  • Stitched Rectangles Dies
  • Word Wishes Dies
  • Halloween Magic Dies

Are you ready to make your own stunning Halloween card? Then click on the photo of the card to go to the shopping cart filled with the supplies you need. I have a video demonstrating how to make this on my YouTube channel. While you are there, subscribe so you receive notification when I upload my next video.

Stunning Double Fan-Fold Card

This image is of a stunning Double Fan Fold Star Card

I love this stunning double fan-fold star card. If you have been following my posts you may have learned that I love fancy folds. Here and here are a couple other fancy fold cards I have shared. I thank Lavonne Schwendeman for sharing a template with the measurements and scoring directions on one of our facebook groups. This card can stand by itself and folds up to fit into a standard A2 envelope for mailing. I did a Facebook live demonstration of how to make this card yesterday and am sharing that video today with you. First, though, here are the supplies, cutting dimensions and scoring directions I used.

Supplies for the Double Fan Fold Star Card

  • Stamp set – Itty Bitty Christmas
  • Ink – Memento
  • Very Vanilla Cardstock 7 ½” x 5 ½” scored at 1¼”, 2½”, 5”, 6¼”. Then diagonally from top left corner to bottom of 2½” score and top of 2½” score to bottom left corner. Repeat with other end, scrap
  • Brightly Gleaming Specialty dsp – Night of Navy with copper stars 5” x 2”, 2 pieces 4¾” x 2”
  • Copper Foil Sheets – 5¼” x 2¼”, 2 pieces 5” x 2¼”, scrap
  • Accessories – Stitched So Sweetly dies, Starlight Thinlits Dies (retired), Blue Adhesive-backed Gems, Stampin’ Seal, Multipurpose Liquid Glue, Stampin’ Dimensionals

To get the supplies I used to make this stunning double fan-fold star card, click here.

Poinsettia Bay Window Fancy Fold

photo is of Poinsettia Bay Window Fancy Fold card created with the Bay Window Fancy Fold technique and Plush Poinsettia specialty paper

I love this beautiful Poinsettia Bay Window Fancy Fold! If you have been reading my blogs, you have discovered that I love fancy folds. This fold is a really easy one that you will like to make.

I used the Plush Poinsettia Specialty Paper (153486) on the bay window part as it looks like lace curtains to me. It is one of the products in the Poinsettia Place Suite (155109). Another product is the Poinsettia dies (153522) which I used to cut out and emboss the flowers from Red Foils Sheets (153510). The greeting is from the Peaceful Boughs stamp set (150541) found in the 2020-2021 Annual catalog.

Supplies Used for Poinsettia Bay Window Fancy Fold:

  • Shaded Spruce cardstock – 4 1/4″ x 11″ scored parallel to the short side at 3/8″, 1-7/8″, 3-5/8″, 5-1/8″, and 5-1/2″
  • Whisper White cardstock – scrap for greeting, 4″ X 3-3/8″ for inside
  • Plush Poinsettia Specialty Paper – 2 pieces 4-1/8″ x 1-3/8″, 4-1/8″ x 1-5/8″
  • Red Foil Sheet – scraps for poinsettias
  • Poinsettia Dies – smallest and next smallest flowers
  • Tear & Tape, Stampin’ Seal

Learn how to make this card by joining me on my Facebook Live tomorrow at 3 pm Pacific time. You’ll find me on the Soggy Stamper Facebook page. I’ll be demonstrating this technique and a second sample using other supplies. After I’m through with the live presentation, you can watch the video on the Soggy Stamper YouTube channel. While you are at my channel, click the subscribe button to receive notification when a new video is uploaded. I’d love to have you leave a comment here on this post and on the video when you watch it so I know you have been visiting.