Jolly Jingle Part 3

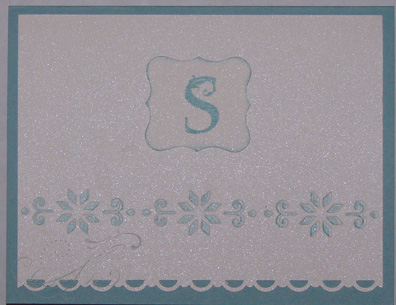
I am a very traditional person and Christmas cards are supposed to be for the most part some shade of red, green, and white. Some of the wording on the Jolly Jingle Stampin' Around Jumbo wheel inspired me to make this icy blue card. It is definitely outside the box color-wise for me but I like it. The Elegant Soiree designer series paper is not Christmas themed either but the pattern and color lends itself well for this design. Thanks for coming by to visit. Let me know what you think of this color combination for Christmas. Do you like it or are you a traditionalist like me?

Happy Holiday Stamping,

Sue

  Jolly Jingle Ornament card Stamp: Jolly Jingle Stampin' Around Jumbo Wheel

Ink: Baja Breeze

Paper: Very Vanilla, Baja Breeze, Elegant Soiree Designer Series paper

Other: Ornament punch, Silver cord (retired), sponge, Stampin' Around Jumbo Handle, Filigree Designer brad, Silver Glimmer Basics Brad

Jolly Jingle #2

Here is another card using the Jolly Jingle Wheel from yesterday's post. I love the multiple layers of the Pinking Heart borders. Thanks for visiting today. I will have a couple more examples using this wheel before I move on to some Thanksgiving ideas so do come back to visit tomorrow. I love receiving comments so I know you have been here.

Blessings,

Sue

Jolly Jingle copy Stamps: Jolly Jingle Jumbo wheel, Season of Joy

Ink: Real Red

Card Stock: Shimmery White, Garden Green, Cherry Cobbler

Other: Jumble Stampin' Around Handle, Pinking Hearts Border punch, Very Vanilla Taffeta ribbon

Jolly Jingles Challenge

Do you know how it is that you see a particular stamp that inspires you to make a specific card so you buy the stamp, make the card, and then don't use the stamp again? That is the case with the Jolly Jingles wheel I bought to make this card. Stay tuned as I am challenging myself to see how many different ways I can use this wheel in addition to this one card. Thanks for visiting today and do come back for the next installment of the Jolly Jingles Challenge tomorrow.

Blessings,

Sue

UDI swap Holiday MiniStamp set:  Jolly Jingles Jumbo Wheel 120864
Card stock: Cherry Cobbler
            Crumb Cake
            Very Vanilla
Ink: Soft Suede Classic Ink Pad
        Always Artichoke Stampin’ Write Marker
Other:  Deck the Halls Designer Series Paper 120810
    Decorative Label Extra-Large punch 120907
    Cherry Cobbler ½” Seam Binding 120992
    Champagne Glass Glitter 120997
    Crimper 101618
    Pinking Hearts Border punch 117649
    Snail Adhesive 104332
    Crystal Effects 101055
    Champagne Mist Shimmer Paint 116806

House of Haunts

What denotes Halloween better than a haunted house? I have used the House of Haunts stamp set from Stampin' Up! to make you this Halloween card.

Once in a while the creative juices just flow and a project turns out even better than you had imagined. I think this is one of those times.

I utilized one of Michelle Zindorff's techniques of clear embossing the house image to protect it while I sponged Peach Parfait ink on the moon and Basic Gray ink on the rest of the background of the image. I also sponged streaks of Basic Gray across the moon with the edge of my sponge to simulate whispy clouds traveling across the moon. I clear embossed the greeting to give it a shiny finish and sponged Basic Gray around the edge of the tag. I hope you like this card. If you would like to make this card and need the supplies, visit my online store to purchase them. Thanks for visiting today and come back again soon.

Happy Haunting,

Sue

Haunted House copy


Stamp set: House of Haunts

Card Stock: Whisper White, Peach Parfait, Basic Black

Inks: Craft Basic Black, So Saffron, Basic Gray

Other: Wicked Fun Specialty Paper, So Saffron Stampin' Write marker, Blender Pen, 1/2" Lace Trim, Clear Embossing Powder, Heat Tool, sponge

Join My Soggy Stamper Mailing List!

If you like the projects you see on my blog, please sign up for my mailing list. The sign up box is on the left side bar. You will receive a monthly newsletter filled with projects, tips, announcements of specials and classes, and much more. Right now I am giving my mailing list subscribers a weekly Christmas project complete with a picture and directions. You won't want to miss out on these special projects so sign up right now. If you include your birthday and phone number when requested in the sign up process, I will send you an e-card during your birthday month.

Blessings,

Sue

Halloween Luminaria

Here is a special decoration you can make to add the Halloween spirit to your bathroom or window sill. It is easily made in an evening by using Stampin' Up!'s Fancy Favorite die and designer paper. You can make more for each season of the year by changing out the designer paper, inks, and stamps. Use a battery operated tea light for that special glow.

Halloween Luminaries Halloween Luminary

                                                                                                                                                    Stamp set: Dark and Dreary (120837 wood, 121151 clear mount)

Paper: Wicked Fun Specialty (117400), Paper Velum (101839), scrap of Basic Black card stock

Ink: Craft Basic Black (102192)

Other: Big Shot Die-Cutting Machine (113439), Fancy Favor die (115965), Bitty Bat Large punch (119279), Stampin' Dimensionals (104430), 2-Way Glue Pen(100425), Paper Cutter (104152) 

Directions:

  1. Cut out the Fancy Favor box from a piece of the Wicked Fun Specialty paper. Trim the tab along the side of the box to 1/4" wide.
  2. Cut a piece of scrap card stock 2 1/4" by 2 1/4" and a piece 1 1/2" x 2 1/4" to use as templates for the cutouts.
  3. Lay the Fancy Favor die cut down on your work space with the scored side up. Center the 2 1/4" square piece of card stock between the score lines on one of the wide sides of the box and trace around it. Repeat on the other wide side. Center the 1 1/2" x 2 1/4" template on one of the narrow sides of the box and trace around it. Repeat on the other narrow side.
  4. Use the paper cutter to cut out the traced shapes.
  5. Cut two pieces of vellum 3" square and two pieces 2" x 3". Stamp desired images in center of each piece of vellum with Craft Basic Black ink. Allow ink to dry thoroughly.
  6. Adhere vellum on inside of box centering the images and using 2-Way Glue Pen.
  7. Fold the box on all score lines and crease with a bone folder. Use 2-Way Glue Pen on tab and glue the open side together. Fold in the two shorter tabs of the bottom. Put glue on both of the larger  tabs and fold them in pressing the bottom together by putting your fingers inside the box.
  8. Punch out two Bitty Bats from Basic Black card stock and two from the designer paper. Adhere them to your luminary with Stampin' Dimensionals.
  9. Add a flameless tea light inside the box and enjoy!  

Inspired by Nature

I want to share this card with you today. I was asked to make a sympathy card for a former pastor of our church so made one that was an 8 1/2 x 11" sheet of card stock folded in half. This would give more space for the members of the congregation to write messages. I created an oval mask by cutting out an oval scallop frame from card stock with the Sizzix Oval Scallop Frame die. Then I stuck post-it notes around the frame to mask off all but the center oval cut-out. I sponged More Mustard, Pumpkin Pie, and Always Artichoke ink in the oval. Then I overstamped the grass image of Inspired by Nature with Basic Black ink. I stamped the saying on a piece of Crumb Cake card stock. I punched the corners of the saying, the Whisper White, and the Tempting Turquoise layers with the Scallop Trim Corner punch and layered them on the base of Crumb Cake. A bow of Black 5/8" satin ribbon finishes off the card. Thanks for visiting today. I'd love for you to leave a comment so I know you were here.

Blessings,

Sue

Inspired by Nature Sympathy card Stamp Sets: Inspired by Nature, Thoughts and Prayers

Inks: More Mustard, Pumpkin Pie, Always Artichoke, Basic Black

Card Stock: Crumb Cake, Tempting Turquoise, Whisper White

Other: Scallop Trim Corner punch, Basic Black 5/8" satin ribbon, Big Shot, Oval Scallop frame die, post-it notes, Stamping Sponges

Thursday Tip

Some of you may already know this but for you who are newer to the rubber stamping craft, I have a great tip for you. You may have wished you could heat emboss a certain color ink with clear embossing powder to give your image a shine but you don't have craft ink in that color. Or you may have wanted to stamp an image and then brayer or sponge a background behind it but again don't have craft ink in the color you want to use. In this case you need to heat emboss the image with clear embossing powder to protect the image from being covered with the other color of ink.

What you can do is to first ink your stamp with Versamark ink and then with the desired color of classic ink. Then stamp on your paper, pour clear embossing powder over the image, and heat it with your heat tool. You must remember though to wash the stamp off before using the Versamark again or you will contaminate your Versamark pad. I hope this tip is helpful and sparks a burst of creative inspiration for you. Thanks for visiting my blog today and come back again soon.

Blessings,

Sue

Need Extra Cash for Christmas?

Owning your own Stampin' Up! business as an independent demonstrator can help you reach your goals of extra cash for Christmas. Some of the benefits of this business are:

  • ability to set your own business hours that work with your family commitments
  • instant income when you place customer orders
  • many tutorials available for training
  • my guidance and support and strong support from Stampin' Up!
  • you represent a company with a strong commitment to family values

If you have been thinking of taking advantage of this opportunity, now is the time to do it! You have less than one week to sign up and get the bonus of the FREE Greenhouse Gala Tote when you join. Contact me for more information.

Blessings,

Sue

Greenhouse_Gala(1)

Northern Trim Monogram Note Card

Yesterday I shared the Stampin' Up! video on using the new letterpress plates available in the Holiday Mini catalog. Today I want to share some tips I discovered for using these plates. This technique is a new one for me and I invested in all four of the letterpress plates Stampin' Up! offers so I could share my experiences using this technique with you. After some experimenting over the weekend, I tweeked the process a little.

I found it difficult to keep the card stock from moving so I laid it down and taped it on the multipurpose platform, taped the letterpress plate to the cutting pad, and inked the plate. Be sure to wipe off any ink that gets on the flat parts of the plate with a damp paper towel. Then I turned the letterpress plate/cutting pad over and laid it on the cardstock.

I wanted a slightly deeper impression so put a card stock shim down on the multipurpose platform before the piece of card stock I was printing. I also wanted to use Baja Breeze ink but did not have that color in craft ink. I first inked the plate with Versamark and then the Baja Breeze classic ink.

I love the soft color that resulted. Wouldn't this notecard make a lovely gift for someone for Christmas?

The letterpress plates are fun to use and produce such elegant projects. Click here to visit my online store to order your supplies. Thanks for stopping by and please leave a comment so I know you were here.

Blessings,

Sue


  Northern Trim copyStamp: Lovely Letters Alphabet (115030)

Paper: Shimmery White (101910), Baja Breeze card stock (111352)

Ink: Versamark (102283), Baja Breeze Classic ink (111833)

Other: Curly Label Punch (119851), Scallop Trim Border Punch (118402), Northern Trim Letterpress Plate (120982)

Letterpress plates

Ever wonder how they made those lovely engraved invitations and cards where the letters are depressed and colored? Well now we know…they use letterpress plates! Now you too can make elegant engraved cards using the new Stampin' Up! letterpress plates they introduced in the Holiday Mini catalog.

Letterpress plates-001

Today I am sharing a video produced by Stampin' Up! on how to use these plates. Tomorrow I will share a tweek I made in the process and a very elegant notecard I created using the Northern Trim Letterpress plate. Thanks for visiting today and be sure to come back tomorrow for some letterpress tips.

Blessings,

Sue


Sweet Hello

Once in a while you need a quick card that still packs a punch. If you have the Simply Sent Sweet Hello Stampin' Up! kit on hand, you are good to go. This wonderful kit contains 8 printed cards, 8 envelopes, and 24 adhesive-backed ribbon flowers with pearl centers. I bought the kit just for the darling little pink ribbon flowers! All you additionally need is a greeting stamp and ink to complete your card. In this card, I used the retired SAB Vintage Labels stamp set and punched the image out with the curly label punch. I then sponged Old Olive ink on the edges of the label to set it off from the rest of the card. I popped the label up with Stampin' Dimensionals for added dimension. I am so pleased with this card and it only took me about 10 minutes from start to finish. If you don't already have this kit, visit my online store or email me to place your order. You really will be glad you have the kit on hand! Thanks for visiting me today and come visit again soon.

Blessings,

Sue

Simply Sent Sweet Hello Stamp Set: Vintage Labels (retired SAB set)

Ink: Baja Breeze, Old Olive

Other: Simply Sent Sweet Hello kit (118710)

Stamping 411 Sketch for this weekend

I love joining in with the operators over on Stamping 411 with their weekend sketches. This week I wanted to try out my new Stampin' Up! letterpress plates, especially the Halloween one. I turned their sketch sideways so the image would fit. I highlighted the letters with Illuminate Top Coat Smooch Pearlized Accent Ink. (What a mouthful that is!!!) I used the black lace ribbon and tied a bow with it. I love how soft the bow is. Thanks for visiting my blog today. Please leave a comment so I know you came and do come back again soon.

Blessings,

Sue

The sketch :                                                                    My version:

411 sketch 10-8-10   Halloween Letter Press copy


Stamp Set: none

Ink: Basic Black Craft Ink

Paper: Basic Black, Tangerine Tango, Wicked Fun Specialty

Other:  Trick or Treet Letterpress plate, 1/2" Lace Trim, Sizzix Big Shot

Stamping 411 Sketch Revisited

I needed to make some birthday cards last weekend so took the opportunity to use the Stamping 411 weekend sketch as the basis of those cards. The Birthday Bakery stamp set and In Color Paper Pack are free gifts for hosting a workshop. If you would like to receive either of these free gifts, schedule a workshop with me. Those who don't live on Prince of Wales Island can schedule a catalog workshop and still earn hostess benefits. Contact me to schedule your workshop. My calendar has just a few spaces open so don't wait! Thanks for coming to visit. I'd love for you to leave a comment so I know you were here.

Blessings,

Sue

Birthday Bakery Stamp Set: Birthday Bakery

Inks: Basic Black

Paper: Whisper White and Crumb Cake card stock, In-Color Designer Series Paper Pack

Other: Cherry Cobbler, Pretty in Pink, Real Red and Always Artichoke Stampin' Write markers, Early Espresso 3/8" taffeta ribbon, Basic Pearls Jewels

Extra Cash for Christmas

Are you looking at your Christmas list and wondering where you are going to find the money to pay for all the gifts you want to give? Consider becoming a Stampin' Up! demonstrator! The benefits of being a demonstrator include:

  • earning extra cash with a flexible schedule that fits in with your family activities
  • financial security in being able to control how much profit you realize
  • a great feeling of being able to help others discover their own creativity
  • working with a company who values faith, family, and relationships as the basis of their business plan

Sound interesting to you? Contact me to learn more.

Blessings,

Sue