Thoughts and Prayers

Do you find that you are always at a loss for words when someone you know is sick or grieving the loss of a loved one? The new stamp set Thoughts and Prayers from the Spring/Summer Stampin' Up! Idea Book and Catalog is just what you need! Not only does this set have a very lovely tree and flower spray, but it also has just the right words to express your thoughts. An added bonus is that Stampin' Up!'s Decor Elements includes the same tree in three different sizes of wall art to coordinate with your stamp. Here is a card I made showcasing the flower sprayThoughts and Prayers Copy . Click here, then click on the "shop now" button on my website  to place your order for this wonderful stamp set.

Stamp sets: Thoughts and Prayers, Hugs and Wishes
Card Stock: So Saffron, Garden Green, Really Rust
Ink: Versamark, Chocolate Chip
Other: Chocolate Chip grosgrain ribbon,
Stampin' Pastels

Daisies and butterflies

I was surprised by receiving a complimentary copy of Stampington's Take Ten magazine in the mail today. I tore open the wrapper because that could mean only one thing….a card of mine had been published in this issue! Here is the card:
Red card #3 copy Stamp Sets: Upsy Daisy, Flight of the Butterfly
Card Stock: Rose Red, Pretty in Pink
Inks: Craft Whisper White, Rose Red, Basic 
         Black
Other: vellum
           Garden Green Stampin' Write markers
           glue dots

Top Note Sympathy Card

I am enjoying using the exclusive Stampin' Up! Top Note die for the Big Shot. In this card, I have cut the design out of three different colors of cardstock. I ran two of them through the Big Shot using the Cuttlebug Swiss Dot embossing folder. The Very Vanilla die cut is stamped with a portion of the coordinating stamp from the Sell-a-Bration 'Yummy" stamp set. I colored the part of the stamp I wanted with markers aWith watermark nd then stamped it on my die cut. Sell-a-Bration starts on Sunday and I am so excited about the choices of limited edition stamp sets, the ribbon bundle, and the designer paper that is available for free with each $50 in purchase of stamps and supplies from the new Spring/Summer 2009 Catalog and Idea Book. Contact me to place an order or click the online order button to go directly to my online store.

Stamp set: Yummy
Card Stock: Regal Rose, Pink Pirouette, Very
          Vanilla, Always Artichoke
Ink: Always Artichoke
Always Artichoke and Pixie Pink Stampin' Write
          Markers

New Stampin’ Up! 2009 Spring/Summer Catalog is Here!

I am so excited about the new catalog. It has a wonderful selection of new stamp sets as well as some of our old favorites. The accessories section has been expanded to include many new Sizzix dies and some new dies exclusive to Stampin' Up! There are wonderful new designer papers, designer buttons, a selection of designer textured card stock, new ribbons, a full heart punch, a scallop lace border punch, and many more Decor Elements to name a few of the exciting new products. Click here to view all the wonderful products available through my Stampin' Up! online store. Email me if you would like to purchase your own copy of the Idea Book and Catalog. It is a wonderful source of inspiration!

Camera Care

Since so many of us love our digital cameras and have a sizable investment in them, it only makes sense to give them the proper care so that they last a long time and continue to take great pictures. Webshots has an excellent article on basic camera care that you will find quite helpful. Get your camera in top shape so it is ready to capture all the moments of the holiday season. Click here for the article.

Sale! Sale! Sale!

Has soggy weather and cold, icy blasts dampening your holiday shopping? Shop from the comfort of your home for every stamper/crafter on your list and just maybe a little for yourself! Stampin' Up! is having a unique, never-before-seen 6 day sale November 26-Dec 1. This sale doesn't offer just 20% off a stamp set or free shipping. No…this sale bundles up similar product and offers the bundle of products from 30% to 50% off. This sale is  while product lasts so check it out on my Stampin' Up! website and either order online or email me your order right away!
Happy stamp shopping,
Sue

Just Over a Month Until Christmas!

Holidaygift Goodness….Christmas is rapidly approaching! Have you started getting ready? Have you started your cards and making gift items? I haven't even begun designing my Christmas cards this year. Oh well, I have a few left over from last year that I can send. But…don't despair! Stampin' Up! is your source for all your papercraft projects and there is still plenty of time to order! Here are some suggestions for your gift giving. If you want to shop by price point check this list out. Click here to order online or  email me with your order.

Comments about using PPA

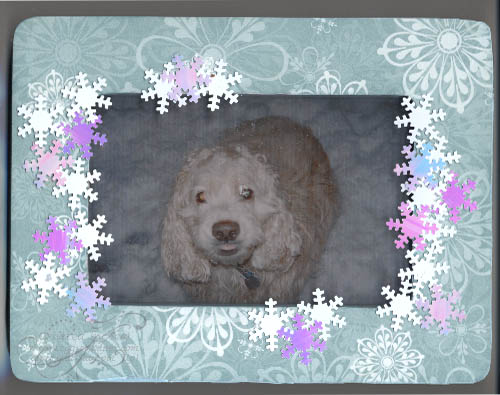
In my post of the picture frame, I mentioned that I had used PPA (Perfect Paper Adhesive) to glue the designer paper to the frame but that the paper came unglued and wrinkled when I painted Varathane on the frame. Susan Pickering Rothamel, president of USArtquest and developer of PPA emailed me the following comments:

"If you use PPA as the 'decoupage' or 'collage' medium, then you do not need to use Varathane.  In fact, the PPA is a stronger and more water resistant, UV resistant medium, even producing less tack, then the Varathane itself.  If you want a shiny finish, use PPA gloss.  If you want a satin finish – mix PPA 1/2 matte and 1/2 gloss.  However, if you do want to use the Varathane anyway, understand that it will yellow over time.  PPA will not. Also, if you choose the Varathane, even a PVA/Elmers/Mod Podge, etc. glue will lift, if it isn't REALLY nailed down. 
 
PPA is used often under Varathane by wood artisans and experimental artists. It is necessary to make sure the paper is glued under every teensy area, and even on top.  The paper should be fully encapsulated in PPA.  Then you must wait for it to dry thoroughly before adding any type or urethane product. However, using the PPA as the finishing varnish needs no extra drying time.  Drying happens by 'curing' rather then evaporation.  Therefore, the longer you wait, the more successful the piece will be.  Easily a day or two in between coats." She further gave these directions for adhering paper to a wood frame or plaque: "You apply PPA to the frame, then continue to use the PPA'ed brush as you apply the paper, brushing even more adhesive over the top of the paper, smoothing it as you go.  For the absolute BEST success, spritz or dunk each piece of paper thoroughly in water before applying it to a frame (or any other surface.  This assures that every fiber is fully wetted, preventing unsightly buckling or bumps.  Make sure that every area though has adhesive under it, or you'll have bumps when the paper dries.  It is quite a simple process, and works everytime with the few tips I've mentioned." Susan graciously permitted me to post this information on my blog. I hope it will help someone else with their creative projects.

Let It Snow

Let It Snow Today it was actually snowing here in SE Alaska! Of course, the snow didn't stay around for long. This card is appropriate for today. I wheeled the jumbo 'Snow' wheel repeatedly on Baja Breeze cardstock with Versamark ink. (To get a jumbo cartridge of Versamark ink, buy an uninked cartridge and ink it with Versamark refill ink.) Then I embossed the images with a mixture of Winter White and Iridescent Ice embossing powder. I cut this cardstock out using the Sizzix Bigz Top Note die and trimmed it along the perforations. I also cut the Top Note die out of Riding Hood Red cardstock and layered the two together. The recipe for this card is below. Order the materials for this card  online or email me.

Materials:
Stamp Set: Big on Christmas
                 Snow wheel
Card Stock: Baja Breeze
                  Riding Hood Red
                  Whisper White
Ink: Versamark, Craft Black
Other: Watercolor crayons
            Ski Slope Designer Paper
            Riding Hood Red Taffeta Ribbon
            Winter White embossing powder
            Iridescent Ice embossing powder

Love Scrapbook Papers But Don’t Scrap?

Ski Slope Christmas Card Do you love scrapbook papers but don't make scrapbooks? You can still enjoy the beauty of these papers. Just use them on your cards! I have made only a few scrapbook pages but have used the lovely papers over and over again on my cards. This  Christmas card uses Stampin' Up!'s Ski Slope Designer Paper to embellish the card.
Go to my DBWS or email me to order the supplies for this card.

Materials:
Stamp set: Best Yet (Level 1 Hostess set)
Card stock: Riding Hood Red, Kiwi Kiss
Ink: Basic Black
Ski Slope Designer Paper
White taffeta ribbon

Snowflake Frame

Snoflake frame with Roscoe copy Have you used designer paper to cover an inexpensive picture frame? When you send your pictures at Christmas, consider framing them with beautiful seasonal frames. I bought some this summer at one of the craft stores for $1 each. I have finally used one of them to make this frame for a Stamping Sister. First I painted the frame with an acrylic paint. Then I traced the frame on a piece of the wonderful Ski Slope Designer Paper from Stampin' Up!, cut it out, and glued it to the front of the frame. I used Perfect Paper Adhesive as the glue. I won't be doing that again. When I sealed the frame with Varathane that cleans up with soap and water, the paper started to come unglued and wrinkle. I think I should have used decoupage medium or run the designer paper through my Xyron for the adhesive. I finished off the frame with iridescent snowflake embellishments and a picture of our cocker spaniel, Roscoe. Roscoe loves to roll in the snow and his fur quickly becomes full of little snowballs. They are visible on his ears if you look very closely. Click here or email me to order your package of Stampin' Up!'s Ski Slope Designer paper.

Life is Good when you use Decor Elements from Stampin’ Up!

I love this saying and jumped at the chance to buy it when Stampin' Up! first brought it out in their new Decor Elements Wall Decor line. However, my walls need painting and I didn't want to put up the design until after they were painted. Instead, I applied the decor to the front of a picture frame's glass. Then I put Autumn Vine Designer paper inside the frame. I can change out this paper with the seasons. This is just one of many ways you can use the Decor Elements. Check out this pageLife is Good picture frame for more ideas and the rest of the designs. Application of the Decor Elements is easy and they can be removed when you want to change them out.

Decorate for the Holidays with Country Living/Stampin’ Up! Kit

This convenient ornament kit comes to you from the joint efforts of Country Living and Stampin’ Up! Everything you need to create these country-inspired ornaments is included in the kit. Click hereCountry Living photo to order this wonderful kit. Supply is limited so don’t wait!

  • Holiday Collection stamp set (six stamps)
  • Four 12″ x 12″ sheets of die-cut chipboard
  • Eight 12″ x 12″ sheets of die-cut Designer Series paper (2 ea. of 4 double-sided designs
  • Four 12″ x 12″ sheets of Designer Series paper (2 ea. of 2 double-sided designs)
  • Two 12″ x 12″ sheets of Whisper White card stock
  • 25 yds. Silver Metallic cord
  • 10 yds. 3/8″ Whisper White taffeta ribbon
  • Pretties Kit brads (20)
  • Stampin’ Dimensionals
  • Dazzling Diamonds Stampin’ Glitter (1/2 oz.)
  • Tombow Multi Purpose Adhesive
  • Riding Hood Red Classic Stampin’ Spot
  • Old Olive Craft Stampin’ Spot
  • Uninked Stampin’ Spot
  • Whisper White Craft Ink refill

Tumbled Tile Trivit

    Have you tried stamping on tumbled tile flooring tiles? It is easy and they make wonderful gifts for Christmas, house-warmings, birthdays….you name it. I made this one using the Happy Blessings stamp set from Stampin' Up! I stamped the images with brown Staz-On ink which dries quickly and works on almost all surfaces. I thought it would be permanent but found that my blender pen was dissolving the stamped image. I stopped working on the tile and baked it in the oven at 150 degrees for 20 minutes. Then I let it cool and the brown Staz-On ink became permanent. Here is a picture of the trivit and directions follow.Happy_ Blessings_Trivit To order this stamp set and the craft inks, click here.
Supplies:
Stamp Set: Happy Blessings
Inks: Timber Brown Staz-On,
        Craft inks-Garden Green
            Pumpkin Pie
            Real Red
            Ruby Red   
            Creamy Caramel
            Summer Sun
            Chocolate Chip
            Really Rust
Other: Blender Pen
           Tumbled Tile 6"x6"
           Four half marbles (found in the floral
                arranging area of a craft store)

Directions:

1. Clean surface of tile well and let dry.
2. Stamp images with Timber Brown Staz-On ink.
3.  Bake tile in 150 degree oven for 20 minutes. Let cool.
4.  Using the blender pen, pick up ink from Craft pads to color in the images.
5.  Bake tile again in 150 degree oven for 20 minutes. Let cool.
6.  When cool, glue a half marble in each of the four corners on the bottom side. These little 'feet' lift the trivit up off the surface of the table or counter and make it easier to pick up the trivit. As an alternate idea, glue a hanger on the back of the trivit instead of the feet and hang it on the wall.

Fall Votive Card

Happy_Blessings_Votive_Card

I love the way this votive card turned out! The tutorial for making a card like this is the online bonus technique of the August/September Technique Junkies Newsletter. To order the supplies to make this card, click here.

Stamp Set: Happy Blessings
Cardstock: Pumpkin Pie, Shimmery White, vellum paper
Ink: Basic Brown
Other: Only Orange and Garden Green markers
           Watercolor crayons
           Aqua Painter