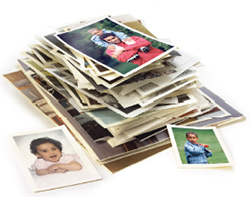
 Does your stack of Christmas photos you took this year look like this? Read more to learn how to organize them and get them in a scrapbook!
- Gather all the photos together
- Weed out the ones that are out of focus or where the lighting is too dark.
- Where there are multiple shots of the same setting (like a family group shot), choose the best one as far as the expressions on the faces. Set the others aside.
- Crop out unwanted elements like someone’s hand appearing at the edge of the photo. If you have a photo with the focal point in the center and lots of extraneous things on the sides, you might want to crop the photo down to just the focal image. This would be also important if the focal image is not centered and the bulk of the photo is not needed for telling the story.
- Decide if you want the photos displayed chronologically or by family/individual grouping and group them.
- Start putting the photos in your scrapbook. You can do traditional scrapbooking with adding embellishments, Project Life by Stampin’ Up! scrapbooking, or scan your photos into your computer if they aren’t already on the computer and do digital scrapbooking. If you choose to do Project Life style, you can put photos that are smaller than the pockets onto cardstock that has been cut to the needed size. You can also add embellishments to the pages and photos when doing Project Life style scrapbooking.
- Add journaling to your pages to record the reasons for the photos and the feelings that go with them.
- Most importantly…DO IT NOW WHILE YOUR MEMORIES ARE FRESH!
This is also Terrific Tuesday and we have some new terrific Weekly Deals for you. Check them out by clicking on the photo below and be sure to order those you are interested in while they are 15% discounted. The prices will go back up next Tuesday.