It’s MDS Monday and a new sketch using Tape

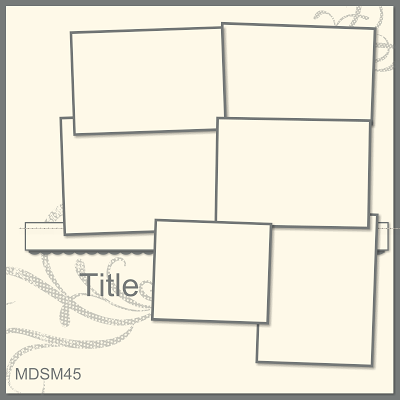
The sketch for today uses tape to attach the main image to the background.MDSM46 card sketch

I started with Washi Tape from the Sent With Love Kit (132914) and Crisp Cantaloupe background. Then I began looking for an image that would fit the rectangular area. I found the saying ‘winter wonderland’ from the Chat Room Occasions stamp brush set which fit the space perfectly but the tape and background didn’t. So I decided to add a winter photo to the card and used a frosty looking background from the Winter Frost designer series paper. That set the color for the tape. I used the global search feature to check out all the different tapes I had in my MDS library and decided this one from the Fall Memories November Kit had the perfect pattern. It reminds me of wind-sculpted snow. I used the color picker feature to recolor the tape to match the color of the background. Then I added a tape from the Downtown Grunge Photobook Template because the color was just perfect. This card was not at all like what I started out to create but the process took over…I love it when that happens…and I love the end result. See for yourself!

Winter Frost Specialty designer series paper

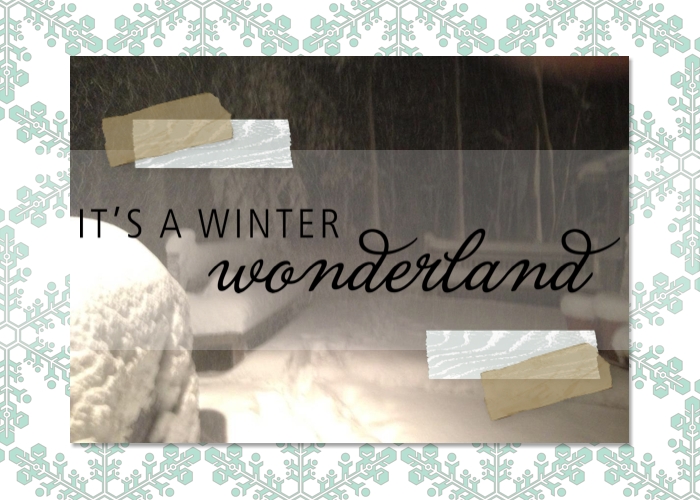
I might add that this picture is one my DIL took of their yard in the Boston area last winter. You wouldn’t find such an accumulation of snow where we lived in Craig, AK, or here in Mount Vernon, WA.

Supplies:
MDS software digital download (130646), MDS software disc (130647), or 30-day Free Trial of MDS (130910)
Background
Winter Frost Designer Series Paper (135265) pattern 4
Embellishments
Fall Memories November Kit (135910) – tape 4 (re-colored)
Downtown Grunge Photobook Template (126056) – tape 3
Stamps
Chat Room Occasions (125159) – winter wonderland

Punches
Basics/1.25 Square Punch (comes with software)

Click on the links or visit my online store to purchase the supplies used in this digital greeting card.


Glittery Gift Bow Bigz Die Packages

I wanted to make a special package for the gifts for our daughters and had these bows made from Winter Frost Specialty Designer Series Paper and the Gift Bow Bigz die laying on my stamping table. I used the Envelope Punch Board to make the thin boxes from Silver Glimmer Paper. The belly band used to close the box is from Island Indigo card stock. These are so sparkly and beautiful in real life that I almost hate to give them away.

Both the Gift Bow Bigz die and the Winter Frost Specialty Designer Series Paper will no longer be available after Jan 2 when the new Occasions catalog will begin. If you are like me and can imagine all the uses for the bow die and don’t have it yet, don’t wait…order it before it is too late!

Here is the list of the items that will be carried over Holiday_Carryover_2014_US-3 and some of the product from the Holiday catalog will be in the Occasions catalog. Check out the list and give me a call if you wonder what items from the Holiday catalog are in the new Occasions catalog. Then place your order through my online store or email it to me.

Supplies:
Paper – Winter Frost Specialty Designer Series Paper (132341), Silver Glimmer Paper (124005), Island Indigo card stock (122923)
Other – Gift Bow Bigz die (129977), Big Shot Die-Cutting Machine (113439), Frosted Finishes Embellishments (132150)


Christmas Card from Japan

handmade Christmas Card

Years ago, we hosted an exchange teacher from Japan for the school year. It was such a great experience for both us and him that we have stayed connected ever since. This is his Christmas card for us this year. I love how he used pieces of thin foam packing material for the leaves of the tree. That is so creative! It looks like the tree is covered with snow and some is falling down at the base of the tree. I am going to hang on the the packing material in the box he sent as I can just see this on an evergreen tree. Look for a post soon of a card I make like that.

I don’t know for sure what the Kanji says but inside the card he wrote Merry Christmas and Happy New Year.

Holiday Mini Catalog Going Bye-bye! Order Now!


Holiday Carry-over listTime is running out on the Holiday Mini Catalog! Come January 3, most items in the catalog will no longer be available. Some of them will be in the Occasions catalog which begins January 3 and some of them are on the Holiday Carryover List. You can check out the carryover list here:  Holiday_Carryover_2014_US-3. The Occasions catalog will be arriving in your mailbox in the next couple of weeks. If you would like one, email with your phone number, time zone, and best time to call you. I want to tell you how you can get a catalog totally free. Or give me a call. I’m sure there are some things in the catalog that you still would like to have. Order them now before they are gone. If you are like me, I love the Winter Frost Specialty paper. I’m thinking I will order some more to have on hand. It is perfect for not just Christmas projects but projects all winter long. If there is a particular item that is not on the carryover list and you wonder if it will be in the Occasions catalog, give me a call and I’ll let you know.

Happy Mistake – Festive Flurry

Sometimes a mistake can turn out to be even better than what a stamper had planned. In this case, it is not better than the original plan but definitely a good discovery. I was working on my Christmas cards. One step in the process was to stamp the Festive Flurry images on the Silver Foil sheets and emboss with Heat & Stick Powder, then sprinkle silver glitter over the images. All was going well until I took a break for the day. The next time I worked on them I grabbed the little jar that was at hand and sprinkled the powder over the images. I was mystified for a moment or two that the glitter wasn’t sparkling like usual. Hmmm….THEN I looked at the jar! I had picked up the silver embossing powder instead of the glitter. Oops! I decided to go ahead and heat emboss the images and was pleased with the end result.

Festive Flurry Christmas card
What do you think? Don’t the snowflakes look like they have been crocheted with silver thread? The lumpiness of the Heat & Stick Powder created a different texture to the heated silver embossing powder. Fortunately, I only had done 6 of these before I discovered my mistake. Here is the original card. Oh yeah…I also forgot to check if I had enough of the Pool Party Seam Binding ribbon and ran out of it. Fortunately, the retired Baja Breeze pleated ribbon I had left over works well too.

Festive Flurry Christmas card

Supplies:

Stamp Sets – Festive Flurry (131788-wood, 131781-clear), Endless Wishes (133455 – sold out)

Ink – Versamark (102283)

Pper – Soft Sky (131203) and Whisper White (100730) card stock, Silver Foil Sheets (132178)

Other – Decorative Label Punch (120907), Heat & Stick Powder (100625), Silver Glitter (132205), Silver Stampin’ Emboss Powder (109131), Embossing Buddy (103083), Heat Tool (129053), Soft Sky 1/2″ Seam Binding (131210)


Terrific Tuesday – MDSM45 Challenge

Here is another challenge from My Digital Studio Monday. This one is a scrapbook page and the sketch enables you to put numerous pictures on the page. Here is the sketch:

My Digital Studio Monday Sketch 45

and here is my version:

Digital Scrapbook Page using Be Yourself Designer Series Paper

Supplies:  MDS software digital download (130646), MDS software disc (130647), or 30-day Free Trial of MDS (130910); Background Be Yourself May Kit (133426) – designer series paper 1; Embellishments Neutral Delightful Digital Tape (128874) 1 – whisper white;  Stamps
Fundamental Phrases (118824)- party, Christmas Messages (135268) – oh what fun

I started this page by adding all the pictures I wanted to share. I played around with their placement and size for quite a while before adding the background. I tried plain Soft Sky card stock and one of the Winter Frost papers but didn’t like either. Then I popped in this pattern from the Be Yourself May Kit designer series paper. I couldn’t believe how it made the colors in the photos pop and tied them all together. The motion in the placement of the photos and the movement of color in the background resonate with the excitement and activity of a three-year-old’s birthday party. Since this is an 8 1/2″ x 11″ scrapbook page, there wasn’t room for any flourishes. The title takes their place. I used the color picker to choose the pink jacket color for the title.

Today is a Terrific Tuesday because we get new digital downloads. Check them out below and then click on the image to order them in my online store.

new MDS downloads for 12-17-13

Don’t forget the Weekly Deals are still going on and the new deals come out on Tuesday…how terrific! Check out these terrific deals now! Then click on the image to order them.

Stampin' Up! Weeky Deals for 12-17-13

MDS Monday – Winter Frost Digital New Year’s Card

MDS Monday sketch 44

Here is a fun sketch for a card from the MDS Monday blog. Part of the challenge was to use flourishes. Once I added the flourishes to my card, they reminded me of fireworks. So I made the card into a Happy New Year card. Here is the result.

Winter Frost Designer Series Paper digital New Year card

I started with a base of Winter Frost Designer Series Paper pattern 11. Then I added the curvy square frame 2 punch from the Convention 2012 Photobook Template and filled it with pattern 12 of the Winter Frost dsp. The flourishes are Autumn Elements flourish 4 with the smallest basic rhinestones resized even smaller and placed on the tips of the flourishes. I think I will have to make this into a hybrid card to send out to some friends. All those rhinestones would really sparkle! Be fore-warned! This project has many, many layers and you have to be patient as your computer works on the project. Sorting through all the layers takes a lot of time!!!

If you need any of the downloads to make this project yourself, either click on the links below or visit my online store here.

Supplies:
MDS software digital download (130646), MDS software disc (130647), or 30-day Free Trial of MDS (130910)
Background
Winter Frost Designer Series Paper ( 135265) pattern 11
Embellishments
Basic Pearls and Rhinestones (124330) – rhinestone small
Stamps
Autumn Elements (127172) – flourish 4
When The Clock Strikes Twelve Ensemble (136679) – happy new year
Punches
Convention 2012 Photobook Template (130971) – curvy square frame 2 punch,  Filled with:  Winter Frost Designer Series Paper – 12
1.25 Square Punch (comes with program), Fill Color = Pool Party
Decorative Label Punch (123951), Fill Color = Whisper White

Just Announced – New Photopolymer Stamp Sets

Stampin’ Up! just released two new photopolymer stamp sets today, Countless Sayings 1 (135892) and Countless Sayings 2 ( 135893)

If you are not familiar with Stampin’ Up!’s photopolymer stamps, let me tell you a little about them. Photopolymer is a synthetic substance the acts like rummer but it totally clear. You may have seen and used clear stamps before. Some people are totally sold on them because you can see exactly how much ink is on them and exactly where they will stamp. However some brands give a slightly fuzzy image, some age and crack or turn yellow over time, and many brands stain badly. This causes many stampers to have nothing to do with clear stamps.

Stampin’ Up! researched countless photopolymer products and spent years testing various formulas until they found a type of photopolymer that met their high standards. They have come up with a great line of photopolymer stamps. The images in this line are generally smaller and designed to be placed together on a block to create endless designs. Here are some reasons Stampin’ Up! gives for why their photopolymer stamps are the best:

  • They’re entirely transparent for perfect placement every time!
  • They are durable. The photopolymer material is designed to last.
  • Can you say sticky? (Don’t worry; in a good way.) These stamps stick amazingly well to our clear blocks.
  • They’re age tested. They won’t yellow or cloud up over time.

Check them out and then order them here.

Countless Sayings 1 & 2 photopolymer stamps

Terrific Tuesday – When the Clock Strikes Twelve

When the Clock Strikes Twelve EnsembleSupplies: MDS software digital download (130646), MDS software disc (130647), or 30-day Free Trial of MDS (130910); Background – Card Stock/Primrose Petals; StampsWhen The Clock Strikes Twelve Ensemble (136679) – overlay fireworks and label border, From My Heart (131234)- happy birthday, , Moments Ago (135717) – sunshine

When the Clock Strikes Twelve Ensemble is one of the new digital downloads today that makes this Tuesday terrific. It is an ensemble for New Year’s Eve specifically but the embellishments, punches, and stamps that come with this ensemble are useful for so many other situations. I used the fireworks and the frame on this birthday scrapbook page of our g-granddaughter’s 3rd birthday. Check out all the stamps included in this download!

Stamp sets in When the ClockClick on the image to check out the rest of the ensemble and order it. You will get so much value for your money!

Now new downloads aren’t the only reason today is a Terrific Tuesday. There are new Weekly Deals. Check them out by clicking on the image below. I would order a few myself but I have spent my monthly budget already preordering Occasions mini catalog product.

Weekly Deals for 12-10-13
Now if that weren’t enough, Stampin’ Up! has started their Clearance Rack Blitz running Dec 10 – Jan 2. Wow! There are a ton of new retired items that have been added with up to 80% off. Click on the image to check the Clearance Rack out. Items are only available as long as supplies last so go now!

Clearance Rack Blitz

Looking for a child’s card? Check this one out!


Deco Label Pop 'N Cut

I created this card for my great-granddaughter who turned 5 in late November. I love this lizard with the balloons from the Tag It stamp set. I colored the stamp with markers to get the different colors on the stamp. I the card stock is one of the retired pinks, Regal Rose, and I used Birthday Basics Designer Series Paper.

So, this is a cute card just looking at the card front, but wait until you see the inside!

Monster Maniac Pop 'N CutYep! It is a Pop ‘n Cuts card using Stampin’ Up!’s exclusive Card Base Pop ‘n Cuts die and the Label Pop ‘n Cuts insert that coordinates with the Deco Label Framelits. Or maybe it is the other way around. The Deco Label Framelits coordinate with this insert. :op Here is a close-up of the label.

Monster Maniacs stamp set

I think the Monstermaniacs stamp set is perfect for kids’ cards. Although they are monsters, they are loveable. Hmmm…sort of like kids themselves? The greeting banner was stamped with Itty Bitty Banners stamp set and cut out with a Bitty Banners Framelits. I punched holes in the banner and used Island Indigo Baker’s Twine to hang it between the monster’s hands. I also fussy cut some balloons from the Birthday Basics dsp for the monster to hold.

Finally, I needed a gift bag for the present and created it out of 1 1/2 sheets of the party hats pattern of the Birthday Basics Designer Series Paper. The bag measures 6″ wide x 9″ tall x 3″ deep. I love that the bag and card go match. You’d not likely find anything that matches so well at a Hallmark store!

Gift bag created using Birthday Basics dsp

To create these projects for yourself, order the supplies by clicking on the links below or visiting my online store and clicking on the ‘shop’ button. Email me if you want the directions for the gift bag. It is really quite simple to make.

Supplies:
Stamps – Itty Bitty Banners (126257-clear, 132022-wood), Tag It (130303-clear, 130300-wood) Monstermaniacs (134972 – only comes in clear mount)
Inks – Garden Green, Rose Red, Early Espresso, and Pumpkin Pie Stampin’ Write markers
Wild Wasabi ink pad
Paper – Regal Rose (retired) and Whisper White card stock,
Birthday Basics Designer Series Paper (130145)

Other – Deco Labels Collection Framelits (130102), Labels Collection Framelits (125598),
Bitty Banners Framelits (129267), Island Indigo Baker’s Twine (125575), Card Base Pop ‘n Cuts die (130099), Label Pop ‘n Cuts  insert (130160), Big Shot Die-Cutting Machine (113439)


Another use for the Gift Bow Bigz Die

I really like this Gift Bow Bigz die for the Big Shot as it quickly makes beautiful bows out of paper. But what else can we do with it? Well, take a look at this!

Bow side

Another use for the Gift Bow Bigz Die


I needed a birthday present for a great-granddaughter’s 5th birthday and got this idea from another demo. The fabric is one of Stampin’ Up!’s retired fabrics which has the same color as the headband. Lucky me! I love the white polka dots with the bright pink background and know it will look wonderful against my great’s dark hair.

So how did I make this? I first put Heat and Steam adhesive between two layers of fabric that was the size of the die. Then I ran the fabric/die sandwich through the Big Shot. I used a hot glue gun to put the bow together. I glued the tail ends together first. I added a strip of the silver ribbon to one side of the bigger bow using glue dots at the ends and in the middle to hold the ribbon in place. I used hot glue to adhere the ends of the loops in the middle with the ribbon side out. Then I glued it to the tails. By accident, I only allowed enough prepared fabric to cut out one of the smaller bow loops so I just made one loop for the center of the bow. I rapped the small strip around the whole bow, securing the ends with hot glue. Finally I glued loops of the silver ribbon to the bow, tucking the ends under the other loops. The final step was to glue the center of the bow to the head band. Voila! A quick and beautiful headband for a darling little girl!

Click on the links below to order the Stampin’ Up! supplies for this project or visit my online store and click on the shop button.

Supplies:Stamps – none
Inks – none

Other – Gift Bow Bigz L Die (129977), Big Shot Die-Cutting Machine (113439), Silver 1/8″ Ribbon (132137), cotton fabric, Steam A Seam 2, purchased headband, Hot Glue Gun

Stampin’ Up! Card Tree

Stampin' Up! card tree

I have been looking for a couple of years for a way to display these wonderful Thomas Kincade Christmas jingle bells but hadn’t found one yet. Then last night I was working on stamp room organization and came across this card tree that Stampin’ Up! demos were able to buy a few years ago at convention. It is perfect for my ornaments! There were exactly enough hooks for the number of ornaments I have collected. After Christmas I can put the ornaments away and use it again to display cards.

This was one tiny benefit of being a demonstrator. The biggest benefit is owning my own business and being able to control how much I work, how much profit I make, and setting my own hours. Some of the side benefits are having fun while working and the relationships I build through my business. You

You, too, can reap these benefits for yourself as a member of my team of Stampin’ Up! demonstrators. Now is the perfect time to get started. Call me, email me, or go here to learn more about the opportunity. I look forward to working with you to make and meet your goals.

Close as a Memory Sympathy Card

Close as a Memory traditional sympathy cardSupplies:
Stamps – Close as a Memory (retired)
Inks – Rose Red and Always Artichoke Stampin’ Writers, Soft Suede stamp pad
Paper – Whisper White and Soft Sky card stock
Other – Labels Collection Framelits (125598), Beautifully Baroque Embossing Folder (130917)

My heart goes out to those who are going through this holiday season saddened by the loss of a dear family member. I have a good friend and customer whose husband just died this Sunday and needed to make her a sympathy card. I pulled out the retired stamp set, Close as a Memory for this card because I love the verse that is for the inside of a card.

Need a gift for a crafty friend or relative but don’t know what they already have? Here’s your solution! Order a gift certificate from me. You choose the value of the certificate and they get the fun of choosing what product or class they want. Email me if you want to buy one.

Have someone you wish would give you a gift certificate to spend on stamping supplies or classes with me? Email me their name and contact information and I’ll contact them for you. I also have a wish list program going. You fill out a list of about 6 things from the Stampin’ Up! catalog you would love to get for Christmas and write the names of the people you would like me to send your wish list to. Send the list back to me and I’ll contact those people for you. Contact me if you would like a wish list.

I know this is a very busy time of year but each of us needs to take a little time for ourselves. I have three classes here in Mount Vernon scheduled for December. Check them out and register now for one or all of them. Pre-registration and prepayment are required to reserve your seat. Spaces are limited so click here now!

Terrific Tuesday – Weekly Deals

Welcome to Terrific Tuesday. This is the day we get new digital downloads for MDS. Click on the image to get the details of the downloads and order your favorites.

New MDS downloads for 12-3-13


Weekly Deals are also announced on Tuesdays. These deals are only good as long as supply lasts so click on the image below to place your order for these deals.

Stampin' Up! Week;ly Deal 12-3-13

The Sales Continue! Cyber-Monday

Did you have a frantic weekend catching all the Black Friday sales? Now it is time for a little shopping for yourself. Sit back and check out these two sales that are still on today, Cyber-Monday.

Soggy Stamper Black Friday/Cyber-Monday Special

Today is the last day of my Soggy Stamper Black Friday/Cyber-Monday Special. I am offering $25 gift certificates for $20 each. You can buy several of these redeemable throughout the year. Give yourself a gift of savings throughout the year. The details are here. You can pay through Paypal or send me an email.

Today is also the last day of Stampin’ Up!’s Holiday Sale and there is another 24 hour special. Click on the image to see these in my online store. You can order them online or email me your choices. But don’t delay! This is for 24 hours only!

Stampin' Up! 24 hour specials