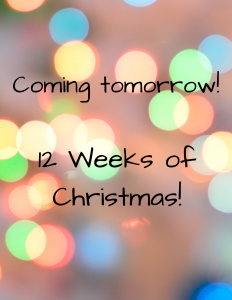
It’s just 4 hours to launch of my 12 Weeks of Christmas gift to my mailing list subscribers. Each Wednesday for the next 12 weeks I will send them a tutorial for a project that is exclusive for my mailing list subscribers. Today is the launch at 1 pm Pacific time and this first project is a beautiful Christmas card! You won’t want to miss this tutorial. Subscribe now! Here is the link.
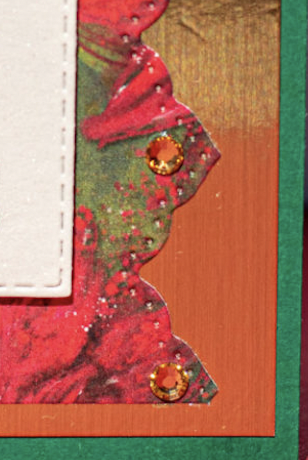
Want a sneak peak? Here you go!
Want to see more of this project? Then subscribe by 1 pm. You will be happy you did. Each week not only will I be emailing a Christmas tutorial on Wednesdays but I also send my Soggy Stamper Newsletter on the first Tuesday of the month…usually… and a shorter email the other Tuesdays. You get fresh ideas, notification of my Soggy Stamper events and Stampin’ Up! events and other stamping related news.
Remember it is 4 hours to launch so get on my mailing list now! Only subscribers will receive these emails.
It’s 24 hours to the exciting launch of my 12 Weeks of Christmas gift! This is a weekly gift of a tutorial for a Christmas project that is exclusive to my mailing list. Each week on Wednesday I will email my subscribers a special tutorial of a Christmas project. The first 5 weeks will be Christmas cards. Next you will receive 3 weeks of gifts to make and give. Now that the cards are done and the gifts made, you will need tags and gift wrap ideas. The last three weeks will be tutorials for those things. I have enjoyed selecting these projects for you and know that you will have fun making them.
My gift of my 12 Weeks of Christmas will make your Christmas planning easier as it will eliminate your need to search for ideas during this busy season. But…you have to be a subscriber. There is just 24 hours to the exciting launch and you won’t want to miss this first tutorial. It’s stunning yet quick to make. Subscribe now. Here is the link.
It’s time for 12 Weeks of Christmas, my gift to my mailing list subscribers. Yes, next week will be the 12th week before Christmas. As a gift I am going to email an exclusive tutorial each Wednesday for a Christmas card, gift to give, or a packaging idea. They will receive an email for 12 weeks all for free!
If you haven’t already started creating Christmas cards or need new ideas for Christmas cards, you will want to subscribe to my mailing list right away so you don’t miss any of these great tutorials. In addition to my gift of the 12 Weeks of Christmas, my subscribers receive a monthly newsletter with several tutorials, tips, Q&As, etc. I also email a weekly tutorial , any upcoming events I’m having, and any specials Stampin’ Up! is offering. Check out my Soggy Stamper business Facebook page for examples of my style stamping.
The thing is that the only way you can receive to my gift to mailing list subscribers is to be on my mailing list. Don’t wait! Subscribe now!
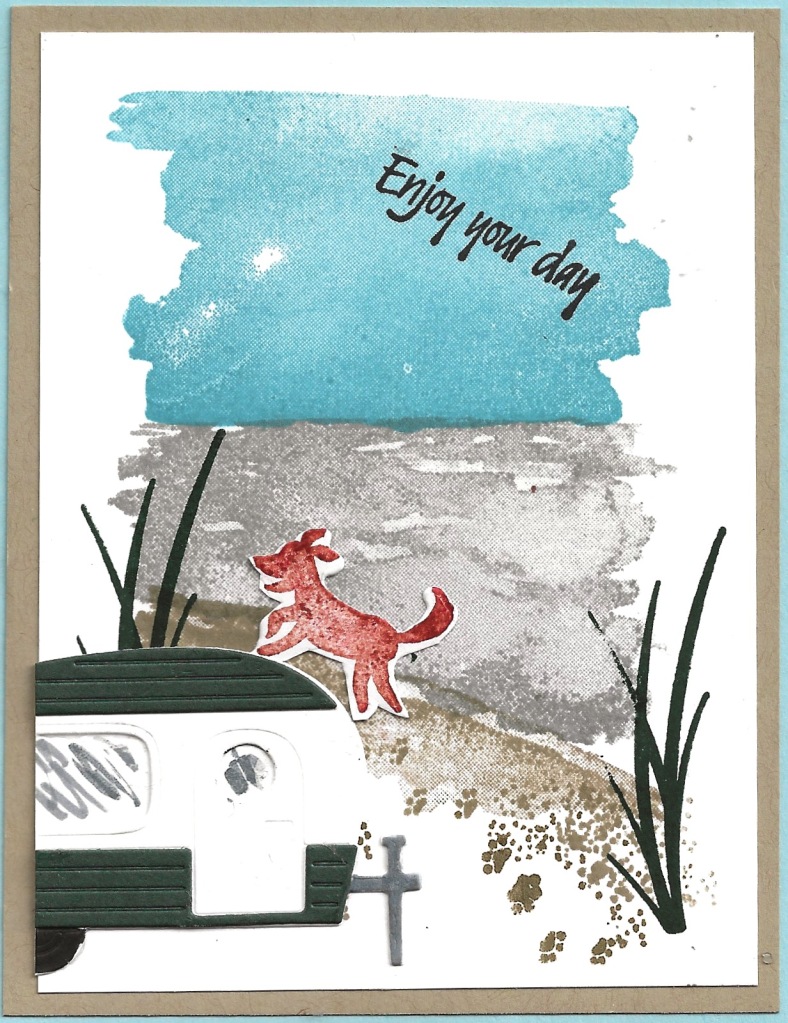
The Tree Lot Dies Go to the Beach in this last card featuring the Trees For Sale and Tree Lot Dies. The July Bundle of the Month is this combination of the Trees For Sale stamp set and the free Sale-a-Bration $100 level gift Tree Lot Dies. When you purchase the Trees For Sale and get the Tree Lot Dies from me during July, I will send you a free bundle of 5 tutorials to make the cards I have shared here on my blog and on my mailing list.
In making this card, I added the Oceanfront stamp set to the Tree Lot Dies to make a beach scene. The greeting comes from the Heron Habitat stamp set. My pooch sure is having fun running on the beach. Check out the previous cards I have shared using this ‘bundle’. You can find them here and here, and you can see some ideas the Stampin’ Up! concept artists stamped here.
Supplies for the Tree Lot Dies Go to the Beach card
Pool Party Cardstock 11″ x 4 1/4″ scored and folded at 5 1/2″ for card base
Crumb Cake Cardstock 5 1/2 ” x 4″
Basic White Cardstock 5″ x 3 3/4″, scraps for trailer and dog
Evening Evergreen Cardstock scrap
Tree Lot Dies (159938) Free with a $100 purchase
Multipurpose Liquid Glue
Stampin’ Seal
Paper Trimmer
Mini Stampin’ Cut & Emboss Machine
Here is the shopping cart with these supplies in my online store. You can remove the items you already have. You will need to add the Tree Lot Dies when you place your order.
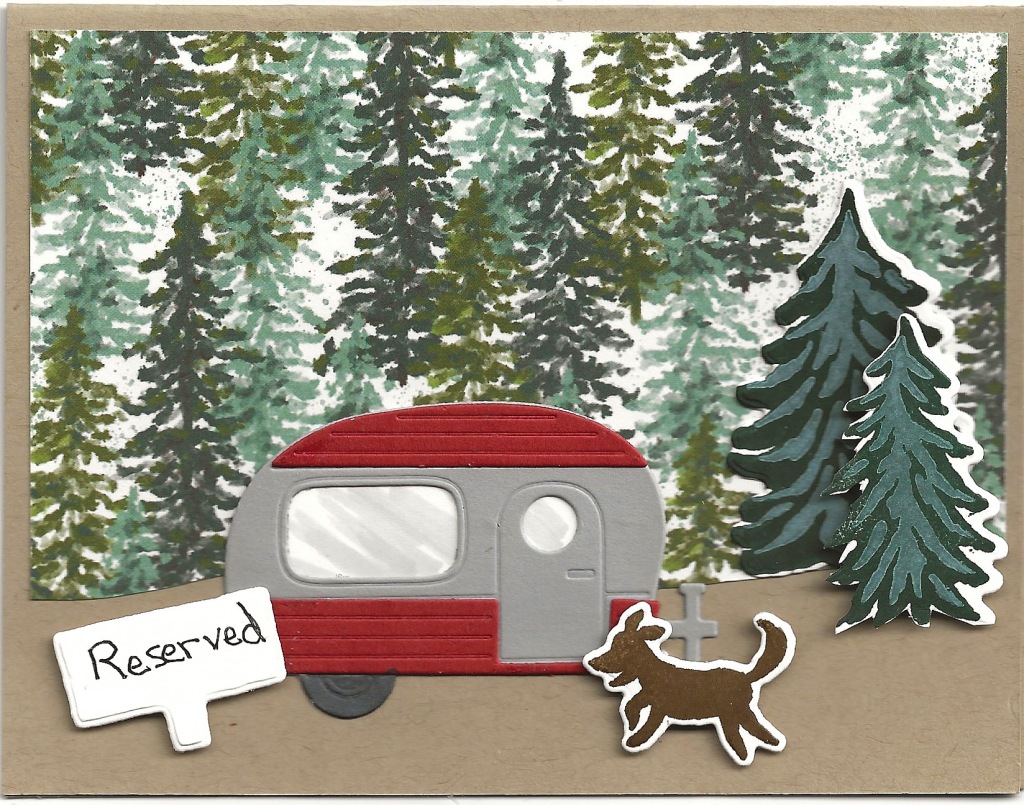
I had such fun creating this Trees For Sale with Trailer greeting card! I used the Trees For Sale stamp set and the coordinating Tree Lot Dies that are one of the free Sale-a-bration choices when you purchase $100 or more during Sale-A-Bration.
The background of this is one of the patterns in the Boughs of Holly Designer Series Paper. It is perfect for backgrounds like this. I hand printed the sign. I used Basic White cardstock that I lightly colored with a Smoky Slate marker to simulate a reflection on the glass for the windows of the trailer. The trees actually were a reject from another card I created with this combination of stamp set and dies. I stamped the solid trees on Basic White cardstock with Evening Evergreen ink. Then I stamped the details with Basic White ink, hoping for a solid white color. However, I like the end result as it blends nicely with the background. A bold solid white would have stuck out.
Supplies Used for the Trees For Sale with Trailer Card
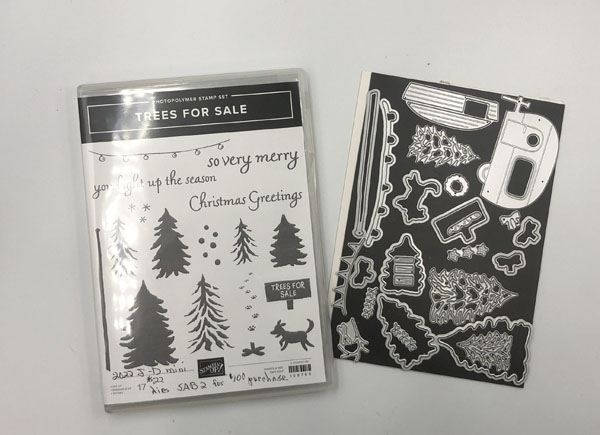
Trees For Sale stamp set (158785)
Tree Lot Dies (159938)
Evening Evergreen Classic Stamp Pad (155576)
White Craft Stampin’ Ink (147277)
Soft Suede Classic Stamp Pad (147115)
Basic Black Stampin’ Blends (154943) Light
Smoky Slate Stampin’ Blends (154904) Light
Crumb Cake Cardstock (120953) 8 1/2″ x 5 1/2″
Basic White Cardstock (159276) scraps
Cajun Craze Cardstock (119584) scrap
Boughs of Holly Designer Series Paper (159600) 5 1/4″ x 4″ bottom cut by hand
Smoky Slate Cardstock (131202) scrap
Click here to be taken to the shopping cart in my online store. You can remove any supplies you already have.
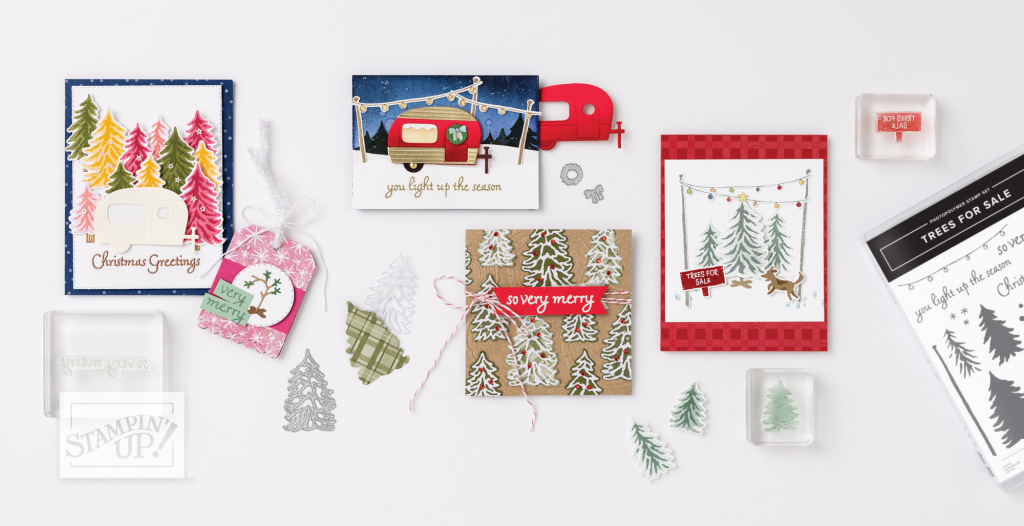
During July, I am featuring this combination of the Trees For Sale and the Tree Lot Dies as my Bundle of the Month. Purchase the stamp set and get the free set of dies from me. I’ll send you a bundle of five tutorials for cards using that ‘bundle’. Check out the details in this post.
The fun July Bundle of the month is not quite a bundle. It is a combination of the Trees For Sale stamp set and the Free Tree Lot Dies. Order the Trees for Sale stamp set (159785) plus other supplies to come to a total of $100 for your order. Then choose the Free the Tree Lot Dies (159938) for your gift. If you order this combination from me during the month of July, I will send you a set of tutorials for 5 cards. Here are some of the cards that Stampin’ Up! concept artists have created with this combination.
I will be sharing cards I create with this bundle here on my blog. Tutorials for these cards will be included in the bundle of tutorials I send you.
I’m celebrating 20 wonderful years as a Stampin’ Up! demonstrator. My reason for starting this paper-crafting business was to share my joy of creating with paper, ink, and stamps with others and teach them how to experience this joy for themselves. I also love the products and enjoy the discount I receive as a demonstrator. The great thing about this company, Stampin’ Up!, is that you can build your business as big as you want or keep it as small as you want. It is all up to you and how much time you put into the work of building a business. I have made great friends far and wide through being a demonstrator and can’t imagine ever retiring. If this intrigues you and you want more information about becoming a demonstrator, contact me. We are in the middle of Sale-A-Bration and this is a great time to join my team.
In celebrating 20 wonderful years, I am offering a 20% discount to my mailing list subscribers from Feb 9 – 15. This discount is on product only, it doesn’t include shipping and taxes. To order you have to contact me as I have no way to give you the discount when you order online. But you must be on my mailing list by 1 pm February 9 to receive this discount. Subscribe now before you forget. The form is right up there in the right hand corner or click here for more information!
There are now only four hours left to subscribe to my mailing list in order to receive my 12 Weeks of Christmas gift to my mailing list subscribers. Don’t miss receiving these free weekly Christmas tutorials. Each Wednesday beginning today until Christmas I’ll be sending my mailing list subscribers and only them an exclusive tutorial for a Christmas card, gift to make, or tags/wraps. The first five weeks will be Christmas cards. If you were to make each card in multiples of say four, by the first week of November you would have 20 cards finished and ready to mail. Just think, your card would be the first a friend or relative received this year! What an impression that would make on them!
The thing is that there are now only four hours left to subscribe. Once I send the first tutorial, you won’t be able to get in for a month and you will have missed all but one of the Christmas card tutorials. Fill out the form in the upper right corner of this page to subscribe or follow this link to subscribe.
Subscribers get free tutorials starting in just 23 hours. What is the 12 Weeks of Christmas you ask? It is my Christmas gift to my subscribers. Each Wednesday starting tomorrow until Christmas I will email them an exclusive Christmas tutorial for a card, gift, or tag/wrap you will love making and giving. The only thing is that you must be subscribed to my mailing list by 1:00 pm tomorrow, October 7 to receive these tutorials. Just fill out the form on the upper right corner to subscribe.
I will be sending you tutorials to make Christmas cards for the first five weeks of 12 Weeks of Christmas. Your problem of what Christmas cards to make has been solved for you. If you make multiples, even just four, each week, you will have 20 beautiful, handmade Christmas cards ready to address and mail by the second week of November. Hey…your cards might be the very first ones to be received if you mail them when you finish them.
Then the next three weeks I’ll send you a handmade gift tutorial. You will have fun making these gifts be proud to give them to family and friends. It is easy to just order something in the mail but your personal touch and the idea that you actually made the gift will show you really love the recipient. It is a win/win situation all around.
Finally, your last three gifts of my 12 Weeks of Christmas will be tutorials for ways to wrap your gifts and an idea of tags to put on the gift . This is a wonderful opportunity and you won’t want to miss even a single tutorial. But only subscribers get free tutorials! Sign up now over in the upper right corner or click here now so you can receive your first tutorial tomorrow.
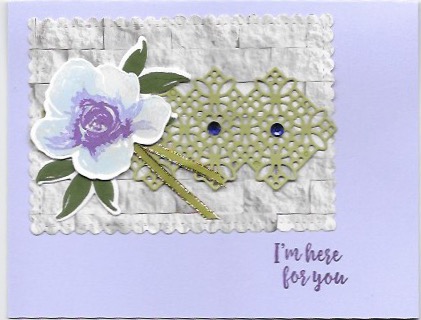
The beautiful All Things Fabulous Bundle is one of my favorite bundles in the 2020-2021 Annual Catalog. I introduced you to it last week in this blog post. Today I’m sharing another card I made with the beautiful All Things Fabulous Bundle.
I started with a card base of Purple Posy cardstock 8 1/2″ x 5 1/2″ scored and folded at 4 1/4″. Then I cut out a piece of one of the patterns in the In Good Taste Designer Series Paper using the largest rectangle of the Stitched So Sweetly Dies. I adhered this to the cardfront. One of the dies in the All Things Fabulous Bundle creates that lacy die-cut from Pear Pizzazz cardstock.
The All Things Fabulous stamp set is a three step stamp set. Normally you would use three different colors of ink to stamp it. Stampin’ Up! only has two Lighter shades of purple inks so I used the Highland Heather ink stamped off once for the lightest shade, the same ink not stamped off, and finally Gorgeous Grape for the darkest ink. I stamped the leaves with Mossy Meadow ink so they would contrast nicely with the Pear Pizzazz die-cut.
When all the stamping was done, I cut the images out with their corresponding dies from the Fabulous Florals Dies. I used Gorgeous Grape ink to stamp the greeting on the card base. I added a piece of the Old Olive ribbon from the All The Trimmings Ribbon Combo pack found in the Holiday catalog. This ribbon has a beautiful gold metallic edge. The two rhinestone gems came from the retired Noble Peacock adhesive rhinestone gems.
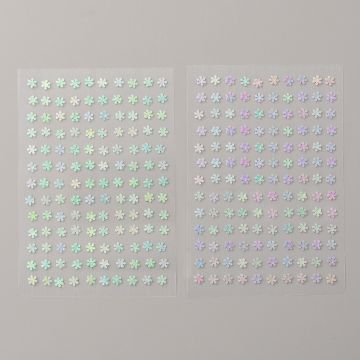
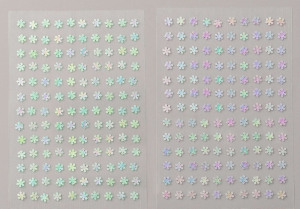
I know you would be able to make beautiful cards and 3D products with this bundle. To order the supplies I used in this card except for the retired rhinestones, click on the photo. You will be taken to a shopping cart in my online store. Deselect the items you may already have then click add all to my cart. Easy peasy! Remember this is my birthday month and I’m celebrating by giving YOU the gift of the Snowflake Adhesive-backed Embellishments on pg 29 of the Holiday catalog when you place an order with me by the end of the month.
There are only three days left for gift! That is…three days left to place an order with me and receive a free package of Adhesive-backed Snowflakes. August is my birthday month and to celebrate I’m giving YOU a gift when you place an order with me. The new Holiday catalog just went live this month and this is a good time to plan for you holiday cards. Check out the new catalog here.
August is also the month to redeem the coupons you earned in July. Check you emails for the coupon codes Stampin’ Up! sent you and them apply them to your order. I hope you saved the codes because I have no way to know what they are.
Remember time is running out for both offers! Order now and thanks.
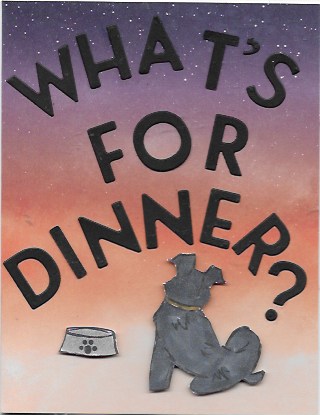
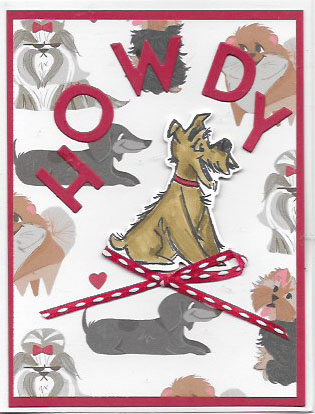
Here are two Happy National Dog Day cards. I created them with the Pampered Pets Bundle (154069) and the Playful Alphabet dies (152706). The first card base is one of the retired Summer Nights Add-on card bases that were available to expand the July Paper Pumpkin Kit. Where did I get the apostrophe you ask? One of the alphabet dies has a cedilla, Ç. I just cut off the squiggle from that character.
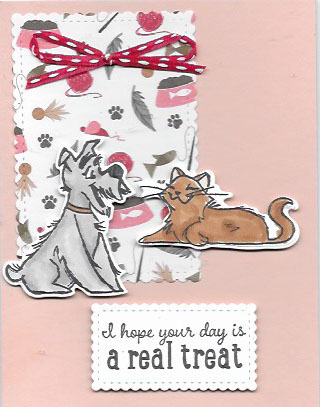
For the second Happy National Dog Day card, I used the same Pampered Pets bundle and Playful Alphabet dies. This time I used one of the designs from the Playful Pets Designer Series Paper for the background. We have two dachshunds so I of course had to be sure that the dachsies were not covered up! LOL!
The Pampered Pets bundle also includes a couple of very cute cat images. On this card, the dog is wishing the cat a day that is a real treat. The smug look on the cat makes me smile every time I look at it.
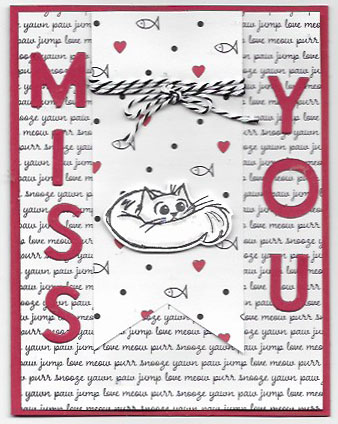
I was having so much fun with the Playful Alphabet dies and the Pampered Pets bundle that I had to make a fourth card using the last cat image. This cat looks like he is sad to me. It is the perfect image for a Miss You sentiment.
I’ll bet you are imagining all kinds of other cards you could make with the Playful Pets Suite of products. To order the supplies I used for these cards, click on the photos to go to the shopping cart on my online store. You will be able to delete any of the supplies you already have before checking out. Remember, this is my birthday month and I’m giving YOU a gift of the Snowflake Adhesive-backed Embellishments when you place an order this month.
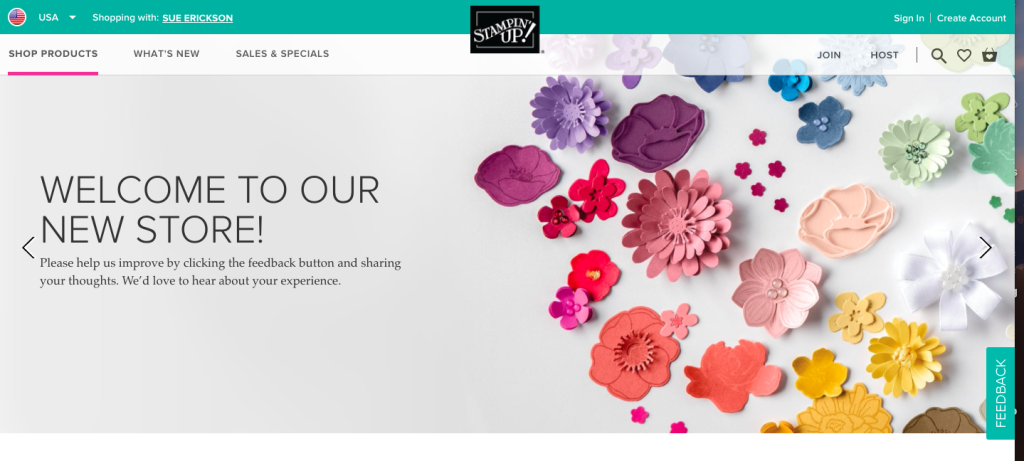
A totally new Online store opening today! The time had come to update the Stampin’ Up! online store. It had become a legacy and almost a dinosaur as online stores go. Rather than just remodel the store, a completely new platform and design has been developed. The old online store closed today at 12:00 am and the new one opened for business at 7:00 am MDT.
You will love the new store! It has been designed with the new stamper in mind so it is much more intuitive. Some of the product names have been changed like patterned paper substituted for designer series papers. You may find other terms changed as you browse through the store. Images are larger so you can see details better. Another feature is a great sorting function. You can choose to just see stamps that are seasonal, for Christmas, etc.
All your information from the old store will be transferred to this store so you don’t have to enter your address, credit card number, etc. again. However, this is a totally new site with a new URL so any saved passwords and links will not work as they are tied to the old store. You will have to enter your password manually the first time you sign in to the new store. If you have forgotten your password, there is a place to click to get a new password.
When you click on an item, you will see a few cool items:
Large photos of the item and samples created with it on the left
On the right is an option to choose the quantity and a ‘Add to Basket’ button
In the upper right corner of every screen is a shopping basket icon. Just click on it to see what is in your basket.
just above the ‘Add to basket’ button is a small heart. When you click on this, you add the item to your wish list. The cool thing about this list is that you can send it to someone else who is interested in giving you a present. This wish list is saved and when you log in again, not only can you access it but you will be reminded of the items on the list.
If an item is in low supply or backordered, that is stated under the picture of the item on the pages that show all the items in that particular category. It lets you know upfront the status of the item.
As you continue to add items to your shopping basket, once you reach the total purchases that give you Stampin’ Benefits, a button appears that allows you to use the rewards to purchase the item.
In the upper right corner there will appear a gift icon. Clicking on this lets you know what gifts you will receive. Everyone who purchased at least $50 in July should see this icon which lets you know you have a coupon available to redeem in August.
On the right side is a turquoise button for giving feedback. Clicking on this button gives you the ability to give directly to Stampin’ Up! feedback on the product on the page, on a possible glitch on the page, a suggestion on how to make the page better, or to ask a question. Do use this feature as it helps Stampin’ Up! make this new online store even better.
Once you have finished shopping, checkout is easy. Click on the shopping basket icon. On the left side of the screen will be pictures, name of items, and prices in your shopping cart. On the right side is a large checkout button and places to enter coupon codes and host codes. Once you click on the checkout button, the next screen will give you a place to enter payment, review order, and place order.
I’m really excited about the new online store opening today. i love the bigger pictures and the wish list function in particular. I’m sure you will love it too! This is my birthday month and I am celebrating by giving YOU a package of adhesive-backed snowflakes when you place an order with me this month.
Go check out the new store…and do a little shopping while you are there. 🙂
Here are the six top reasons to subscribe to my mailing list! If you haven’t subscribed, you are missing out on lots of cool projects!
Receive a monthly newsletter with several exclusive projects and tips
Get a weekly email with a tutorial for a new project and updates
Receive an exclusive free tutorial for a 3D project when you subscribe.
First notice of upcoming classes and events I am holding
Receive occasional subscriber-only offers.
tay connected to what’s happening at Stampin’ Up!
Now that you have seen the top six reasons to subscribe to my mailing list, fill out the form on the right or click here. The June edition will be published tomorrow and you won’t want to miss it!
Yes, you have missed four weeks of my 12 Weeks of Christmas gift to my mailing list subscribers. In the last four weeks I have shared exclusive Christmas card tutorials with those on my mailing list.
But it isn’t too late! You can still receive the next 8 weeks of my 12 Weeks of Christmas Gift by subscribing before 1 pm Pacific time tomorrow. Just fill out the box to the right of this post and click subscribe. You will be glad you did!
Not only will you receive the next 8 exclusive tutorials as a subscriber to my mailing list, you will receive a monthly newsletter with a couple of tutorials and information to assist your creativity, and shorter weekly emails with helpful hints and a project tutorial. Remember to subscribe by 1 pm tomorrow!