Category Archives: Special Occasion cards

The Perfect Card for International Cat Day!

Cat Birthday card created with the Spooky Cat Punch and Pick a Pennant bundle
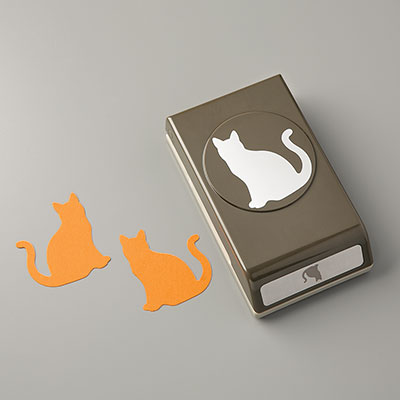
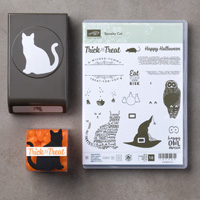
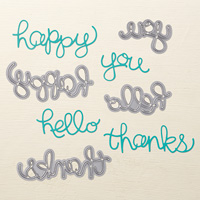
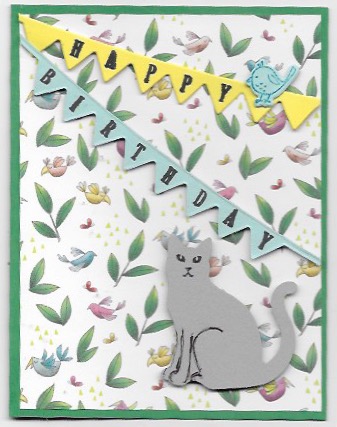
Tomorrow, August 8 is International Cat Day! In honor of this day I created this cute card using the Cat punch and the Pick a Pennant bundle. Although I generally don’t do pennants, I love this Pick a Pennant bundle because of its versatility. The alphabet that comes with the stamp set is easy to use and the perfect size for the pennants. You are only limited as to what to say by the number of pennants you string on your card. Some other possibilities besides Happy Birthday are
For You
Love You
Miss You
Happy Spooks Day (using three banners)
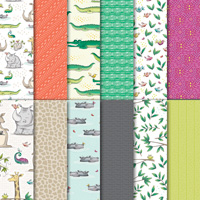
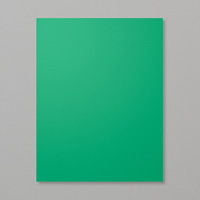
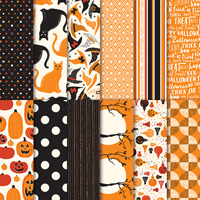
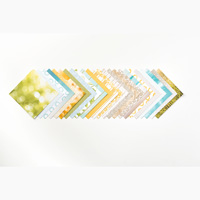
…well you get the idea. I used the retired Spooky Cat stamp set for the cat’s face and hand drew the legs with a Basic Black marker. The background is one of the designs from the Animal Expedition Designer Series Papers. The card base is the new In Color Call Me Clover. To order the supplies I used on this card, click on the images below to be taken to their place in my online store.

Use That Designer Series Paper

Christmas card created with Home for Christmas designer series paper


If you are like me, you hate to cut up those beautiful designer series papers. We tend to hoard them don’t we. Last year’s Holiday catalog had the Home for Christmas designer series paper. I positively love it and as you can see, I still have some left over. On this card, I used a strip of the red striped design down the center of the card. Another design has these adorable little Rudolph deer. While I could have used that design to cover the whole front of the card, I chose to cut out the deer and back it with a piece of cardstock punched with the Pretty Label punch (143715). The greeting is from a retired stamp set Bells and Boughs.

Christmas Card with poinsettia on front of card


Here is another card using a different pattern from the Home for Christmas designer series paper. This pattern was an all-over pattern of poinsettias. I simply cut out one of the flowers and layered it over a piece of ribbon. The background was created with the new Tufted 3-D Dynamic Textured Impressions Embossing Folder (146335) and the greeting is from the Ready for Christmas stamp set (photopolymer – 144823),

Now that I have showed you a couple of ways to use your designer series papers, head on over to my online store and take advantage of the current special where you buy 3 packages of dsp and get a fourth one for free. This special ends July 31 so order now!

New Fancy Fold with Share What You Love DSP

B.J Peters a fellow demonstrator recently shared a card with this type fun fold on the Alaska Achievers Monthly Blog Hop. I love fun folds and immediately wanted to make my own book fold card. I used her cutting and scoring directions which I share below.

The supplies for this card all come from the Share What You Love Early Release “Gotta Have It All Bundle (149526) except for the Whisper White cardstock and a retired glimmer paper. I used one of the patterns from the Share What You Love Specialty Designer Series Paper which is currently part of the bundle but will be available June 1 to order individually. This dsp is cardstock weight and comes in a package of 24 sheets, 4 sheets of 6 double-sided designs. Four of these designs have a beautiful pearled surface to the images. I used a retired glimmer paper (probably from an Occasions catalog last year) for the Happy Birthday die-cut because the color goes so well with the Mint Macaron cardstock. I added two strips of Rich Razzleberry 1/4″ Velvet Ribbon on the spine of the card.

Inside view of the book fold cardOn the inside I stamped a greeting from the Perennial Birthday stamp set in Rich Razzleberry and one of the little flowers from that set in the corner. Here are the measurements:

cardstock for base 5 1/2″ x 7 1/4″ scored at 4 1/4″, 5″, 5 3/4″, 6 1/2″
dsp 4 1/4″ x 5 1/2″
inside stamping layer 3″ x 5 1/8″

photo shows how to fold the score linesFold on the score lines as shown. The piece of dsp goes in the mountain fold between the two valley folds. Adhere all the folds together with the dsp adhered in the folds as well. Contact me if you have questions. You can order the supplies I used by clicking on the links below.


Only 2 1/2 days of Sale-a-bration left!

Birthday card created with Springtime Foils DspYou have only 2 1/2 days left to earn this free gift of Springtime Foils Specialty DSP! I absolutely love this and hope there will be more like it in the new 2018-2019 Annual Catalog. Place an order for $50 of product and you can choose a package of this DSP. The paper is heavy like the thick cardstock and all the pieces have foil on them. Place an order NOW before time runs out!

I used the striped design that has sliver foil for the background and brayered Pear Pizzazz ink to color the white spaces. The flower is from the floral design. I colored it with Stampin’ Blends and then fussy cut it out. the fussy cutting took the most time in making this card.

Here is another card I created using the dotted background and again brayering the cardstock, this time with Night of Navy ink. This card was for a Hispanic baby so I hand wrote “Hello Baby” in Spanish.

Baby card using Springtime Foils DSPTo order the supplies I used in these cards, just click on the images below to be taken to their location in my online store. If you use my March host code when you order, I’ll be sending you a small gift. Thanks!


Another Stained Glass Technique Card

handmade card created with Bird Banter stamp set and Stained Glass TechA few days ago I shared a card I made using the “Stained Glass” technique and Petal Palette stamp set. You can see it here if you missed that post. Today I am sharing a card I made with the same “Stained Glass” technique and Bird Banter stamp set.

The last time I used black embossing powder for the ‘leaded’ part of the stained glass. Then I realized that Stampin’ Up! retired that powder a couple of years ago. Oops! Not to worry though. Since it takes ink a while to dry on vellum paper, I stamped the images with Tuxedo Black Memento ink and immediately added clear embossing powder. This works pretty well.I used Fast Fuze Adhesive to adhere the birds to the card front since the Fast Fuze does not show through the vellum.

I purchased this set mainly because one of the sentiments goes like this: “A little birdie told me it was your birthday….obviously, it wasn’t an early bird!” I am a great procrastinator and my modus operandi is to get the birthday card in the mail on the day of the birthday…if I’m lucky. So that greeting will be used a lot. However, I am falling in love with the birds. Stay tuned for more of these birds on cards.

As always, you can click on the images below to be taken to their spot on the shelves of my online store if you want to create this card for yourself. Also, remember that this is Sale-A-Bration time and you get to choose a free item for each $50 of product you purchase. Be sure to use the January host code when you order and receive a thank you gift from me.

The Excitement Builds!

Birthday card created with the Petal Palette bundleI am getting so excited for Jan 3rd when the 2018 Occasions catalog goes live.! You will find so many exciting new products in there to rejuvenate your creativity! My currently favorite set from this new catalog is the Petal Palette stamp set and its coordinating Petals and More Thinlits. You can buy them as a bundle for a 10% discount beginning Wednesday.

I heat embossed the flower image with black embossing powder on cardstock vellum and then colored the image on the back side with Dark Rich Razzleberry and Dark Old Olive Stampin’ Blends. This technique is called ‘stained glass’ and is so easy!

If you don’t have a local demonstrator and would like a 2018 Occasions Catalog, contact me. I’d love to send you one and be your demonstrator. To order the supplies used in this card, just click on the images below to be taken to their spot in my online store.

Sign Up for Paper Pumpkin Today!

Season of Style Header

Why you ask? Because you have to be signed up by the 10th of October to receive October’s Paper Pumpkin. And why do I want to get it? Watch this video to find out!

If you are not familiar with Paper Pumpkin, by subscribing you will receive a box in the mail with all the supplies you need except for scissors and adhesive to put together cute/beautiful/quick projects. The estimated time for each project is about 30 min and the box includes a detailed picture tutorial for the project. There are usually extra pieces left over for you to use on your own creations. The ink and stamp set are included with the project. You can postpone a month or drop at any time as long as you have done so by the 10th of the month. Now is a great time to join since time for crafting becomes scarce as the holiday preparations begin. To subscribe click this link and choose me as your demonstrator if you don’t already have one. https://www.paperpumpkin.com/en-us/

Spooky Night Suite Card

Halloween card using theSpooky Cat bundle and Spooky Night Designer Series Paper

I am not particularly fond of Halloween nor am I a cat lady but this cat punch which is part of the Spooky Cat Bundle has so many possibilities outside of Halloween, that I had to get the bundle. Besides, the punch exactly fits the cats in the Spooky Night Designer Series Paper, a win/win situation!

This card came together in about 10 minutes and would be a great one to make multiples of to send to your family and friends. I stamped the cat-shaped words onto Smoky Slate cardstock and punched it out with the Cat Punch. I fussy cut one of the hats from one of the Spooky Night Designer Series Paper patterns, die cut a circle from one of the other patterns, and used a Stitched Shape circle die to cut a circle from Very Vanilla cardstock. The greeting is from the stamp set.

To order the supplies you need to create this card, just click on the images below to be taken to their place in my onliine store. If you enter this host code Z2CTPN2C in the lower left corner of your order screen, I will send you a gift. If your order is $150 or more, don’t use the code as you will be your own host.

Let the Holiday Stamping Begin!

Christmas card created with Card Front Builder Thinlits, Starlight Framelits, and Star of Light stamp set

As a demonstrator, I was able to preorder stamp sets and supplies from the 2017 Holiday catalog. I finally finished a scrapbook of our granddaughter’s four years of college and am now able to begin making cards for the upcoming holidays.

The card pictured above is one of the cards we made in my August Christmas Card Class. If you missed the class, you will be able to join us on September 17th at 2 pm for the September class. We will also have one in October and November. Be sure to watch for the dates of those classes.

Do you notice the subtle sparkle in the swirl of stars? I mixed gold embossing powder and gold glitter in about a 50/50 amount. When embossing this mixture, it takes a little longer because the glitter deflects some of the heat away from the embossing powder. I positively am in love with the tree dies from the Card Front Builder Thinlits. The thinlits are bundled with the Carols of Christmas stamp set for a 10% savings. I hand cut the slope of the snow from Shimmer paper.

To order the supplies I used for this card, click on the images below to be taken to their location in my online store.

Grandson’s Graduation Card

Graduation card for grandson using Large Letters Framelits

What to do for a graduation card for an eighth-grader? You make a quick card using the Large Letters Framelits, retired Pumpkin Pie Glimmer Paper, and Naturally Eclectic Designer Series Paper...easy, peasy and so quick! The letters take center front and I’m really happy the framelit set includes punctuation.

Inside of grandson's graduation card

Now this particular boy did not like middle-school and was not very excited about going to graduation. So I computer-generated the sentiment on the inside. I printed it out and used the Stitched Shapes Frameiits to cut it out. The white label on a white background would not have been very impressive so I backed it with an oval of the same pattern as on the front of the card. I really love this Naturally Eclectic designer series paper. Check out all the wonderful designs in it and place your order for it by clicking on the image below. Thanks for stopping by to visit today. I invite you to grab a cup of coffee and take some time to browse through my blog. Leave me a comment so I know you have been here.

Beautiful You Grad Card

Graduation card created with Beautiful You and Sunshine Sayings stamp setsDoesn’t this woman from the Beautiful You stamp set (wood-143004, clear-143637) exude happiness and joy? I thought it would be a perfect image to use on this graduation card for our granddaughter who graduated from high school yesterday. Almost all the product used in this card is new to the 2017-2018 Annual Catalog. The background is one of the patterns in the Naturally Eclectic Designer Series Paper. I stamped the woman with Basic Grey ink onto Whisper White cardstock; colored her with Bermuda Bay, Calypso Coral (for her skin) and Daffodil Delight watercolor pencils; then fussy cut her out.  The sentiment came from the Sunshine Sayings stamp set. I have fallen in love with the 1/4″ Ombre Ribbon in Island Indigo and am going to order both the Calypso Coral and Lemon Lime Twist colors on my next order.

Thanks for stopping by to visit today. If you need to order any of the supplies I used for this card, just click on the images below to find them in my online store.

Flourishing Phrases Anniversary Card

I love it when you can make a quick card from just one stamp set like Flourishing Phrases (wood – 141531, clear – 141534). Our daughter and son-in-law are renewing their marriage vows on their 33rd anniversary on Saturday. The 33rd anniversary stone is the amethyst so I used Elegant Eggplant and Perfect Plum for this card. I have not used those colors in a long time! The rhinestones were added to the card for a little bling and because there was a tiny extraneous spot of Perfect Plum ink by the top sentiment. This is a great way to cover up booboos! You can order the supplies I used for this card by clicking on the images below which are linked to my online store. Thanks for stopping by.

Detailed Dragonfly Birthday Card

Birthday card created with Detailed Dragonfly Thinlit Dies and Watercolor Wash stamp set

Just look at those beautiful dragonflies cut with the Detailed Dragonfly Thinlits Dies from Sweet Sugarplum Glimmer paper! Yes, you read that right…Sweet Sugarplum Glimmer paper. A pack of glimmer paper which includes 4 sheets each of Sweet Sugarplum, Bermuda Bay, and Mint Macaron glimmer paper is one of the three new FREE Sale-A-Bration products you can choose from when you spend $50 in Stampin’ Up! products during January, February, and March.

Now on to the card. I resisted getting the very popular Dragon Fly Dreams bundle for a while because I already have all the butterfly dies Stampin’ Up! offers and really didn’t need to also have a set of dragonflies as well. Yeah…right! I especially love this particular die with the dragonflies flying up and it is this die that finally hooked me into getting the bundle.

I envisioned the dragonflies coming up out of grass with flowers in the background so I brought out my Watercolor Wash background stamp and used Pear Pizazz, Sweet Sugarplum, and Pool Party markers on it. Then I spritzed it with water and stamped onto watercolor paper. The sentiment is from the Special Reason stamp set. Click on the images below to go to their place in my online store to order any of the supplies you need to CASE this card.

Good Tools = Quick Cards

handmade birthday card created with Window Box Thinlits Die

When you have good tools, you can create a birthday card so quickly! This card used one of the dies from the Window Box Thinlits Dies, a Layering Ovals Framelit, one of the Stitched Shape Oval Framelits, and a greeting from the FREE Sale-A-Bration Avant-Garden stamp set. I put a square of Festive Birthday Designer Series Paper behind the cutout and then covered it on the inside with another piece of Whisper White cardstock. (I didn’t want the cactus pattern which is the reverse side of this pattern showing on the inside. It doesn’t fit the theme of this card.)

The Big Shot Die-Cutting machine, great dies, and wonderful designer paper, plus ink, stamps and adhesives = great quick card! Click on the images below to order the supplies I used in this card so you, too, can make a quick card when needed.

Oh, and…the beautiful ribbon is a FREE Sale-A-Bration choice when you order $50 in product! This ribbon is soft and sooooo beautiful! It comes in a Combo pack of white ribbon with a silver metallic thread and Very Vanilla ribbon with a gold metallic thread.

My Father’s Day Card

Handmade Father's Day Card using the Wetlands stamp

Happy Father’s Day to all the fathers out there. I created this Father’s Day card for my husband. The Wetlands stamp set is one of my favorites and when I saw this beautiful designer series paper from the new Serene Scenery Designer Series Paper Stack, I knew I needed to use that stamp set! I used the Hello You Thinlit dies and the Crazy About You stamp set for the greeting. This card was so easy to put together since the beautiful background was all done for me on the designer series paper. Both of these stamp sets and the Hello You Thinlits are carryovers from last year’s annual catalog. That makes me really happy!

You can order the supplies I used for this card by clicking on the images below to go to each item in my online store. Remember that for each $50 you order in one order, you can check off a box on my Customer Appreciation Tracker to earn $45 in free product from me. Check it out here.