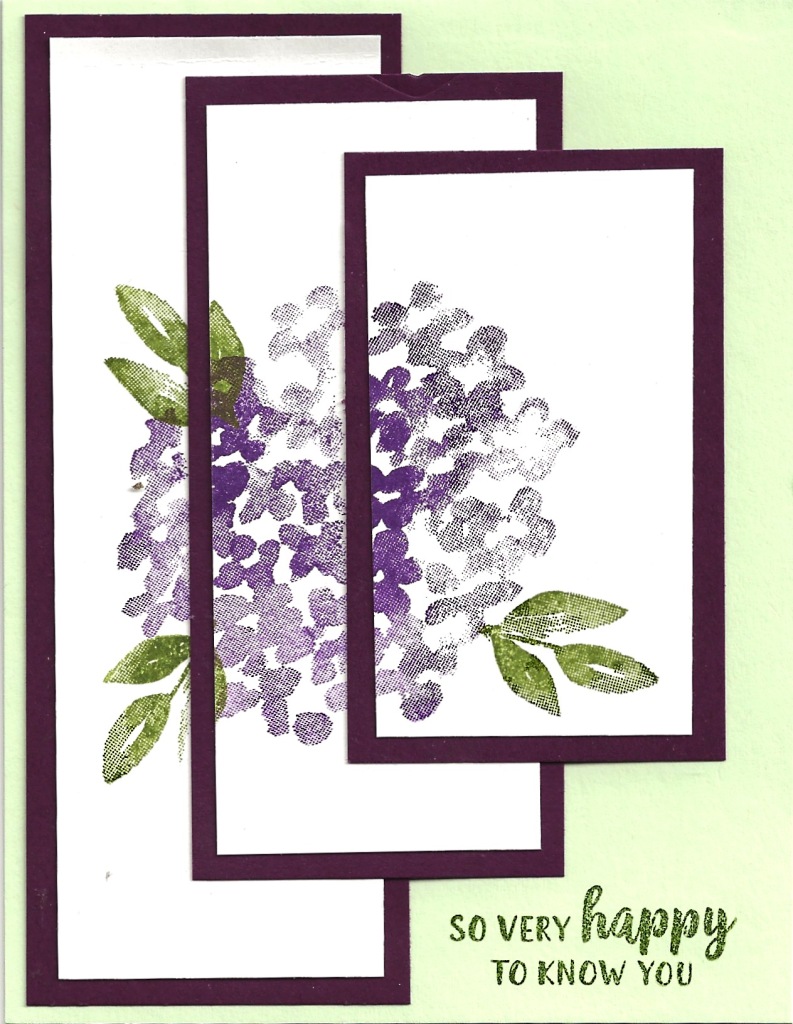
I showed how to make this stunning offset triple time card on my Facebook Live this afternoon. The technique is really quite simple and yields beautiful results. The trick is to layer three different sized pieces of light colored cardstock either one on top of another or offset them as I have done. Then stamp an image that is large enough to cover parts of all three layers. The image will most likely not be stamped right up against the edge of the cardstock on top of it but that is OK as the pieces of cardstock are layered on a contrasting color like above. That layer covers the poorly stamped areas.
Products Used for Stunning Offset Triple Time Card
- Beautiful Friendship stamp set
- Soft Seafoam Cardstock – 11″ x 4 1/4″ scored and folded at 5 1/2″ for card base
- Blackberry Bliss Cardstock – 5 1/4″ x 2 1/4″; 4 1/4″ x 2 1/4″; 3 1/4″ x 2 1/4″
- Shimmery White Cardstock – 5″ x 2″; 4″ x 2″; 3″ x 2″
- Old Olive and Gorgeous Grape ink pads
- Multipurpose Liquid Glue, Stampin’ Seal
- Stamparatus
- To order these supplies click here.
I used the stamparatus to stamp the flower for one important reason. I could stamp and then re- ink the stamp and stamp again several times until I got the depth of ink I desired. That is one of the wonderful benefits of the Stamparatus. Another hint I have is to put a couple small dots of the multipurpose liquid glue on the overlapping edge of each piece of Shimmery White cardstock. Use your finger to spread it out a bit and then let the glue dry. This makes it repositionable. Now when you place the pieces of cardstock in place, they will stay there while you stamp them.
Give this Offset Triple Time stamping technique a try. Play with different colors and different focal images. Black is often used for the mat layers or some other dark color. I toyed with the idea of using gold foil sheets for the mats which would also be stunning. If you do try this technique, I’d love to have you send me a photo of your card. I would share it on this blog with your permission.

