Category Archives: Uncategorized

Happy Independence Day! – Red, White, and Blue Digital Kit

Digital Independence Day card created with Red, White, and Blue Digital Kit

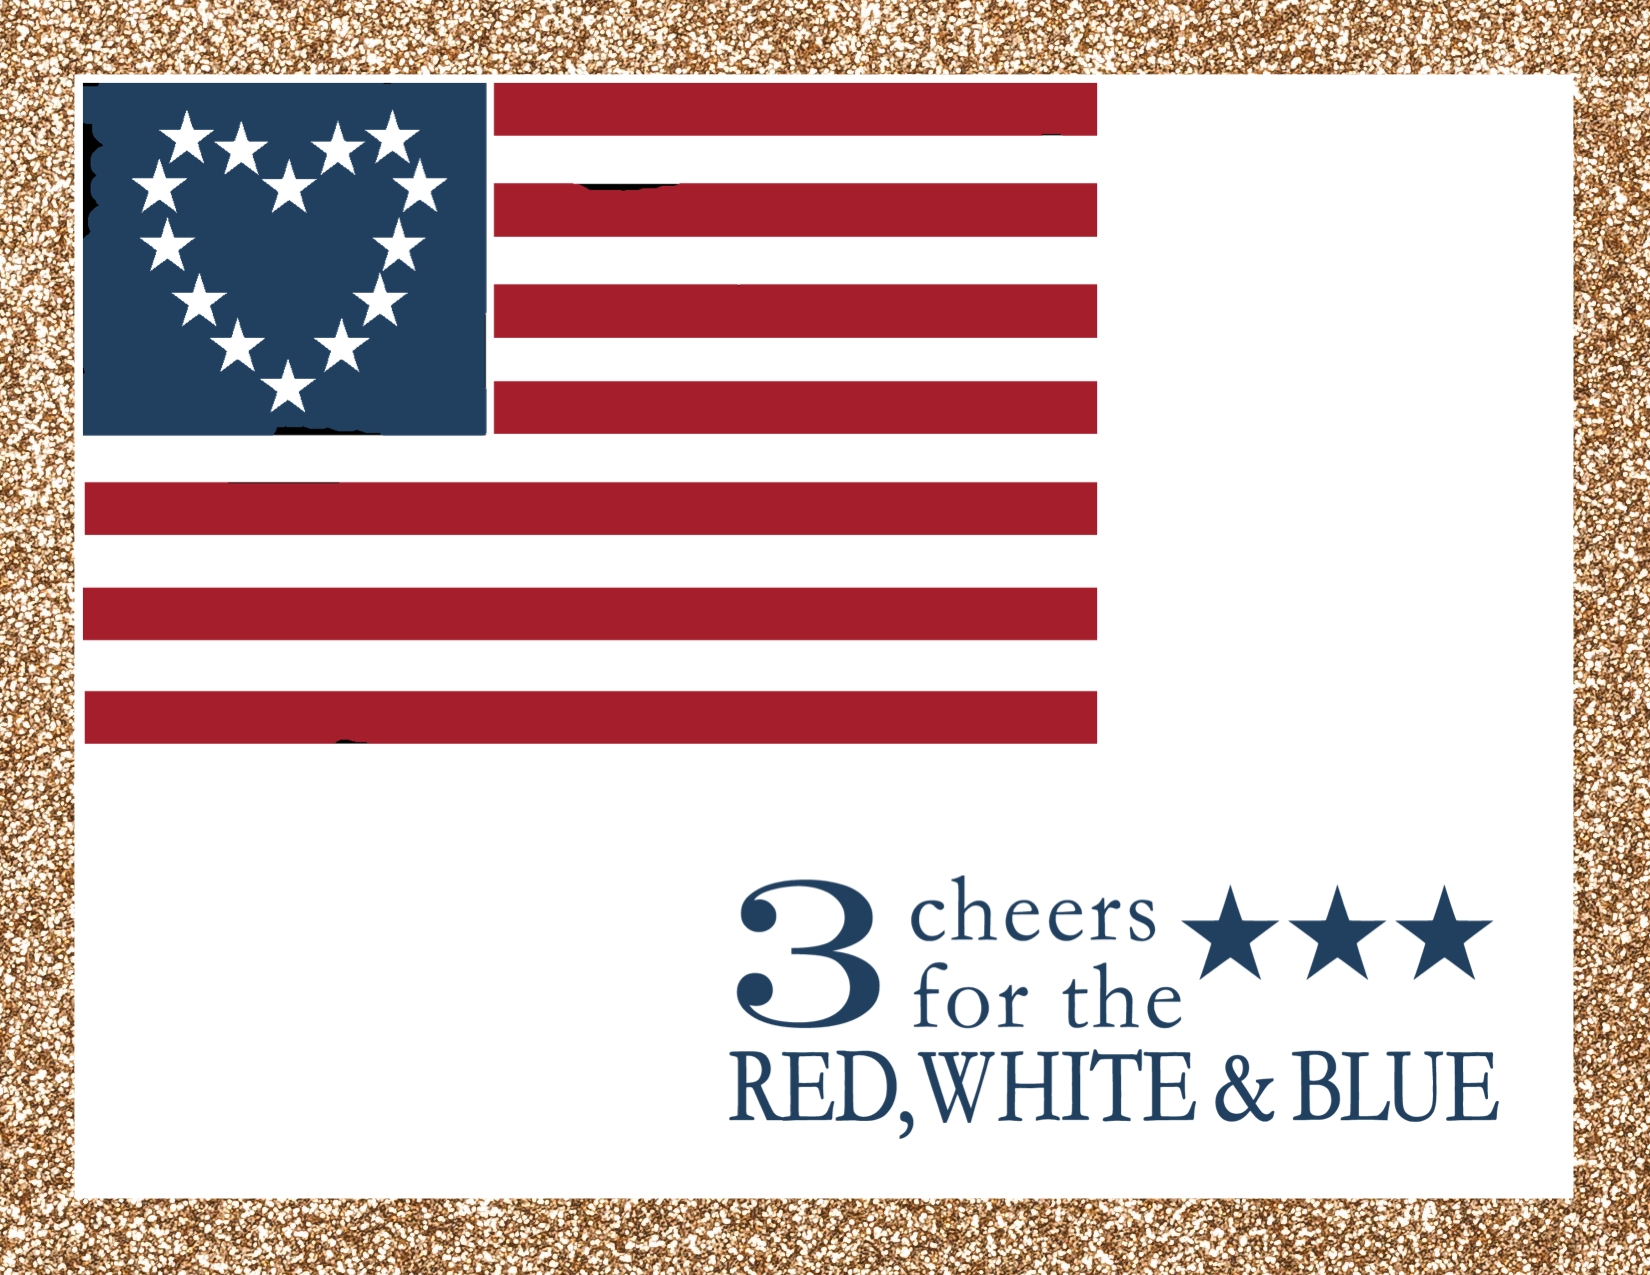
This Red, White, and Blue Digital Kit (127163) is the perfect way to create a card to share with all your online friends and relatives. I added the Gold Glimmer paper as the background. I used the coloring tool to color the flag. Check out all the elements of this kit by clicking on the link below.

My prayer today first that all my readers have a happy and safe holiday and more importantly that America will be worthy of God’s blessings.

Supplies: MDS software digital download (130646), MDS software disc (130647), or 30-day Free Trial of MDS (130910)
BackgroundGlimmer Designer Series Paper (132917) – gold
Stamps
Red, White & Blue Designer Kit (127163) – flag and 3 Cheers for the Red, White and Blue
Punches
Basics/1.25 Square Punch, Fill Color = Whisper White

Purchase Blendabilities Beginning Today!

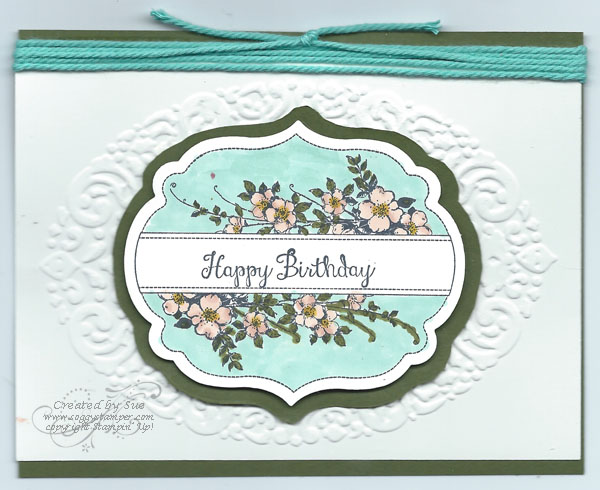
 Whoohoo! You can start ordering the first six colors of Blendabilities today, July 1! Finally the wait is over and I can show you this card I colored with them! I used Ivory and Natural of the new skin colors for the flowers and Old Olive shades for the leaves. The background is the light shade of Coastal Cabana.

Apothecary Art_edited-1Supplies: Stamps – Apothecary Art (wood-128415, clear-125527), Bloom with Hope (Hostess sets); Cardstock – Whisper White, Mossy Meadow; Other – retired Holiday Frame embossing folder, Apothecary Accents framelits (127003), Old Olive Blendabilities (130999), Coastal Cabana Blendabilities (1310000), Skin Tone Assortment (129370), Memento Ink Pad (132708)

I love these Blendabilities because I can finally color my images with shading. I also like the transparency of the ink. When I tried to color with the Stampin’ Write markers, the color covered any shading lines already in the stamped image and when I tried to blend colors, the surface of the paper would get sort of shredded. With the blendabilities, the color is carried on an alcohol base so the paper does not get messed up. These are the colors of Blendabilities you will be able to purchase starting July 1. The rest of the colors are scheduled to be released August 1.

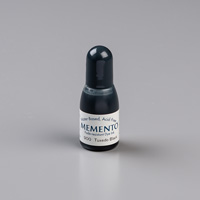
When you order them, you will want to be sure to also order the Memento Ink Pad and the Color Lifter. The Memento Ink Pad is a water-based ink like the Basic Black Stampin’ Ink Pad but it dries very nicely on Whisper White cardstock unlike the Basic Black. Stazon is another alternative to the Basic Black but it can’t be used with the Blendabilities. Stazon is a solvent-based ink as are the alcohol markers, the Blendabilities. It would run when coloring with a Blendability marker.

The Color Lifter is a colorless alcohol marker to use to push color back into the lines or to lighten a color.

You will also want to use Whisper White cardstock with the Blendabilities. I have used White Shimmer cardstock and it works also. The shimmer shines through the color beautifully! :o)

So get busy! Order your Blendabilities by clicking on the links or visiting my online store. Have renewed fun coloring!

Terrific Tuesday – Something to Say

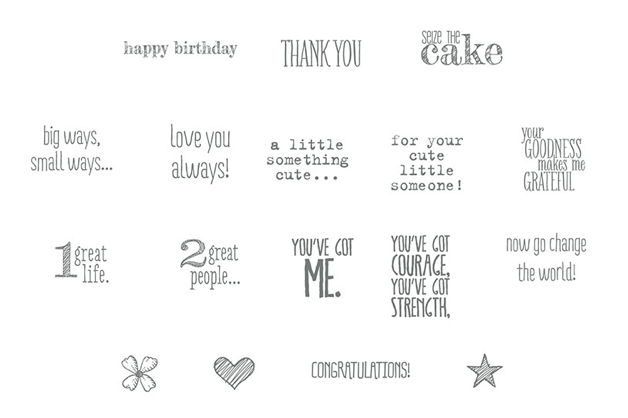
Something to Say (138099) is another of the great MDS downloads released the first Tuesday in June. I love this stamp brush set that matches the traditional stamp sets in the 2014-2015 annual catalog. Just look at all the wonderful sayings:Something to Say stamp brush set

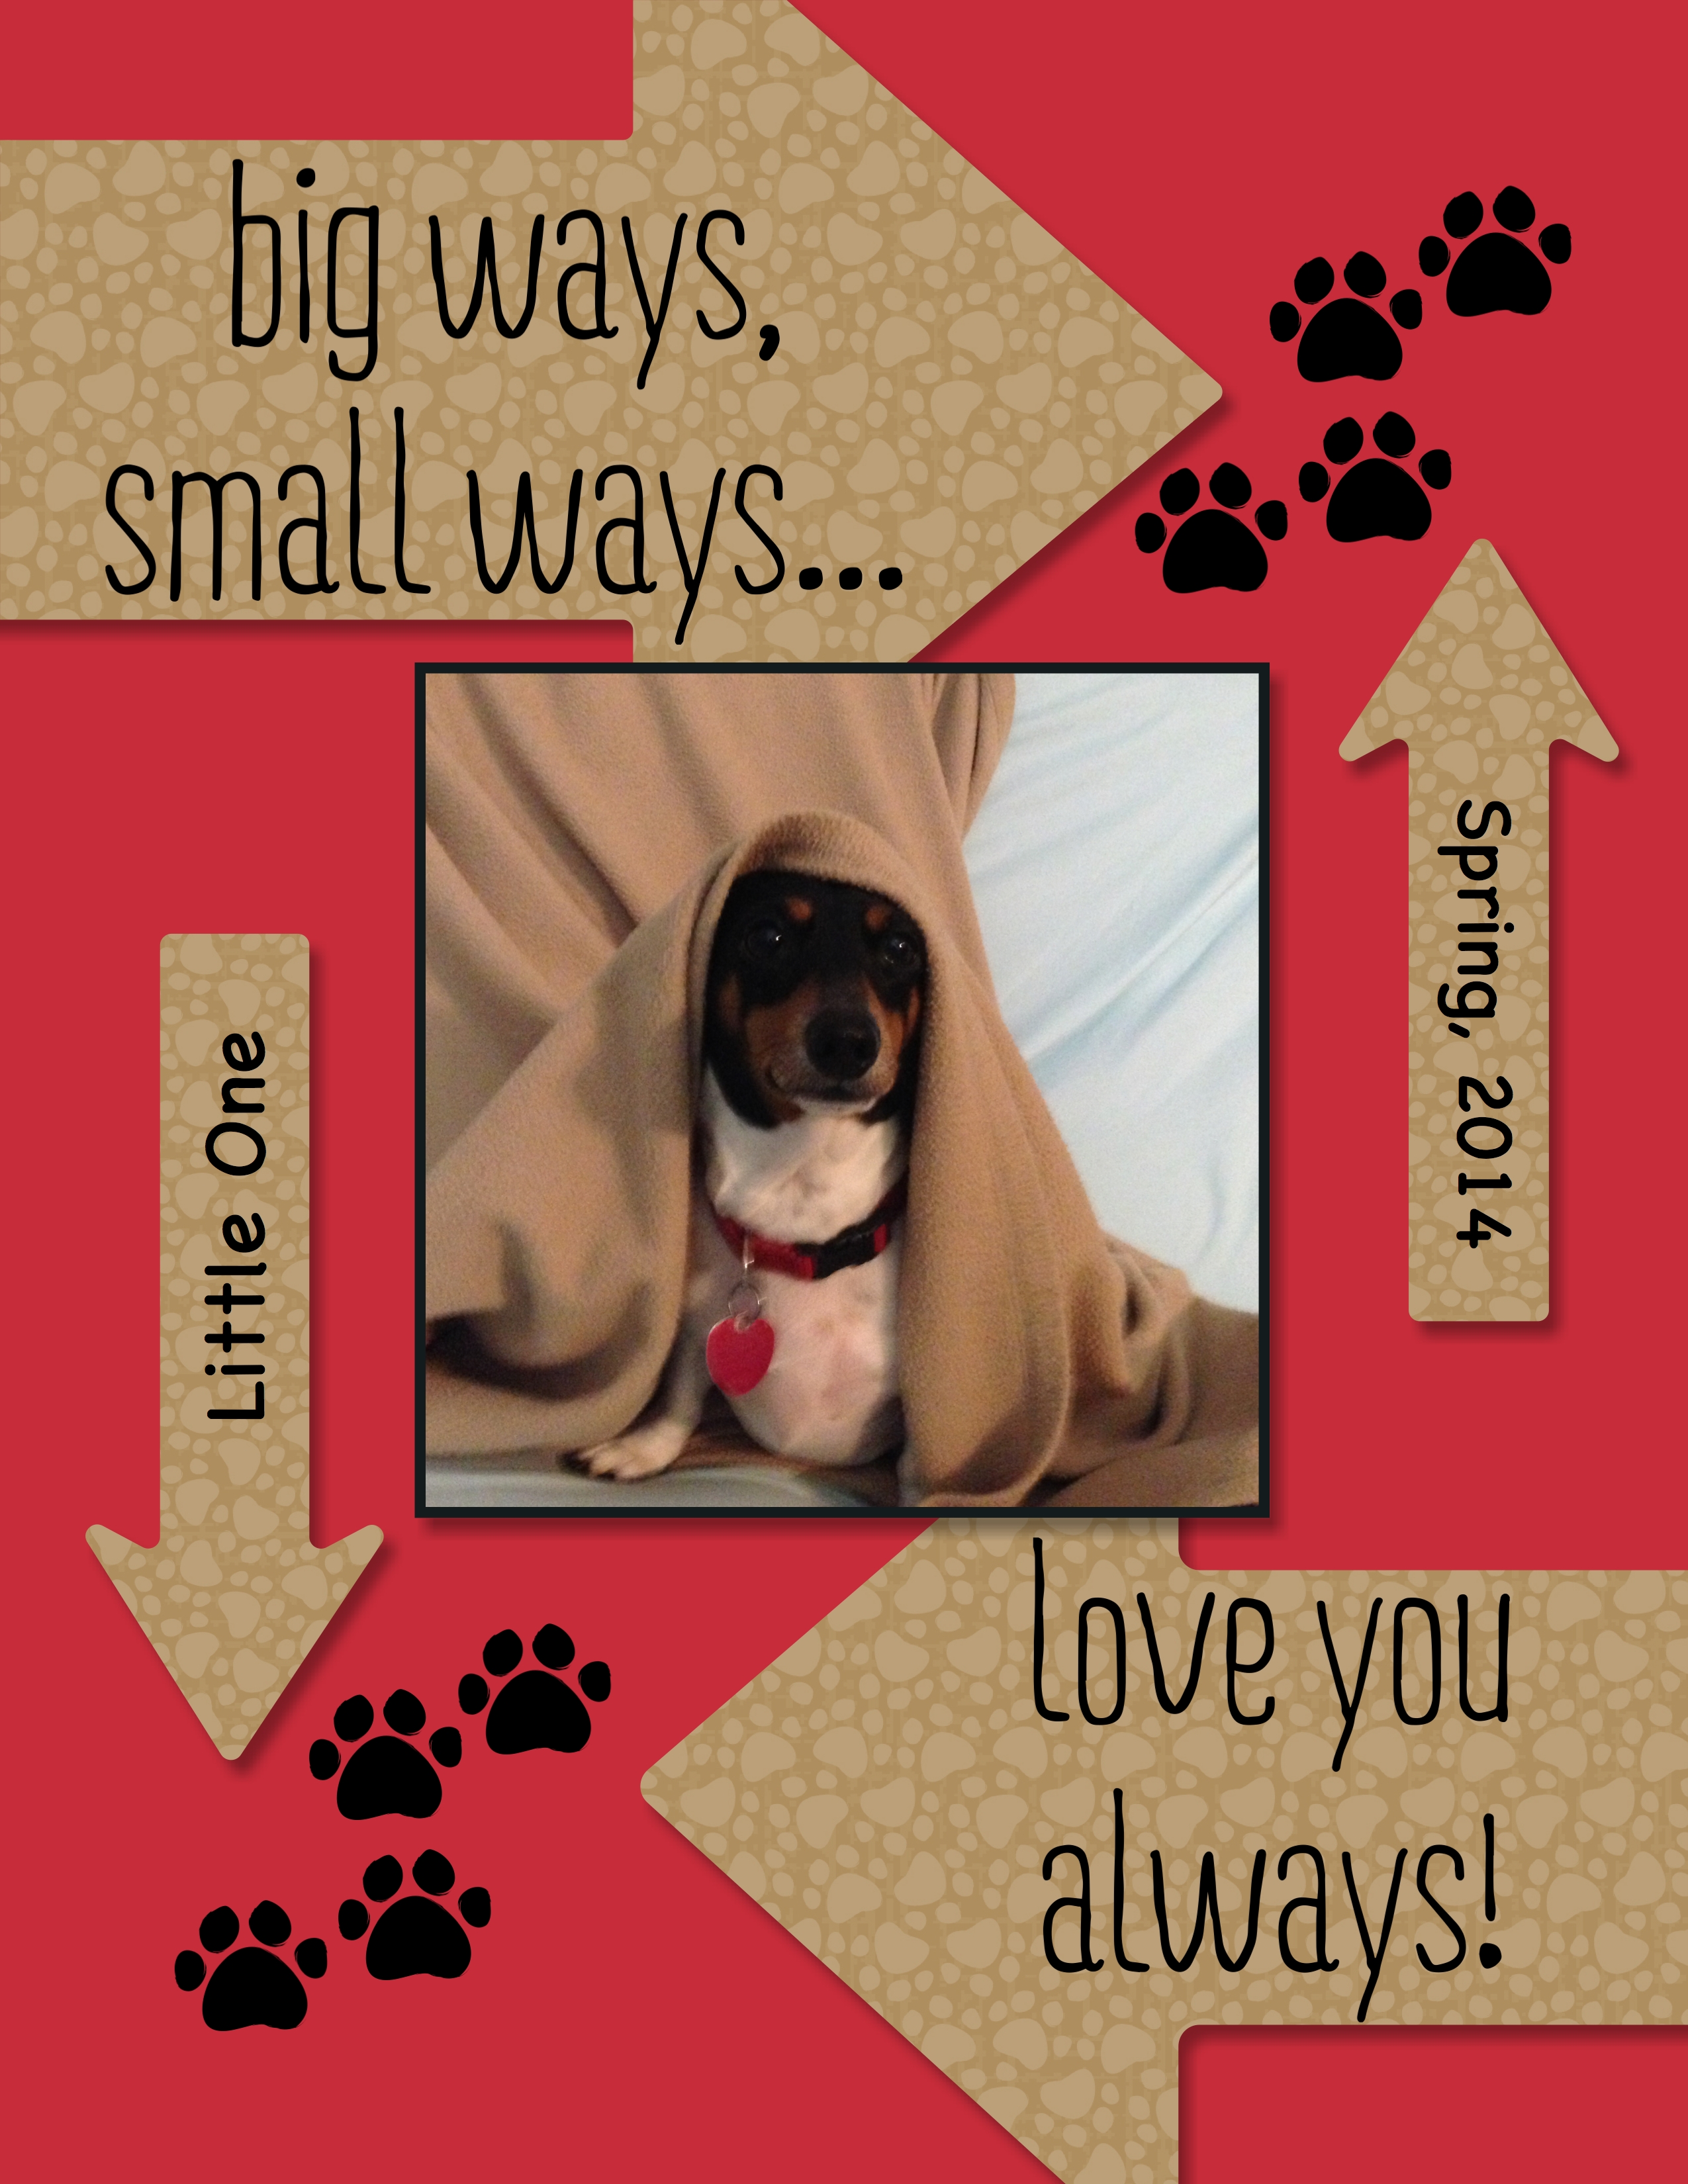
See how I used this set on my scrapbook page of one of our pups.

Something to Say digital scrapbook page of my mini dachshundSupplies: MDS software digital download (130646), MDS software disc (130647), or 30-day Free Trial of MDS (130910); Background – Card Stock/Real Red; StampsSomething To Say (138099) – big ways small ways and love you always, Paw Parade Kit (138037) – paw; Punches – Arrows 1, 2, 3 filled with Paw Parade Kit designer series paper – 5

Today we also have a new Weekly Deals. Check them out and order while the price is at this great reduction!

Hamburger Box Deluxe

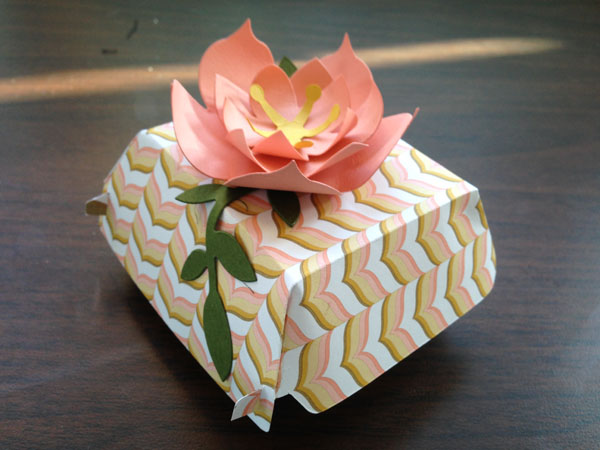
With the new Hamburger Box Bigzs Die (133724), the lowly hamburger take-out box has been elevated to a work of art! Check out this darling little hamburger gift box I made last night with the the die and  the Flower Frenzy Bigz Die (133728) . It is just toooo cute! I cut it out of some new Lullaby Designer Series Paper (133695).

Hamburger Box dieThis little box measures about 3 1/2″ x 2 1/2″ x 1 3/4″ tall and is perfect for a small gift or some candy treats. Imagine the surprise if someone opened this little box to find one of the expensive chocolate truffles nestled inside. What a great way to present something like that.

I have a couple of tips for you to make putting this box together easily.

  • If you are using designer series paper, be sure to put the side you want on the outside of your box down against the die. This way the score lines are on the outside. You want to fold away from the score lines.
  • Make crisp folds.
  • Use small dots of the Liquid Multipurpose Glue on the triangular corners.
  • Use Sticky Strip on the bottom front flaps or the glue if you prefer it.
  • Make sure the slots on the front of the lid are open. You can insert the tip of your Paper Snips into to open the slot a little wider.
  • Fold the triangular flaps on the front of the lid so they are lying along the inside sides of the lid so they are not in the way of the slots.

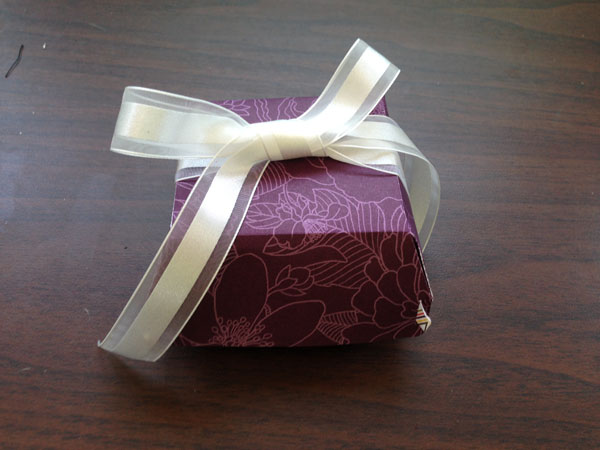
This little hamburger box is so cute you don’t even have to dress it up much. Just cut it out of any designer series paper and tie a ribbon around it. Here is another example using the Blackberry Bliss pattern from the Park Lane Designer Series Paper (133694).

Park Lane designer series paper cut with Hamburger Box Bigz dieIsn’t that an elegant packaging for a small gift? Have I convinced you yet? Don’t you need this die? Click on the links or visit my online store to order it. You’ll be glad you did and so will I! :o)

Supplies:
Paper – Crisp Cantaloupe (131298), Hello Honey (133678) and Mossy Meadow (133676) cardstock; Lullaby Designer Series Paper (133695), Park Lane Designer Series Paper (133694)
Other – Hamburger Box Bigz die (133724), Flower Frenzy Bigz Die (133728),
Liquid Multipurpose Glue (110755), Sticky Strip (104294)

Terrific Tuesday – Weekly Deals

It’s Terrific Tuesday and I have some terrific new MDS digital downloads for you. Stampin’ Up! has changed from giving new downloads every Tuesday to just releasing them on the first Tuesday of the month. So here are the downloads for today. Click on the links for more details and to order from my website. I will be creating projects highlighting a different download each of the rest of the Tuesdays in the month so be sure to continue to follow my blog posts.

Work of Art Greeting Card

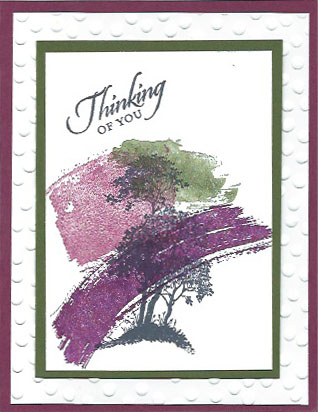
Work of ArtI really love this Work of Art stamp set that is in the new catalog. It makes me look like a great arteest with little effort. LOL! This card is a bit of a tease for you but only for a short time. I used two of the new In Colors, Blackberry Bliss and Mossy Meadow which are fast becoming my new favorite colors.

You, too, can enjoy these new In Colors in just a few days. The new 2014-2015 Stampin’ Up! catalog goes live at noon MDT on Monday. You will also be able to view the online catalog at that point. But….if you email me your phone number, time zone, and best time to call you, I’ll give you a call to let you know how you can receive the new catalog for FREE. There is no better bedtime reading than pouring through the Stampin’ Up! catalog. Well…on second thought…maybe it would be better daytime reading because you will get so excited about all the great products and ideas that your mind will start spinning with the possibilities. Sleep will not be possible. :o)

So send me your phone numbers. I love giving out free catalogs!

Supplies:
Stamps – Work of Art (w-134111, c-134114), Serene Silhouettes (w-132073, c-127324), Wetlands (w-126695, c-126697)
Card stock – Whisper White (100730), Blackberry Bliss (133675), Mossy Meadow (133676)
Inks – Blackberry Bliss (133642), Mossy Meadow (133645), Memento (132708), Rich Razzleberry (126950)
Other – Decorative Dots embossing folder (133520)

MDS Monday – Remembering

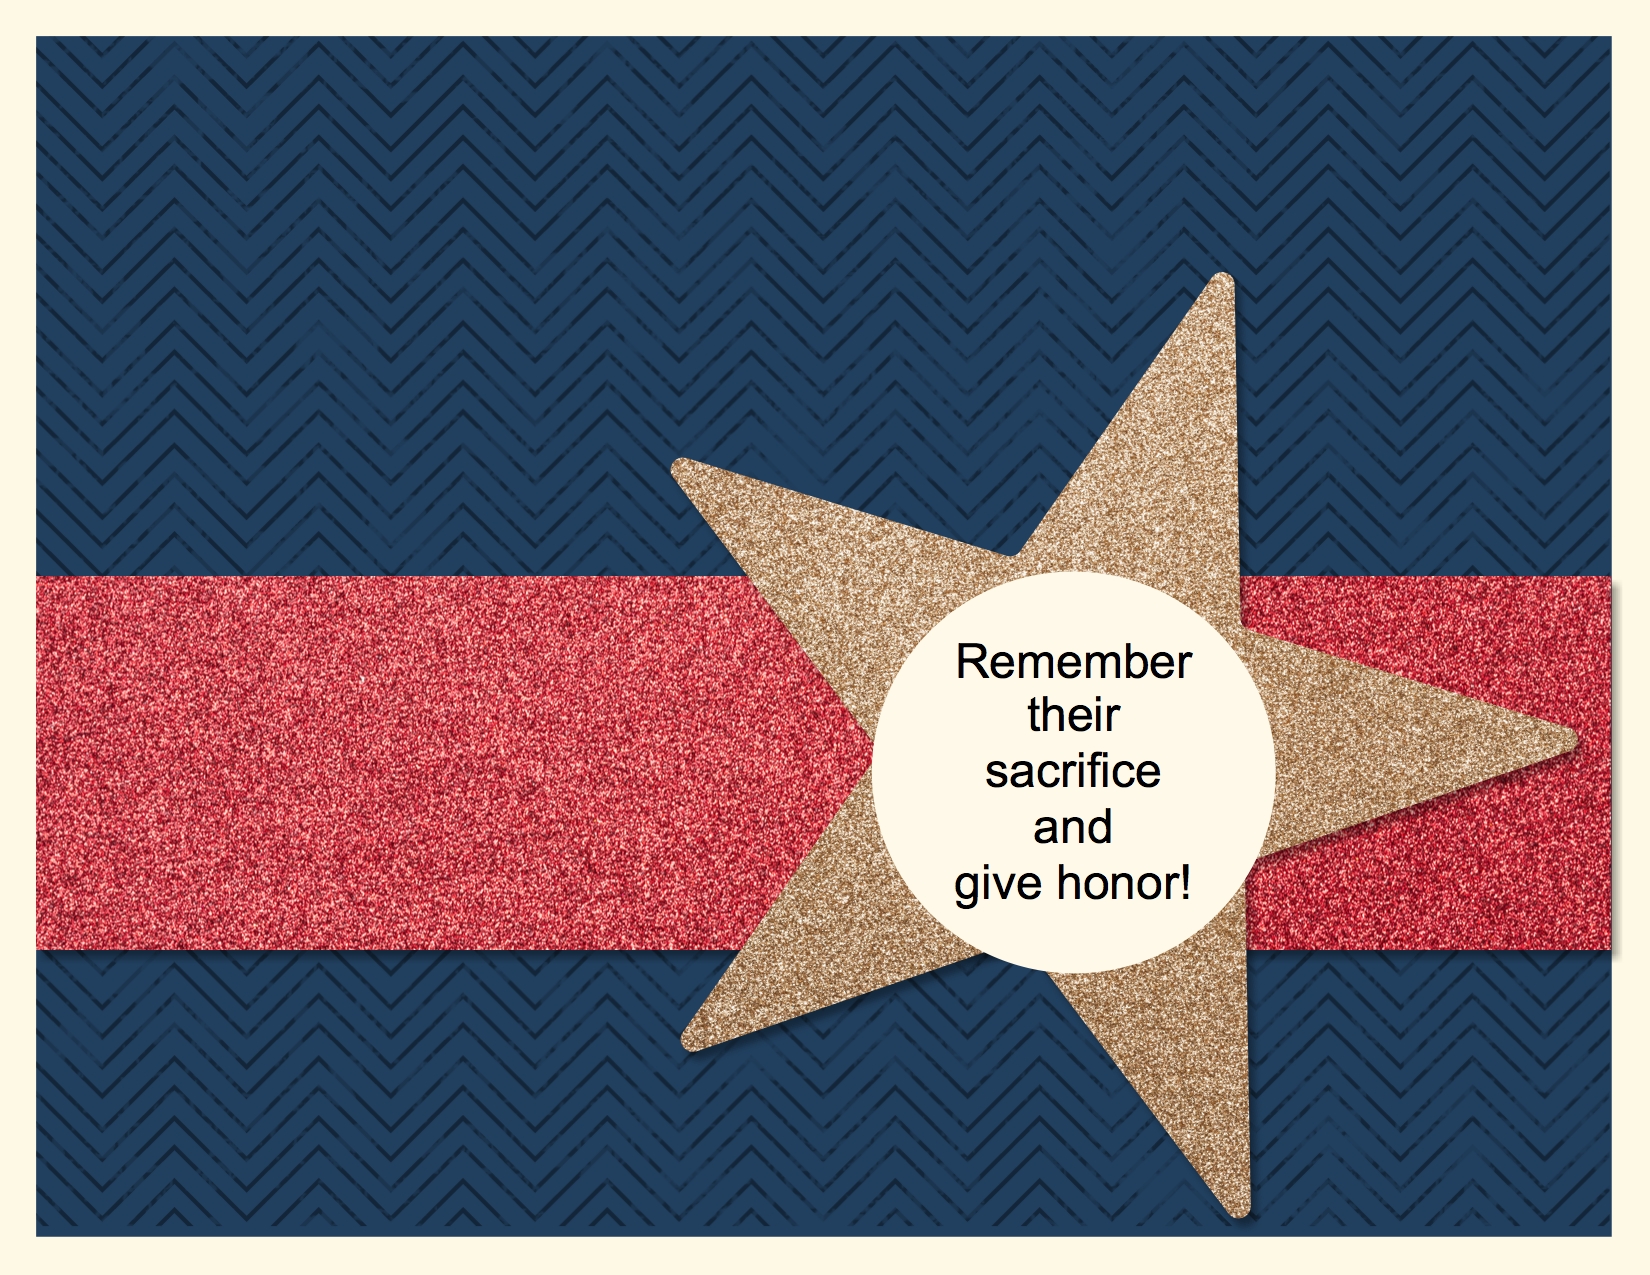
MDS Monday Memorial Day cardThis Memorial Day, take time to remember the sacrifices our armed service men and women make to keep us safe and allow us to enjoy our freedom. So many have given their lives, suffered lasting injuries, or endured separation from their loved ones to serve our country. They deserve all honor and respect.

Our family has had generations serve in the armed forces including a son-in-law, two grandsons, and a granddaughter-in-law who are currently serving in the military. Pray with me for their safety!

Supplies:MDS software digital download (130646), MDS software disc (130647), or 30-day Free Trial of MDS (130910)
Background – Card Stock/Very Vanilla
Stamps All in the Family Decorative Overlays – chevron, Black color opacity of about 40%
Punches
    Basics/1.25 Square Punch, Fill Color = NIGHT OF NAVY 33,64,95
    Basics/1.25 Square Punch,  Filled with: Designer Series Paper/_Designer Kits/Glimmer – red
    Basics/Star Punch,  Filled with: Designer Series Paper/_Designer Kits/Glimmer – gold
    Basics/1.25 Circle Punch, Fill Color = VERY VANILLA 254,249,232

To order any of these supplies, click on the links or visit my online store. If you have any questions about MDS, I’d be happy to try to answer them for you.

New Photopolymer Set – Endless Birthday Wishes

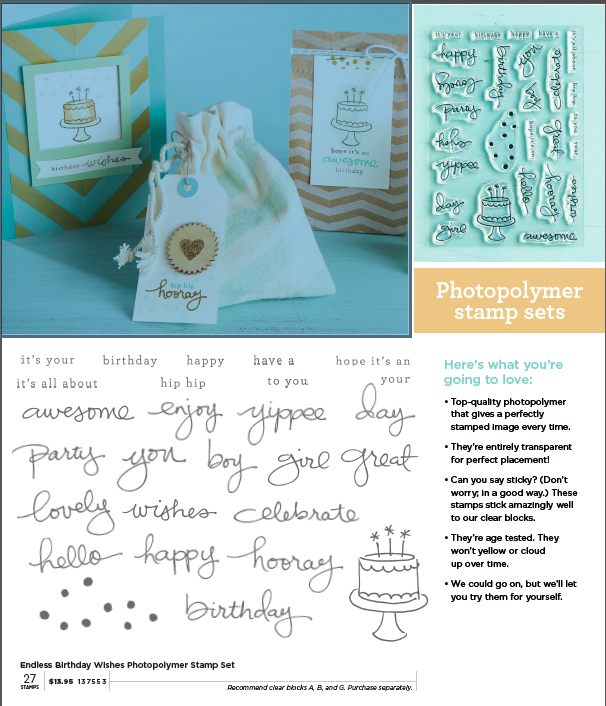
Endless Birthday WishesStampin’ Up! has released a new photopolymer stamp set, Endless Birthday Wishes (137553). I absolutely LOVE the font on this stamp set. It is the same one that was in the very popular Endless Wishes set that was available last December. That set sold out within the month and I am sure this one will sell out quickly too. You need to order it right away to be sure you get it!

I am sure you are wondering what is so great about Stampin’ Up!’s photopolymer stamps. First, Stampin’ Up! searched and searched for a photopolymer compound that would hold up to stamping for a long time and not break down in a short period of time like some of the other photopolymer stamps. They also were looking for a photopolymer that would not yellow or get excessively stained over time. They did not make clear stamps until they were confident that the material met their strict quality requirements.

Now for some benefits of photopolymer stamps:

    • They stick really well to clear blocks but can still be easily peeled off when you are finished with the stamp.
    • You can see through the stamp to see if you have it inked up well.
    • You can see exactly where the image will be stamped.
    • It easy to create a unique greeting for your card as you can combine several stamps on one block and easily line them up because you can see the image.

Give photopolymer stamps a try by ordering Endless Birthday Wishes before the set sells out. Click on the link!


Confused by Stamping Terms?

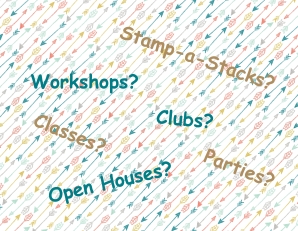
Photo of Stamping OptionsDo you get confused by all the various terms used in the stamping world? Each hobby, avocation and indeed each discipline in the workplace has it’s own language. Without knowing what various terms mean, a person has no clue what is being said. I am going to write a series of posts on stamping terms beginning with the terms in the photo above.

Each of these terms expresses a type of interaction between a demonstrator and the customers. By giving the definitions below, I hope you will be better able to choose which stamping events you want to participate in.

  • Party or workshop – These two terms are used interchangeably. With either one, there is a hostess who invites friends over to their home or to the demonstrator’s home for a time of stamping with the intention that the friends will place orders of stamping products so the hostess will earn free product. There is no charge to come. It is a great time to get together for fun and stamping.
  • Class – This is a class. The demonstrator charges a prepaid fee to attend the class and teaches a technique, how to make a specific product, or how to use a specific stamp or tool. It is not necessary to place an order although orders are always welcome.
  • Private class – A private class is where the demonstrator comes to your home and teaches a class for you and a few of your friends. There is a class fee and orders are not expected.
  • Club – This a group of 6 – 10 stampers who agree to spend a specific minimum amount each month so that each club member has a turn at being the hostess for a month. Usually the demonstrator gives a demonstration and the members do some stamping at the monthly meeting.
  • Stamp-a-Stack – The demonstrator sets up a series of tables with a specific project at each table. There is a fee for attending and the stamper leaves the event with a specific number of cards they have stamped. Usually there are up to five different designs and the customer stamps multiples of each design by rotating from one table to another.
  • Open House – A demonstrator holds an open house at their home or a public location where customers are invited to come see new products, samples of cards made, stamp a small project and perhaps enter for door prizes. There is no fee to attend and orders are accepted but not required.
  • Crop – A crop is specifically for scrapbooking. The demonstrator holds the crop in their home or at a public location. The scrapbookers bring their own supplies and photos. Everyone works on their own projects but enjoy snacks, perhaps share a meal, and enjoy each others company. Often short classes, door prizes and other fun activities are offered with the crop.

I hope this clears up some confusion for you when you look at my class list and events on my calendar. I rarely do Stamp-a-stacks but am willing to give it a try if some of you are interested in it. Contact me if you want to host a workshop/party or if there is a specific technique or project you would like me to teach.


Terrific Tuesday – New Items For You

Striped Grosgrain ribbon and Today Starts Here Designer Kit

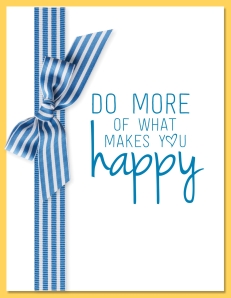
Hey…it’s Terrific Tuesday and Stampin’ Up! hasn’t disappointed us. They offer us ttwo terrific options to feed our creative addictions.First up are the terrific new MDS downloads. I created the card above to showcase one of the new downloads the Striped Grosgrain ribbon (137451). It comes in this wonderful Pacific Point blue and in Summer Starfruit yellow. I added the greeting from the Today Starts Here Photobook Template (137120). Check out the new digital downloads below and either click on the links or visit my online store to order the ones that have your name on them.

Baby We've Grown Stamp Brush Set - Digital Download
Baby We’ve Grown Stamp Brush Set – Digital Download

Price: $4.95
Gold Silver Baker's Twine - Digital Download
Gold Silver Baker’s Twine – Digital Download

Price: $4.95
Hello Sailor Stamp Brush Set - Digital Download
Hello Sailor Stamp Brush Set – Digital Download

Price: $4.95
High Tide Designer Series Paper - Digital Download
High Tide Designer Series Paper – Digital Download

Price: $4.95
Striped Grosgrain Ribbon - Digital Download
Striped Grosgrain Ribbon – Digital Download

Price: $4.95
The Grad Life Ensemble - Digital Download
The Grad Life Ensemble – Digital Download

Price: $10.95

The next great option is the new Weekly Deals. Check them out here. Since they are available at these prices for a limited amount of time place your order right now!

3 Inch Circle Originals Die

Price: $17.95 $13.46
Ahoy, Matey Ensemble -- Digital Download
Ahoy, Matey Ensemble – Digital Download

Price: $14.95 $8.97
Argyle Textured Impressions Embossing Folder

Price: $7.95 $5.96
Chevron Textured Impressions Embossing Folder

Price: $7.95 $5.96
Circles #2 Originals Die

Price: $15.95 $11.96
Dress Form Pop' N Cuts
Dress Form Pop’ N Cuts

Price: $21.95 $16.46
Peekaboo Frames Bigz L Die

Price: $32.95 $24.71
Set Designer Frames Textured Impressions Embossing Folder Die

Price: $8.95 $6.71


Time is running out!

The Soggy Stamper NewsletterThat is…time is running out if you want to receive the March edition of The Soggy Stamper Newsletter. The newsletter is filled with great projects, tips, and techniques and the March edition comes out next Tuesday. If you are not a subscriber to my mailing list yet, sign up now so you don’t miss out! Just fill out the form to the right and be sure to follow through by responding to the email I will send you. Once your subscription is confirmed, you will receive a link to two free tutorials as a than-you gift.

Is the newsletter not enough of an incentive to subscribe? Here are a few more benefits:

  • First notice of classes, specials, and events
  • Receive a e-birthday card if you add your birthdate
  • Exclusive card of the month tutorial
  • and much more

So fill out the form!


Terrific Tuesday – Glimmer Kit Digital Download

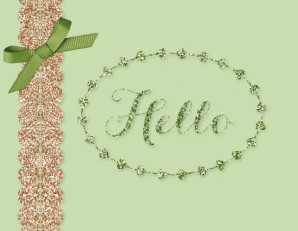
Glimmer Kit digital card

Supplies: MDS software digital download (130646), MDS software disc (130647), or 30-day Free Trial of MDS (130910); Stamps – Natural Composition Overlays (130855); Background – Whisper White card stock; Embellishments – Glimmer Kit (137342)

This Terrific Tuesday we have a very Terrific digital download! If you are like me and love Glimmer paper, you will go crazy for the new Glimmer Kit (137342)! See how easy and elegant the card above is? All I did was add a Natural Composition Overlay to the background and color it Very Vanilla with a Smokey Slate drop shadow. I reduced the opacity of the stamp to about 50%. Then I added the two elements from the Glimmer Kit. Done!!!

You can also recolor the elements in the Glimmer Kit and in the Glimmer paper. I have created another card for you from this kit.

Glimmer Kit digital card

This time I recolored the gold wreath and Hello with Gumball Green color. I added two of the scallop borders, changed them to vertical and did a mirror image on one of them to create the scalloped embellishment. Here are all the elements you get with this digital kit

The other new downloads are

Blossoms Abound Kit - Digital Download
Blossoms Abound Kit – Digital Download

Price: $9.95
Dream Of A Mother Greeting Card Template - Digital Download
Dream Of A Mother Greeting Card Template – Digital Download

Price: $2.95
Glimmer Kit - Digital Download
Glimmer Kit – Digital Download

Price: $9.95
Hip Notes Stamp Brush Set - Digital Download
Hip Notes Stamp Brush Set – Digital Download

Price: $4.95
Nursery Framables - Digital Download
Nursery Framables – Digital Download

Price: $4.95
On Film Kit - Digital Download
On Film Kit – Digital Download

Price: $7.95
Peachy Keen Stamp Brush Set - Digital Download
Peachy Keen Stamp Brush Set – Digital Download

Price: $4.95
Sweetest Dreams Framables - Digital Download
Sweetest Dreams Framables – Digital Download

Price: $6.95

Click here to learn more about them and to order your favorites.

Don’t forget that Terrific Tuesday is also when we get new Weekly Deals. Check them out below and then place your order here.

3/16 Inch Corner Punch

Price: $6.95 $5.21
A Royal Day Ensemble -- Digital Download
A Royal Day Ensemble – Digital Download

Price: $14.95 $8.97
Etcetera Designer Series Paper

Price: $10.95 $8.21
Gold & Silver Stampin' Glitter
Gold & Silver Stampin’ Glitter

Price: $7.95 $5.96
In Color Dahlias
In Color Dahlias

Price: $7.95 $5.96
Label Insert Pop' n Cuts Die
Label Insert Pop’ N Cuts Die

Price: $21.95 $16.46
Petals-A-Plenty Textured Impressions Embossing Folder Die

Price: $7.95 $5.96
Silver Metallic Encore Pad

Price: $9.95 $7.46

It’s Raining Hearts – Tags 4 You

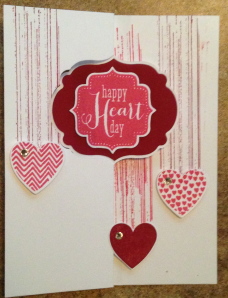
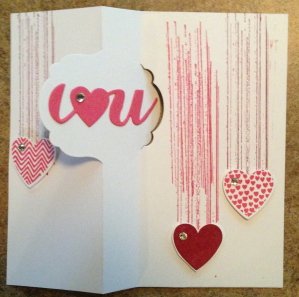
Hearts a Flutter and Gorgeous Grunge Flip cardHearts a Flutter and Gorgeous Grunge Flip Card


It’s raining hearts! I made this card last fall as part of a series of cards using the Tags 4 You stamp set. The stamp set, which was in the Holiday catalog, was thankfully carried over through the spring. Other stamp sets used in this card are Hearts a Flutter and Gorgeous Grunge. I used the wonderful Thinlets Label Card die, the Label Bracket Punch and the Hearts Collection Framelits to do my cutting. The I [heart] you is part of the Thinlits Label Card set. Small Rhinestone Basic Jewels add a touch of bling to finish off the card.

Thinking about Valentine’s Day, do you realize that it is only eleven days away? Oh my gosh! If you are as great a procrastinator as I am, we really have to get busy creating and getting Valentines mailed to our loved ones and friends. Hmmm…..!

Tomorrow the February issue of The Soggy Stamper Newsletter will be delivered to your inboxes. If you like my work and want to receive a monthly newsletter filled with tips and great projects and aren’t already signed up, fill out the form to the right right now! I have a great welcome gift waiting for you! After you fill in the form and click ‘submit’ you will receive an email from me. It is important that you respond to the email to complete your subscription.

Supplies:
StampsTags 4 You (131823-c, 131820-w), Hearts a Flutter (129252-c, 131922-w), Gorgeous Grunge (130517-c, 130514-w)

InksStrawberry Slush (131178), Cherry Cobbler (126966)
AccessoriesRhinestone Basic Jewels (119246), Hearts a Flutter Framelits (130159), Bracket Label Punch (132153), Thinlits – Label Card (133479)

How do I fix it?

Oh no! My image didn’t get completely stamped on my card! How can I fix it?

When that happens to me, I get out my trusty Stamp-a-ma-jig! It is not only useful for placing an image exactly where you want it but it is also for fixing incomplete images.

The Stamp-a-ma-jig comes with a plastic square. Position one corner of the square in the angle of the Stamp-a-ma-jig so the edges of the plastic are up tight against the Stamp-a-ma-jig. Ink up your stamp…I use a contrasting color of ink so it is easy to see if it lines up with the original image. Then place the stamp up tight inside the Stamp-a-ma-jig and stamp on the plastic sheet. See photo 1.
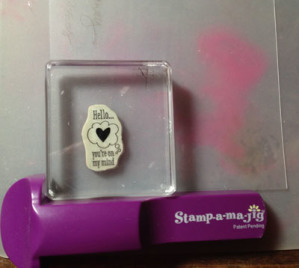
Using the Stamp-a-ma-jig to fix an image

Remove the stamp and the Stamp-a-ma-jig. This is what you will see.
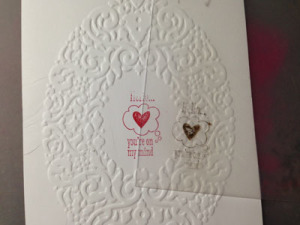
Using the Stamp-a-ma-jig to fix an imagePlace the plastic on top of your card stock so the images line up perfectly. Without moving the plastic or the card stock, put the Stamp-a-ma-jig back around the corner of the plastic making sure it is tight around the plastic.
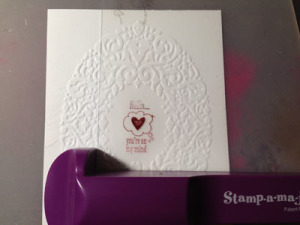
Using the Stamp-a-ma-jig to fix an image

Carefully remove the plastic without disturbing the Stamp-a-ma-jig. Ink up your stamp again with the original color of ink and place it in the corner of the Stamp-a-ma-jig exactly the same way you had it when you stamped on the plastic and stamp on your card stock.
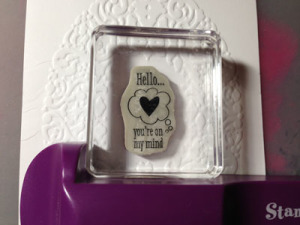
Using the Stamp-a-ma-jig to fix an imageRemove the stamp and the Stamp-a-ma-jig and….voila! You have a perfect image!
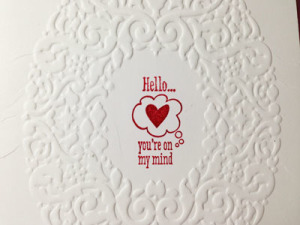
Love You to the Moon stamp set

So there you have it! The Stamp-a-ma-jig (101049) to the rescue! Order yours here. The image is from the wonderful new Love You to the Moon (133140-w, 133140-c) stamp set which is in the new catalog. If you would like a catalog, send me an email with your phone number and best time to reach you or just give me a call. I’d love to discuss with you how you can get one totally free.

Terrific Tuesday – Terrific MDS Tip

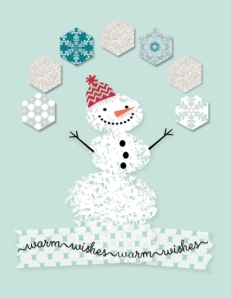
Snow Day digital cardSupplies: MDS software digital download (130646), MDS software disc (130647), or 30-day Free Trial of MDS (130910), Background – Card Stock/Soft Sky, Embellishments – (134509) See Ya Next Year Photobook Template– embellishments washi tape 1, Stamps – (135251) Snow Day, Punches – (130924) Hexagon PunchPaper – (135265) Winter Frost Designer Series Paper patterns 3,4,6,8; (132917) Glimmer Designer Series Paper – Silver

Have you ever titled a project but completely changed what you had planned to make during the creative process? As an example, this card originally was named Wreath Base and was a 12 x 12 page. I didn’t need the wreath base after all so converted the file to this hexagon card for the FILE pull-down menu and choose ‘rename project’. I changed the name from Wreath Base to MDS Monday Hexagon card. I also changed the project size by choosing ‘Change Project Size/Type’ from the EDIT pull-down menu. It is so easy to do this and by accurately naming your project you will easily find it again.

Since this is Terrific Tuesday, we have new digital downloads. Check them out below and then click on the image to go order them.

New digital downloard for 1-7-14