Category Archives: 3-D projects

Time to Get Serious

I’ll admit it…I have been really lax about posting on my blog for quite some time now but I a turning over a new page. I will spend more time sharing ideas and tips with you and less playing Secret Society on my i-pad. After all, you are much more important to me than a silly game!

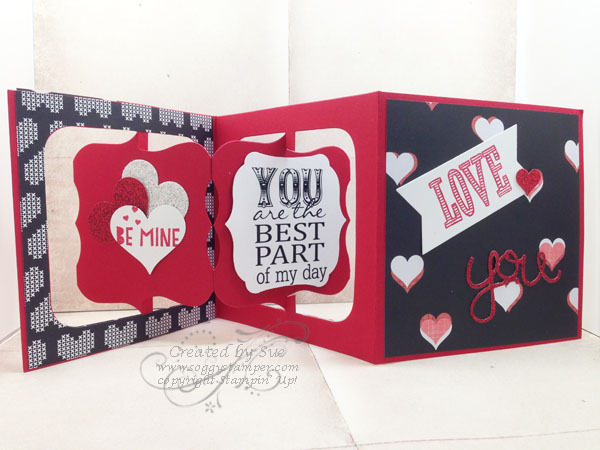
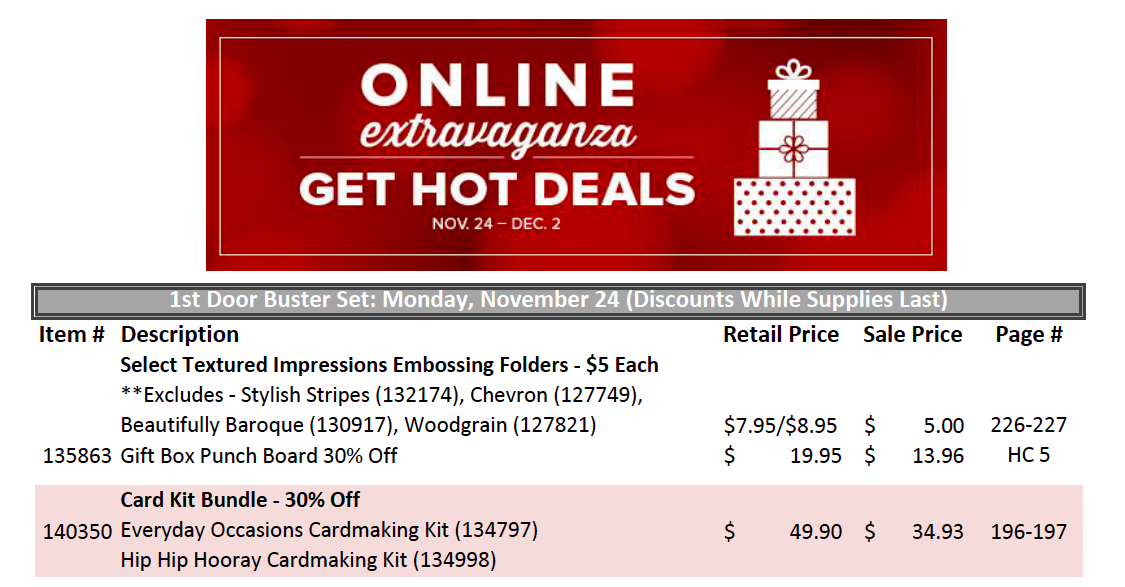
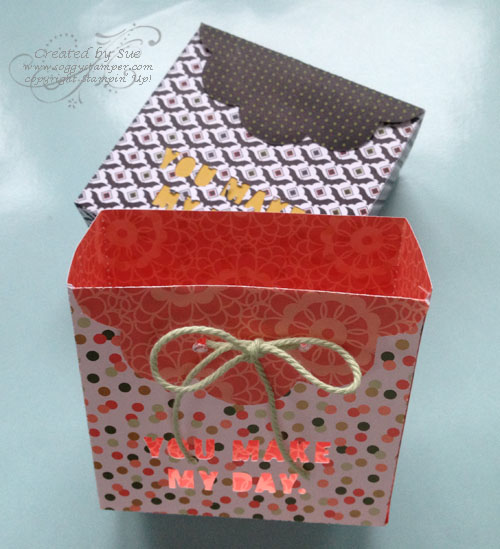
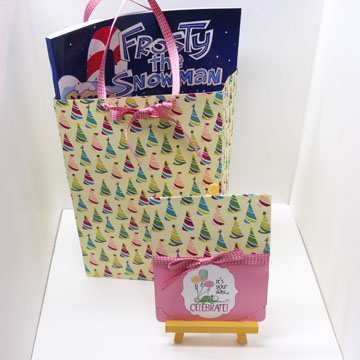
When Stampin’ Up! discontinued releasing new downloads on Tuesdays, I was quite disappointed and Tuesdays became a little less terrific. However, they still give us new Weekly Deals on Tuesdays. I created this treat bag with several of this week’s deals.

Treat Bag created with Dazzling Diamonds Glimmer paper, Island Indigo card stock and treat bag thinlits

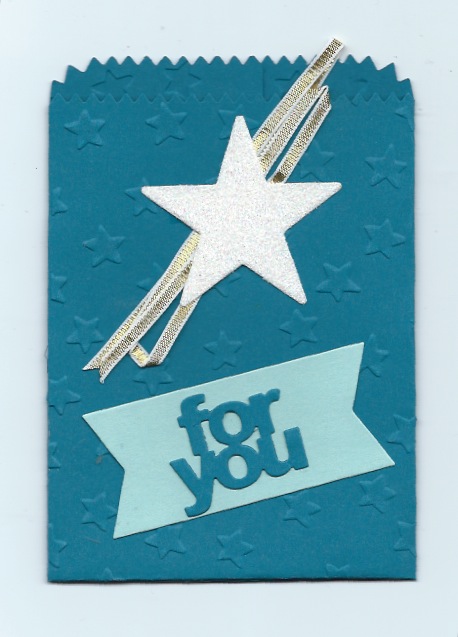
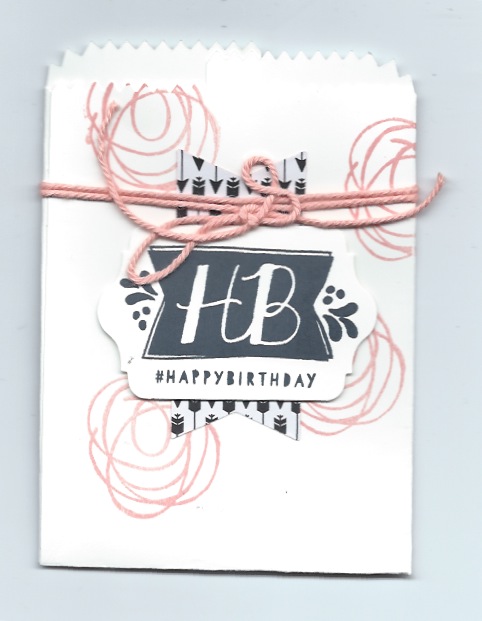
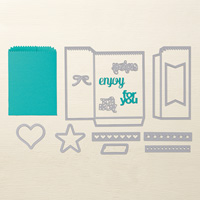
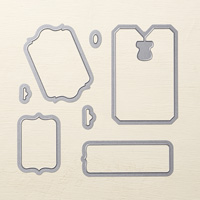
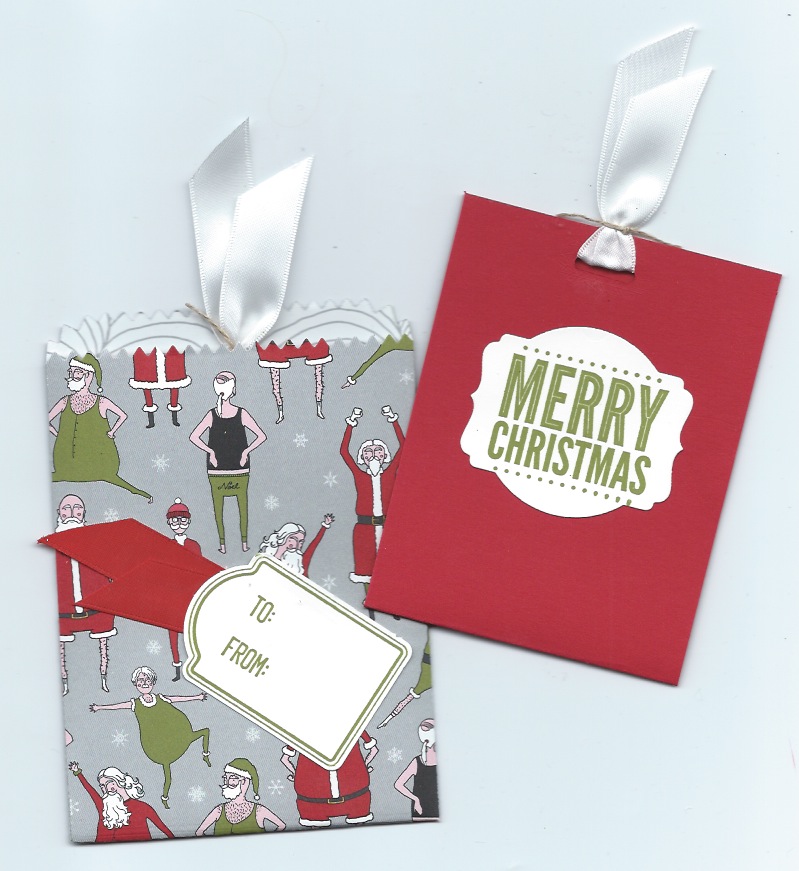
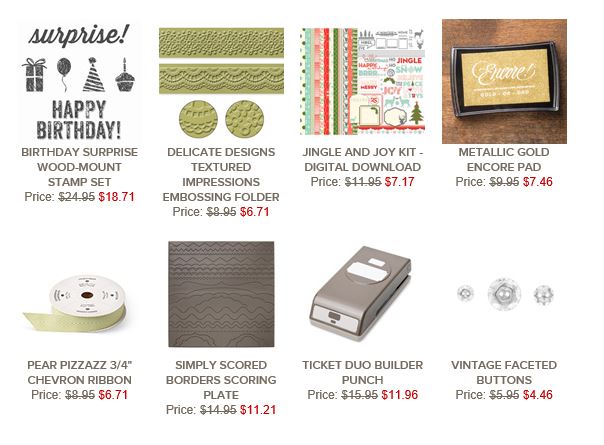
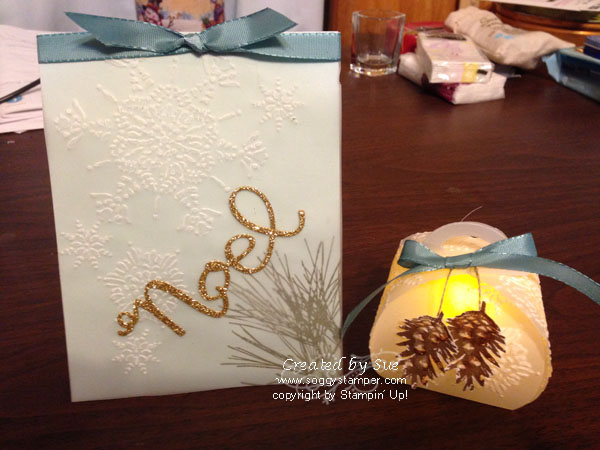
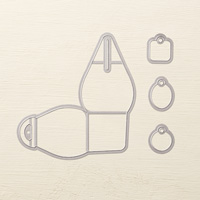
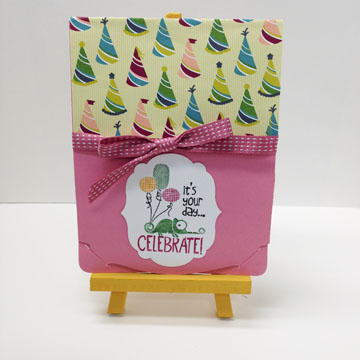
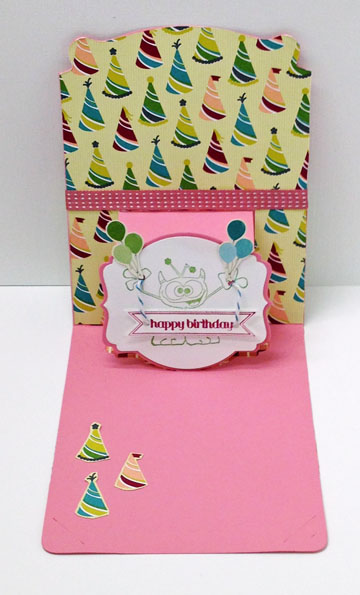
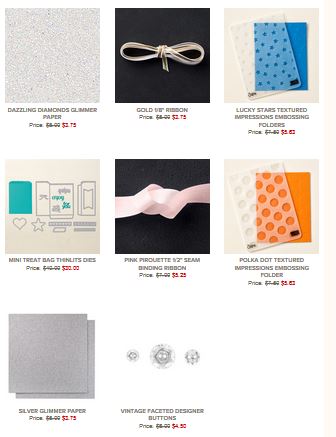
I love the Mini Treat Bag Thinlits. Not only can you use the treat bag to hold candy and cookies, it makes a really easy pocket card. You just cut a piece of cardstock to fit in the bag and stamp a greeting on it. The dies come with a variety of shapes in addition to the bag itself. The banner, ‘for you’, and the star are all part of the set. I like having texture on bigger expanses of cardstock so I used the Lucky Stars embossing folder on the front of the bag. The Dazzling Diamonds glimmer paper, the Lucky Stars embossing folder, the Mini Treat Bag Thinlits and the gold ribbon are all part of this week’s Weekly Deals. Click on the image below to go order them while they are 15% off. Next Tuesday will be too late to get in on the bargain.

Weekly Deals for week of 6-23-15

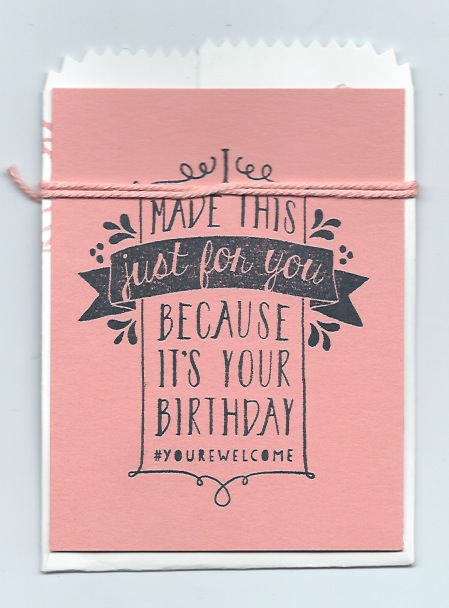
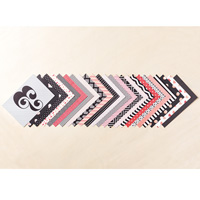
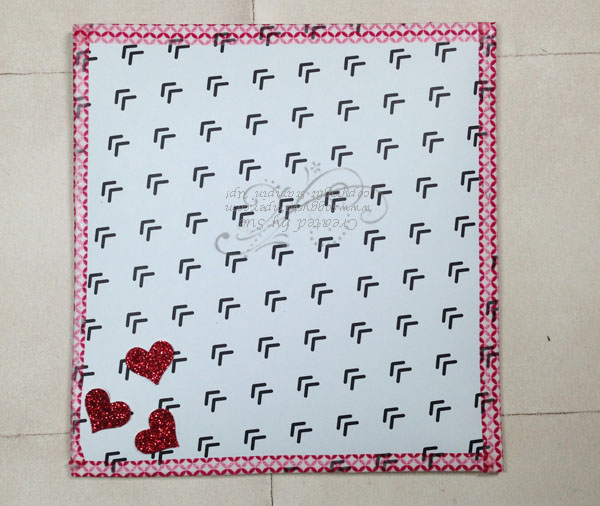
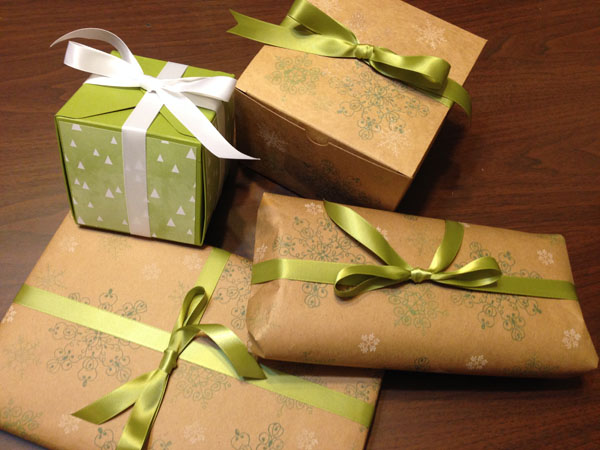
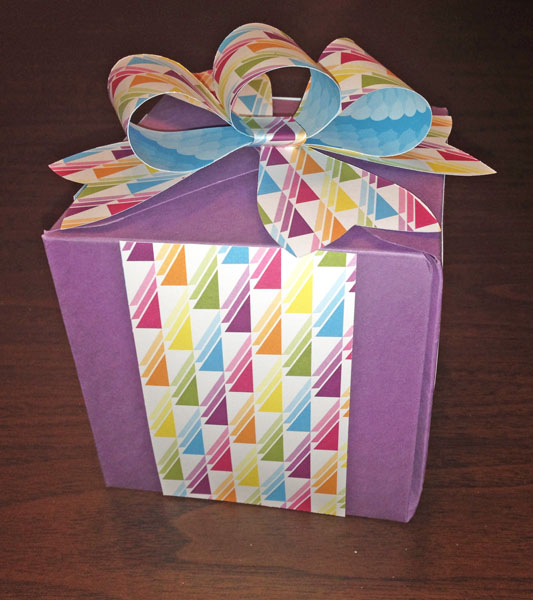
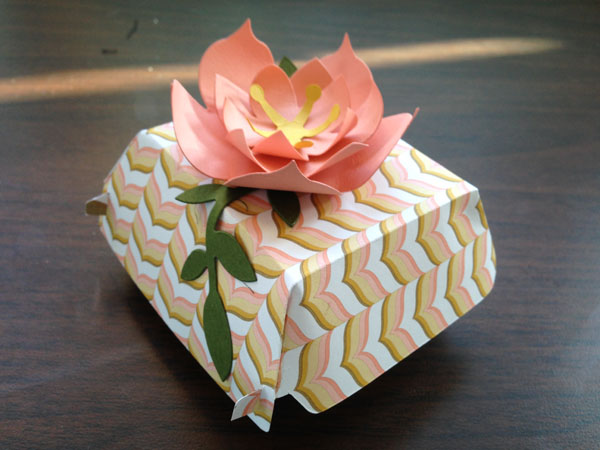
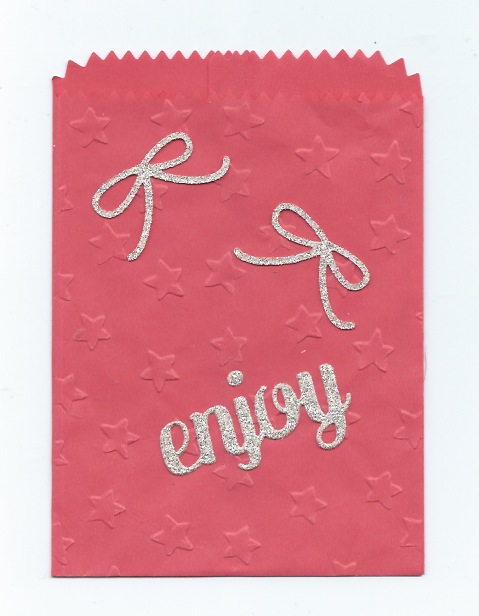
Stampin’ Up! has come out with a Cotton Paper Assortment. Cotton paper is thinner than cardstock and works beautifully when making flowers with the Bouquet Bigz L die. It also makes a great treat bag. I used the Watermelon Wonder color to make the treat bag below. It did wrinkle slightly as I used the Lucky Stars embossing folder with it but I liked the effect. It looks like it is almost quilted. I just love the little bows cut from the Dazzling Diamond glimmer paper. The bow die is also part of the treat bag thinlits set.

Treat bag made with Watermelon Wonder Cotton Paper, Lucky Stars embossing folder, Treat Bag Thinlets, and Dazzling Diamonds Thinlits

Have I convinced you yet that you ‘need’ the Mini Treat Bag Thinlits yet?

Valentine Treat Bag Redo

Mini Treat Bag with Balloon Bash stamp set

Sometimes we find leftover cards or 3-D items laying around on our stamping table just waiting to be repurposed. This treat bag started out as a Valentine one but didn’t send it. Tonight I sat down to make a Birthday card for a dear friend and saw this treat bag lying there.

I had planned to turn it into a pocket card so I stamped the largest image from the Balloon Bash stamp set on a piece of Crisp Cantaloupe cardstock cut to fit in the treat bag. When I turned the treat bag over I discovered that I had written on the back of it. What to do? Well, I just glued the image on the back to cover the writing and will put some treats inside the bag instead of a card.

Back of Mini Treat Bag with Balloon Bash stamp set

I stamped the HB image on Whisper White cardstock and cut it out with one of the Chalk Talk Framelits. Then I put it over the black and white banner on the front with Stampin’ Dimensionals to cover some adhesive that was on the front. As usually happens, I love the redo better than the original plan!

The moral of this story is that covering up perceived flaws in our creations often leads to even better creations! If you would like to create this treat bag for yourself and need some of the supplies I used, just click on the images below to be taken to them in my online store.


Dear Valentine!


3-D handmade Valentine using You Plus Me stamp set and Stacked with Love paper stackHappy Valentine’s Day to all my readers. I hope your day is filled with love. I’ve had a wonderful time creating a special Valentine for my hubby! The creative spirit really kicked in…yay! Usually I need to make a quick card and don’t spend as much time on it as I have with this one.

I used the Stacked with Love Designer Series Paper Stack (137779), the You Plus Me stamp set (wood – 137133, clear 138594) (wood bundle -138879, clear bundle -138880), and the photopolymer stamp set Snuggles & Smooches (140326) to create this card. The middle greeting is a free digital download from Create with TLC that I printed on Whisper White cardstock and then cut out with a Labels Collection Framelits die (129381). I had to trim part of the top and bottom of the layer off so that the hinge mechanism would work.

I love how so many different Stampin’ Up! products play well with each other. Did you notice that the word LOVE was die cut using one of the banner dies from the Mini Treat Bag Thinlits Dies (137547) and the ‘you’ was die cut using the Hello You Thinlits Dies (137363)? The frame base for the card was cut with a Sizzix die. This card does fold flat for mailing.

The card is square when folded up so I created my own 5″ square envelope from a piece of Back to Black Designer Series Paper (133700) using the Envelope Punch board. Check it out! It was so quick to make. If you don’t have this tool yet, why not? Tip: Use a light touch with the bone folder when scoring designer series paper! It has a tendancy to split if you score too hard. I used some retired Washi tape to cover the splits. :o) It does add an element of design to the envelope.

Square envelope created with the Envelope Punch Board and Back to Black Designer Series Paper

The supplies I used that come from Stampin’ Up! are listed below. Click on them for more details and to order the ones you need.

Sneak Peek – Mini Treat Bag Thinlits

Mini Treat Bag Money enclosureWhat do you do when you want to play with your new toys from your preorder but have to stay focused on Christmas? You find a way to use them for Christmas presents! These Mini Treat Bag Thinlits Dies are in the new Occasions catalog and you can buy them beginning Jan 6.

But you don’t have to use the dies just for treats. I created a money enclosure using the dies. You pull up on the ribbon to remove a little card with money tucked in it. These are so much fun and so simple to make! I used Santa & Co. Designer Series Paper (135821), the Merry Everything stamp set (wood – 135068, clear – 135071), the Note Tag Punch (135860) and the Deco Labels Collection Framelits (130102) to make this project. What is even better is that the Merry Everything stamp set and the Note Tag Punch are in a bundle for 15% off!

Click on the images below for more information and to order these supplies. It is getting close to Christmas, but if you order these now before the end of the Holiday catalog sales period, you will have them ready for next Christmas creating.

Today is also a Terrific Tuesday so here are the new Weekly Deals:
<div style="margin: 20px 0"><div style="border: 1px solid #efefef; padding: 15px;"><div><div style="float: left; margin-right: 20px; width: 155px; height: 210px; text-align: center; position: relative" class="product-container"><div class="product-image"><a href="http://www.stampinup.com/ECWeb/ProductDetails.aspx?productID=137635&dbwsdemoid=33458" target="_blank" rel="nofollow" style="text-decoration: none; cursor: pointer; color: #16a085;"><img src="http://www.stampinup.com/images/EC/137635S.jpg" style="width: 120px; max-height: 120px"></a></div><div class="product-title"><a href="http://www.stampinup.com/ECWeb/ProductDetails.aspx?productID=137635&dbwsdemoid=33458" target="_blank" rel="nofollow" style="text-decoration: none; cursor: pointer; color: #16a085;">Merry Everything Wood-Mount Bundle</a></div><div class="product-price"><a href="http://www.stampinup.com/ECWeb/ProductDetails.aspx?productID=137635&dbwsdemoid=33458" target="_blank" rel="nofollow" style="text-decoration: none; cursor: pointer; color: #16a085;">$32.95</a></div></div><div style="float: left; margin-right: 20px; width: 155px; height: 210px; text-align: center; position: relative" class="product-container"><div class="product-image"><a href="http://www.stampinup.com/ECWeb/ProductDetails.aspx?productID=137636&dbwsdemoid=33458" target="_blank" rel="nofollow" style="text-decoration: none; cursor: pointer; color: #16a085;"><img src="http://www.stampinup.com/images/EC/137636S.jpg" style="width: 120px; max-height: 120px"></a></div><div class="product-title"><a href="http://www.stampinup.com/ECWeb/ProductDetails.aspx?productID=137636&dbwsdemoid=33458" target="_blank" rel="nofollow" style="text-decoration: none; cursor: pointer; color: #16a085;">Merry Everything Clear-Mount Bundle</a></div><div class="product-price"><a href="http://www.stampinup.com/ECWeb/ProductDetails.aspx?productID=137636&dbwsdemoid=33458" target="_blank" rel="nofollow" style="text-decoration: none; cursor: pointer; color: #16a085;">$28.75</a></div></div><div style="float: left; margin-right: 20px; width: 155px; height: 210px; text-align: center; position: relative" class="product-container"><div class="product-image"><a href="http://www.stampinup.com/ECWeb/ProductDetails.aspx?productID=135821&dbwsdemoid=33458" target="_blank" rel="nofollow" style="text-decoration: none; cursor: pointer; color: #16a085;"><img src="http://www.stampinup.com/images/EC/135821S.jpg" style="width: 120px; max-height: 120px"></a></div><div class="product-title"><a href="http://www.stampinup.com/ECWeb/ProductDetails.aspx?productID=135821&dbwsdemoid=33458" target="_blank" rel="nofollow" style="text-decoration: none; cursor: pointer; color: #16a085;">Santa & Co. Designer Series Paper</a></div><div class="product-price"><a href="http://www.stampinup.com/ECWeb/ProductDetails.aspx?productID=135821&dbwsdemoid=33458" target="_blank" rel="nofollow" style="text-decoration: none; cursor: pointer; color: #16a085;">$10.95</a></div></div></div><div style="clear:both"></div></div><div><div style="float: left; background-color: #f5f5f5; padding: 0 10px;"><a href="http://www.stampinbuddy.com/" rel="nofollow" target="_blank" style="text-decoration: none; cursor: pointer; color: #1abc9c;">Table by StampinBuddy. Try it FREE.</a></div><div style="clear:both"></div></div></div>hoto of Weekly Deals for 12-16-14These prices only last through next Monday night so order the ones you want now while you are looking at them. Click on the image to go to my online store.

Pretty Packages – Endless Wishes

Handstamped gift wrap using Endless Wishes stamp setWhen you are a stamper, you have the ability to create beautiful packages with just some stamps, ink, and common brown wrapping paper. I used the Endless Wishes (photopolymer – 136829) and Letterpress Winter (photopolymer – 135143) snowflakes to stamp on the paper with shades of blue and white ink. I also stamped on one of the Extra Large Gift Boxes (132147) which is 6″ x 6″ x 4 3/8″..

I love making boxes using the Gift Box Punch Board (135863). I have been knitting hats for birthday and Christmas presents and the 4″ x 4″ x 4″ box is large enough to hold one of these hats. I used Old Olive 12″ x 12″ cardstock for the box and embellished it with 3 1/2″ squares of the tree design of the All is Calm Specialty designer series paper. Retired Old Olive and White satin ribbon hold the packages shut.

Our family decided to make this Christmas a handmade Christmas and these wrappings fit the theme perfectly! Having fun using my creativity is an added bonus.

Click on the images below to see more details and to order the supplies I used.


Let the Shopping Begin!

Online Extravaganza Monday DoorbustersToday is the first day of Stampin’ Up!’s Online Extravaganza and you have to check out these door busters available only today!

Just look at the Card Kit Bundle! This bundle includes everything but adhesive to create 40 cards for less than $1 a card! This bundle even includes the envelopes, stamps, and ink needed. Not only is this a great deal for you but it is a great deal for gift giving. The two cardmaking kits will come packaged separately so you can order the bundle and then give the two kits to different people. That makes the gifts less than $17 each.

The Gift Box Punch Board (135863) is a most useful item to have in your gift-wrapping supplies. If you are like me, finding a box for a small gift is difficult and I used to save them whenever a small box would arrive at my door. No longer do I need to do that because I can quickly create one out of cardstock or colorful designer series paper in a variety of sizes, the largest being a 4″ cube. Here is a box I created with this Gift Box Board and the Gift Bow Bigz L die (129977). I used Perfect Plum cardstock and Sweet Taffy Designer Series Paper (133693) for the bow and to decorate the box.gift box created with the Gift Box punch board and Gift Bow Bigz L die

Click here to download all the items that are on sale during this Online Extravaganza. Online_Extravaganza_Products_US-8

To sweeten the deal, I am adding a couple of Soggy Stamper offers:

Soggy Stamper Black Week Specials

FREE shipping!
You must email me your order so I can place it for you to give you free shipping. I will accept payment by PayPal, credit card, or check if you are local.

$25 Gift Certificate for $20
No limit of quantity and can be used for both product and classes.


These Soggy Stamper specials are offered only by me and the gift certificates can only be redeemed through me.

Ornamental Pine Meets Northern Flurry


Handmade Christmas card using Ornamental Pine stamp set and Northern Flurry Tea Light HolderIf you had come to my class last Tuesday, you would have learned how to make this beautiful vellum tea light holder and matching Christmas card.

We cut card stock vellum with the Curvy Keepsake Box Thinlits Dies (135853). Then we dry embossed the pieces with the Northern Flurry Textured Impressions Embossing Folder (120902) and the Big Shot. We curled the pieces slightly with bone folders.

Next we stamped the pine cone from the Ornamental Pine stamp set (wood – 135104, clear – 135107) twice on Whisper White card stock with Soft Suede Suede ink and cut them out. Dazzling Details (124117) was applied to the white areas of the pine cones and then they were cut out. A little Multipurpose Liquid Glue (110755) was used to attach them to a short piece of Linen Thread (104199) and attached to just one side of the overlapping flaps of the box.

A bow of Lost Lagoon 3/8″ Silky Taffeta Ribbon (135841) was attached on top with a glue dot. We placed a flameless tea light inside. I love the soft glow of the tea light through the vellum and the embossed area gives a lacy look to the box. See other Curvy Keepsake Boxes I have created here and here.

To go along with the tea light holder we created a Christmas card with a vellum overlay. The overlay was embossed with the Northern Flurry embossing folder and applied to the Soft Sky card base with SNAIL adhesive along the top edge. A length of the Lost Lagoon ribbon was tied around the card front to cover where the vellum was attached. The pine bough was stamped on the Soft Sky card base in the lower right corner. We used the Noel framelit from the Wondrous Wreath Framelits Dies (135851) to cut out the word from Gold Glimmer paper (133719) and glued it to the vellum layer with Multipurpose Liquid Glue.

Do you need the supplies for these projects or are you running out of some of your other supplies? Just click on the links above or on the pictures below to go to my online store to order them. I appreciate your business! :o)

Happy Halloween!

Halloween trict or treats with Curvy Keepsake Box Thinlits dieHappy Halloween everyone! Our great-granddaughters are coming to trick or treat at our house tonight so I made up these treat holders with their treats inside. The Curvy Keepsake Box Thinlits Dies (135853) is what I used to cut out these jack-0-lanterns. I stamped the straight stamp from the Work of Art stamp set (wood – 134111, clear – 134114) with Tangelo Twist ink on Pumpkin Pie cardstock. I used my Basic Black marker for the faces. These little boxes are just big enough to fit a Snicker’s Fun Size bar, snack size Reese’s Peanut Butter Cup, and packet of Welches Fruit Snacks. You can order the supplies to make these darling little pumpkins by clicking on the images below.

Awesome Product on Weekly Deals

Stampin' Up! Weekly Deals imageThis week we have some really great items available at a discount but for only this week. I know I am going to order the Gold Glitz Dazzling Details. I haven’t used it yet but am ready for some gold glitz for Christmas cards.

And how about that…3 Big Shot dies. I already have all of them so I won’t be able to take advantage of the discount but YOU will! Look how cute the hamburger box is. It is one of the dies that is in the Weekly Deals.

Hamburger Box die

Have you tried paper piercing yet? This is a quick way to add little details on your card and the paper-piercing packs have the spacing already figured out for you. You will also need the Stampin’ Pierce Mat (126199) to put under the paper-piercing packs so you don’t pierce your work top. The Stampi’ Pierce Mat is also a perfect cushion to put your cardstock on when you are stamping with the new photopolymer stamps. It helps ensure a good stamped image.

So check out the details of these Weekly Deals and order them while supplies last by clicking on the links below.

Holiday Seasonal Catalog is here!

handmade Christmas card created with the Snowflake Card Thinlit

It’s not too soon to be starting to make your Christmas cards and the Holiday Seasonal catalog has wonderful stamp sets and supplies with which to make them. The best news is that you can order from the catalog beginning tomorrow, Aug 28! What? You don’t have one? Well I’d be delighted to send you one for FREE. Email me with your phone number and best time to call you so we can have a conversation about how you can get one totally free from me.

Do you love the label card and circle card thinlits? Then you will be excited as I am to see this Snowflake card thinlit in the new catalog! It even has the thinlits to cut out snowflakes. And to make it even sweeter, the thinlits will cut the Glimmer paper! Yay!

This Snowflake card thinlit is part of the All Is Calm Suite which has beautiful designer series paper, coordinating stamp sets, and embellishments. Check out this suite on pgs 20 – 23 in the Holiday Seasonal Catalog.

The supplies needed for this card are below. Click on the links to order them through my online store.

Terrific Tuesday – Cool Like That Giftables

Cool Like That Giftable Templates BoxesThis Cool Like That Giftable Templates (136573) digital download for MDS is one of the nine new downloads that were released for June. Like I said last week, Stampin’ Up! is changing the focus a little in it’s MDS offerings and instead of releasing new downloads each Tuesday, they are releasing a group of them on the first Tuesday of each month and have more MDS downloads featured in the annual catalog. I will feature one of those downloads each Tuesday of the rest of the month.

I fell in love with this download when I saw samples made with it in the 2014-2015 annual catalog and it is the first one I ordered this month. I received a Silhouette Cameo e-cutter from Ron for Christmas and am just starting to learn how to use it. This Cool Like That Giftables Templates is perfect to use with an e-cutter. Stampin’ Up! has designed many downloads to be used either with an e-cutter or to cut out by hand. They even have an e-cutter category for those files in the online MDS catalog.

These templates can make either little bags or boxes. There are perforated lines on the sides to facilitate making the box into a bag. Some of the stamps in the kit can be added to the bag/box punches and when sent to the e-cutter, these stamps can be cut out like the samples I have in the photo. When you do this, be aware of which part of the box/bag will be the front. In the case of the samples, I paced the stamp on the same side as the flap so I couldn’t make it a bag with the flap folding down over the opening.

I urge you to purchase this Cool Like that Giftable Templates download by clicking on the link or visiting my online store. Have fun seeing what you can create with it. Remember that you can print the project on cardstock or designer series paper and cut them out by hand. You don’t have to have an e-cutter to enjoy the download.

Supplies:

MDS Monday – Sunshine and Sprinkles

Checkbook cover created with MDS and Sunshine & Sprinkles EnsembleDid you know you could use MDS to create a checkbook cover? With the Custom project option, you can easily make any size project you want up to 24″ x 24″! For my checkbook cover I chose a project size of 6.5″ x 7″. I added a square punch sized 6.5″ x 3.5″ to the bottom half my project and filled it with the Sunshine and Sprinkles Designer Series Paper – 15. After filling the punch I double clicked on it and clicked the minus magnifying glass 3 times to reduce the size of the raindrops. I also reduced the opacity to 80% so my printing would show up better. Then I copy, pasted, and flipped the rectangle and positioned it on the top half. This way the raindrops would still be falling when the checkbook cover was folded in half.

Back view of checkbookI grouped three of the umbrella embellishments from the Sunshine and Sprinkles Ensemble (130668) on the front of the checkbook and used the same umbrella to make a line of them on the back.  Then I printed the cover out on Whisper White card stock. I purchased the plastic checkbook cover from Stamp on This but I can’t find a website for them any more. Here is a link to another place that sells the clear plastic covers. https://www.cistamps.com/checkbook

I am so excited to be able to create this checkbook cover to match my Soggy Stamper branding!

Supplies: (Click on the links or visit my online store to order any supplies you need.)
MDS software digital download (130646), MDS software disc (130647), or 30-day Free Trial of MDS (130910)
Embellishments
Sunshine & Sprinkles Ensemble (130668)- embellishments- umbrella multi
Punches
Basics/1.25 Square Punch,  Filled with: Sunshine & Sprinkles Designer Series Paper – 15 from the Sunshine & Sprinkles Ensemble

Baby Pop-up Box Card

Baby Pop-up Box CardI love making these pop-up box cards! They are easy to make but can take a lot of time depending on the amount of embellishments you add to the card. However much time you spend, the card is sure to surprise and please the recipient.

I used a mixture of current and retired supplies on this baby card. The stamp sets are the retired Bundle of Joy set, the Easy Events set and the balloons came from a long-retired frame set. I used Pink Pirouette cardstock (111351) and a Blushing Bride pattern from the 2013 – 2015 In Color Designer Series Paper Stack (130136) for the base of the card.

For a free tutorial on how to make this type card, sign-up for my mailing list. Those of you who are on my mailing list now, I am moving it to a new provider and you have to re-subscribe.  I am excited and thankful that many of you have already re-subscribed. I urge those of you who haven’t already resubscribed to do it soon so you can continue to get my newsletter and other emails from me. You can either use the subscribe box on this page or respond to the email I sent you. After March first I will no longer be using the old provider for The Soggy Stamper Newsletter only. I haven’t changed anything yet for News From My Digital Craft Corner.

Glittery Gift Bow Bigz Die Packages

I wanted to make a special package for the gifts for our daughters and had these bows made from Winter Frost Specialty Designer Series Paper and the Gift Bow Bigz die laying on my stamping table. I used the Envelope Punch Board to make the thin boxes from Silver Glimmer Paper. The belly band used to close the box is from Island Indigo card stock. These are so sparkly and beautiful in real life that I almost hate to give them away.

Both the Gift Bow Bigz die and the Winter Frost Specialty Designer Series Paper will no longer be available after Jan 2 when the new Occasions catalog will begin. If you are like me and can imagine all the uses for the bow die and don’t have it yet, don’t wait…order it before it is too late!

Here is the list of the items that will be carried over Holiday_Carryover_2014_US-3 and some of the product from the Holiday catalog will be in the Occasions catalog. Check out the list and give me a call if you wonder what items from the Holiday catalog are in the new Occasions catalog. Then place your order through my online store or email it to me.

Supplies:
Paper – Winter Frost Specialty Designer Series Paper (132341), Silver Glimmer Paper (124005), Island Indigo card stock (122923)
Other – Gift Bow Bigz die (129977), Big Shot Die-Cutting Machine (113439), Frosted Finishes Embellishments (132150)


Looking for a child’s card? Check this one out!


Deco Label Pop 'N Cut

I created this card for my great-granddaughter who turned 5 in late November. I love this lizard with the balloons from the Tag It stamp set. I colored the stamp with markers to get the different colors on the stamp. I the card stock is one of the retired pinks, Regal Rose, and I used Birthday Basics Designer Series Paper.

So, this is a cute card just looking at the card front, but wait until you see the inside!

Monster Maniac Pop 'N CutYep! It is a Pop ‘n Cuts card using Stampin’ Up!’s exclusive Card Base Pop ‘n Cuts die and the Label Pop ‘n Cuts insert that coordinates with the Deco Label Framelits. Or maybe it is the other way around. The Deco Label Framelits coordinate with this insert. :op Here is a close-up of the label.

Monster Maniacs stamp set

I think the Monstermaniacs stamp set is perfect for kids’ cards. Although they are monsters, they are loveable. Hmmm…sort of like kids themselves? The greeting banner was stamped with Itty Bitty Banners stamp set and cut out with a Bitty Banners Framelits. I punched holes in the banner and used Island Indigo Baker’s Twine to hang it between the monster’s hands. I also fussy cut some balloons from the Birthday Basics dsp for the monster to hold.

Finally, I needed a gift bag for the present and created it out of 1 1/2 sheets of the party hats pattern of the Birthday Basics Designer Series Paper. The bag measures 6″ wide x 9″ tall x 3″ deep. I love that the bag and card go match. You’d not likely find anything that matches so well at a Hallmark store!

Gift bag created using Birthday Basics dsp

To create these projects for yourself, order the supplies by clicking on the links below or visiting my online store and clicking on the ‘shop’ button. Email me if you want the directions for the gift bag. It is really quite simple to make.

Supplies:
Stamps – Itty Bitty Banners (126257-clear, 132022-wood), Tag It (130303-clear, 130300-wood) Monstermaniacs (134972 – only comes in clear mount)
Inks – Garden Green, Rose Red, Early Espresso, and Pumpkin Pie Stampin’ Write markers
Wild Wasabi ink pad
Paper – Regal Rose (retired) and Whisper White card stock,
Birthday Basics Designer Series Paper (130145)

Other – Deco Labels Collection Framelits (130102), Labels Collection Framelits (125598),
Bitty Banners Framelits (129267), Island Indigo Baker’s Twine (125575), Card Base Pop ‘n Cuts die (130099), Label Pop ‘n Cuts  insert (130160), Big Shot Die-Cutting Machine (113439)