
I really like this Gift Bow Bigz die for the Big Shot as it quickly makes beautiful bows out of paper. But what else can we do with it? Well, take a look at this!
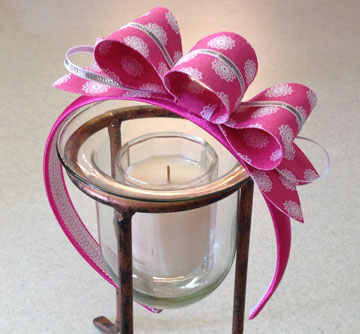
I needed a birthday present for a great-granddaughter’s 5th birthday and got this idea from another demo. The fabric is one of Stampin’ Up!’s retired fabrics which has the same color as the headband. Lucky me! I love the white polka dots with the bright pink background and know it will look wonderful against my great’s dark hair.
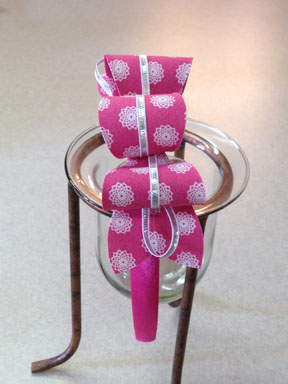
So how did I make this? I first put Heat and Steam adhesive between two layers of fabric that was the size of the die. Then I ran the fabric/die sandwich through the Big Shot. I used a hot glue gun to put the bow together. I glued the tail ends together first. I added a strip of the silver ribbon to one side of the bigger bow using glue dots at the ends and in the middle to hold the ribbon in place. I used hot glue to adhere the ends of the loops in the middle with the ribbon side out. Then I glued it to the tails. By accident, I only allowed enough prepared fabric to cut out one of the smaller bow loops so I just made one loop for the center of the bow. I rapped the small strip around the whole bow, securing the ends with hot glue. Finally I glued loops of the silver ribbon to the bow, tucking the ends under the other loops. The final step was to glue the center of the bow to the head band. Voila! A quick and beautiful headband for a darling little girl!
Click on the links below to order the Stampin’ Up! supplies for this project or visit my online store and click on the shop button.
Supplies:Stamps – none
Inks – none
Other – Gift Bow Bigz L Die (129977), Big Shot Die-Cutting Machine (113439), Silver 1/8″ Ribbon (132137), cotton fabric, Steam A Seam 2, purchased headband, Hot Glue Gun


