Category Archives: General Cards

Wishing You Well

Handmade card created with the Wishing You Well stamp setThis Wishing You Well stamp set didn’t catch my eye until I started seeing samples created with it. I have fallen in love with this beautiful bow that looks like organdy. This stamp set is one of those DistINKtive stamp sets that were created so that the multistamped effect is actually just one stamp. The best way to ink up this kind of stamp is to sponge the ink on. That way you don’t get blobs of ink on the image. It is hard to see in the photo but after inking up the stamp with the sprigs with Crumb Cake ink, I sponged Champagne Mist Shimmer Paint on the stamp to give it a nice shine. I used the label die from the Petals & More Thinlits Dies and fussy cut the bow. To create this card for yourself, click on the images below to order the supplies I used.

12 Cards in 2 1/2Hours???

handmade thank you cards created with a variety of dspDo you need a bunch of cards but little time to make them? Then you will want to read this post. Last night I needed to make 12 thank you cards for the MOPS group (Mothers of PreSchoolers) for today. Here’s how I did it.

  1. Since they needed to be big so lots of mothers could sign them, I used 12 full 8 1/2″ x 11″ sheets of Whisper White cardstock folded in half. I saved time this way because there was no cutting for the card base.
  2. Next I cut 12 of a variety of designer series papers to 5 1/4″ x 8 1/4″ for a layer. Stampin’ Up!’s designer series papers are so beautiful that they make the card.
  3. I did coordinate the colors of ink on the greeting to the designer series papers and stamped Thank You (a retired Watercolor Thank You stamp) 12 times. Then I cut them all out.
  4. Now was time to put the cards together. I stamped the inside greeting on all the cards first. The Stamparatus made this step a snap. I also stamped my name on the back of the cards at this time.
  5. I adhered the dsp to the card base with SNAIL adhesive and added a ribbon treatment. For most of the cards I put SNAIL adhesive on the back of the greetings and stuck the ribbon down to the SNAIL. Then added the greeting to the card front with Stampin’ Dimensionals.

And the cards were done! By doing an assembly line process for all the steps up to 5, I was able to finish all 12 cards in 2 1/2 hours.

I encourage you to stock up on these beautiful designer series papers before they retire on May 31. As you can see, they make a beautiful card with little effort. Click on the links below to order them. Unfortunately, the Delightful Daisy Designer Series papers and the Lots of Labels Framelits have already sold out. Be sure to check the retiring list frequently and get your orders in while quantities last.


Waterfront Yet Again!

Thinking of You card using Waterfront Stamp Set I am so enthralled with the Waterfront stamp set that I can’t stop making cards with it. This time I stamped a scene and then cut it out with an oval Stitched Shapes framelit. Then I matted it with a scalloped edge Layering Ovals framelit. The greeting is from Heartfelt Blossoms, one of the free Sale-a-Bration stamp sets. How do you get a free stamp set? Order $50 or more in product during Sale-A-Bration. If you order $100, you can even choose from two more detailed items or get two $50 items Be sure to use the January Host Code when you order to get a small Thank You gift from me as well. You can download the Sale-A-Bration brochure herel

Tropical Waterfront Card

photo of Calendar Easel Card created with Waterfront Stamp SetYesterday I shared a mountain sunset scene created with the Waterfront stamp set. Today I’m sharing one that has a tropical sunset created with the same Waterfront stamp set. Yep…it has both pine trees and palm trees in the set. I have been seeing so many, many different scenes created with this set. You really must get it for yourself. It makes you look like a wonderful artist which you are but with very little effort.

This card uses the same Soft Sky for the base but I changed up the colors of inks a bit. I used the same colors as yesterday for the sun and clouds but used Soft Sky and Pool Party for the water. I used Crumb Cake for the sandy beach and the palm trees are stamped with Wild Wasabi and Soft Suede. I added a bit of shimmer to the clouds, sun, sand and water with Clear Wink of Stella. It’s too bad that the camera didn’t pick it up.

BTW, I got the calendars from Vippies stamp company, www.vippies.com. They come in three different sizes and are self-adhesive. This is the large size and measures 3″ x 2 1/4″.

To order the supplies for this project, just click on the images below to go to my online store. Remember this is Sale-A-Bration time and for each $50 you spend in product, you get to choose one of the exclusive free Sale-a-Bration products. When you order, use the January Host Code and I’ll send you a small Thank You gift. And don’t forget for each $50 you order, you get to check off one line on my Customer Appreciation form to earn $45 in free product from me. Check this program out here.

Waterfront Sunset

easel calendar card created with Waterfront stamp setThe secret artista in me has been released with this Waterfront stamp set! I love, love, love using the various stamps to create this water-colored look using the stamps in this set. No, I’m not really an artist, the stamps and the wonderful Stampin’ Up! inks make it look like I am an artist. Eh…maybe a stamper really is an artist, just not one who draws the images. Anyway, I’m thrilled with the results of my stamping tonight.

Since January is the beginning of a new year, I wanted to hold a class where we made an easel card with a mini calendar on it. To make an easel card, cut a piece of cardstock 4 1/4″ x 11″ and fold it in half. Then fold the front of the card in half again with a mountain fold. Glue a 5 1/2″ x 4 1/4″ piece of cardstock to just the section of the card front that is farthest from the center fold. Put a button, bow, or popped up label on the bottom of the inside of the card to hold the easel open. Decorate the front however you want.

For this card I used Soft Sky for the card base. Then I stamped a 3 3/4″ x 5″ piece of Whisper White cardstock with my scene using a variety of inks. I did mask the mountains when I stamped the setting sun. I used Tranquil Tide for the mountains and the pine trees. The grass was Garden Green. I used Marina Mist and Soft Sky to stamp the water and sponged Soft Sky on the sky. The sun was stamped with Tangerine Tango. The clouds were stamped with Sweet Sugarplum, Melon Mambo, and Peekaboo Peach. I also stamped some Peekaboo Peace on the water.

This layer was then adhered to a 4″ x 5 1/4″ layer of Tranquil Tide and then to the card base. I really urge you to purchase the Waterfront stamp set and release your inner artist. The stamp set also has images to make a tropical waterfront. You can purchase the supplies I used for this card by clicking on the images below to go to my online store. When you order, use the January host code and I’ll send you a small Thank You gift.

Another Stained Glass Technique Card

handmade card created with Bird Banter stamp set and Stained Glass TechA few days ago I shared a card I made using the “Stained Glass” technique and Petal Palette stamp set. You can see it here if you missed that post. Today I am sharing a card I made with the same “Stained Glass” technique and Bird Banter stamp set.

The last time I used black embossing powder for the ‘leaded’ part of the stained glass. Then I realized that Stampin’ Up! retired that powder a couple of years ago. Oops! Not to worry though. Since it takes ink a while to dry on vellum paper, I stamped the images with Tuxedo Black Memento ink and immediately added clear embossing powder. This works pretty well.I used Fast Fuze Adhesive to adhere the birds to the card front since the Fast Fuze does not show through the vellum.

I purchased this set mainly because one of the sentiments goes like this: “A little birdie told me it was your birthday….obviously, it wasn’t an early bird!” I am a great procrastinator and my modus operandi is to get the birthday card in the mail on the day of the birthday…if I’m lucky. So that greeting will be used a lot. However, I am falling in love with the birds. Stay tuned for more of these birds on cards.

As always, you can click on the images below to be taken to their spot on the shelves of my online store if you want to create this card for yourself. Also, remember that this is Sale-A-Bration time and you get to choose a free item for each $50 of product you purchase. Be sure to use the January host code when you order and receive a thank you gift from me.

The Embossing Paste Discovery Continues

Birthday card using tinted embossing paste and Detailed Floral Thinlits

I have become addicted to the Embossing Paste. Stampin’ Up! sells a set of four Pattern Party Decorative Masks (144103) to use with the embossing paste and which I have purchased but not used yet. I have been creating masks using various thinlits and cutting the masks from cardstock. By using cardstock, I feel I can just throw the mask away after using it and not have to worry about washing it immediately before the paste dries on it. I also can create all kinds of masks this way.

For this card, I cut the mask from the larger Detailed Floral Thinlits. I tinted the embossing paste with a drop of Wisteria Wonder reinker to give it a light lavender tint. While the embossing paste was still wet, I sprinkled Dazzling Diamonds Glitter on it. Unfortunately, the scan doesn’t show the subtle shimmer. I love the results but then went on to another idea.

Birthday card with sponged ink on embossing paste

I cut another mask with the Detailed Floral Thinlits, spread the white embossing paste, and allowed it to dry. Then I cut a second, clean mask and laid it over the embossing and sponged Rose Red, Marina Mist, Crushed Curry, and Pear Pizzazz ink on the dry paste. I love this result even more!

I have another idea using embossing paste that I will share with you in another blog post so come back again soon! When you order embossing paste from my online shop, I suggest you order at least two jars of it so you don’t run out. Click on the images below to order the supplies I used for these cards.

Embossing Paste

handmade greeting card using O So Eclectic Bundle and embossing paste

The 2017-2018 Stampin’ Up! Annual Catalog, introduces Embossing Paste to our arsenal of creative tools. We now have three ways to add embossing to our creations. There is the traditional heat embossing using a heat tool and embossing powder, dry embossing made easy with embossing folders and the Big Shot Die-Cutting machine, and now embossing paste.

With this paste, you temporarily stick a stencil onto your cardstock and smear the embossing paste onto the stencil. When you lift the stencil, sections of the paste are left on the cardstock. Over the next few posts, I will share different ways you can use this embossing paste. On pg. 201 of the catalog, Stampin’ Up! offers precut stencils, Pattern Party Decorative Masks (144103) and Palette Knives (142808) to use with the Embossing Paste (141979). The masks are very lovely but you don’t have to limit your creativity to what Stampin’ Up! offers. With the wide variety of dies offered, you can create your own masks.

In the card above, I used one of the dies from the O So Eclectic Bundle (wood – 145355, clear – 145356) to make a mask. I tinted the embossing paste with a drop or two of Lemon-Lime Twist reinker. I love how it came out! You can purchase the items I used for this card by clicking on the images below to find them in my online store or contact me by email.

Come back soon to see more ideas for using the new Embossing Paste.

What Is Your Favorite Bundle in the New Catalog?

What is your favorite bundle from the new 2017-2018 Stampin’ Up! Annual Catalog? Mine is the Colorful Seasons Bundle (145348).

  • It is so very versatile with all four seasons represented,
  • The stamp set Colorful Seasons is a photopolymer set, my favorite type.
  • I love the greetings.
  • The Adirondack chair, leaf skeleton, and snowflake dies are wonderful!

You will be seeing many cards created with this bundle. The one at the top of this post is the first. You can order the supplies for this card by clicking on the images below.

Window Box Birthday Card

Handmade Birthday Card using the Window Box Thinlits Dies

Yesterday I shared a quick Birthday card I created with one of the dies in the Window Box Thinlits Dies collection. You can see that card here if you missed my post. Today I want to share another fairly quick Birthday card using the candles die from that collection of dies. This time I backed the die cut strip with a different design from the Festive Birthday Designer Series Paper. The greeting is from the Balloon Adventures stamp set. Both the Window Box Thinlits and the Ballomn Adventures stamp set are found in the new 2017 Occasions catalog.

Do you have one of these catalogs yet? Would you like to have one totally free to hold in your hands and pour over? It makes really good bedtime reading…wait…maybe it doesn’t because your mind will get filled with all the exciting creations you could make with the products in this catalog. Anyway, contact me if you would like me to send you a catalog. You can order the supplies I used for this card by clicking on the images below to be taken to where they are in my online store. Shopping is just as easy as that! And….for every $50 you spend during Sale-A-Bration, you can choose a FREE item from the Sale-A-Bration brochure! And…don’t forget that when you order $50 or more online, you can check off a box on my Customer Appreciation Tracker. When you have 8 checks, you can order from me $45 worth of product for free. Check this program out here and download your tracking sheet.

Hey Chick!

Wiper card using Hey Chick stamp set

When I first saw the Hey Chick stamp set in the Sale-A-Bration brochure, I knew I had to make a wiper card with the set. This SAB set is absolutely darling and the best part of it is that it is FREE when you purchase $50 in product from me before taxes and shipping.

Now the closed card is cute in and of itself but just see what happens when you pull the ends of the card!

Opened wiper card using Hey, Chick stamp set

Giggle! I just love that floppy-maned chicken popping up to wish you a happy day! There are several online tutorials and videos showing how to make a wiper card. I followed Dawn Olchefsky’s  directions on this video  but made the tag a little longer so more of it would stick up. Wiper cards are fun to make but do take a little fussing to get them right the first time you make one.

The new 2017 Occasions catalog became live Jan 4th and that also was the first day of Sale-A-Bration which runs through March 31st. Sale-A-Bration is the exciting time of year when you can choose one of the FREE items from the Sale-A-Bration brochure for each $50 you purchase in Stampin’ Up! products. Contact me if you would like a copy of the 2017 Occasions catalog and the Sale-A-Bration brochure. I love giving them away for just the agreement that I can periodically give you a call to see how I can help you with your creative needs.

Check out this blog and my facebook page frequently to see samples I’ve created with product from these catalogs.

Clicking on the images below will take you to that product in my online store so you can order them if needed.

Jar of Love Shaker Card

Jar of Love Shaker Card

When the new 2016-2017 Annual Catalog first arrived, I did not think I would buy the Jar of Love/Everyday Jars Thinlits bundle. But my downline, Dina Merchant, helped me see the possibilities of this bundle. Thanks, Dina!

This bundle is perfect for shaker cards and the saying “Throw Kindness Around Like Confetti” inspired me to make this card. I had also purchased the Sprinkles punch at OnStage Live and was happy to use it finally. The Foam Adhesive Strips make shaker cardmaking a snap. Check out all the stamps you get with this Jar of Love stamp set:

Jar of Love stamp set

You can order the supplies I used to make this card by clicking on the images below. They are linked to the item number in my online store.

Have you received your copy of the new 2016-2017 Annual Catalog? If not, contact me! I’d love to have a conversation on how I can give you one totally free.

Moroccan Nights Birthday Card

Moroccan Nights BD card

I recently took of the job of SUDSOL Design Challenge coordinator. SUDSOL is a Yahoo group of Stampin’ Up! demonstrators designed to provide support, information, inspiration, and challenges to demonstrators. I particularly enjoy the group as I have no support from those demonstrators who are in my upline.

This week’s challenge is to create a card using the Moroccan Nights stamp set we were given at OnStage Live. I found very few samples of this set on Pinterest as this is a new set that is in the new 2016-2017 Annual Catalog.

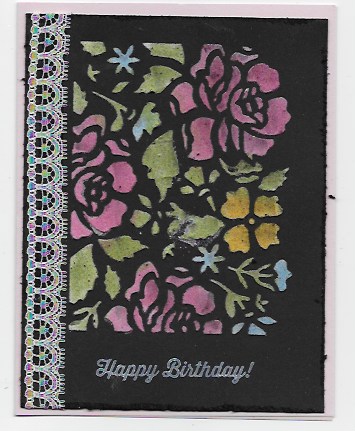
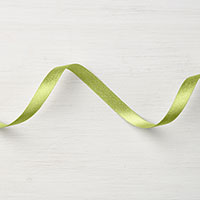
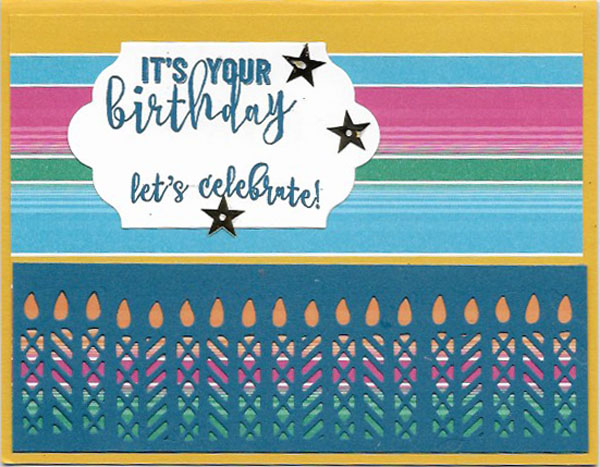
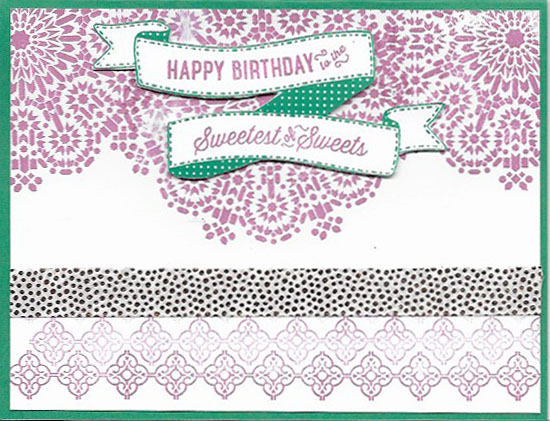
This card was indeed a challenge! I started out with the bottom border in mind. I used a stamp aligner to stamp the border. The first two rows turned out well. The third one…not so great so I put a couple layers of  the copper dotted Affectionately Yours Designer Washi tape over it. Then I had planned to stamp one of the hanging lamps from the stamp set on the left side above the border. However, the greeting really needed something besides white space behind it. I stamped 1/4 of the medallion on each corner. Now the card was beginning to work. But…I got a ghost image from the rubber on one side and had to either start all over or figure out a way to cover the mistake up. That’s when I decided to stamp the medallion in the center as well. The colors used in this card are two of the new In Colors, Emerald Envy and Sweet Sugarplum. I used two new stamp sets as well, Moroccan Nights and Birthday Banners.

I love the way the medallion scallops turned out and will use this idea again on another card. There you have it…the evolution of this card.

There are only two more weeks before we can order from the new catalog. If you would like a free one, contact me! I love giving them away!
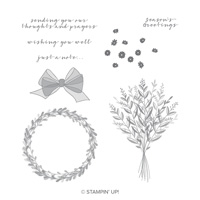
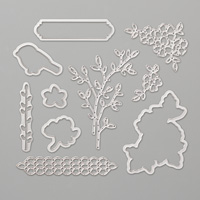
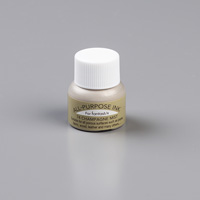
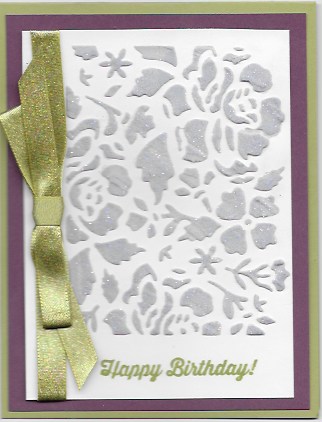
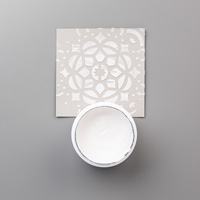
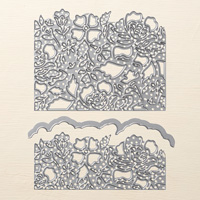
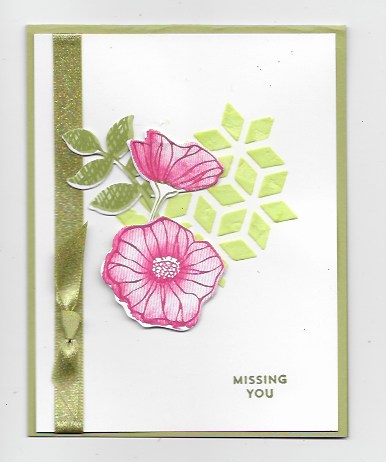
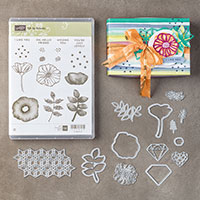
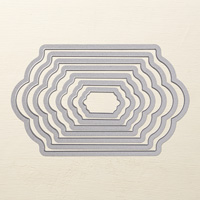
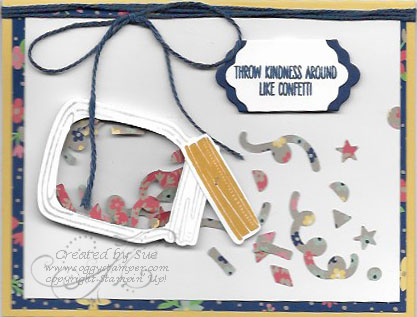
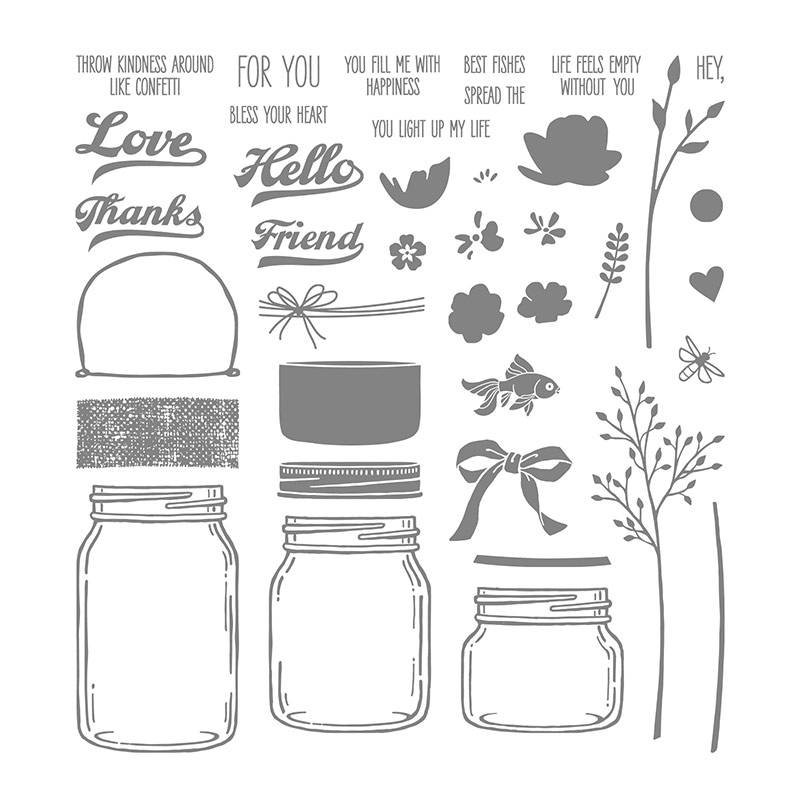
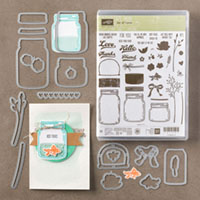
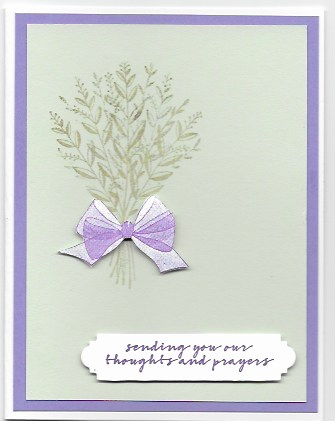
Best Thoughts Four Panel Card

I ordered the hostess stamp set Best Thoughts way last July because I saw a card posted by Joanne Mulligan on Pinterest and wanted to CASE her card. Now almost 9 months later I have finally gotten around to making my card!

handmade greeting card using the Best Thoughts stamp set

This flower reminds me so much of the purple rhododendrons that are now blooming here in Mount Vernon. I watercolored the image with an aqua painter and Blackberry Bliss ink, then added highlights with the gold Wink of Stella. The butterfly was stamped on a separate piece of Whisper White cardstock, watercolored with Blue Lagoon ink, and then painted with clear Wink of Stella. I cut it out and popped it up with a Stampin’ Dimensional. I like this four panel layout with the corners rounded with the Project Life corner rounder and will definitely make this card again. This particular one is going to a friend who just lost her husband.

Click on the images below to order the supplies I used.