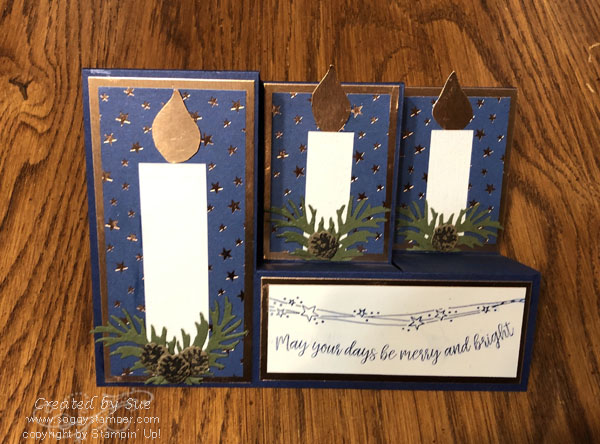
Tag Archives: Christmas Card

Beautiful Oh Christmas Tree Christmas Card

image is of the Beautiful Oh Christmas Tree Christmas Card created with a Twinkling Lights die and a Framed Florets die

This beautiful Oh Christmas Tree Christmas card is so easy to make! I used one of the Twinkling Lights dies and two of the Framed Florets dies to make it.

I love, love, love the Framed Florets die (160623) that cuts out the oval of hearts. This makes such a wonderful frame for the gorgeous tree that I cut out from Evening Evergreen Glimmer paper. I backed this with the Distressed Gold Specialty Paper which is sadly temporarily unavailable. I went to reorder it and the Evening Evergreen Glimmer paper this morning to find out that the gold is out of stock (due to be available week of Jan 9) and the evergreen glimmer paper is sold out! What?!? I’m sorry if you missed out!

The top layer of the card is the beautiful Boughs of Holly designer series paper. I used a greeting from the Hope & Peace stamp set (159773) and cut it out with a die from the Meadow Dies (155852).

Supplies to make Beautiful Oh Christmas Tree Christmas Card

Click on the links to be taken to the item’s location in my online store. Thank you for shopping with me. Once you have the supplies to make this beautiful Oh Christmas Tree card, watch my facebook live and stamp along with me. You can stop the video anytime you need to catch up.

Featuring The Peaceful Place Suite

In this post I am featuring the Peaceful Place Suite (156277). This suite of products includes several unique offerings. First there is the Peaceful Cabin stamp set and coordinating Cabin dies. Then there is the beautiful Peaceful Place Specialty Designer Series Paper. You really have to see this paper to appreciate it because the silver embossing does not show up in the photo in the catalog. The colors of this paper are Smoky Slate, Basic Gray and Black with one side of the dsp having silver embossing. The suite includes Snowy White 12″ x 12″ velvet sheets, Timber 3D Embossing Folder, Subtle Shimmer Sequins, and White 3/8″ Glittered Organdy Ribbon.

Handmade Christmas Card created with the Peaceful Cabin bundle.

This is the first card I created with the Peaceful Cabin bundle. This stamp set is a DistINKtive set so you get wonderful depth to the image with only one stamping. The background is Pool Party cardstock on which I stamped the snowflake stamp with Craft White ink. This ink is slower to dry than the classic Stampin’ Up! inks so I was able to add retired Iridescent Ice embossing powder to the snowflakes for a little sparkle. It’s there, the scanner just can’t pick it up. I have a very good friend who just moved to the mountainous Northern Arizona to a log house they built. This card is for them. I’m sure they will like it.

  • Peaceful Cabin Bundle
  • Basic White Cardstock 8 1/2″ 5 1/2″ scored and folded at 4 1/4″ for card base , 5 1/4″ x 4″ for stamped images, scrap
  • Pool Party Cardstock 5 1/4″ x 4″
  • Mossy Meadow, Soft Suede, Cinnamon Cider, and Craft White inks

Supplies for Daytime Card Featuring Peaceful Place Suite

image is of the Cabin Dies

These are the Cabin Dies. At first I tried to use both the outline and the detail cabin dies together to cut out the cabin. The results were not good! I went on pinterest for ideas of how others had used the dies and realized that the two together were intended to cut a silhouette of the cabin. So I created this card that is like a crisp winter night.

Image is of a Christmas card created with the silhouette dies of Cabin Dies.

One of the lovely designs of the Peaceful Place Specialty Designer Series Papers is this snowflake design. The snowflakes are white and then there are silver foil dots. This time, the scanner was able to pick up the shine. I used the White 3/8″ Glittered Organdy Ribbon as an accent and stamped the greeting from the Sparkle of the Season stamp set in Real Red ink to add a touch of color to the card. I cut the greeting out with one of the Seasonal Labels dies.

Supplies for Nighttime Card Featuring Peaceful Place Suite

  • Basic Gray Cardstock 8 1/2″ x 5 1/2″ scored and folded at 4 1/4″ for card base
  • Peaceful Place Specialty Designer Series Paper 5 1/2″ x 4″ for card #2
  • Basic Black Cardstock 5 1/4″ x 4″
  • Basic White Cardstock 5 1/4″ x 4″ for inside of card, scrap for greeting
  • Real Red Ink
  • White 3/8″ Glittered Organdy Ribbon
  • Click here to be taken to the shopping cart on my online store for the products used in this card. You can remove any products you already have.

Double Box Fancy Fold Card

Handmade Christmas Card using the Double Box fancy fold and Peaceful Place Designer Series Paper

I love fancy folds and this double box fancy fold card is easy and fun to make. The October Paper Pumpkin’ kit had pre-printed cards with this image on both the front and the back of the card. It is such a beautiful image with the snowy evergreen trees and the silver snowflakes that I couldn’t see using the patterned paper for the back of the card. So I cut the cards in half, added card bases from cardstock I had, and made twice the number of cards. That is what is on the front of this card.

However, you can still make this card even if you didn’t get the October Paper Pumpkin’ kit because the Peaceful Place Specialty Designer Series Paper found in the July – December mini catalog has a design just like the card in the kit. The kit was designed to coordinate with the Peaceful Place Suite of products. I love it when Stampin’ Up! designs products this way!

The back of this Double Box fancy fold card is where you can write your message and sign the card.

Photo shows the back of the double box fancy fold card

Supplies Used

  • Christmas to Remember stamp set
  • Real Red Classic Stampin’ Pad
  • Real Red Cardstock 10 1/2″ x 4 1/4″ scored at 1/2″, 1 3/4″, 3 3/4″ and 5″ (bottom box/card base); 5 3/4″ x 3 1/4″ scored at 1/2″, 1 3/4″; scraps for cutting the birds
  • Basic White Cardstock 5 1/4″ x 4″ for back of card, scrap for greeting
  • Silver Foil Sheet 3 3/4″ x 3″
  • Heartwarming Hugs Designer Series Paper, green dotted design – 5 1/4″ x 4″, 1 3/4″ x 4″, 1″ x 4″
  • Peaceful Place Specialty Designer Series Paper, tree pattern or back of tree patterned card from October Paper Pumpkin kit – 3 1/2″ x 2 3/4″
  • Seasonal Labels Dies – long thin label
  • Beautiful Trees Dies – bird die
  • Red Rhinestone Basic Jewels
  • Tear & Tape, Stampin’ Seal, Mini Glue Dots
  • Bone Folder
  • Paper Trimmer
  • Stampin” Cut & Emboss Machine or Mini one
  • Use this link to order these supplies. If you already have some of the supplies, you can delete them from the shopping cart.

This card can also be made in the landscape orientation as in this card using the same supplies.

Handmade Christmas card using the double box fancy fold in the landscape orientation.

Thanks for dropping by today. Grab a cup of coffee or tea and relax while browsing for other projects I have shared on my blog. And…leave a comment so I know you have been here. Thanks!

Candle Triple Side-step Card

Handmade Christmas Card using the Curvy Cgleaming Specialty Designer Series Paperhristmas stamp set and Brightly

I’m very excited to share with you this Candle Triple Side-step card! Last Saturday, I shared another Triple Side-fold Christmas card here and told you the design suggested to me a row of candles. Ta daa! Here is the creation.

I used the same Night of Navy cardstock for the base but changed the dsp to another Brightly Gleaming Specialty Designer Series paper design. This time I used copper foil sheets as a layer under the dsp. The smaller of the Gleaming Ornaments Punch Pack was used to punch out the copper foil and then I hand-cut the shape of the flames. I happened to have a piece of Very Vanilla cardstock that had been embossed with the Subtle embossing folder. That was perfect for the candles.

I cut branches from Mossy Meadow cardstock using the Beautiful Boughs dies. I stamped the little pine cones from the In the Woods stamp set on Soft Suede cardstock using Early Espresso ink. Then I used the little pinecone die from the In The Woods Dies to cut them out. The greeting and swoosh of stars were stamped on Very Vanilla with Night of Navy ink using stamps from the Curvy Christmas stamp set. The Curvy Christmas stamp set is part of the Quite Curvy Variety Bundle special starting November 3.

Supplies for Candle Triple Side-step Card

  • Night of Navy Cardstock – 10″ x 7″
  • Very Vanilla Cardstock – 4″ x 1 1/2″, 6 3/4″ x 2 3/4″ for inside, 1″ x 3″, 2 pieces 2″ x 3/4″
  • Mossy Meadow Cardstock – scrap
  • Soft Suede Cardstock – scrap
  • Copper Foil Sheets – 4 3/4″ x 2 3/8″, 4 1/4 x 1 3/4″, 2 pieces 2 7/8″ x 2 1/8″, scrap
  • Brightly Gleaming Specialty DSP – 2 pieces 2 5/8 ” x 1 7/8″, 2 1/8″ x 4 1/2″
  • Night of Navy and Early Espresso Ink
  • Curvy Christmas stamp set – available Nov 3
  • Winter Woods stamp set – pine cone
  • Beautiful Boughs and In the Woods dies
  • Paper Trimmer
  • Stampin’ Cut Emboss Machine
  • Multipurpose Liquid Glue

You can order the supplies for this card here.

Poinsettia Bay Window Fancy Fold

photo is of Poinsettia Bay Window Fancy Fold card created with the Bay Window Fancy Fold technique and Plush Poinsettia specialty paper

I love this beautiful Poinsettia Bay Window Fancy Fold! If you have been reading my blogs, you have discovered that I love fancy folds. This fold is a really easy one that you will like to make.

I used the Plush Poinsettia Specialty Paper (153486) on the bay window part as it looks like lace curtains to me. It is one of the products in the Poinsettia Place Suite (155109). Another product is the Poinsettia dies (153522) which I used to cut out and emboss the flowers from Red Foils Sheets (153510). The greeting is from the Peaceful Boughs stamp set (150541) found in the 2020-2021 Annual catalog.

Supplies Used for Poinsettia Bay Window Fancy Fold:

  • Shaded Spruce cardstock – 4 1/4″ x 11″ scored parallel to the short side at 3/8″, 1-7/8″, 3-5/8″, 5-1/8″, and 5-1/2″
  • Whisper White cardstock – scrap for greeting, 4″ X 3-3/8″ for inside
  • Plush Poinsettia Specialty Paper – 2 pieces 4-1/8″ x 1-3/8″, 4-1/8″ x 1-5/8″
  • Red Foil Sheet – scraps for poinsettias
  • Poinsettia Dies – smallest and next smallest flowers
  • Tear & Tape, Stampin’ Seal

Learn how to make this card by joining me on my Facebook Live tomorrow at 3 pm Pacific time. You’ll find me on the Soggy Stamper Facebook page. I’ll be demonstrating this technique and a second sample using other supplies. After I’m through with the live presentation, you can watch the video on the Soggy Stamper YouTube channel. While you are at my channel, click the subscribe button to receive notification when a new video is uploaded. I’d love to have you leave a comment here on this post and on the video when you watch it so I know you have been visiting.

Easy-Peasy Christmastime Is Here Card

Christmas Card created with Christmastime Is Here Specialty Designer Series Paper

This easy-peasy Christmastime Is Here card was created in no time. When you use the beautiful Christmastime Is Here Specialty Designer Series paper (152154), the paper is the star of the card! Notice the gold embossed splatters and edges of the rose on this designer series paper. I love, love, love it!

Close up of the Christmastime Is Here Specialty Designer Series Paper showing the gold embossing

The card base is an 11″ x 4 1/4″ piece of Mossy Meadow cardstock which I scored and folded at 5 1/2″. I trimmed down a piece of the large rose print to 4″ x 4″ and added a 4″ x 1″ piece of the gold-embossed Cherry Cobbler design at the bottom. Since the dsp is so beautiful, all this card needed was a greeting.

Close up of the greeting part of Easy-peasy Christmastime Is Here Card

The greeting comes from the Bells Are Ringing stamp set (150476) I stamped it onto Whisper White cardstock with Mossy Meadow ink. Then I cut it out with one of the Stitched Labels Framelits dies (146828). I backed the label with a piece of Mossy Meadow cardstock to show off the pretty ends of the label.

Check out all the products that are part of the beautiful Christmastime Is Here Suite in my online store. These products are only available during November and are on an ‘as long as quantity lasts’ basis. You must order early, like today to be sure you will get the supplies needed to make this Easy-Peasy Christmastime Is Here card for yourself. I will be sharing more projects using this suite so come visit my blog often.

First Christmas Gleaming Card

Handmade Christmas card using Christmas Gleaming Bundle and Brightly Gleaming dsp

This is my first Christmas Gleaming card of the season. Demonstrators are allowed to preorder items in August from the upcoming 2019 Holiday catalog. You could too if you were to join me in being a demonstrator. Contact me, sue@soggystamper.com, or click here for more information.

I created this first Christmas Gleaming card using the Christmas Gleaming bundle which is a stamp set and two ornament punches. Yes two! I punched the ornaments from three patterns of the Brightly Gleaming Specialty Designer Series Paper. This paper is so gorgeous! One side of papers has copper foil accents. I stamped the tops of the ornaments on copper foil sheet scraps and punched them out. Then I glued them to the tops of the ornaments.

The base of this card is an 8 1/2″ x 5 1/2″ piece of Pretty Peacock cardstock. I used the edge trim from the Magnolia Memory Dies to cut and emboss the bottom edge of a 5 1/4″ x 4″ piece of Copper Foil Sheets and adhered it to the card base. I used the same die on a 5″ x 3 3/4″ piece of Very Vanilla cardstock. Then I embossed it with the Tufted embossing folder.

Closeup view of First Christmas Gleaming card

To complete this Christmas Gleaming card, I adhered the ornaments with Stampin’ Dimensionals. Then I stamped the greeting on Very Vanilla cardstock with Mossy Meadow ink and cut it out by hand. I popped this greeting up with Stampin’ Dimensionals as well. Since the card base is dark, I added a 5 1/4″ x 4″ piece of Very Vanilla to the inside.

Are you eager to see what other exciting things are in this Holiday catalog? Just email me your address and phone number so we can discuss how you can get one for free.