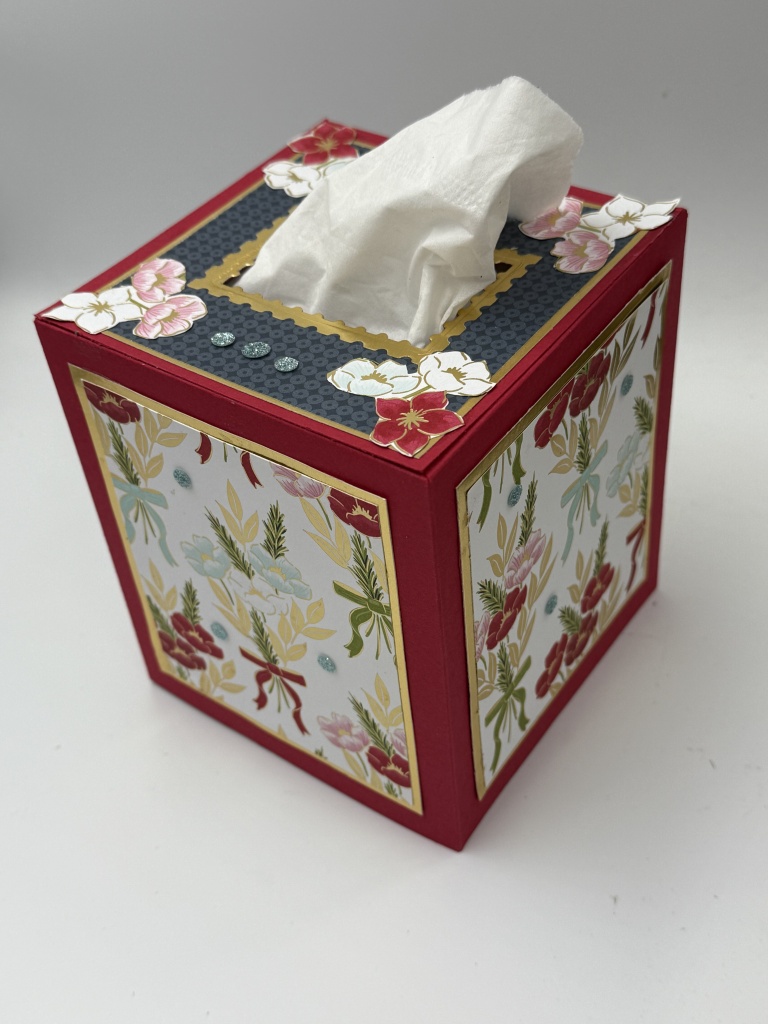
This beautiful Christmas tissue box cover changes a drab box of tissues into a beautiful work of art. And it is easy to make. The base of the cover is Real Red cardstock adorned with panels of Gold Foil and Traditions of Christmas Specialty Designer Series Paper.
Supplies Needed for This Beautiful Christmas Tissue Box Cover
Real Red Cardstock (102482) – 2 pieces 5 3/4″ x 9 1/2″ each scored at 1/2″ on one long side and 1/2″ on one end, 4 1/2″ x 4 1/2″ for top
Gold Foil Sheets (132622) – 4 pieces 3 3/4″ x 4 1/2″, one piece 4 1/8″ x 4 1/8″
The Sweet Days of Autumn Designer Series Paper can not only be purchased by itself but also as a Sweet Days of Autumn Bundle which includes a coordinating sticker sheet.
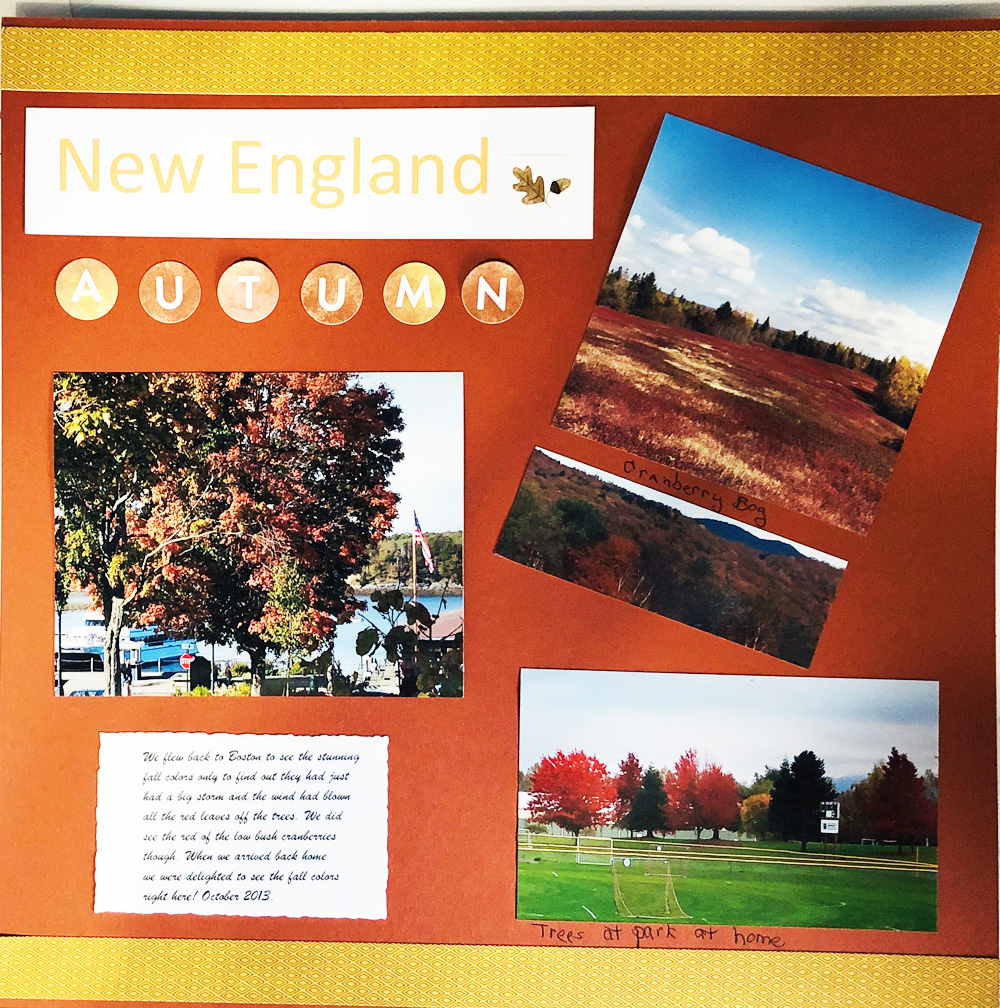
This Sweet Days of Autumn bundle is perfect for scrapbooking as it includes four double-sided sheets each of three combinations. There is one combination of the trees on one side and darling forest animals on the other. (Too bad the reverse of each pattern wasn’t a neutral pattern.) The stickers quickly add details to a scrapbook page.
One year we flew to Boston from Seattle to view the famous fall colors in New England. Unfortunately the day we flew in, there was a huge storm with lots of wind and all the red leaves blew off the trees. What a disappointment! However the low bush cranberry fields were still in glorious reds. I used the stickers on this simple page of some of the photos taken on this trip. I computer generated the ‘New England’ and my journaling.
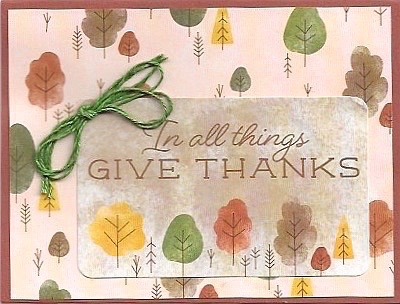
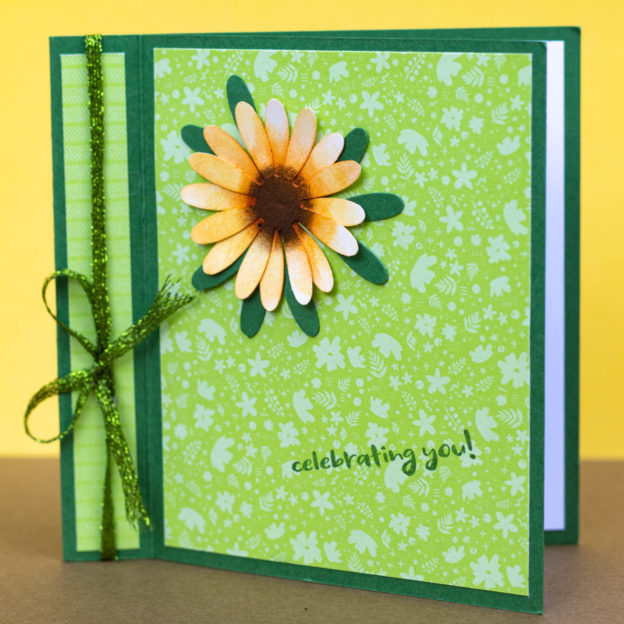
However, the Sweet Days of Autumn bundle is useful for quick greeting cards. I made this card in about 5 minutes and I think you will be able to as well.
SUPPLIES USED
Copper Clay Cardstock [CS] (161721) 8 1/2″ x 5 1/2″ scored and folded at 4 1/4″
Basic Beige Cardstock [CS] (164511) 5 1/4″ x 4″ for inside of card
Sweet Days of Autumn Designer Series Paper [DSP] (166498) 5 1/4″ x 4″
Natural Tones Linen Thread (164071) about 36″
Sticker from Sweet Days of Autumn coordinating sticker sheet
Stampin’ Seal (152813)
Mini Glue Dots (103683)
INSTRUCTIONS
Fold Copper Clay CS in half for card base.
Adhere the DSP to card front with Stampin’ Seal
Apply the label from the sticker sheet
Fold the linen thread into thirds and tie a bow.
Use a mini glue dot to adhere to bow to the card front.
Stamp a greeting on the Basic White cardstock if desired and adhere to inside of card.
For your convenience, I have a shopping cart ready with these supplies in my online store. Click here to access the shopping cart. Thank you for your business.
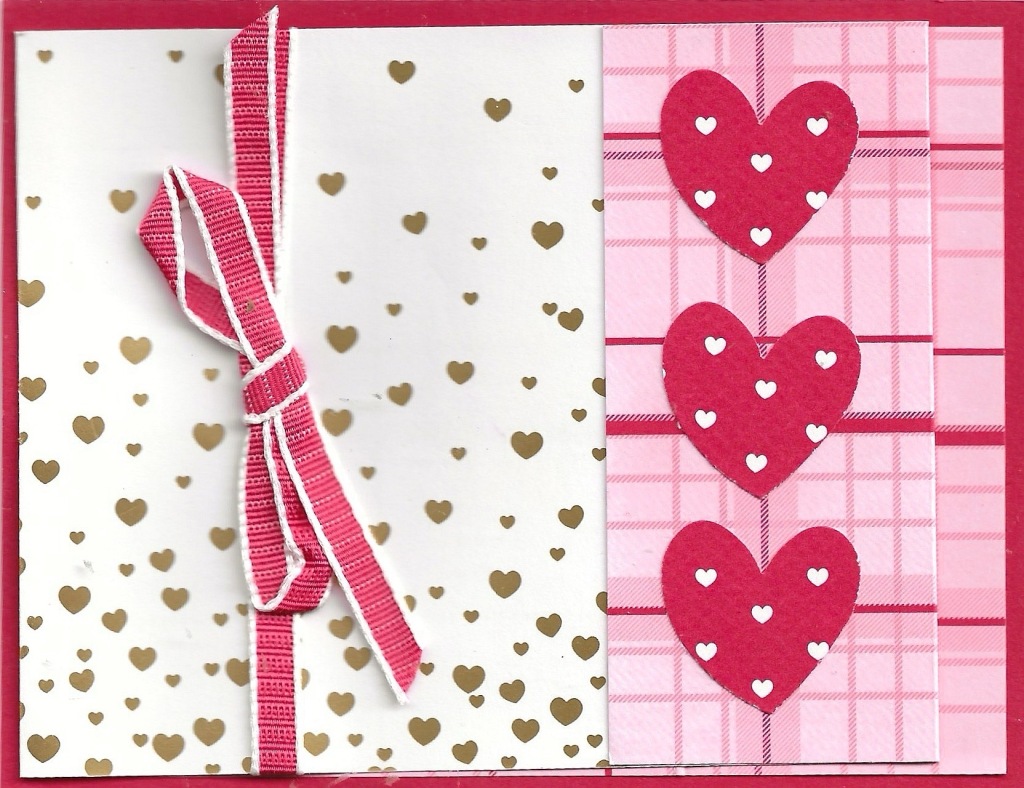
The 2024 Sale-a-bration brochure has five different beautiful designer series papers for free and the question is how to best show off dsp. Both sides are so beautiful and it is a challenge sometines to choose which one to use. This easy fun fold card shows off both sides of any designer series paper.
SUPPLIES for How to Best Show Off DSP
Bee My Valentine Bundle
Memento Ink
Real Red cardstock 5 1/12″ x 4 1/4″ – card base
Basic White Cardstock 4″ x 3 3/4″
Most Adored Specialty Designer Series Paper 12″ x 4″
Sweet Sorbet 1/4″ Bordered Ribbon
Stampin’ Seal
Paper Trimmer
For your convenience, click here to go to a shopping cart in my online store filled with the above items. Any items you already have can be deleted.
Instructions for How to Best Show Off DSP
Score the Most Adored Specialty Designer Series Paper at 5 1/4″ and 10″. Make Valley folds at both score lines.
Adhere the 5 1/4 x 4″ section to the card base with Seal.
Secure the folded back flap to card front with Seal.
Tie a length of ribbon around the card front.
Punch out three hearts using the Bee Builder Punch and add to the folded back flap.
Stamp Happy Valentine’s Day on the Basic White cardstock and adhere to inside of card.
Now that you have created this card using your choice of dsp, share it with me. I’d love to see what you have made!
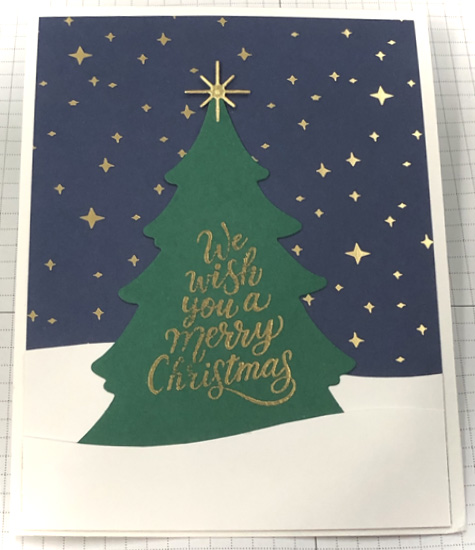
It’s a snap to make this easy Merriest Trees Christmas card! A total beginner stamper had no trouble making this card in class last week. We used the Merriest Trees bundle (162048) and a piece of beautiful Shining Brightly Specialty Designer Series Paper (162378). The greeting was heat embossed with gold embossing powder. Heat embossing is such a magical technique that still enchants me after at least 45 years.
Supplies Used for Easy Merriest Trees Christmas Card
Stamp Set – Merriest Trees
Paper including cutting measurements – Basic White Cardstock 11″ x 4 1/4″ scored and folded at 5 1/2″, 4″ x 2 1/2″; Shaded Spruce Cardstock 5″ x 3 3/4″; Shining Brightly Specialty Designer Series Paper – Night of Navy with stars 5 1/4″ x 4″; Gold Foil Sheet scrap
Ink – Versamark
Accessories – Merriest Trees Dies, Adhesive Sheets, Paper Trimmer, Paper Snips, Stampin’ Seal, Stampin’ Cut & Emboss Machine
Click here to be taken to a shopping cart in my online store with all these supplies already pulled for you. You can delete any you might already have.
Directions
Use Stampin’ Seal to apply the designer series paper to the folded Basic White card base.
Rub the Shaded Spruce cardstock with the embossing buddy and stamp the greeting with versamark. Apply gold embossing powder, tap off excess and heat emboss.
Cut the greeting out with the largest tree die.
Use the paper snips to cut the 2 1/2″ x 4″ Basic White cardstock approximately in half with a snowdrift type curve. Turn one piece around so they overlap.
Use seal to stick the back layer to the card front.
Adhere the front layer with seal only on the sides and bottom of the piece. The top should be not sticky.
Apply a little seal on the back of the tree and then slip it between the Basic White layers.
Cover the back of the gold foil sheet scrap with adhesive sheet and cut one of the stars from it. Put it on the top of the tree.
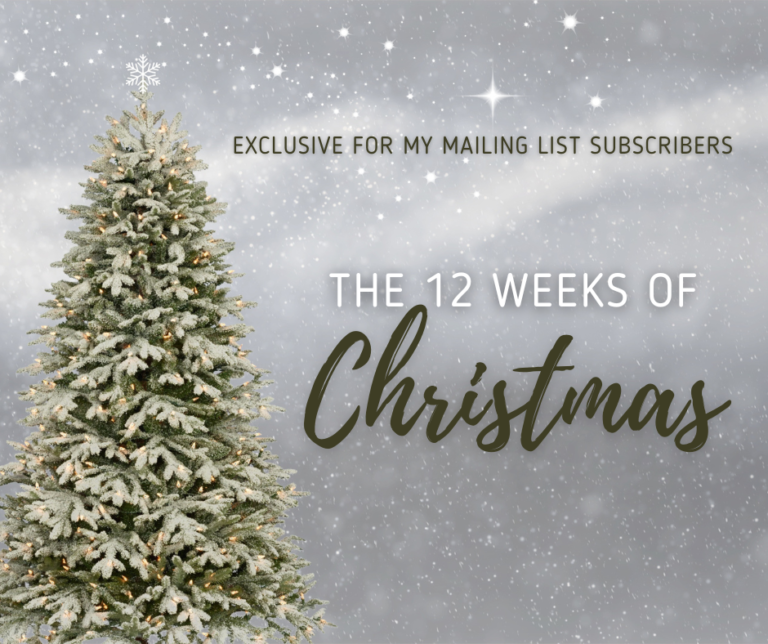
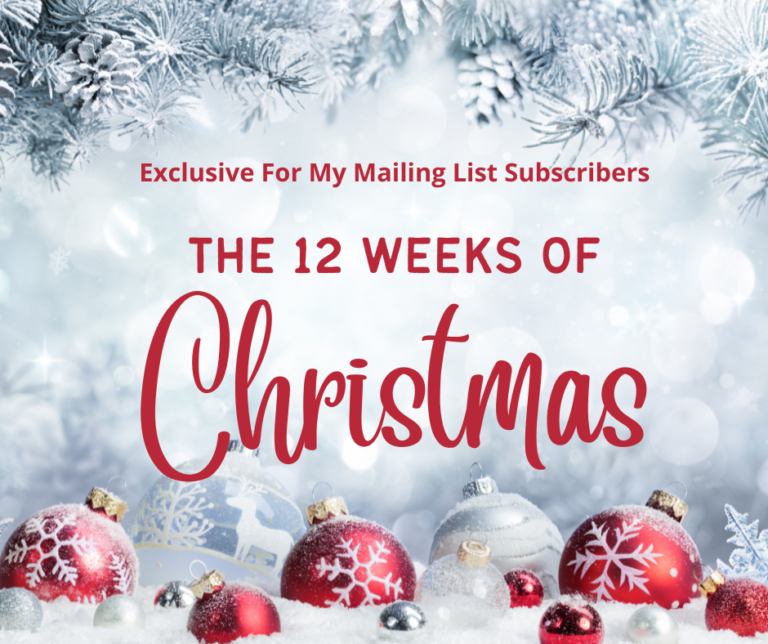
It’s just 4 hours to launch of my 12 Weeks of Christmas gift to my mailing list subscribers. Each Wednesday for the next 12 weeks I will send them a tutorial for a project that is exclusive for my mailing list subscribers. Today is the launch at 1 pm Pacific time and this first project is a beautiful Christmas card! You won’t want to miss this tutorial. Subscribe now! Here is the link.
Want a sneak peak? Here you go!
Want to see more of this project? Then subscribe by 1 pm. You will be happy you did. Each week not only will I be emailing a Christmas tutorial on Wednesdays but I also send my Soggy Stamper Newsletter on the first Tuesday of the month…usually… and a shorter email the other Tuesdays. You get fresh ideas, notification of my Soggy Stamper events and Stampin’ Up! events and other stamping related news.
Remember it is 4 hours to launch so get on my mailing list now! Only subscribers will receive these emails.
It’s 24 hours to the exciting launch of my 12 Weeks of Christmas gift! This is a weekly gift of a tutorial for a Christmas project that is exclusive to my mailing list. Each week on Wednesday I will email my subscribers a special tutorial of a Christmas project. The first 5 weeks will be Christmas cards. Next you will receive 3 weeks of gifts to make and give. Now that the cards are done and the gifts made, you will need tags and gift wrap ideas. The last three weeks will be tutorials for those things. I have enjoyed selecting these projects for you and know that you will have fun making them.
My gift of my 12 Weeks of Christmas will make your Christmas planning easier as it will eliminate your need to search for ideas during this busy season. But…you have to be a subscriber. There is just 24 hours to the exciting launch and you won’t want to miss this first tutorial. It’s stunning yet quick to make. Subscribe now. Here is the link.
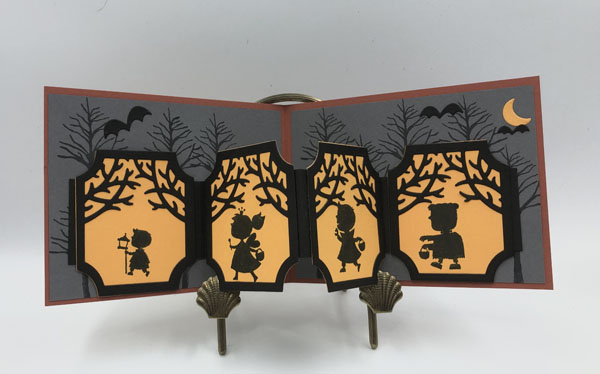
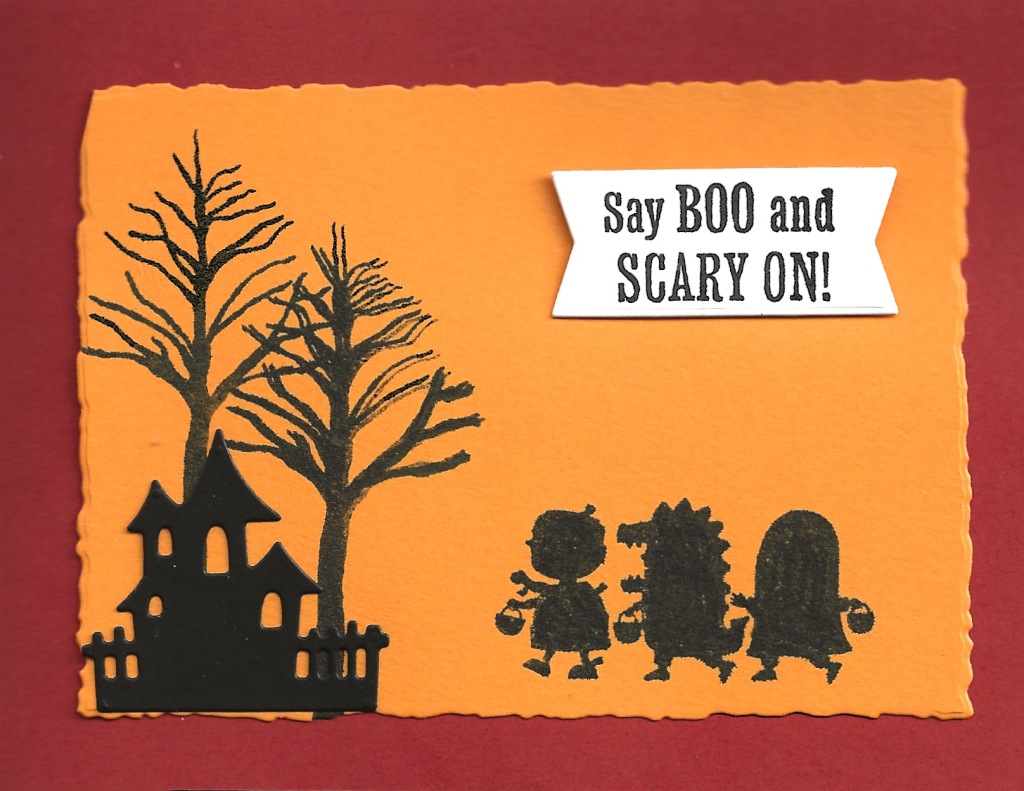
I am delighted to share this Scary Cute W Fold card with you. My Bundle of the Month is the Scary Cute Bundle (159852). When you purchase this bundle from me during September, I will send you a free bundle of 5 tutorials to make cards and a treat holder using this bundle. I shared another card using this Scary Cute bundle in this post.
While the card front is cute, look at the inside! This is where the cuteness explodes.
Imagine the kids out Trick-0r-Treating on a dark night with the light of street lights lighting their way. Here are the supplies I used to make this darling card.
Supplies Used
Scary Cute Bundle (159852)
Beauty of Friendship stamp set (154983)
Deckled Rectangle Dies (159173)
Cajun Craze Cardstock (119684) 11″ x 4 1/4″ scored and folded at 5 1/2″
Basic Gray Cardstock (121044) 2 – 5 1/4″ x 4″
Mango Melody Cardstock (146989) 8 1/2″ x 5 1/2″, 5″ x 4″
Basic Black Cardstock (121045) 8 1/2″ x 5 1/2″; 11″ x 1 3/4″ scored at 2 3/4″, 5 1/2″ and 8 1/4″; scraps
Basic White Cardstock (159276) Scrap
Tuxedo Black Memento Stamp Pad (132708)
Multipurpose Liquid Glue (110755)
Stampin’ Seal (152813)
Stampin’ Cut & Emboss Machine (149653)
These items are in a shopping cart for your convenience. You can delete items you already have from the cart.
Once you have the supplies ready, watch this video of my Friday Facebook Live and stamp long with me to make this Scary Cute W Fold Halloween Card.
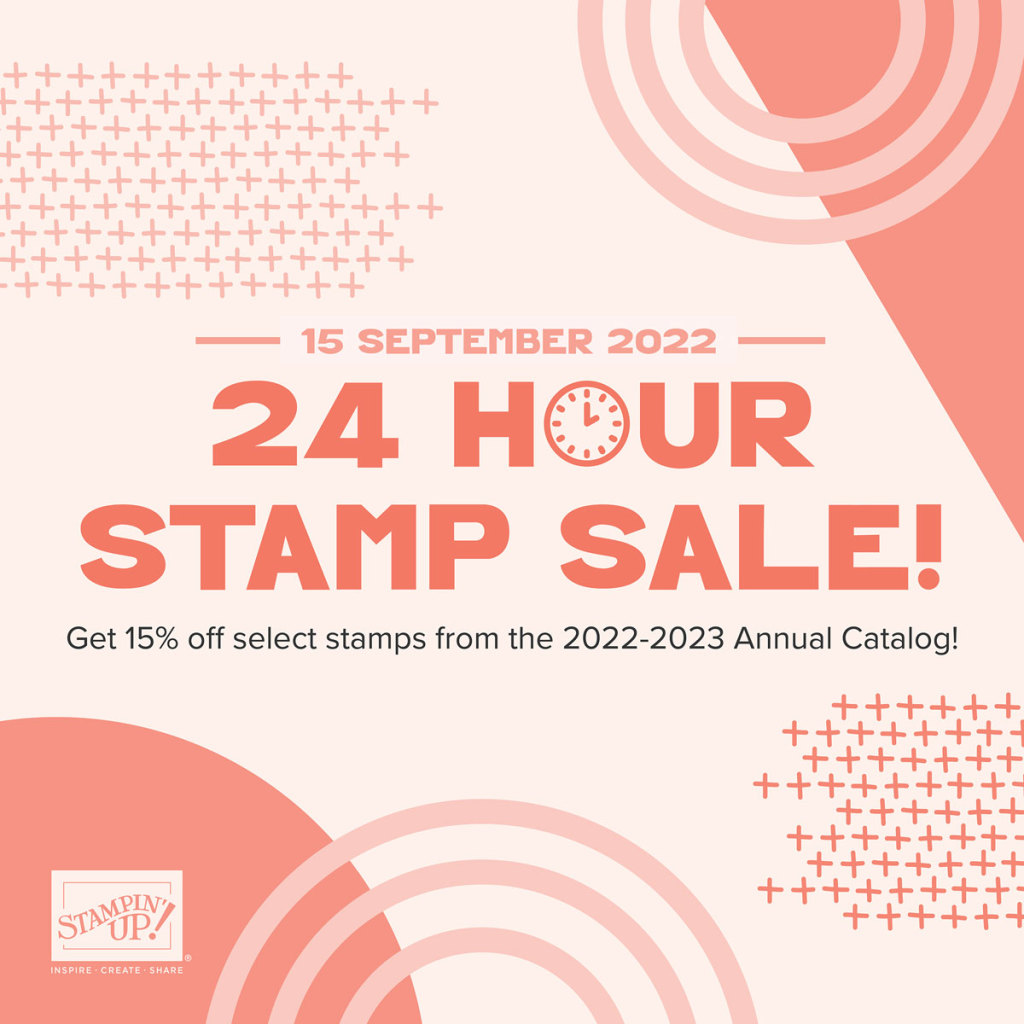
Don’t miss this sale! This coming Thursday, September 15 for just 24 hours almost all stamps in the 2022-2023 Annual Catalog will be 15% off. This sale occurs just once a year and I don’t want you to miss it. I’m sure you have stamps you would like to buy but just haven’t ordered yet. Thursday is THE day to get them at a discount. Get out your wish list and have it ready. Then on Thursday place your order in my online store or email it to me and I’ll place it for you.
While you are at it, check out the new Weekly Deals that will be posted on Thursday and add some of them to your order. You can easily find them here.
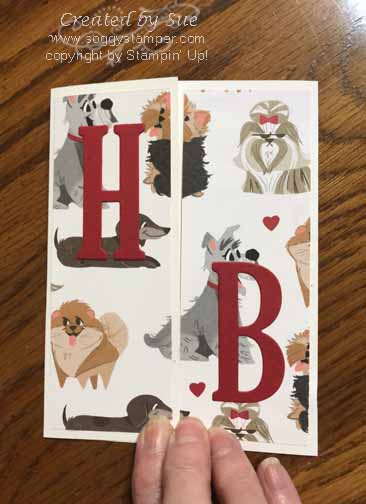
I’m excited to share with you this Hot Dog Floating Gatefold Card today! Our granddaughter was just given two long-haired mini dachshunds for her birthday and I knew this would be the perfect card for her. We also share our home with a couple of very spoiled mini dachshunds so when the Hot Dog stamp set became available in the Stampin’ Up! January to June mini catalog, I jumped on buying it.
I used the following materials to make this Hot Dog Floating Gatefold Card
Stamp set – Hot Dog
Inks – Memento, Real Red, Lt Cinnamon Cider Blend, Lt Basic Black Blend
Basic White Cardstock – 8 1/5″ x 5 1/2″ scored at 2 1/8 ” on both ends for card base, scraps of Basic White, and two strips 3″ x 1/4″ scored at 1/4″, 1 7/8″ and 2 3/8″
Real Red Cardstock – scrap
Playful Pets Designer Series Paper – 5″ x 3 3/4″, 2 pieces 5 1/4″ x 17/8″
Accessories – Stitched So Sweetly Dies, Retired Large Letters Framelits Dies, Stampin’ Cut & Emboss Machine, Multipurpose Liquid Glue, Stampin’ Seal
To Make Card
fold card base on score lines. Then adhere dsp to card base.
cut H and B from Real Red cardstock and adhere to front of card
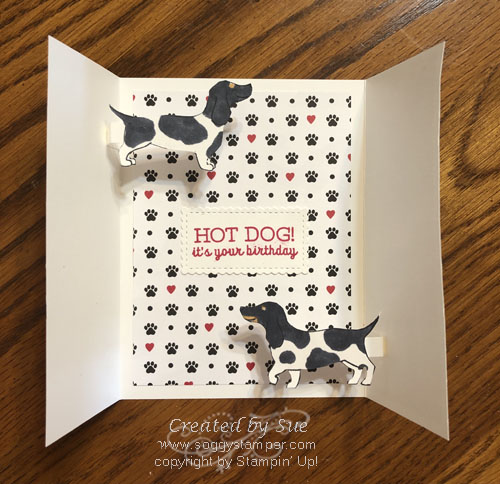
stamp greeting with Real Red ink on white scrap. Cut out with a Stitched So Sweetly rectangle die. Adhere to inside center of card.
stamp the dogs on Basic White cardstock scraps and color with Stampin’ Blends. Fussy-cut them out.
Bend score lines on narrow strips of cardstock into a C shape. Adhere the 5/8″ end inside near bottom of right card front near the fold. Glue the dog to the strip being sure it doesn’t show below the closed card. Apply glue just to 1/4″ section and fold the strip back under the dog. Close card and press on the 1/4″ tab. Open card to be sure only the 1/4″ tab is glued down.
Repeat this process in the upper left side of the card gluing the 5/8″ section to the inside of the left card front.
To order the supplies used in this card just click here. I appreciate your business.
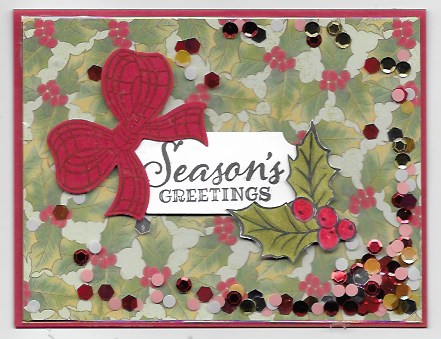
One of the demonstrators presenting at OnStage@home this year shared a easy and quick shaker card. It is so easy that I want to share the technique with you.
To make this easy and quick shaker card you need
Poinsettia Petals stamp set – Merry Christmas greeting
Gift Wrapped stamp set – plaid bow
Christmas Gleaming stamp set – holly cluster
Real Red cardstock 8 1/2″ x 5 1/2″ scored at 4 1/4″ and folded for card base, scrap
Whisper White cardstock scrap
Poinsettia Place designer series paper – holly design 5 1/4″ x 4″
Inks – Memento, Cherry Cobbler, Stampin’ Blends – Old Olive, Mossy Meadow, Real Red, and Cherry Cobbler
Click on this link to add these products to your shopping cart.Check out my Facebook Live presentation of how to make this card.
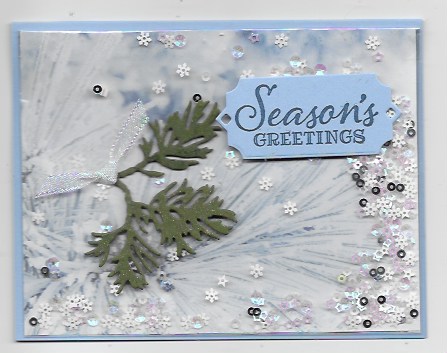
This technique is so versatile that you can create the card to fit any occasion, wedding, birthday, Thinking of You, etc. All you have to do is change out the designer series paper design and add coordinating images/embellishments to the front of the card. Here is another sample I have made with this technique. In this sample I used Feels Like Frost Specialty Designer Series Paper (153512), Snowflake Sequins (150443), Peaceful Boughs stamp set (150541) and Beautiful Boughs Dies (150661). You can add these supplies to your shopping cart here.
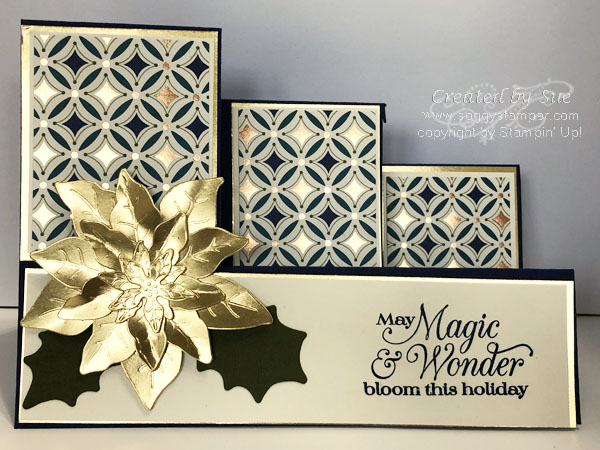
Very Vanilla Cardstock – 1 piece 2 3/4″ x 2 1/4″, 2 pieces 2 3/4″ x 2″, 1 piece 6 3/4″ x1 3/4″, 1 piece 6 3/4″ x 2 3/4″ for inside
Mossy Meadow – scrap for leaves
Gold Foil Sheets – 2 7/8″ x 2 3/8″, 2 pieces 2 7/8″ x 2 1/8″, 1 piece 6 7/8″ x 1 7/8″, 1 piece 6″ x 5″ for poinsettia petals
Brightly Gleaming DSP – 1 piece 2 5/8″ x 2 1/8″, 2 pieces 2 5/8″ x 1 7/8″
Poinsettia Petals Bundle
Stampin’ Trimmer
Stampin’ Cut Emboss Machine
Multipurpose Liquid Glue
To order these supplies to make this card, click here. I want to thank Karen Eagan of Crafty Karen Designs for her great tutorial I used to make this card. You can find my tutorialhere and my Facebook Live video of this card here.
The design of this card makes me think of Christmas candles. I’m mentally designing another card with this fold. Come back in the next couple of days to see what evolves. While Karen’s card was the inspiration for this card, my next card will be an inspiration from God.
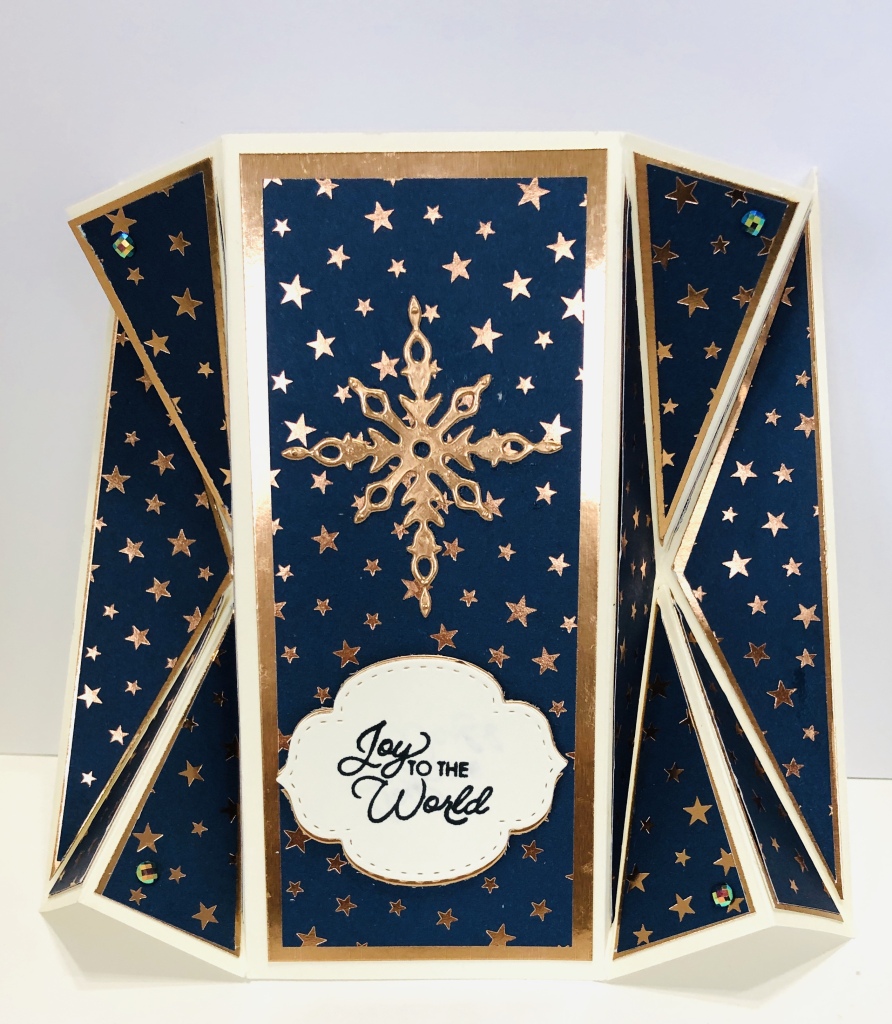
I love this stunning double fan-fold star card. If you have been following my posts you may have learned that I love fancy folds. Here and here are a couple other fancy fold cards I have shared. I thank Lavonne Schwendeman for sharing a template with the measurements and scoring directions on one of our facebook groups. This card can stand by itself and folds up to fit into a standard A2 envelope for mailing. I did a Facebook live demonstration of how to make this card yesterday and am sharing that video today with you. First, though, here are the supplies, cutting dimensions and scoring directions I used.
Supplies for the Double Fan Fold Star Card
Stamp set – Itty Bitty Christmas
Ink – Memento
Very Vanilla Cardstock 7 ½” x 5 ½” scored at 1¼”, 2½”, 5”, 6¼”. Then diagonally from top left corner to bottom of 2½” score and top of 2½” score to bottom left corner. Repeat with other end, scrap
Brightly Gleaming Specialty dsp – Night of Navy with copper stars 5” x 2”, 2 pieces 4¾” x 2”
Copper Foil Sheets – 5¼” x 2¼”, 2 pieces 5” x 2¼”, scrap
Accessories – Stitched So Sweetly dies, Starlight Thinlits Dies (retired), Blue Adhesive-backed Gems, Stampin’ Seal, Multipurpose Liquid Glue, Stampin’ Dimensionals
To get the supplies I used to make this stunning double fan-fold star card, click here.
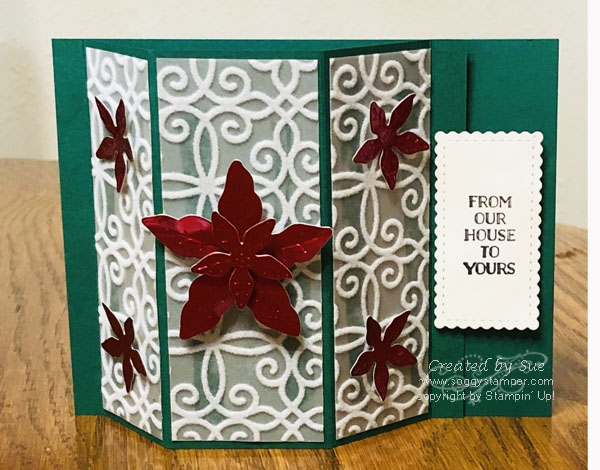
I love this beautiful Poinsettia Bay Window Fancy Fold! If you have been reading my blogs, you have discovered that I love fancy folds. This fold is a really easy one that you will like to make.
I used the Plush Poinsettia Specialty Paper (153486) on the bay window part as it looks like lace curtains to me. It is one of the products in the Poinsettia Place Suite (155109). Another product is the Poinsettia dies (153522) which I used to cut out and emboss the flowers from Red Foils Sheets (153510). The greeting is from the Peaceful Boughs stamp set (150541) found in the 2020-2021 Annual catalog.
Supplies Used for Poinsettia Bay Window Fancy Fold:
Shaded Spruce cardstock – 4 1/4″ x 11″ scored parallel to the short side at 3/8″, 1-7/8″, 3-5/8″, 5-1/8″, and 5-1/2″
Whisper White cardstock – scrap for greeting, 4″ X 3-3/8″ for inside
Plush Poinsettia Specialty Paper – 2 pieces 4-1/8″ x 1-3/8″, 4-1/8″ x 1-5/8″
Red Foil Sheet – scraps for poinsettias
Poinsettia Dies – smallest and next smallest flowers
Tear & Tape, Stampin’ Seal
Learn how to make this card by joining me on my Facebook Live tomorrow at 3 pm Pacific time. You’ll find me on the Soggy Stamper Facebook page. I’ll be demonstrating this technique and a second sample using other supplies. After I’m through with the live presentation, you can watch the video on the Soggy Stamper YouTube channel. While you are at my channel, click the subscribe button to receive notification when a new video is uploaded. I’d love to have you leave a comment here on this post and on the video when you watch it so I know you have been visiting.
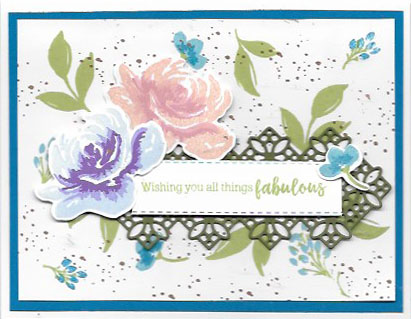
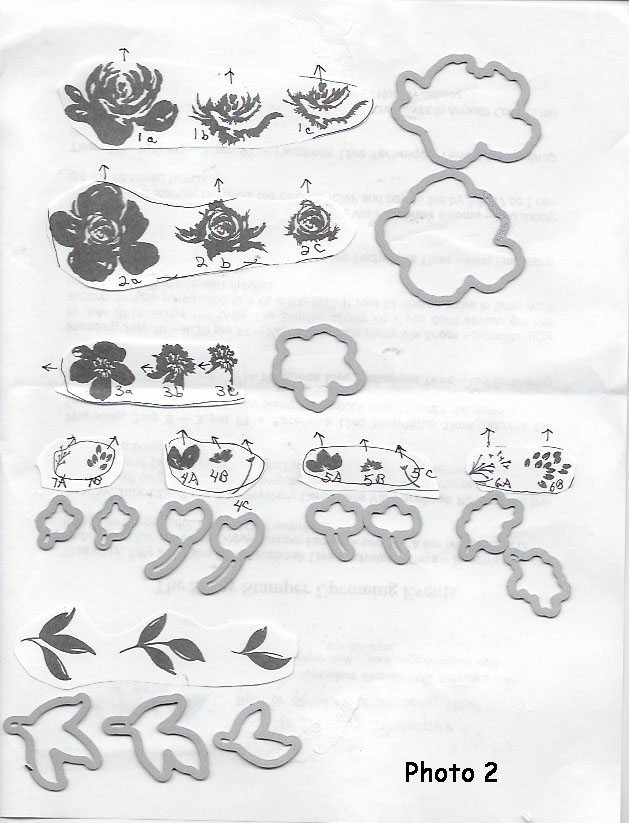
The stunning All Things Fabulous Bundle (154112) enables you to make beautiful floral cards and decorate 3D items. This bundle includes a set of 26 photopolymer stamps and is a 3-step stamp set. This gives you the ability to create a wonderful sense of depth to the flowers. With so many stamps, it is easy to get confused as to how to use them all. Let me share some things I have discovered to make it easier for you.
The stamp case insert has the three stamps for each flower
grouped together in a line. That is helpful. The clear plastic sheet the stamps
stick to not only has the stamped image of the stamp but also has the three
stamps to use labelled in very tiny, almost microscopic print along with an
arrow showing the direction the stamp faces to line up with each stamp of the
series. Honestly, I did not see the tiny print even after someone said it was
there. I thought the labelling was missing on my set. Finally, I was able to
see it when I got the light to reflect just right off the plastic sheet. I have
created a cheat sheet for you with the labeling and direction arrows
hand-written so even aging eyes like mine can see them. I also found
positioning the dies a little challenging at first so I have included the die
to use next to each set of stamps. I hope this cheat sheet will help you as
much as it has helped me. I keep it close by so I can see the positioning of
each stamp. See photo 2.
On a side note, I though 4a and 5a were leaves with 4b and
5b being flowers to nest with the leaves. After several tries, it dawned on me
that 4a and 4b were a two-step flower with 4c being the stem. The same is true
for 5a, 5b, and 5c.
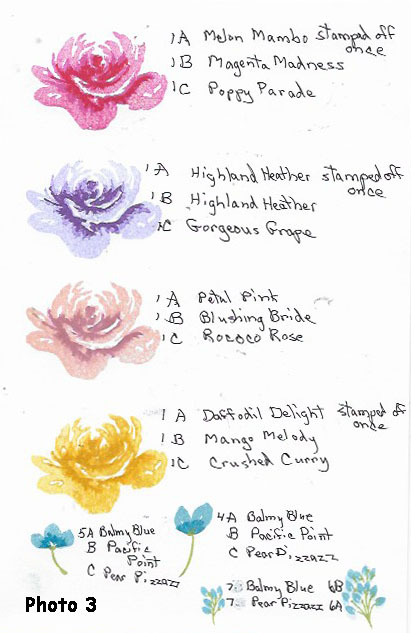
In 3-step stamping, ink the stamp with the least detail with
the lightest color stamp, the next greater detail with the next darker ink, and
the stamp with the greatest detail with the darkest ink. Sometimes it helps to
stamp off once one of the colors to create a nice gradation of depth of color.
Use the lines and spaces on each successive stamp in a series to guide in
placement of each stamp. Have fun experimenting with different color
combinations while practicing placement of the stamps. See photo 3 with some of
the combinations I really like.
TO MAKE THE STUNNING ALL THINGS FABULOUS BUNDLE CARD
Supplies: Stamp sets – All Things Fabulous, Forever Fern (speckles stamp)
Inks – Combo 1 for rose – Petal Pink, Blushing Bride, Rococo Rose Combo 2 for rose – Purple Posy (retired), Highland Heather*, Gorgeous Grape Combo for flower 5 – Balmy Blue, Pacific Point Pear Pizzazz, Cinnamon Cider *since Purple Posy ink is retired, use Highland Heather ink stamped off once for first layer
Cardstock – Whisper White 8 ½” x 5 ½” scored and folded for card base, 5” x 3 ¾”, scraps for large flowers and label; Pacific Point 5 ¼” x 4”, Mossy Meadow 5” x 2”
Instructions: 1. Adhere Pacific Point CS to card base with Stampin’ Seal 2. Randomly stamp small flowers and leaves on 5” x 3 ¾” Whisper White piece. Hint – Place all three leaf stamps on D acrylic block and only have to stamp it twice on this layer. 3. Fill in blank spaces with the speckles stamp using Cinnamon Cider ink. Then adhere this layer to card front. 4. Cut the Mossy Meadow CS out with the beautiful lattice die. Adhere it to the card front with a bit of Stampin’ Seal. 5. Stamp the greeting on Whisper White CS with Pear Pizzazz ink. 6.Use the next to smallest skinny rectangle to cut out the greeting. However, the label will be too wide and cover too much of the Mossy Meadow diecut. Make the label thinner by placing the die on the CS so that one edge of the die is close to the stamped image and run through the die-cutting machine. Place the resulting label back in the die matching the stitching on the ends and cutting off part of the width of the label. 7. Adhere the label to card front with Stampin’ Dimensionals. 8. Stamp the rose series of stamps that are open at the top on scraps of Whisper White CS once with the Combo 1 of inks and once with the Combo 2. Cut out with the matching die. Add to the card front with Stampin’ Dimensionals. 9. Stamp the flower 5 series with Balmy Blue and Pacific Point inks and cut out with die. Add to card front by corner of label with Stampin’ Mini Dimensional.
Order this stunning All Things Fabulous Bundle and follow along as I share different samples using this bundle in the next few blog posts. I will also be featuring it on this coming Friday’s FaceBook Live at 3 pm on my Soggy Stamper Facebook page.
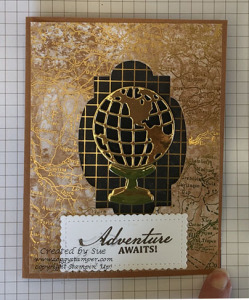
This Stunning World of Good Grad Card is made with the wonderful World of Good Suite of products. This suite is shown on pgs 24 – 26 in the 2020-202 Annual Catalog and includes the Beautiful World stamp and dies bundle (154091), brass embossed World of Good Specialty Designer Series Paper (152491), Faux Suede Trim (152472), World of Good Memories & More Card Pack (153600), Old World Paper 3D Embossing Folder (153200), Antique Corners & Slides (152471) , and Brass Foil Sheets (153057). You can order all of this with just one number (154140).
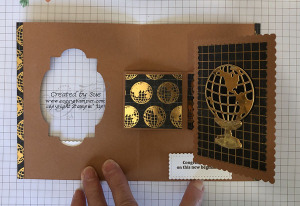
I used the rectangle Rocker technique to make this card. When you open the card, the image behind the cut-out window on the card front rotates to the right. Interactive cards are such fun to make and receive. Watch the video below to learn how to do the technique.
The cutting measurements of the papers are: –Cinnamon Cider Cardstock (153078) 8 1/2″ x 5 1/2″ scored at 4 1/4″ for card base; 5 1/2″ x 2″ scored at 1/2″, 2 3/4″, and 4″, 3″ x 2″ scored on all sides at 1/2″ for mechanism: and 4 1/4″ x 3 1/4″ for moving panel –Basic Black Cardstock ( 121045) scrap –Whisper White Cardstock (100730) scrap –Brass Foil Sheets (153057) scrap – World of Good Specialty Designer Series Paper (152491) Cinnamon Cider embossed map design 5 1/4″ x 4″ Checkered Black design 4″ x 3″ Black with globe design 2″ x 1-7/8″, 1-7/8″ x 1″
You can order the supplies I used to make this Stunning World of Good Grad card by visiting my online store or clicking on the links to be taken to each item’s location in my store.