
 Some time back, I had a customer ask me for different ways to use Washi tape. As a response, I created Washi Wednesday where I have been sharing different ways to use this semi-transparent and repositionable tape. You can see previous Washi Wednesday posts here, here, here, and here.
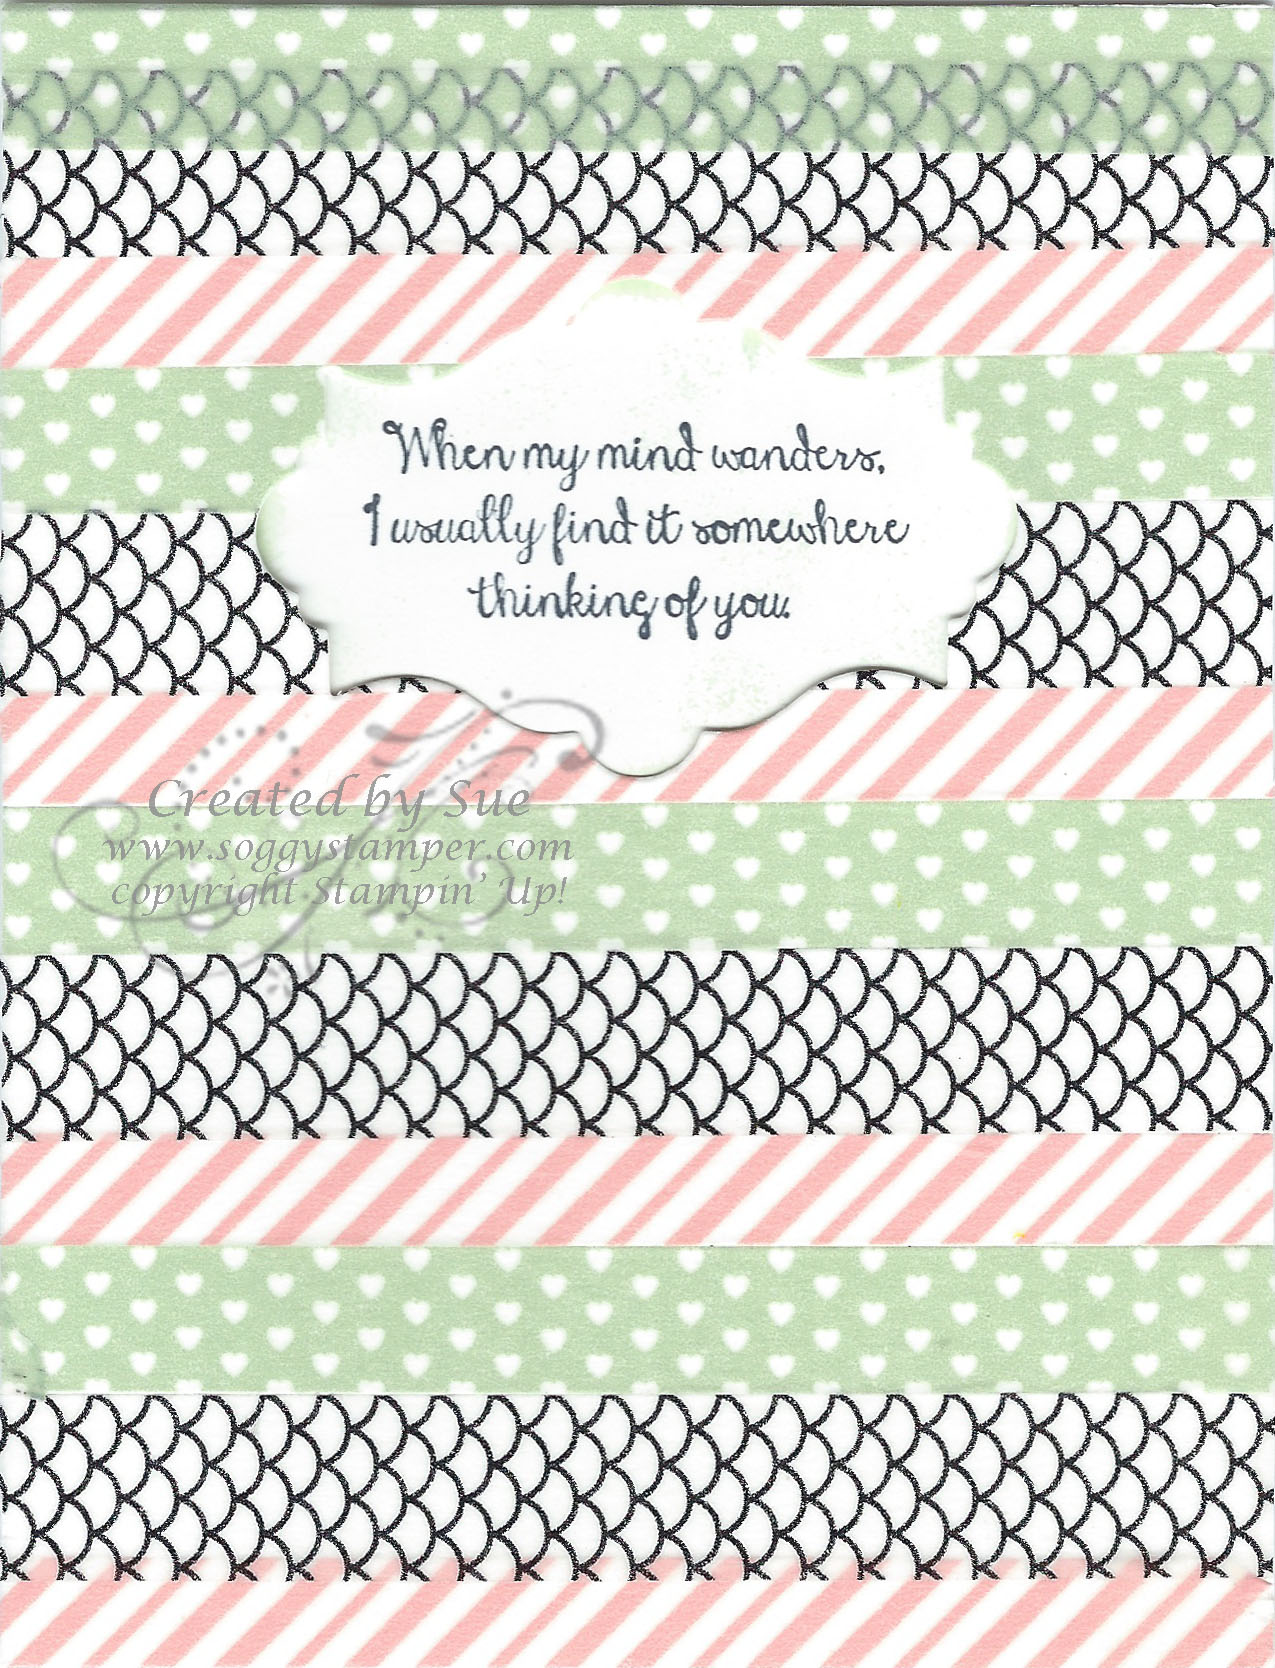
Today I have another card using Washi tape. The technique this time is called Reverse Washi and uses the new Sweet Sophie Designer Washi Tape. To do this technique, apply different patterns of Washi tape to the front of your card. Ideally you would apply them to a layer for the card front, not on the Whisper White card base like I did. Then you punch out or use a framelit to make a cutout in the card front. I used one of the Apothecary Accents Framelits. The official directions say to lightly trace around the cutout and then stamp your greeting in the tracing on the inside of your card. I just stamped through the cutout using the When my mind… from Bloom with Hope, a Hostess stamp set. However, the stamping was crooked! Don’t you just hate that? What I did to fix it was to stamp the greeting on another piece of Whisper White card stock and sponged around it with a little Pistachio Pudding ink. I then mounted this to the inside of the card centering the greeting in the cutout. Here is the inside of the card.


