Grace’s Garden Handmade Card

Photo shares Grace's Garden Handmade card created with Grace's Garden stamp set and Stitched Lace die

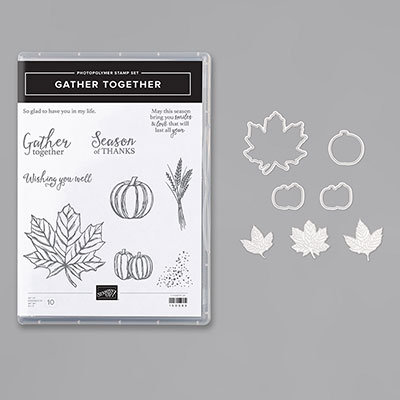
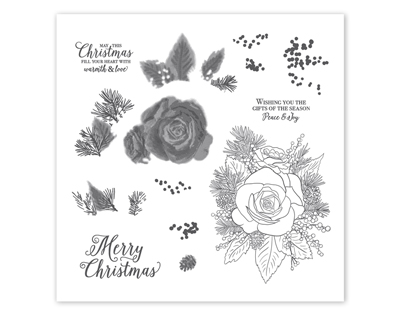
I love this Grace’s Garden Handmade card! Grace’s Garden stamp set (151513) is the first set to catch my eye in the new spring mini catalog. I love flowers in my garden and this set has flowers galore and a lovely garden gate. Check out the stamp set.

photo shows index of Grace's Garden stamp set

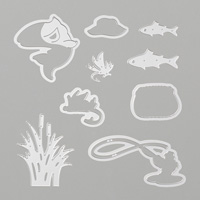
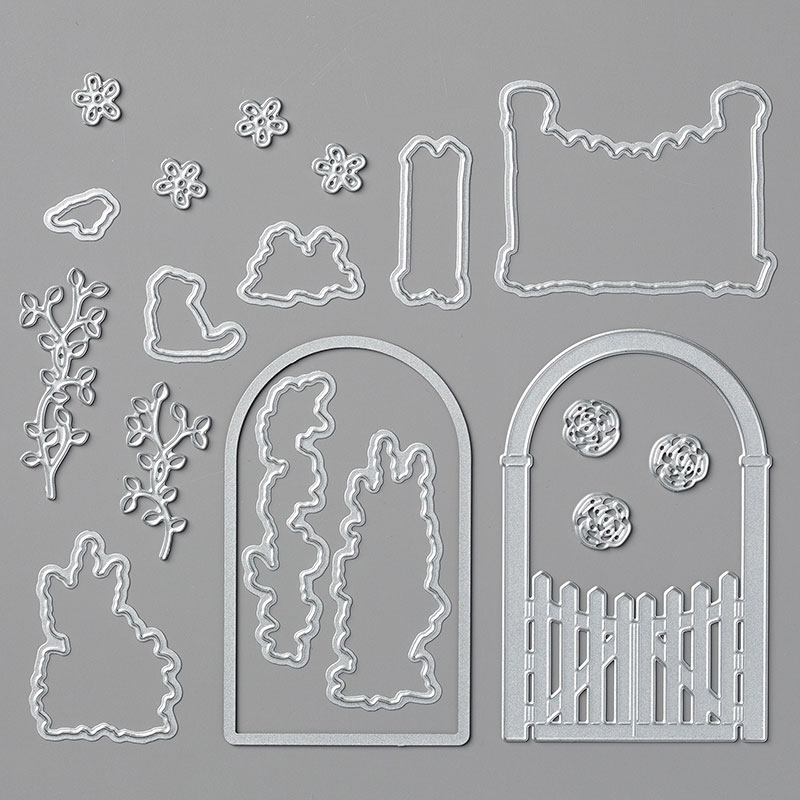
What is even better is that it comes bundled with Garden Gateway Dies (151512), Grace’s Garden Bundle (153789) for a 10% discount! Having the coordinating dies eliminates fussy cutting the flowers and gate. Note: the arched gate die is larger than the stamped gate. I have made it work by die-cutting the gate and the arch separately, cutting the gate in half and cutting the gate off the arch as shown in my second card.

photo shows picture of the Garden Gateway dies

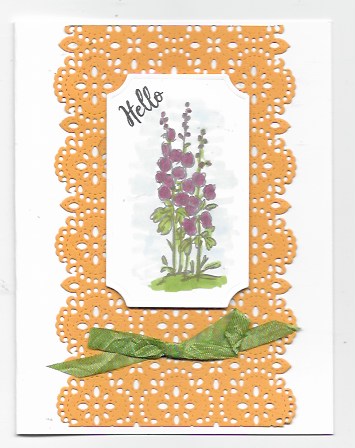
To make Grace’s Garden Card I first folded a 8 1/2″ x 5 1/2″ piece of Whisper White cardstock to make the card base. Then I cut a 5 1/2″ x 4 1/4″ piece of Crushed Curry cardstock with the Stitched Lace dies (149625) and a die-cutting machine. I used the single edge die to make the scallops along the sides. I stamped the image with Gray Granite ink on Whisper White cardstock and colored the flowers with Light Lovely Lipstick and Light Granny Apple blends. I shaded the background with the Light Sea Side Spray blend. Then I cut the image out with one of the Painted Labels dies and mounted all this on the card front.

Now the ribbon I used on this Grace’s Garden Handmade card is tricky. I wanted a Granny Apple Green ribbon but the one in the catalog was wider than I wanted. So I took the Dark Granny Apple Green Stampin’ Blend and colored the Whisper White 1/4″ Crinkled Seam Binding Ribbon (151326). I love the softness and width of this ribbon and the fact that you can color it any color you wish with our Stampin’ Blends. You’d better stock up on this ribbon that will only be available in the spring mini catalog!

Diorama card created with Grace's Garden Bundle

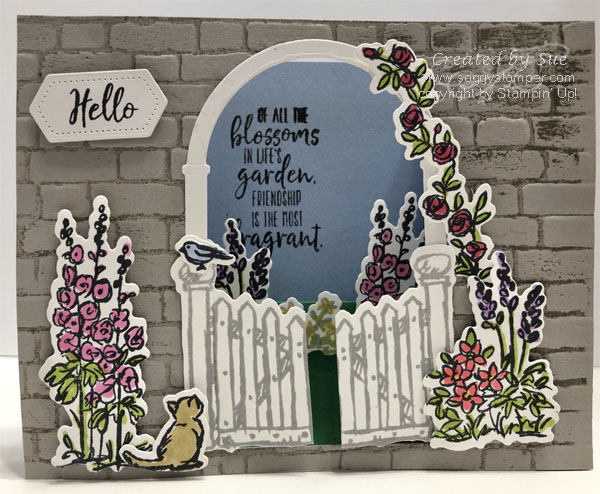
I also created this beautiful diorama card using the Grace’s Garden Bundle. If you would like a picture tutorial of this card, contact me and I’ll be happy to send you one. The cost of the tutorial is $5.

Happy New Year – 2020! May It Be The Best Yet!

Photo says Happy 2020!

Happy New Year – 2020! It is hard to believe that it is actually 2020. When a kindergarten class was labelled as the class of 2020, it seemed like a very long time in the distance. Now 2020 is here! There is something about starting a new decade that is intimidating and yet exhilarating. A fresh page has begun. It is up to us to make it the best decade possible. My prayers for this new decade are that our society can become united in our common desires and respectful and generous with each other in our differences. So Happy New Year, Happy 2020!

Have you made New Year’s resolutions yet? Have you broken any of your resolutions yet? I have unfortunately. I have resolved to kick the sugar and carb addiction and eat a Keto lifestyle. Unfortunately, the leftover Christmas candy called my name insistently and by noon I had succumbed to that siren call. But…tomorrow is a new day and I can start again.

With my stamping business I resolve to keep in better touch with you all through my blog and social media. I really want to get to know you better, to know your likes, desires, and hopes. I’ll continue to share my creativity with you but hope to be able to include you in that creativity through online classes, classes by mail, and Facebook live presentations.

With the new year, we also have the beginning of Sale-A-Bration and a new Handmade for You mini catalog. These start on Jan 3. This means that today is the last day to purchase many of the supplies in the Holiday catalog. In particular, the bundles will no longer be available. Stampin’ Up! is trying a new strategy. Some of the items from the Holiday Catalog will be in the 2020-2021 Annual Catalog and can still be purchased before that catalog is live. Some other items from this year’s Holiday Catalog will be in the 2020 Holiday catalog but won’t be available until that catalog is live. The safest thing to do is not wait! If there are some items that you want from the 2019 Holiday catalog, especially the bundles, order them today! Visit my online store. The host code for January is P6KRKYMC. Please use it when you place your order to receive a small gift from me. You can also email me your order and pay through PayPal if that is more convenient for you.

Free Shipping One Day Only!

Photo shows Free Shipping One Day Only

Wow! Free Shipping One Day Only tomorrow, December 11! It’s time to finish up your wish list from the Holiday catalog and prepare for the new Spring mini catalog. This sale begins tonight at 12:01 mountain time and runs through 11:59 pm MT. You can either email me your order or order online through my online store.

Another reason to take advantage of the Free Shipping One Day Only is that the bundles in the Holiday catalog and much of the other products will retire on January 2. Check out the retiring products and order them tomorrow. You need to especially check out the bundles. Even if the stamp set and dies or punches carry forward into the next catalog, they won’t be bundled together at a 10% discount. Check out the clickable images of the bundles below and then order the ones you don’t yet have.

/

Year-End Papercrafting Closeout!

Image is  about Stampin' Up!'s year-end papercrafting closeout

The Year-end Papercrafting Closeout has begun. The retirement list is up and some items are even on discount.

Here are some things you need to know: about the Year-end Papercrafting closeout.

* Many items from the Holiday Catalog are being carried forward to the 2020-2021 Annual Catalog. They just won’t be bundled together. If you want the discount, buy the bundle now!
* Other product from the Holiday Catalog will not be available to order after January 2, 2020 until they appear in the 2020 Holiday catalog. Yes, some of the supplies will appear again next fall.
* As always, retiring items are on an “as long as inventory lasts” so order NOW! Things will sell out fast. Click on the image above to go to my online store. Use the host code AZFJF474 and receive a gift from me.

Easy-Peasy Christmastime Is Here Card

Christmas Card created with Christmastime Is Here Specialty Designer Series Paper

This easy-peasy Christmastime Is Here card was created in no time. When you use the beautiful Christmastime Is Here Specialty Designer Series paper (152154), the paper is the star of the card! Notice the gold embossed splatters and edges of the rose on this designer series paper. I love, love, love it!

Close up of the Christmastime Is Here Specialty Designer Series Paper showing the gold embossing

The card base is an 11″ x 4 1/4″ piece of Mossy Meadow cardstock which I scored and folded at 5 1/2″. I trimmed down a piece of the large rose print to 4″ x 4″ and added a 4″ x 1″ piece of the gold-embossed Cherry Cobbler design at the bottom. Since the dsp is so beautiful, all this card needed was a greeting.

Close up of the greeting part of Easy-peasy Christmastime Is Here Card

The greeting comes from the Bells Are Ringing stamp set (150476) I stamped it onto Whisper White cardstock with Mossy Meadow ink. Then I cut it out with one of the Stitched Labels Framelits dies (146828). I backed the label with a piece of Mossy Meadow cardstock to show off the pretty ends of the label.

Check out all the products that are part of the beautiful Christmastime Is Here Suite in my online store. These products are only available during November and are on an ‘as long as quantity lasts’ basis. You must order early, like today to be sure you will get the supplies needed to make this Easy-Peasy Christmastime Is Here card for yourself. I will be sharing more projects using this suite so come visit my blog often.

Introducing The Beautiful Christmastime Suite!

photo shows all the product in the Christmastime Is Here Suite

This Thursday the beautiful Christmastime Is Here Suite (153947) of products will be available to order. This suite has a beautiful Christmas rose stamp set (152431) and coordinating Roses Dies (152144). Buy them in a bundle (153944) for 10% off.

images in the Christmastime Is Here stamp set

The suite includes the gorgeous Christmastime Is Here Specialty Designer Series Paper (152154). One side of the paper is gold embossed.

Christmastime Is Here Specialty Designer Series Paper

Finish off your projects with the beautiful gold shimmer ribbon and gold glitter enamel dots. The best part of this suite for me is this beautiful gold rose bracelet (152159) I am enjoying wearing on my wrist.

the beautiful gold rose bracelet that is part of the Christmastime Is Here Suite

The thing is that this beautiful Christmastime Is Here Suite is only available Nov 1 – 30 and as long as supplies last. So hop on over to my online store this coming Thursday to order before quantities run out. You really will love everything in this suite.

12 Weeks of Christmas Gift – Subscribe Now!

photo shows a banner saying 12 Weeks of Christmas

Yes, you have missed four weeks of my 12 Weeks of Christmas gift to my mailing list subscribers. In the last four weeks I have shared exclusive Christmas card tutorials with those on my mailing list.

But it isn’t too late! You can still receive the next 8 weeks of my 12 Weeks of Christmas Gift by subscribing before 1 pm Pacific time tomorrow. Just fill out the box to the right of this post and click subscribe. You will be glad you did!

Not only will you receive the next 8 exclusive tutorials as a subscriber to my mailing list, you will receive a monthly newsletter with a couple of tutorials and information to assist your creativity, and shorter weekly emails with helpful hints and a project tutorial. Remember to subscribe by 1 pm tomorrow!

Frosted Frames Birthday – Feel Free to CASE

Birthday card created with Frosted Frames dies and Beautiful Friendship Stamp Set

This Frosted Frames Birthday card was a cinch to make and you can make it too. I started with a Smoky Slate card base, 8 1/2″ x 5 1/2″ folded in half. Add a 5 1/4″ x 4″ layer of Feels Like Frost 6×6″ Specialty Designer Series paper using SNAIL adhesive.

The next step for making this card is to cut a piece of Purple Posy cardstock with the beautiful large Frosted Frames die and a die-cutting machine. Adhere this to the card front using Multipurpose Liquid Glue.

Finally, stamp the greeting from the Beautiful Friendship stamp set on Whisper White cardstock with Rich Razzleberry ink. Cut it out with the smaller frame die and mount it on the card front with Stampin’ Dimensionals.

Tadaa! Your beautiful Frosted Frames Birthday card is finished. Write a birthday wish on the inside. Be sure to put your signature on the back like artists do because you really are an artist. Now put someone’s name and address on an envelope and mail it off.

12 Weeks of Christmas Starts Wednesday

Photo is of a background of holly with the words 12 Weeks of Christmas

Announcing the 12 Weeks of Christmas starting on Wednesday, October 2. Imagine the excitement of opening an email each Wednesday with a cute or maybe beautiful Christmas project that has a complete tutorial.

Each week I will send you an email with a surprise tutorial to make a Christmas project. It might be a card or maybe a Christmas gift project or a tag.

The only thing is…you have to be a subscriber to my mailing list to receive this weekly email for the next 12 weeks. Because this is a gift to my mailing list subscribers.

The first email will go out at 1 pm tomorrow so you have only 24 hours to subscribe. It is easy to do. Just fill out the form on the right to start receiving my 12 Weeks of Christmas. Take the time to do it right now.

Hand-stamped Wedding Candle

The  finished hand-stamped Wedding Candle

Check out this Hand-stamped Wedding Candle! I posted about this wedding candle, complete with direction for stamping on candles, the end of July in this post. At that time I had not embellished it with a tray and other accessories. Now I have finished it and am sharing the finished product with you.

The Waterfront (146386) and Let It Ride (148765) stamp sets were used to create the scene on this hand-stamped wedding candle. I stamped the images on tissue paper using Shaded Spruce (147088) and Mint Macaron (147106) inks. By stamping the mountains and some of the trees in the lighter green ink, they seem to recede into a mist. I stamped the wedding date with numbers from the Make a Difference stamp set (146676) using Basic Gray ink (149165). Once I sealed the tissue paper into the candle wax, the date was barely visible. To fix this, I enhanced the numbers with the Dark Basic Black Stampin’ Blend marker (147941). I highly recommend using Jet Black Stazon (101406) or Tuxedo Black Memento (132708) ink to do the stamping in the first place!

Since the wedding couple are foresters on Prince of Wales Island in SE Alaska, I set the candle in a woven basket with preserved moss and a few pieces of driftwood from that island. I’m so happy with the way the whole thing came out!

If you haven’t tried stamping on candles yet, refer back to my previous post and give it a try. You will find it is so easy to create beautiful candles with the technique. Be sure to use real wax candles. Then send me a picture of your creation. I’ll be happy to share it in a blog post. To recreate this exact hand-stamped wedding candle, click on the links above to find the items in my online store.

Best Catch Stamp Anniversary Card

Anniversary card using Best Catch stamp set

This anniversary card uses the Best Catch stamp set (148598) found in the 2019-2020 Annual catalog on pg 150 and the coordinating Catch of the Day dies (148815). Today is our 55th wedding anniversary and I wanted a quick card for my husband. Since he loves fishing, this Best Catch stamp set was the perfect choice.

The card base is 8 1/2″ x 5 1/2″ Seaside Spray cardstock folded in half. I cut the cattails out of Mossy Meadow cardstock and colored the actual cattails with an Early Espresso marker. I stamped the large fish onto a piece of Champagne Foil Sheet with Black Stazon ink. Then I cut it out and one each of the smaller fish dies.

I originally stamped the greeting directly on the cardfront with Memento ink and, of course, messed it up! So I stamped it on a scrap of Seaside Spray cardstock and cut it out with the single rectangle of the Stitched Rectangles dies and popped it up with Stampin’ Dimensionals. So often correcting/covering a boo boo enhances the design of the card!

You can recreate this Best Catch Stamp Anniversary Card by clicking on the images below to go to their place in my online store. If you earned any $5 bonus coupons in July that you haven’t redeemed yet, you have only three more days to do so. They could be used to order these supplies. 🙂

Beautiful New Stamping Toys!

Handmade card created with Christmas Countdown stamp set and Frosted Frames Dies, two new stamping toys I just ordered

Beautiful new stamping toys arrived yesterday and I had to play with them right away. This stunning card was the result!

The first beautiful new toy is the Christmas Countdown stamp set that coordinates with the Christmas Countdown Project Kit which is an advent calendar with 25 little boxes to fill with all sorts of goodies. I plan to send this advent calendar as a family gift to our grandkids and greats.

photo of the Christmas Countdown stamp set index, a new stamping toy I ordered

I haven’t opened the kit yet to read the directions and don’t know how the stamp set is used with the kit. However, I love the cardinal on the branch of berries and wanted to use it on a card front.

I also ordered is the Frosted Foliage Bundle. I still enjoy last year’s Frosted Bouquet Bundle so really wasn’t sure I ‘needed’ this new bundle. They are very similar in detail. But…this beautiful frame that is part of the bundle got me hooked. Just look at it’s beauty!

photo of two of the Frosted Frame dies, a beautiful new stamping toy I just received

The big frame is shown cutting-side down and I turned the cutting-side of the inner frame up so you could see that it not only cuts but embosses the frame with stitching. I love it!

So I combined these two beautiful new toys to make this card. I cut a piece of Champagne Foil Sheets (144748) with both frames and saved the inner piece of foil for another project. Then I stamped the bird on Whisper White cardstock with Gray Granite ink (147118). I used the Light Cherry Cobbler (144576) and Dark Mango Melody (147944) Stampin’ Blends to color the image. I used the smaller frame to cut the image out. The card base is a 8 1/2″ x 5 1/2″ piece of Gray Granite cardstock (146983) and I layered a 5 1/4″ x 4″ piece of Cherry Cobbler cardstock (119685) on that.

These beautiful new toys can be ordered from the Holiday Catalog beginning September 4. You will be thrilled with all the new toys available in this catalog! It will be hard to choose what to order first.

There are two ways you can a copy of this catalog into your own hands now. The first way is to join my team as a Stampin’ Up! Demonstrator. You can even order things from it now if you join! Contact me if you are interested or visit my online store here.

The second way to receive a free catalog is to just email me your mailing address and phone number. I’ll give you a call to confirm your contact information and mail one out to you.

First Christmas Gleaming Card

Handmade Christmas card using Christmas Gleaming Bundle and Brightly Gleaming dsp

This is my first Christmas Gleaming card of the season. Demonstrators are allowed to preorder items in August from the upcoming 2019 Holiday catalog. You could too if you were to join me in being a demonstrator. Contact me, sue@soggystamper.com, or click here for more information.

I created this first Christmas Gleaming card using the Christmas Gleaming bundle which is a stamp set and two ornament punches. Yes two! I punched the ornaments from three patterns of the Brightly Gleaming Specialty Designer Series Paper. This paper is so gorgeous! One side of papers has copper foil accents. I stamped the tops of the ornaments on copper foil sheet scraps and punched them out. Then I glued them to the tops of the ornaments.

The base of this card is an 8 1/2″ x 5 1/2″ piece of Pretty Peacock cardstock. I used the edge trim from the Magnolia Memory Dies to cut and emboss the bottom edge of a 5 1/4″ x 4″ piece of Copper Foil Sheets and adhered it to the card base. I used the same die on a 5″ x 3 3/4″ piece of Very Vanilla cardstock. Then I embossed it with the Tufted embossing folder.

Closeup view of First Christmas Gleaming card

To complete this Christmas Gleaming card, I adhered the ornaments with Stampin’ Dimensionals. Then I stamped the greeting on Very Vanilla cardstock with Mossy Meadow ink and cut it out by hand. I popped this greeting up with Stampin’ Dimensionals as well. Since the card base is dark, I added a 5 1/4″ x 4″ piece of Very Vanilla to the inside.

Are you eager to see what other exciting things are in this Holiday catalog? Just email me your address and phone number so we can discuss how you can get one for free.

Top Seven Stamping Tips

New to stamping? Or want to improve your stamping? Read on for my top seven stamping tips and tricks!

Priming solid stamps

Ever ink up a brand new solid stamp and get a streaky-looking image when you stamp it? Just gently rub a plain clean eraser over the surface of the stamp. Clean any bits of eraser left behind with a baby wipe (I like the Kirkland brand at Costco because they don’t leave lint behind). Then ink and stamp. It’s amazing what a little priming can do to create a clean stamped impression.

No More Halos

Haloing is when a stamped image has lines of ink outside of the actual inked impression. To avoid halos, ink your stamp and gently press straight down on your paper

Too Much of a Good Thing

The foam ink pads can sometimes be so juicy that you get too much ink on a stamp. So tap, tap, tap instead of squish, squish, squish when you ink up your stamp. Also, look at the inked stamp before you stamp with it. If you can see the raised edges of the design with ink on the top of the ridges rather than pooled ink in the valleys, you’re good to go.

Stamp Platform

If you are using layered or two-step stamps, or have hand or wrist weakness or pain, the Stamparatus (146276) is a must-have instead of a nice-to-have. To use the Stamparatus, simply place your cardstock on one side of the tool and secure it with the included magnets. Place your stamp on top of the cardstock image side down, positioning it wherever you want the image to be. Once you are happy with your stamp positioning, gently close the lid, then open it again. The stamp will cling to the lid in perfect position! Ink the stamp surface, close the lid and your image will be stamped on to the cardstock. And if any of the ink didn’t transfer perfectly, just ink and close the lid again.

For two-step stamping, stamp the first layer with the Stamparatus. Keep the cardstock where it is, then remove the stamp. Place the second layer of the design on top of the stamped image and close the lid. Ink the stamp, then close the lid. Repeat for all stamp layers.

Get More out of Sentiment Stamps

Create different messages from your sentiment stamps by masking off portions to say something different! Use washi tape, clear tape, or any other low tack tape such as painter’s tape to cover up any of the words you don’t want. Ink your stamp, remove the tape, and stamp. Now you’re saying exactly what you want.

Easy Masking for Dimension

Create dimension by using the masking technique. Masking makes an image look as though it’s in front of, or behind, another image.

Begin by stamping the image on scrap paper. This is the mask, so don’t worry about stamping a prefect image. Sometimes I stamp onto a Post-It note so that the sticky border on the back is perfectly placed on the other side. Cut out the image

Now stamp the same image on to your cardstock. Place the mask over the stamped image. Stamp another image next to the first, with the edge of the stamp overlapping the sticky note mask. Remove the mask and you’ll see one image behind the other!

A Clean Stamp is a Happy Stamp

While stained stamps are well-loved, a dirty stamp will not make clear impressions. A quick swipe across the Simply Shammy (147042) as you go will make clean up a breeze. Then a deep clean every so often with the Stampin’ Mist (102394) and Stampin’ Scrub (126200) will keep your stamps in top shape.

I hope these seven top stamping tips and tricks will help you in your creating with stamps! Which ones will you try out next time you have your stamps out?

Candle Stamping – My Favorite Technique

Photo of a handstamped candle

Candle Stamping is my favorite technique! I get such satisfaction from making gifts like this. This particular one is a wedding candle for the daughter of our good friends in Alaska. The bride and groom work for the Forest Service so this candle with the mountains and pine trees is most appropriate. I even stamped their wedding date on the candle.

Here are the directions for the candle stamping technique.

SUPPLIES:

White tissue paper or tissue paper the color of your candle
Wax candle -Be sure they are wax candles. They can be ones you light or flameless. I got this flameless vanilla scented real wax candle at Walmart in a package of four for $19.99.
Strip of wax paper long enough to wrap around the candle plus extra for you to hang on to
stamps and ink as desired – I used the Let It Ride and Waterfront stamp sets with Basic Gray, Shaded Spruce, and Mint Macaron inks. I applied SNAIL adhesive to one side of Copper Trim, then stuck it to the Gold Metallic-edge Ribbon.
heat tool

INSTRUCTIONS:

1. Stamp desired images on tissue paper. I have found that line drawings work better than solid ones. The solid ones have so much ink that it wrinkles the tissue paper.
2. Carefully tear around the images leaving as little border around them as possible.
3. Position the images on the side of the candle and then wrap the wax paper around the candle covering the tissue paper. Pull the wax paper tight.
4. Use the heat tool to melt the wax on the paper and on the candle just until the tissue paper is soaked with wax. Melting the wax too much will make an uneven surface to the candle.
5. Remove the wax paper and finish the candle as desired

So that is how easy it is to do my favorite technique – stamping on candles. Click on the images below to find them in my online store.