Tag Archives: Stitched So Sweetly Dies

Beautiful All Things Fabulous Bundle

Handmade greeting card using the beautiful All Things Fabulous Bundle

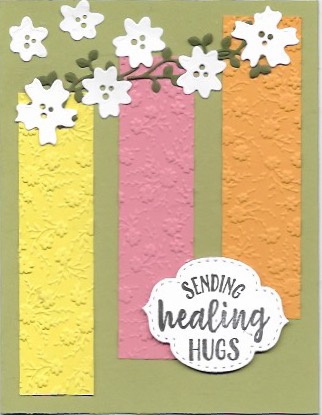
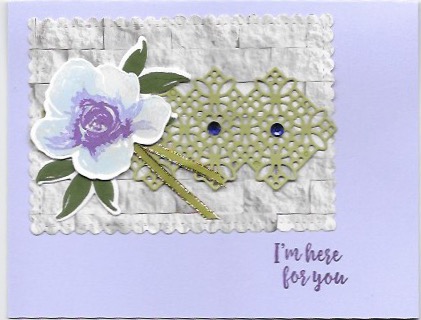
The beautiful All Things Fabulous Bundle is one of my favorite bundles in the 2020-2021 Annual Catalog. I introduced you to it last week in this blog post. Today I’m sharing another card I made with the beautiful All Things Fabulous Bundle.

I started with a card base of Purple Posy cardstock 8 1/2″ x 5 1/2″ scored and folded at 4 1/4″. Then I cut out a piece of one of the patterns in the In Good Taste Designer Series Paper using the largest rectangle of the Stitched So Sweetly Dies. I adhered this to the cardfront. One of the dies in the All Things Fabulous Bundle creates that lacy die-cut from Pear Pizzazz cardstock.

The All Things Fabulous stamp set is a three step stamp set. Normally you would use three different colors of ink to stamp it. Stampin’ Up! only has two Lighter shades of purple inks so I used the Highland Heather ink stamped off once for the lightest shade, the same ink not stamped off, and finally Gorgeous Grape for the darkest ink. I stamped the leaves with Mossy Meadow ink so they would contrast nicely with the Pear Pizzazz die-cut.

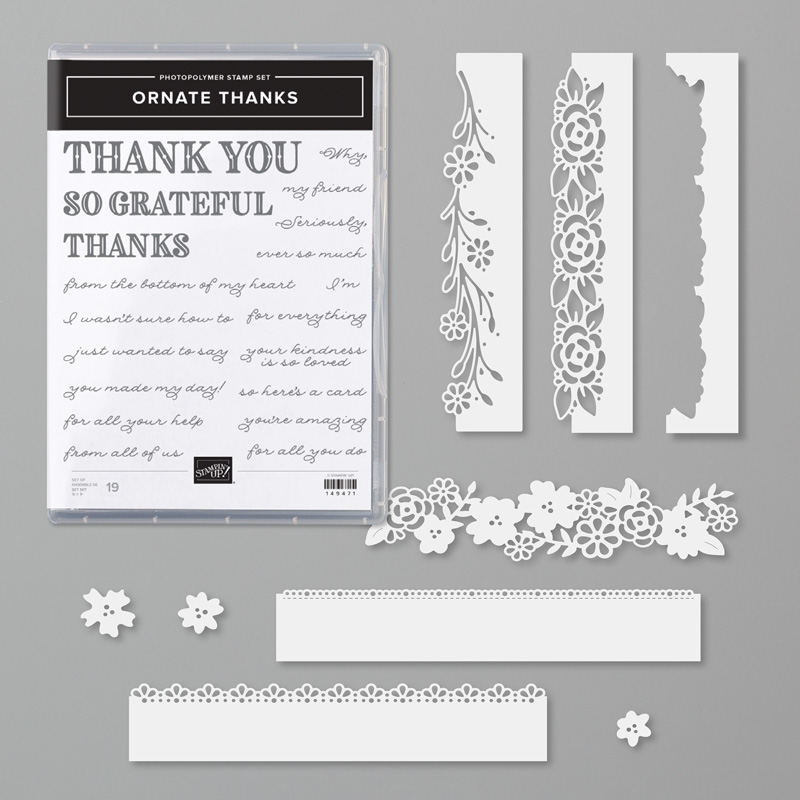
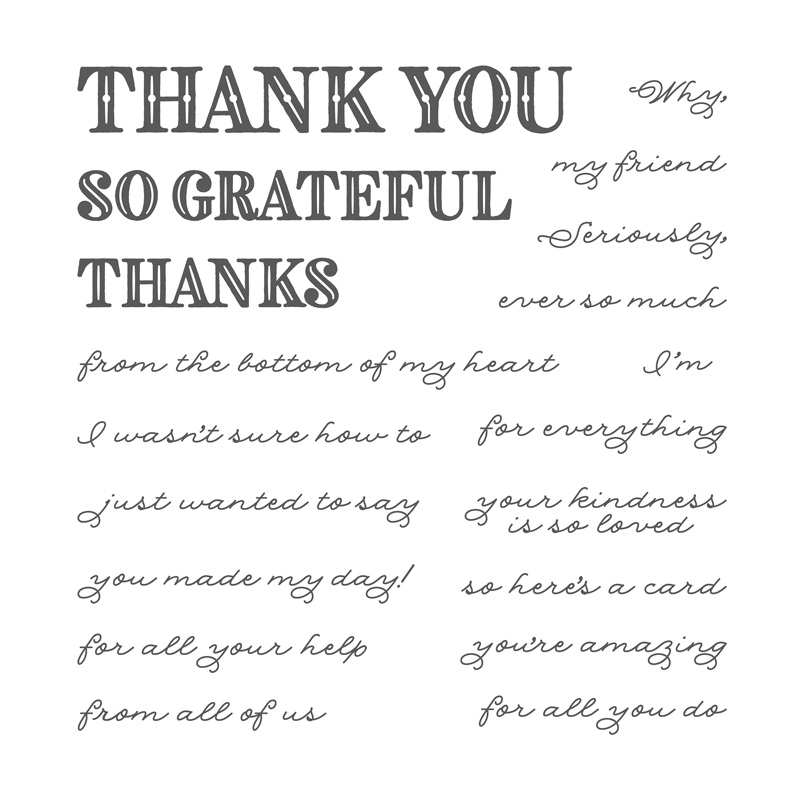
When all the stamping was done, I cut the images out with their corresponding dies from the Fabulous Florals Dies. I used Gorgeous Grape ink to stamp the greeting on the card base. I added a piece of the Old Olive ribbon from the All The Trimmings Ribbon Combo pack found in the Holiday catalog. This ribbon has a beautiful gold metallic edge. The two rhinestone gems came from the retired Noble Peacock adhesive rhinestone gems.

I know you would be able to make beautiful cards and 3D products with this bundle. To order the supplies I used in this card except for the retired rhinestones, click on the photo. You will be taken to a shopping cart in my online store. Deselect the items you may already have then click add all to my cart. Easy peasy! Remember this is my birthday month and I’m celebrating by giving YOU the gift of the Snowflake Adhesive-backed Embellishments on pg 29 of the Holiday catalog when you place an order with me by the end of the month.

Those Zany Zebras Are So Much Fun!

Handmade birthday card created with Zany Zebras stamp set

Oh my, those Zany Zebras (152536) are so much fun! Aren’t they just the cutest? Last Friday I shared a #simplestamping card a child could make. Check it out! Today I’m sharing the card I made for a swap with an online demonstrator group. This card is quite a step up from the simple stamping one I shared on Friday.

For this card I started with a Misty Moonlight cardstock base. Misty Moonlight is one of the beautiful new 2020-2022 In Colors. You can see the other colors here. I used one of the Stitched So Sweetly dies to cut out piece of Ornate Garden Specialty Designer Series Paper to serve as a background for the zebras. The zebras and greetings were stamped with Memento ink on Whisper White cardstock and hand cut out. Finally I added a bow from the Bumblebee 1/4″ gingham ribbon.

Supplies Used

  • Misty Moonlight cardstock, 8 1/2″ x 5 1/2″ folded in half for card base
  • Whisper White cardstock, scraps
  • Ornate Garden Specialty Designer Series Paper, scrap
  • Stitched So Sweetly Dies
  • Bumblebee 1/4″ Gingham Ribbon
  • Memento ink pad

Since those Zany Zebras are so much fun, I have fancy-fold card using them coming in another post this week. Check back on Friday. You won’t want to miss this post.

Beautiful Prized Peony Bundle

handmade greeting card created with the beautiful Prized Peony Bundle

Today I’m sharing a card I have created with the Prized Peony Bundle (154056), part of the Peony Garden Suite. Last Friday I introduced you to this beautiful Peony Garden Suite (154129) and showed you all the components of this suite.

In addition to the wonderful Peony dies (152701) that cut out the pieces to make the beautiful 3-D peony flower, this bundle has a lovely Prized Peony stamp set (152504), a DisINKtive stamp that creates the illusion of depth with just one stamp. The Peony dies also include dies to cut out the stamped images.

Supplies for sample card

What will you create with this beautiful Prized Peony Bundle? Head over to my online store to order it or contact me and I’ll place the order for you.

Another World of Good Graduation Card

handmade graduation card created with World of Good suite of products

Here is another World of Good Graduation Card I created with the World of Good Suite (154140) of products. I had to make seven of these so this design is less intricate. Actually, I had the cut out portion of the card I posted on Saturday lying on my Big Shot table and decided to make good use of it.

The World of Good Suite is found on pgs 24 – 26 in the 2020 -2021 Annual Catalog. I love this suite for a couple of reasons. You can quickly create exceptional cards with the stunning World of Good Specialty Designer Series Paper that has several designs embossed with Brass foil. Brass foil sheets are part of the suite. These foil sheets coordinate perfectly with the dsp. The Beautiful World stamp set has great sayings as well as a vintage look to the images. Finally, the World Map Dies perfectly cut out the images eliminating the need of hand cutting.

These are the supplies I used to make Another World of Good Graduation Card:
-The card base is the lovely new Misty Moonlight, one of the new 2020-2022 In Colors 8 1/2″ x 5 1/2″ and scored at 4 1/4″.
– The second layer is the misty moonlight pattern of the World of Good Specialty Designer Series Paper 5 1/4″ x 4″.
– The next layer is the Cinnamon Cider map pattern die-cut with the largest shaped die of the Stitched So Sweetly Dies.
– Stamp the greeting from the Beautiful World stamp set with Memento ink and cut out with a rectangular Stitched So Sweetly die.
– Adhere this with Stampin’ Dimensionals. Add a small Gilded Gem.

Another Ornate Floral Embossing Folder Idea

handmade card using Ornate Floral 3D Embossing Folder

Here is another Ornate Floral 3D Embossing Folder (152725) Idea. I shared my first card in this blog post. This time I also used one of the Ornate Border Dies (152724) along the right side of the card. This border die is so delicate that you really have to have it mounted on another piece of cardstock. In this case, I used Mossy Meadow cardstock for the card base. See the detail of the embossing folder in this close up photo.

To Make this Card:

  • Fold 8 1/2″ x 5 1/2″ piece of Mossy Meadow in half to form card base.
  • Die-cut right edge of 5 1/2″ x 4 1/4″ piece of Petal Pink cardstock with Ornate Border Die and die-cutting machine.
  • Use the Ornate Floral 3D Embossing Folder and the die-cutting/embossing machine to emboss the Petal Pink cardstock after the side is die-cut. To emboss first would cause the embossing to flatten when run through the machine to die-cut the edge.
  • Glue the Petal Pink layer to the card front with Multipurpose Liquid Glue or the Fine-Tip Glue Pen.
  • Stamp the greeting from Free as a Bird stamp set (149468) on Whisper White cardstock with memento ink and the plumeria flower from the Timeless Tropical stamp set (151497) on another scrap of Whisper White cardstock.
  • Die-cut the greeting with the next to the smallest Stitched So Sweetly Dies (151690) and the die-cutting machine.
  • Color the plumeria flower with the Calypso Coral Combo Stampin’ Blends (144045) and then either fussy-cut the flower out or use the corresponding die from the In the Tropics Dies (151495). Save 10% by purchasing the stamp set and dies together in the Timeless Tropical Bundle (153811). Then use a glue dot to attach it to the label.
  • Put some SNAIL adhesive on the back of the label and attach loops of gold and silver metallic thread to the SNAIL.
  • Use Stampin’ Dimensionals to adhere the label to the card front.

You can get the supplies needed to make this project by clicking on the items. They are linked to their location in my online store. When you place your order use the host code EQAYGMPG to receive a small thank you gift from me. Don’t use the host code if your order is $150 or more. With that amount you are your own host and will receive host benefits.

Ornate Floral 3D Embossing Folder

image shows handmade Get Well Card using the Ornate Floral 3D Embossing Folder

The Ornate Floral 3D Embossing Folder (152725) is one of the items in this month’s featured Ornate Style Suite that will be in the new 2020-2021 Annual catalog. This embossing folder embosses tiny flowers and leaves sprinkled across your cardstock. It makes a subtle texture as a background for a focal image or, as in this card, the Ornate Floral embossing of this folder can be the focus of the card. It is so pretty that I didn’t want to cover it up!

The tops of the Ornate Floral 3D embossed strips looked like they were missing something, so I embellished them with white flowers die-cut with dies from the Ornate Borders Dies (152724) that are also a part of the Ornate Style Suite. I shared a card I created with these border dies here. I added leafy vines die-cut from Mossy Meadow cardstock with dies from the Garden Gateway Dies (151512).

The greeting is from the So Sentimental stamp set (151691) and was die-cut with a Stitched So Sweetly Dies (151690). You can order the stamp set and the corresponding dies as the So Sentimental Bundle (153828) and save 10%.

Directions for Card

  • Fold 8 1/2″ x 5 1/2″ piece of Pear Pizzazz in half to form card base
  • Cut 4″ x 1 1/4″ strip of Pineapple Punch, Mango Melody, and Flirty Flamingo cardstock
  • Place these strips in Ornate Floral 3D Embossing Folder and run through die-cutting machine
  • Adhere to card front as shown with favorite adhesive
  • Die-cut one each of the leafy vine dies from the Garden Gate Dies from Mossy Meadow cardstock. Glue them to the top of the embossed strips.
  • Die-cut from Whisper White cardstock two large flowers, three medium flowers, and two small flowers from the Ornate Border dies. glue them over the vines.
  • Stamp the sentiment on Whisper White cardstock with Memento ink and die-cut with one of the Stitched So Sweetly dies. Adhere it to the card front with Stampin’ Dimensionals.

Come back on Wednesday to see more ideas for using the Ornate Floral 3D Embossing Folder. For more inspiration like my Soggy Stamper Facebook page and subscribe to my mailing list. The subscription form is in the upper right corner of my blog.

Beautiful Ornate Thanks Bundle

photo shows all the pieces of the Ornate Thanks Bundle

Today I am sharing two Thank You cards created with the Ornate Thanks Bundle (154115). This bundle is part of the Ornate Garden Suite (154153) which is in the upcoming 2020=2021 Annual Catalog. If you are an avid stamper like me, you will love this chance to buy the suite now instead of having to wait until June. Click here to see the whole Ornate Garden Suite.

photo is of a handmade Thank You card created with the Ornate Thanks Bundle

This is the first card I created when I started playing with the Ornate Thanks Bundle. I was immediately drawn to the Ornate Border Dies shown here.

photo shows the Ornate Border Dies

I love this new Ornate Thanks stamp set(149471) because it’s a photopolymer set, I love the script font of the various sayings you can add to the big, bold thanks stamps. For this card I chose to add ‘for all you do’ to the ‘Thanks’. These cards are going to a couple friends who are highly stressed nurses right now.

To Make This Card:

  • Fold Bermuda Bay cardstock 8 1/2″ x 5 1/2″ in half for card base
  • Die-cut Pool Party cardstock 5 1/2″ x 1 1/2″ with the two dies in the upper right corner and adhere diagonally across the card front with Multipurpose Liquid Glue
  • Stamp greeting from Ornate Thanks stamp set on Whisper White with Bermuda Bay ink and die-cut with die from Stitched So Sweetly Dies (151690) and applied to card front with stampin’ dimensionals
  • Tie an overhand knot in Silver metallic edged ribbon and affixed to card front with mini glue dot.
handmade Thank You card created with product from the Ornate Garden Suite

This is the second Thank You card I created with the new Ornate Thanks Bundle.

To Make This Card:

  • Fold Pineapple Punch cardstock 8 1/2″ x 5 1/2″ in half for card base
  • Die-cut Call Me Clover cardstock 5 1/2″ x 1 1/4″ with Ornate Border die and adhered to card front
  • Stamp greetings from Ornate Thanks stamp set on card base with Call Me Clover ink
  • Add four sequins to flower centers with Multipurpose Liquid Glue

Now go order this new Ornate Thanks Bundle and begin creating gorgeous but easy cards with it. Share a photo of your card with me and I’ll share it here on my blog.