Category Archives: Interactive Cards

Beautiful Hexagon Fancy Fold Card

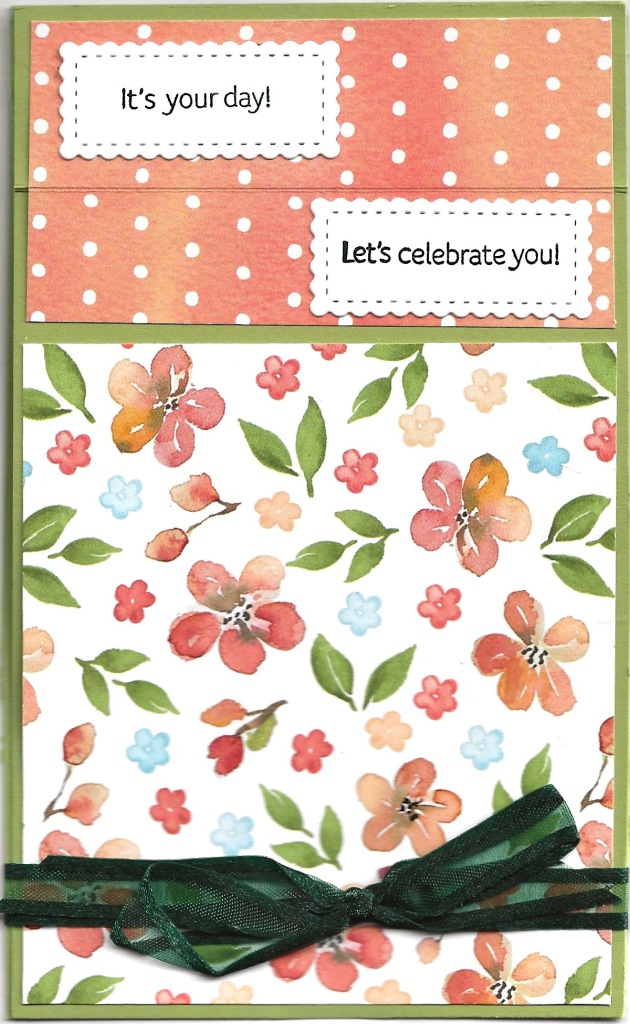
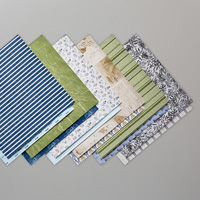
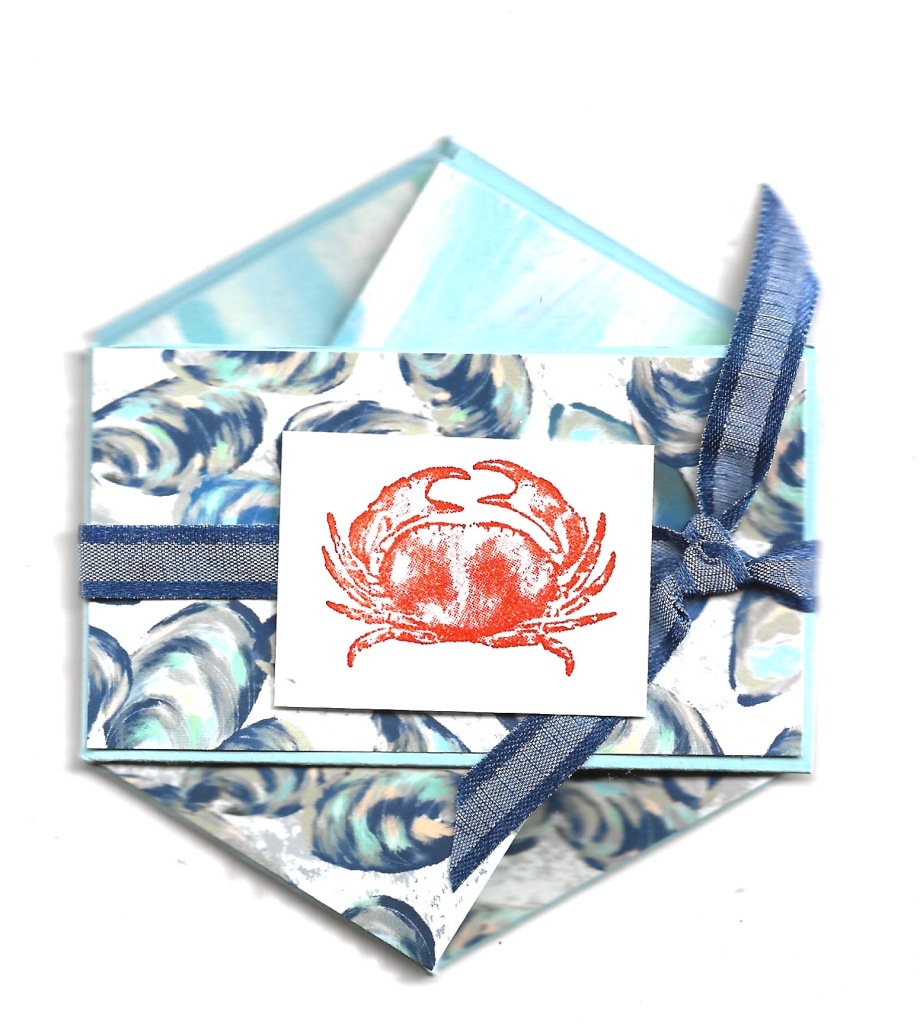
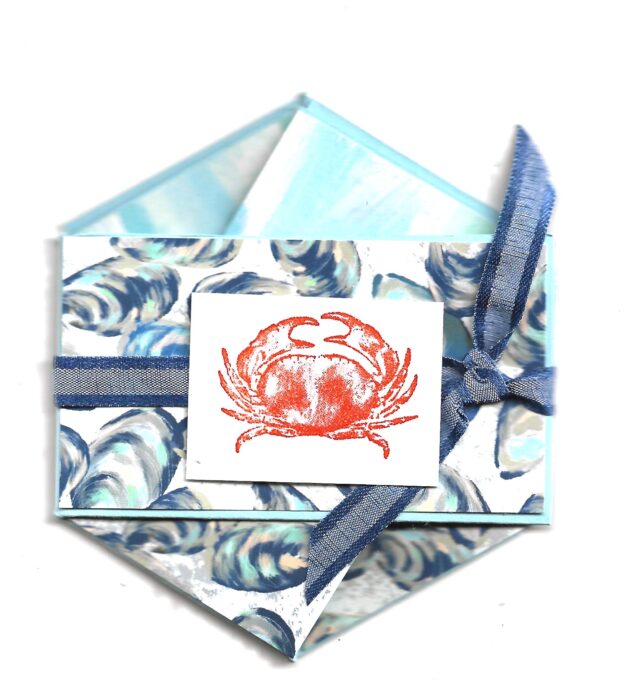
a BeautifulHexa gon Fancy Fold card created with the By the Bay Specialty Paper

I love fancy fold cards and this beautiful hexagon fancy fold card is such fun to receive. When you remove the ribbon, it opens to reveal three pockets with little message cards in the pockets.
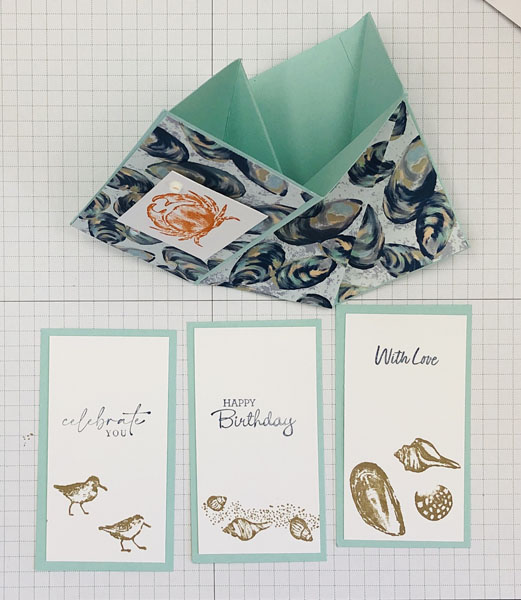
beautiful hexagon fancy fold card opened and showing the little cards that go in the pockets

I watched a great video by Julie DiMatteo on how to make this card and am sharing the template she has on her blog, the Paper Pixie. Fold the straight score lines in mountain folds and the diagonal ones in valley folds. Cut off the shaded areas.
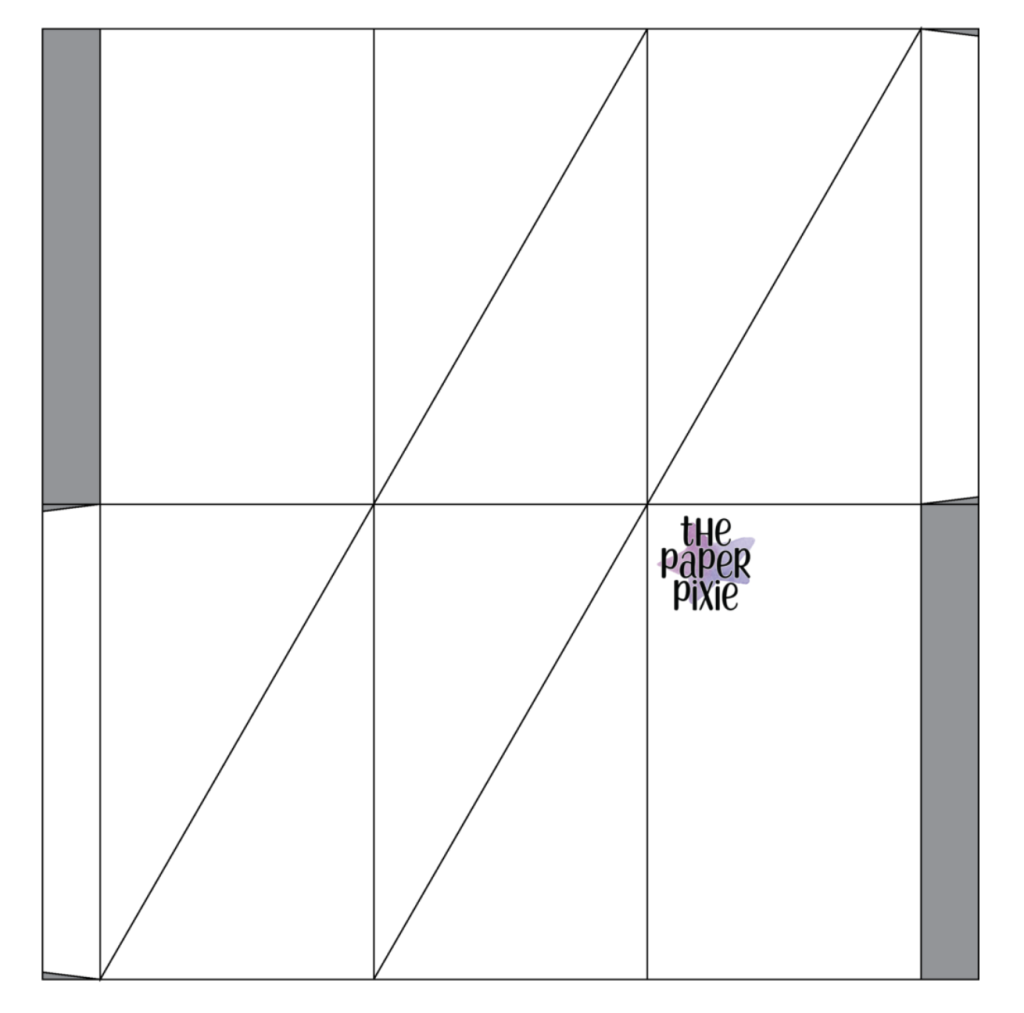
Supplies to make this beautiful hexagon fancy fold card

  • Seaside Bay stamp set (160436)
  • Night of Navy, Pumpkin Pie, and Crumb Cake inks
  • By the Bay 6″ x 6″ Specialty Paper (160434) soon to be retired, one piece 4″ x 2 1/4″, 2 pieces 3 7/8″ x 2 1/4″ cut diagonally f
  • From upper right corner to lower left corner
  • Pool Party cardstock (122924) 8 1/4″ x 8 1/8″ scored with the 8 1/8″ length at top of trimmer at 1/2″, 2 7/8″, 5 1/4″, and 7 5/8″ then turned to have the 8 1/4″ side at top and scored at 4 1/8″, 3 pieces 2 1/4″ x 4″
  • Basic White Cardstock (159276) 3 pieces 2″ x 3 3/4″, scrap for stamping the crab
  • Night of Navy 3/8″ Bordered Ribbon (160581)
  • Flat Adhesive-backed Pearls (160449)
  • Multipurpose Liquid Glue (110755)
  • Paper Trimmer (152392)
  • For your convenience, click here to be taken to a shopping cart in my online store with these items in it. You can delete any products you already have.

Once you collect the supplies needed, you can stamp along with me in this video.

Thanks for stopping by. Grab a cup of coffee or tea and spend some time checking out my various blog posts. There are other fancy fold posts here, here, and here. Leave a comment about which one you like best.

Scary Cute Pop-upCard

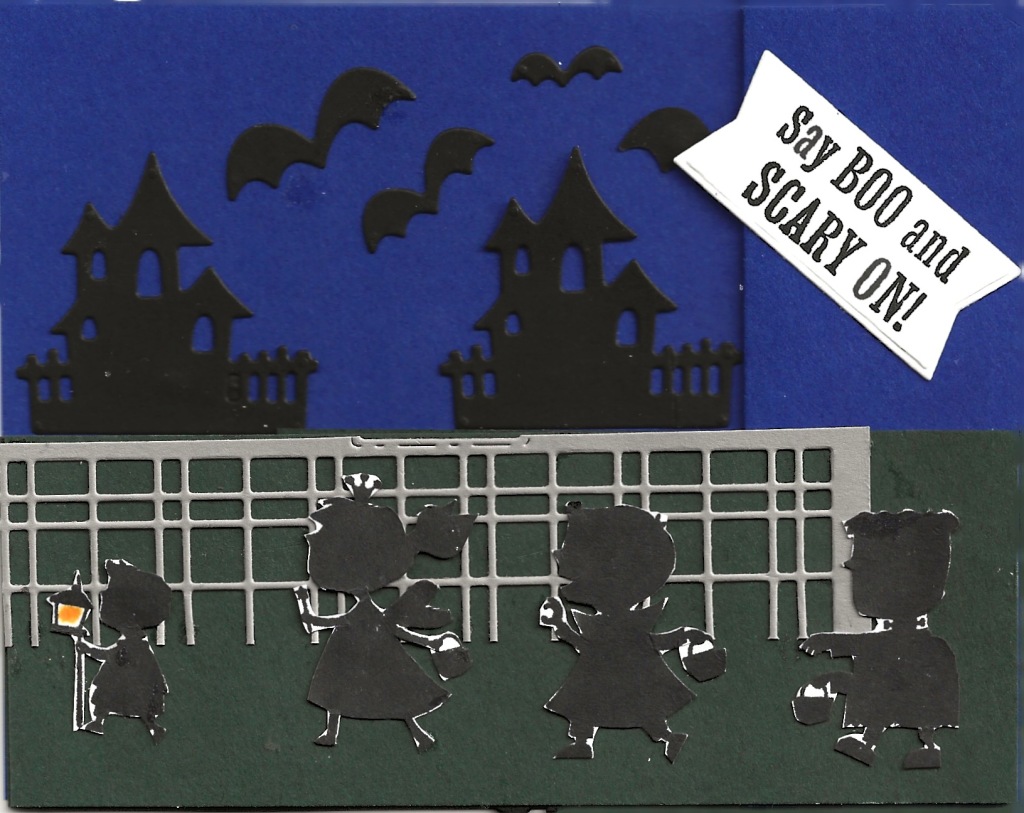
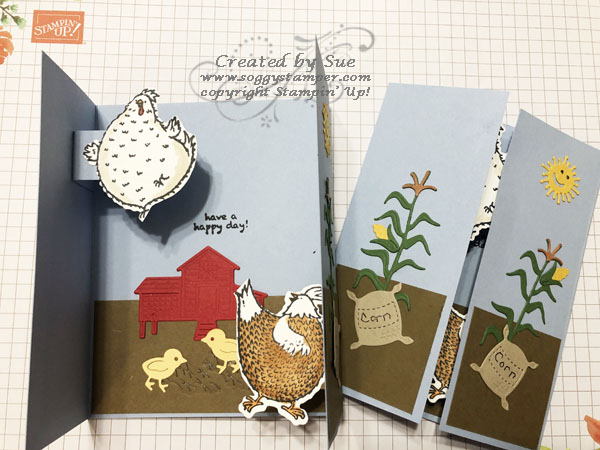
photo is of a Halloween Scary Cute Pop-up Card

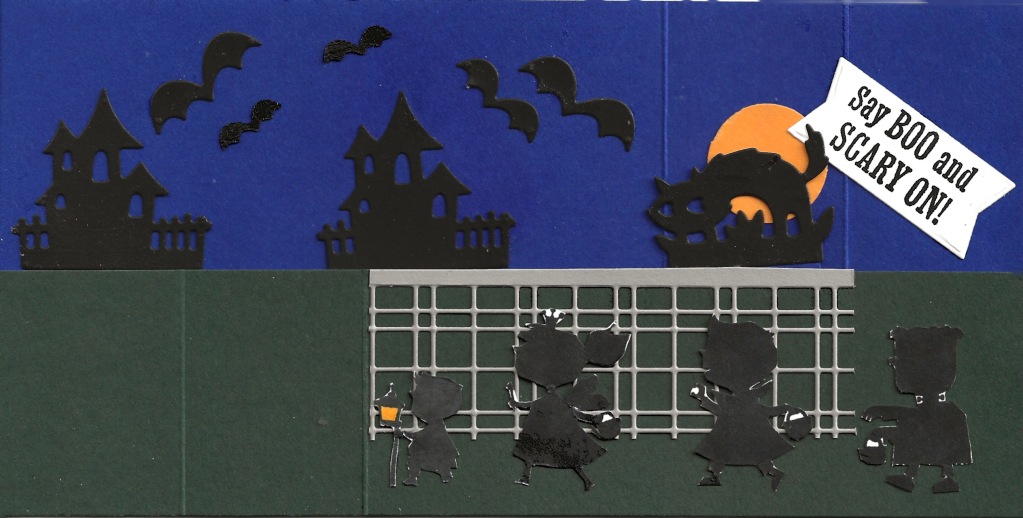
This scary cute pop-up card is such fun to play with. What you are seeing is the card in the closed. The magic happens when you open the card. The photo shows the card flattened open but it is 3 dimensional otherwise. I love how the black cat pops up! I can play with it for minutes at a time. 🙂

Halloween Scary Cute Pop-up card opened

The images of the children do not have a corresponding die so I fussy cut them out. The tricky part of the card is getting the pop-up feature to work properly without any of the cat showing out the bottom of the card when it is closed. The fence is cut out with part of a Split Card Textures die

Supplies Used for Scary Cute Pop-up Card

  • Scary Cute Bundle (159852)
  • Starry Sky Cardstock (159263) 8 1/2″ x 4 1/4″ scored at 5 1/2″ and 7″, 1 1/2″ x 1 1/4″ for pop-up
  • Evening Evergreen Cardstock (155574) 8 1/2″ x 2″ scored at 5 1/2″ and 7″, 3 7/8″ x 2″
  • Basic Black Cardstock (121045) scraps for cat, haunted houses and bats
  • Gray Granite Cardstock (146983) 4 3/4″ x 1″ for fence
  • Basic White Cardstock (159276) scrap for tag, scrap to stamp children on
  • Mango Melody Cardstock (146989) scrap for moon
  • Tuxedo Black Memento Ink (132708) and Dark Mango Melody Stampin’ Blend (retired) use marker instead
  • Split Card Textures Dies (159162)
  • 1″ Circle Punch – retired
  • Paper Snips (103579)
  • Paper Trimmer (152392)
  • Stampin’ Cut & Emboss Machine (149653)
  • adhesives of choice
  • you can find these supplies in a shopping cart in my online store for your convenience. Click here.

Once you have gathered your supplies, watch this FaceBook Live I did to see how to put the card together.

For other samples of cards using this Scary Cute bundle, click here and here.

Waterfall Card with Kindest Gnomes

Image shows handmade waterfall card with Kindest Gnomes bundle

I love this waterfall card with Kindest Gnomes. Waterfall cards are such fun to play with and the gnomes are so cute. The Kindest Gnomes bundle is in the July – December mini catalog and has a wintry feel to the images so it makes a perfect Christmas card. However, gnomes stay around all year so this month I will be featuring projects with the gnomes in all four seasons.

In fact, my August Bundle of the Month is the Kindest Gnomes bundle (159626). Purchase this bundle from me during August and I’ll send you a free bundle of 5 tutorials for projects you can make with this bundle.

There a variety of waterfall cards as the technique has been around for years. Most of the cards have the same-sized pieces for the waterfall so that you see a part of the layers lying underneath the top one. I like this style because the subsequent layers are hidden and a surprise as they flip up. The products I used for this card along with cutting dimensions are below. When you have your pieces cut, follow along with me in the video I made during my Facebook Live today.

Supplies Used

  • Kindest Gnomes Bundle (159626)
  • Leaves of Holly Stamp Set (159601) for greeting
  • Soft Suede Cardstock (115318) card base 11″ x 4 1/4″ scored at 5 1/2″ and folded; strip 3/4″ x 4 1/4″; waterfall pull 8 3/4″ x 2″ scored at 1 3/4″, 2 1/2″, 3 1/4″ and 4″; waterfall panels 3″ x 4″, 3″ x 3 1/4″,3″ x 2 12″, 3″ x 1 3/4″
  • Basic White Cardstock (159276) 5 1/4″ x 4″, 2 3/4″ x 1 1/2″, scrap
  • Storybook Gnomes Designer Series Paper (159615) 5″ x 3 3/4″ on card base; 2 3/4″ x 3 3/4″, 2 3/4″ x 3″, 2 3/4″ x 2 1/4″, plus fussy-cut and die-cut images
  • Tear & Tape Adhesive (154031)
  • Stampin’ Seal (152813)
  • Multipurpose Liquid Glue (1107550
  • Mini Stampin” Cut & Emboss Machine (150673)
  • Click here to go to the shopping cart with these supplies in it. You can remove any supplies you already have.

Waterfall Card with Kindest Gnomes Video

Sliding Double Pop Out Card

Handmade Sliding Double Pop OutBirthday card created with You're Peachy Designer Series Paper and Sweet as a Peach stamp set

Creating this sliding double pop up card was fun. I love making cards that do the unexpected. While this card front is pretty, look what happens when you pull down on the card front!

Isn’t this Sliding Double Pop Out card great? ! Here is the supplies list with cutting dimensions:

  • Stamp Set – Sweet as a Peach
  • Ink – Evening Evergreen
  • Pear Pizzazz cardstock – for pop-out pieces 2 pieces 7 cm x 5 cm, for mechanism 15 cm x 10 cm, card front and base 16.5 cm x 10 cm
  • You’re a Peach Designer Series Paper – 2 pieces 6.5 cm x 4.5 cm for pop-outs, 2 pieces 7 cm x 9.5 cm with corners trimmed around the triangles for mechanism, 1 piece 9.5 cm x 5 cm of one pattern and 1 piece 10.7cm x 9.5 cm of another pattern
  • Basic White Cardstock – scraps for labels
  • Accessories – about 20″ of Evening Evergreen Open Weave Ribbon, 3/4″ circle punch, Paper Trimmer, Multipurpose liquid glue, Stampin’ Seal, Tear & Tape pencil
  • Click here to go purchase these supplies.

Once you have the needed supplies, watch this video to see how to make the card. Contact me if you have questions.

Thanks for visiting my blog. Leave a comment so I know you were here. Also, subscribe to my mailing list in the upper right corner to receive great card tutorials and information to help you with your paper crafting.

Floating Gate Fold Card

Floating Gate Fold Card created with the Hey Chick and Birthday Chick bundles

This floating gate fold card features the Hey Chick and Birthday Chick bundles that work so well together. The dies that are bundled with these two stamp sets cut a nice variety of accessories to enhance cards and 3D items you make with the stamp sets. I used many of them in making this card.

I demonstrated how to make a floating gate fold card during my Friday Facebook Live presentation using parts of both the Hey Chick and Birthday Chick bundles. Gather the supplies I used listed below with cutting and scoring measurements and then watch the embedded video from the Facebook Live.

Supplies to make this Floating Gate Fold Card

  • Stamp sets – Hey Chick and Birthday Chick – *These can be bought bundled with corresponding dies for a 10% discount
  • Inks – Memento, Stampin’ Blends – Cinnamon Cider Combo, Real Red Dark, Pumpkin Pie Dark, Crumb Cake Light
  • Cardstock – Seaside Spray 8 1/2″ x 5 1/2″ scored at 2 1/8″ on each end (card base), 4″ x 1/2″ scored at 1″, 2″, 3″; Soft Suede 2 pieces 1 7/8″ x 1 7/8″, 4″ x 1 7/8″, 4″ x 1/2″ scored at 1″, 2″, 3″; scraps of Basic White, Real Red, Garden Green, So Saffron, Bumblebee, Crumb Cake, Cinnamon Cider
  • Accessories – Birthday Chick Dies*, Hey Chick Dies*, Adhesive Sheets, Multipurpose Liquid Glue, Stampin’ Seal
  • Click here to order any of these supplies you need to make this project.

Watch the Video

I hope this blog post and video help you learn to make floating gate fold cards. If you do try this fancy fold, I’d love to have you send me a photo of your creation. I’ll be happy to feature it here on my blog.

Remember this is the last month of Sale-A-Bration. There are so many wonderful and cute items you can get for FREE when you place an order with me with each $50 you order in product. Visit my online store to see the Sale-A-Bration brochure and place an order. I appreciate your business.

Hot Dog Floating Gatefold Card

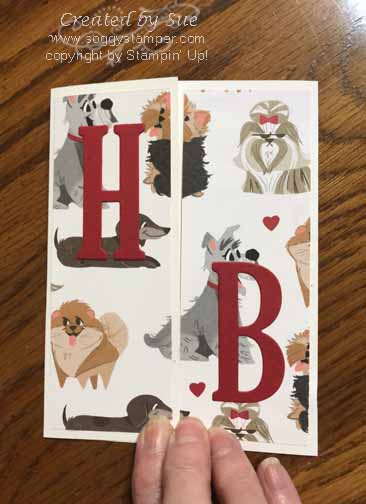
photo is of a handmade birthday card with various dogs on the front
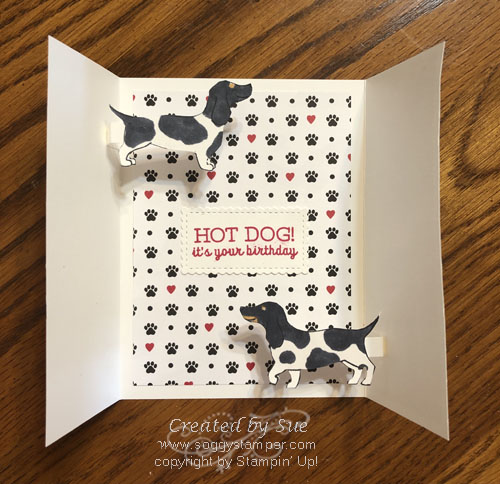
photo shows handmade birthday card using Hot Dog stamp set with the card opened

I’m excited to share with you this Hot Dog Floating Gatefold Card today! Our granddaughter was just given two long-haired mini dachshunds for her birthday and I knew this would be the perfect card for her. We also share our home with a couple of very spoiled mini dachshunds so when the Hot Dog stamp set became available in the Stampin’ Up! January to June mini catalog, I jumped on buying it.

I used the following materials to make this Hot Dog Floating Gatefold Card

  • Stamp set – Hot Dog
  • Inks – Memento, Real Red, Lt Cinnamon Cider Blend, Lt Basic Black Blend
  • Basic White Cardstock – 8 1/5″ x 5 1/2″ scored at 2 1/8 ” on both ends for card base, scraps of Basic White, and two strips 3″ x 1/4″ scored at 1/4″, 1 7/8″ and 2 3/8″
  • Real Red Cardstock – scrap
  • Playful Pets Designer Series Paper – 5″ x 3 3/4″, 2 pieces 5 1/4″ x 17/8″
  • Accessories – Stitched So Sweetly Dies, Retired Large Letters Framelits Dies, Stampin’ Cut & Emboss Machine, Multipurpose Liquid Glue, Stampin’ Seal

To Make Card

  • fold card base on score lines. Then adhere dsp to card base.
  • cut H and B from Real Red cardstock and adhere to front of card
  • stamp greeting with Real Red ink on white scrap. Cut out with a Stitched So Sweetly rectangle die. Adhere to inside center of card.
  • stamp the dogs on Basic White cardstock scraps and color with Stampin’ Blends. Fussy-cut them out.
  • Bend score lines on narrow strips of cardstock into a C shape. Adhere the 5/8″ end inside near bottom of right card front near the fold. Glue the dog to the strip being sure it doesn’t show below the closed card. Apply glue just to 1/4″ section and fold the strip back under the dog. Close card and press on the 1/4″ tab. Open card to be sure only the 1/4″ tab is glued down.
  • Repeat this process in the upper left side of the card gluing the 5/8″ section to the inside of the left card front.

To order the supplies used in this card just click here. I appreciate your business.

Darling Shaker Card for Zeke

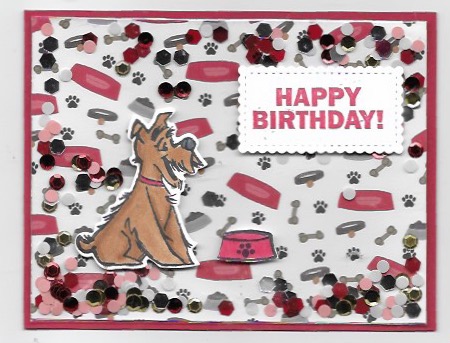
Darling shaker card for Zeke using Pampered Pets Bundle

Here is a darling shaker card for Zeke. Zeke is our youngest great-grandchild and he turns 4 on Monday. It is so very gratifying when you can create such a cute shaker card in less than 30 minutes. I showed you on this post Wednesday how to make this type of easy shaker card and included a video in the post. Check it out.
Today’s card features the Pampered Pets bundle and the Playful Pets designer series paper. I think they are perfect for a four-year-boy who has three dogs in his family. I used the following supplies to make this card.
  • Stamps – Pampered Pets, Approaching Perfection (Free SAB stamp set available Jan 2021)
  • Real Red Cardstock 11″ x 4 1/4″ scored and folded at 5 1/2″
  • Whisper White Cardstock 5 1/4″ x 4″ for inside, scraps
  • Playful Pets Designer Series Paper 5 1/4″ x 4″
  • Inks – Memento, Real Red, Stampin’ Blend Combos – Basic Black, Real Red, Cinnamon Cider
  • Accessories – Pets Dies, Holiday Rhinestone Basic Jewels, Clear medium envelope, Tear & Tape, Stampin’ Snail, Stampin’ Dimensionals, Scotch Tape

To order the supplies to make this darling shaker card for Zeke, just click on this link. The products will be added to your shopping cart. You can delete any of them that you already have. Of course, the card you make most likely won’t be for a Zeke. Leave a comment below with the name of the person you create this card for.

Easy and Quick Shaker Card

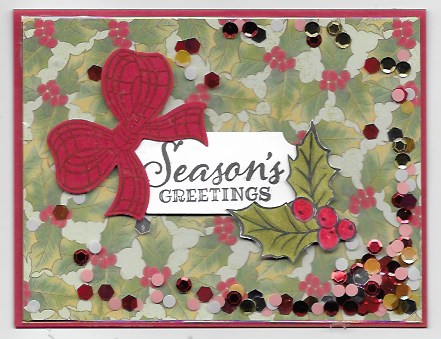
Easy and quick shaker card using the  Poinsettia Place designer series paper, Gift Wrapped stamp set, Christmas Gleaming stamp set, and Poinsettia Petals stamp set

One of the demonstrators presenting at OnStage@home this year shared a easy and quick shaker card. It is so easy that I want to share the technique with you.

To make this easy and quick shaker card you need

  • Poinsettia Petals stamp set – Merry Christmas greeting
  • Gift Wrapped stamp set – plaid bow
  • Christmas Gleaming stamp set – holly cluster
  • Real Red cardstock 8 1/2″ x 5 1/2″ scored at 4 1/4″ and folded for card base, scrap
  • Whisper White cardstock scrap
  • Poinsettia Place designer series paper – holly design 5 1/4″ x 4″
  • Inks – Memento, Cherry Cobbler, Stampin’ Blends – Old Olive, Mossy Meadow, Real Red, and Cherry Cobbler
  • Accessories – Bow Builder Punch, Holiday Rhinestone Basic Jewels, Tear & Tape, Stampin’ Seal, Clear medium envelope, Scotch Tape, Stampin’ Trimmer, Paper Snips

Click on this link to add these products to your shopping cart.Check out my Facebook Live presentation of how to make this card.

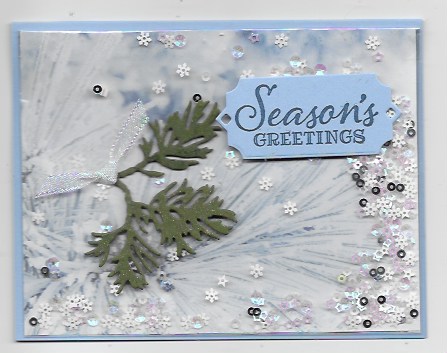
This technique is so versatile that you can create the card to fit any occasion, wedding, birthday, Thinking of You, etc. All you have to do is change out the designer series paper design and add coordinating images/embellishments to the front of the card. Here is another sample I have made with this technique. In this sample I used Feels Like Frost Specialty Designer Series Paper (153512), Snowflake Sequins (150443), Peaceful Boughs stamp set (150541) and Beautiful Boughs Dies (150661). You can add these supplies to your shopping cart here.

Photo shows an easy and quick shaker card using Feels Like Frost Specialty Designer Series Paper

Stunning World of Good Grad Card

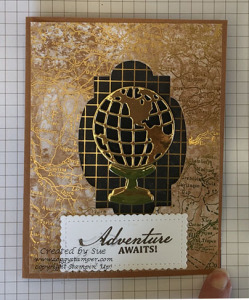
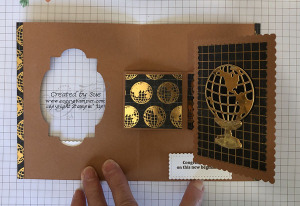
photo shows the front of the Stunning World of Good Grad Card
photo shows the Stunning World of Good Grad Card opened

This Stunning World of Good Grad Card is made with the wonderful World of Good Suite of products. This suite is shown on pgs 24 – 26 in the 2020-202 Annual Catalog and includes the Beautiful World stamp and dies bundle (154091), brass embossed World of Good Specialty Designer Series Paper (152491), Faux Suede Trim (152472), World of Good Memories & More Card Pack (153600), Old World Paper 3D Embossing Folder (153200), Antique Corners & Slides (152471) , and Brass Foil Sheets (153057). You can order all of this with just one number (154140).

I used the rectangle Rocker technique to make this card. When you open the card, the image behind the cut-out window on the card front rotates to the right. Interactive cards are such fun to make and receive. Watch the video below to learn how to do the technique.

The cutting measurements of the papers are:
Cinnamon Cider Cardstock (153078) 8 1/2″ x 5 1/2″ scored at 4 1/4″ for card base; 5 1/2″ x 2″ scored at 1/2″, 2 3/4″, and 4″, 3″ x 2″ scored on all sides at 1/2″ for mechanism: and 4 1/4″ x 3 1/4″ for moving panel
Basic Black Cardstock ( 121045) scrap
Whisper White Cardstock (100730) scrap
Brass Foil Sheets (153057) scrap
World of Good Specialty Designer Series Paper (152491)
Cinnamon Cider embossed map design 5 1/4″ x 4″
Checkered Black design 4″ x 3″
Black with globe design 2″ x 1-7/8″, 1-7/8″ x 1″

You can order the supplies I used to make this Stunning World of Good Grad card by visiting my online store or clicking on the links to be taken to each item’s location in my store.

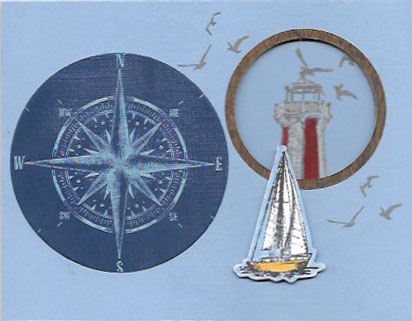
Sailing Home Peekaboo Slider Card

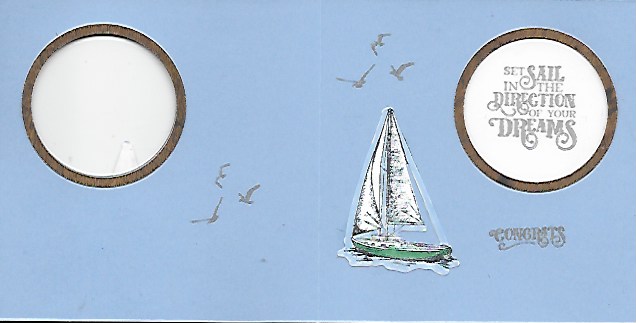
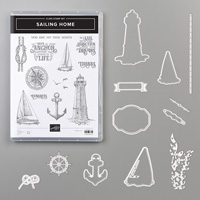
This Sailing Home Peekaboo Slider Card is my favorite of the group of slider cards I have made this week. I really love the whole Come Sail Away suite (152175) of products from the Sailing Home Stamp Set (149457) with its coordinating Smooth Sailing Dies (149481) to the beautiful Come Sail Away Designer Series Paper (149481). You can find the suite on page 145 in the new Annual Catalog.

Of course, you want to see this card opened. Check it out! This is a perfect graduation or new job card and is gender neutral.

Click on these links to see the other peekaboo slider cards I have shared this week.
Mosaic Mood
Pressed Petals
Over the Moon

Now it’s time for you to order this great Sailing Home Bundle so you can create cards for a variety of occasions. Click on the photos below to find the products I used in my online store. Thanks for stopping by to visit.


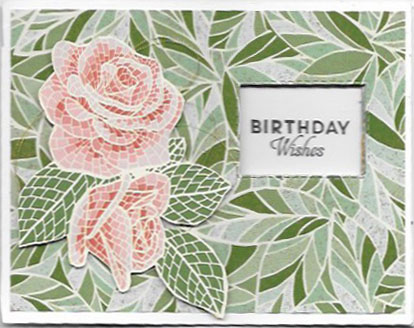
Mosaic Mood Peekaboo Slider Card

Peekaboo slider card created with Mosaic Mood Specialty Designer Series Paper

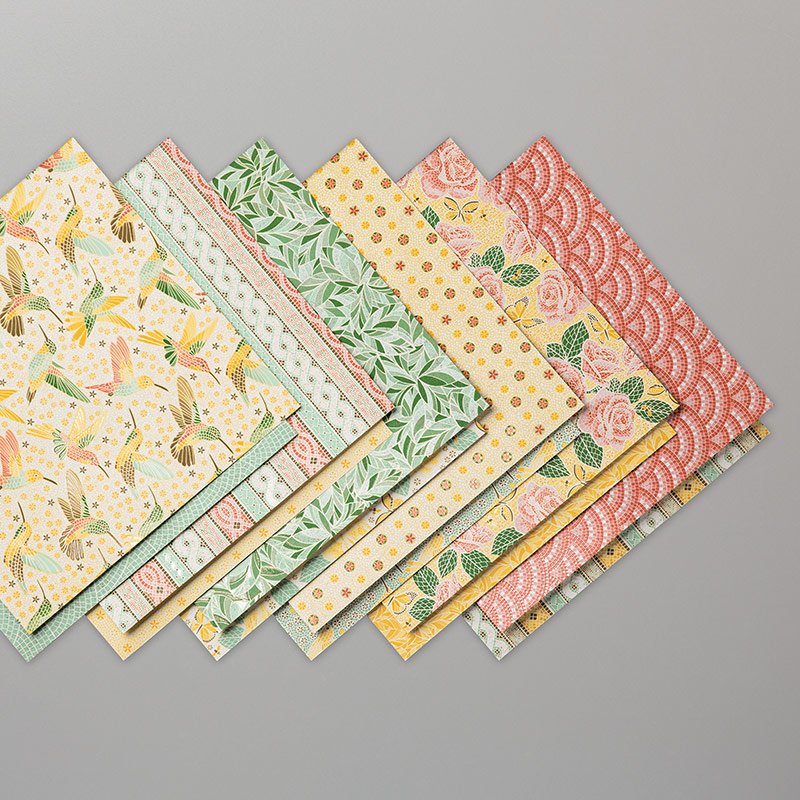
Here is another Peekaboo slider card. This time I used the stunning Mosaic Mood Specialty Designer Series Paper (149478) we received at OnStage this spring. The designs on this paper lend themselves to cutting out images from them. Unfortunately, there are no dies to match so you have to hand cut the images. Check out this wonderful paper.

Photo shows the patterns in the Mosaic Mood Specialty Designer Series Paper

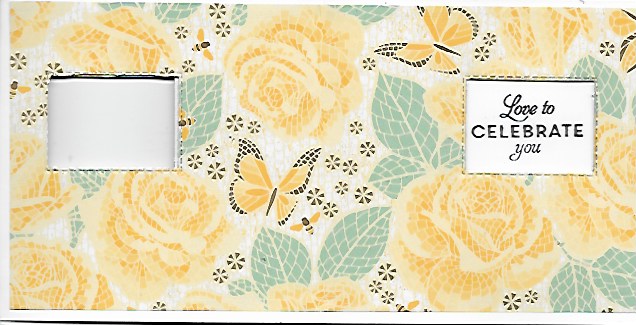
Here is the inside of this Mosaic Mood Peekaboo Slider Card. The dsp on the inside is the reverse side of the dsp on the front. I cut the roses out of another design of this Mosaic Mood designer series paper.

Photo is of the opened Mosaic Mood Peekaboo Slider Card

Supplies used:

I have one more peekaboo slider card up to my sleeve. I’ll post it later this week. Then I promise I will move on to other things. Thanks for stopping by. I’d love to have you leave a comment so I know you have been here.

Second Peekaboo Slide Card

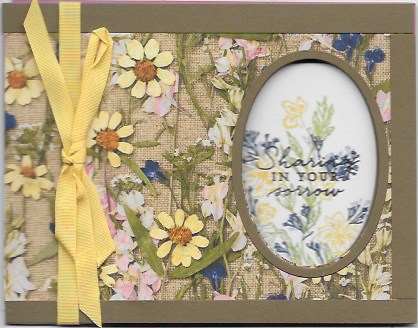
Closed view of Second Peekaboo Slide Card using Pressed Petals Specialty Designer Series Paper

Here is the second Peekaboo Slide Card I have created. (if you missed it, my first card can be seen here.) In this sample, I used the beautiful Pressed Petals Specialty Designer Series Paper (149500) and the coordinating Path of Petals stamp set (149283) to make a sympathy card for a friend who recently lost her husband.

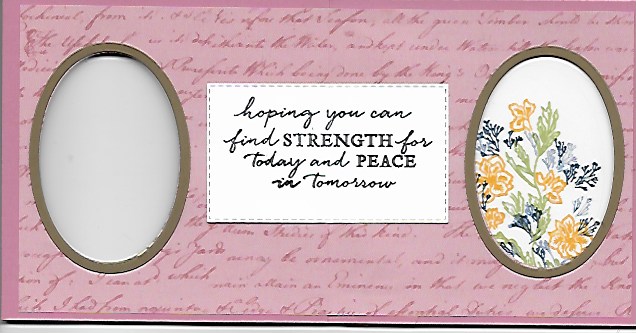
Check out the inside of this second peekaboo slide card:

Second Peekaboo Slide Card opened

If I had planned ahead, I might have oriented the card with the fold at the top instead of the side so the verse would fit inside the window. Since I didn’t, I slid in a bouquet of flowers and put the verse on a label. The dsp is the reverse side of the pattern I used on the front of this second peekaboo slide card.

To order the supplies I used for this card, click on the images below. Not shown are the Layering Oval Dies which are not available at the moment and the cheerful yellow retired ribbon.

Supplies used:


Thanks for stopping by to visit. I urge you to get a cup of tea or coffee or maybe a glass of wine depending on the time of day and browse through my blog. I’ll be sharing another peekaboo slide card later this week so come back to visit soon. I’d love to have you leave a comment below so I know you have been here.

Over the Moon Peekaboo Slider Card

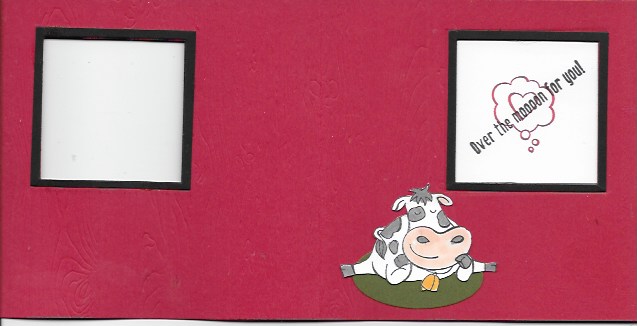
Closed Over the Moon Peekaboo Slider Card created with Over the Moon stamp set

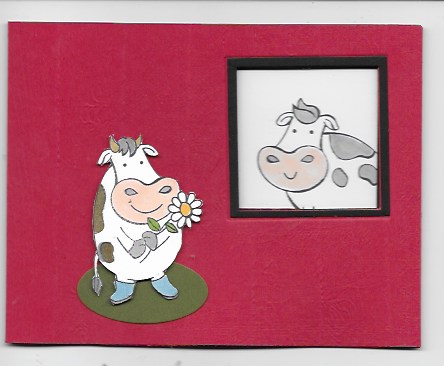
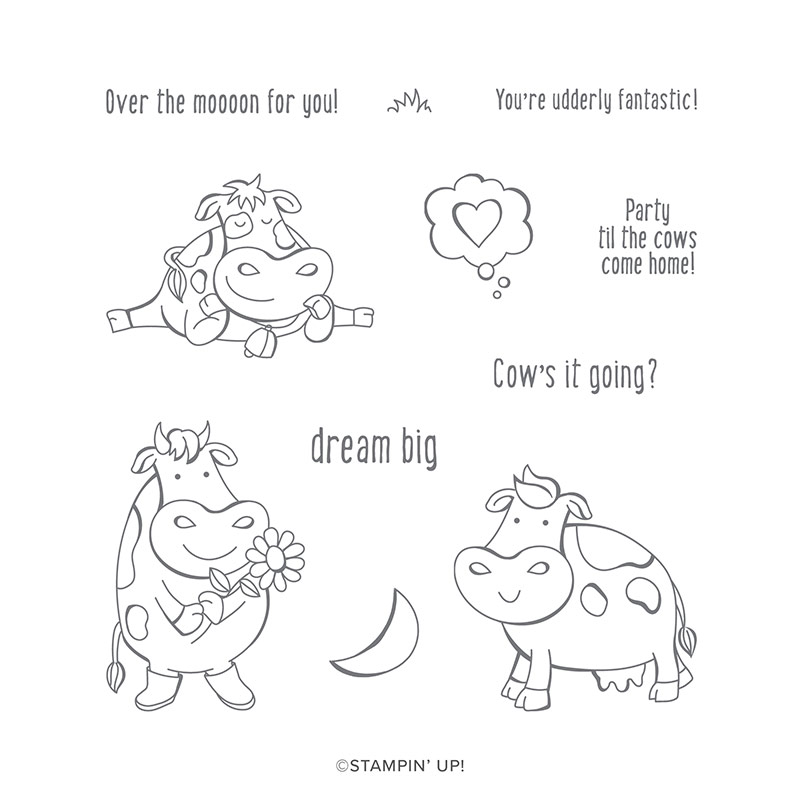
I had such fun making this darling Over the Moon Peekaboo Slider Card! It is my sort-of CASE of Cindy Brumbaugh”s Peekaboo Slider Card using the Over the Moon stamp set (149331) found on page 32 in the new 2018-2020 Annual Catalog. I followed her video with a few variations. Since I don’t have the retired Hardwood background stamp any longer I used the Pinewood Planks embossing folder for the walls of the barn. I also decided to have a square window instead of a round one.

These silly cows in the Over the Moon stamp set make me smile. I will be using them often. Just look at the cute sayings that come with the set!

photo shows the images in the Over the Moon stamp set

While the front of this peekaboo slider card is darling, but the real surprise is when you open the card! Look at what appears.

Over the Mooon peekaboo slider card opened

The image of the cow in the window disappears and the greeting slides into the window. This is so cool!

Supplies Used:

This card style has been used to create a wide variety of cards and is such fun. It looks complicated but once you have done it, making more cards like it is a piece of cake. I am going to make a series of posts using this style card so check back often.