The last two days of Sale-A-Bration are upon us! So do you have FOMO? FOMO stands for fear of missing out. If you have FOMO you need to go shopping in my online store NOW! August 31, this Wednesday is the last day of Sale-A-Bration and your last chance to pick up free Stampin’ Up! products with each $50 you spend on products from our annual catalog and July – December mini catalog. Or…..you could prepay for 3 months of Paper Pumpkin, Stampin’ Up!’s monthly subscription kit. Check it out here.
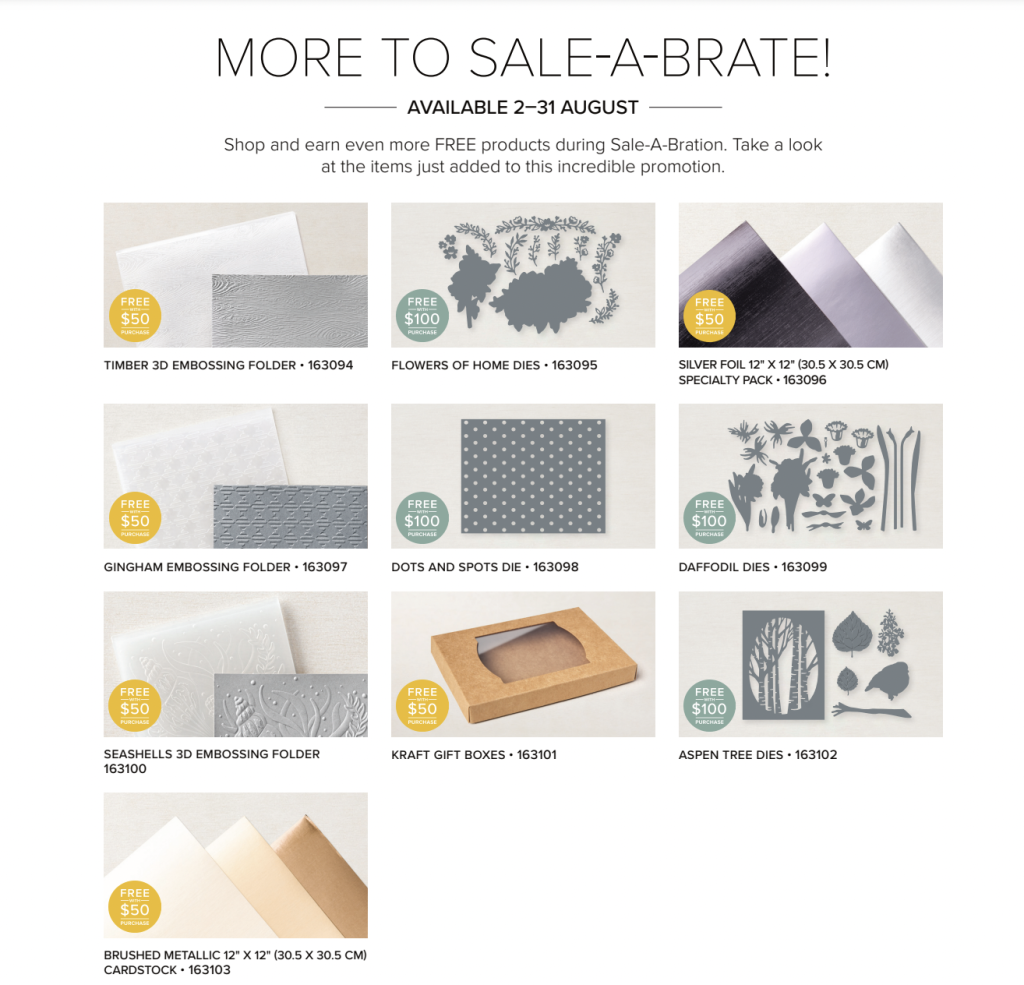
In addition to the items you can choose from the Sale-A-Bration brochure, you can choose from these additional items that were added the first of August. All the available choices can be seen and ordered here.
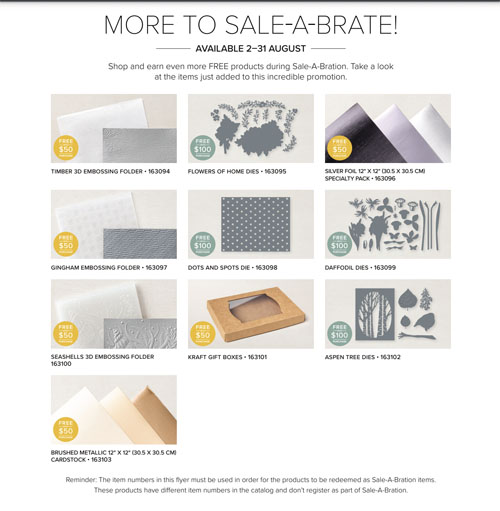
Since the last two days of Sale-A-Bration are here, you won’t be able to get these items for free after August 31. The items added in August are in the current catalogs but have different numbers and aren’t free. Shop now and don’t miss out!
This is the second month of Sale-A-Bration and there is more to celebrate! The Pool Party and Soft Sea Foam Cards & Envelopes and the Tree Lot Dies have already sold out! But never fear…there are still many more items from which to choose. In addition, Stampin’ Up! has added a new set of items. You can find these are items in the annual catalog but are being offered for free during Sale-A-Bration with different ordering numbers. Check them out! This link gives you a full-size version of the flyer.
I’m excited that Stampin’ Up! included dies in this new More to Sale-A-Brate offering of products. By ordering the matching stamp set and enough products to make your total $100 you can get the dies for free.
Paper Pumpkin Prepaid Subscription
One way you can increase your total to $100 is to order a 3 month prepaid subscription (137859) to the Paper Pumpkin. This subscription is $67.50 US. If you are already a subscriber, the three months will be added to your subscription and used first. Once the three months are up, your account reverts to a monthly billing.
If you are not familiar with the Paper Pumpkin, it is a monthly subscription program offered by Stampin’ Up! Each month you receive a kit in the mail with all you need to complete a project including an exclusive stamp set. All you need to add is a pair of scissors. Stampin’ Up! is generous with the amount of supplies and you generally have enough left over to create a few more cards of your own design. Complete directions with photos are included. Generally the project is greeting cards but sometimes it is party favors or some type of 3D project. The element of surprise and receiving fun mail adds to the benefits of subscribing to the Paper Pumpkin. Subscribe here for a month by month subscription. However, I encourage you to order the 3 month prepaid subscription and receive Sale-A-Bration awards.
I love this waterfall card with Kindest Gnomes. Waterfall cards are such fun to play with and the gnomes are so cute. The Kindest Gnomes bundle is in the July – December mini catalog and has a wintry feel to the images so it makes a perfect Christmas card. However, gnomes stay around all year so this month I will be featuring projects with the gnomes in all four seasons.
In fact, my August Bundle of the Month is the Kindest Gnomes bundle (159626). Purchase this bundle from me during August and I’ll send you a free bundle of 5 tutorials for projects you can make with this bundle.
There a variety of waterfall cards as the technique has been around for years. Most of the cards have the same-sized pieces for the waterfall so that you see a part of the layers lying underneath the top one. I like this style because the subsequent layers are hidden and a surprise as they flip up. The products I used for this card along with cutting dimensions are below. When you have your pieces cut, follow along with me in the video I made during my Facebook Live today.
Supplies Used
Kindest Gnomes Bundle (159626)
Leaves of Holly Stamp Set (159601) for greeting
Soft Suede Cardstock (115318) card base 11″ x 4 1/4″ scored at 5 1/2″ and folded; strip 3/4″ x 4 1/4″; waterfall pull 8 3/4″ x 2″ scored at 1 3/4″, 2 1/2″, 3 1/4″ and 4″; waterfall panels 3″ x 4″, 3″ x 3 1/4″,3″ x 2 12″, 3″ x 1 3/4″
Basic White Cardstock (159276) 5 1/4″ x 4″, 2 3/4″ x 1 1/2″, scrap
Storybook Gnomes Designer Series Paper (159615) 5″ x 3 3/4″ on card base; 2 3/4″ x 3 3/4″, 2 3/4″ x 3″, 2 3/4″ x 2 1/4″, plus fussy-cut and die-cut images
Tear & Tape Adhesive (154031)
Stampin’ Seal (152813)
Multipurpose Liquid Glue (1107550
Mini Stampin” Cut & Emboss Machine (150673)
Click here to go to the shopping cart with these supplies in it. You can remove any supplies you already have.
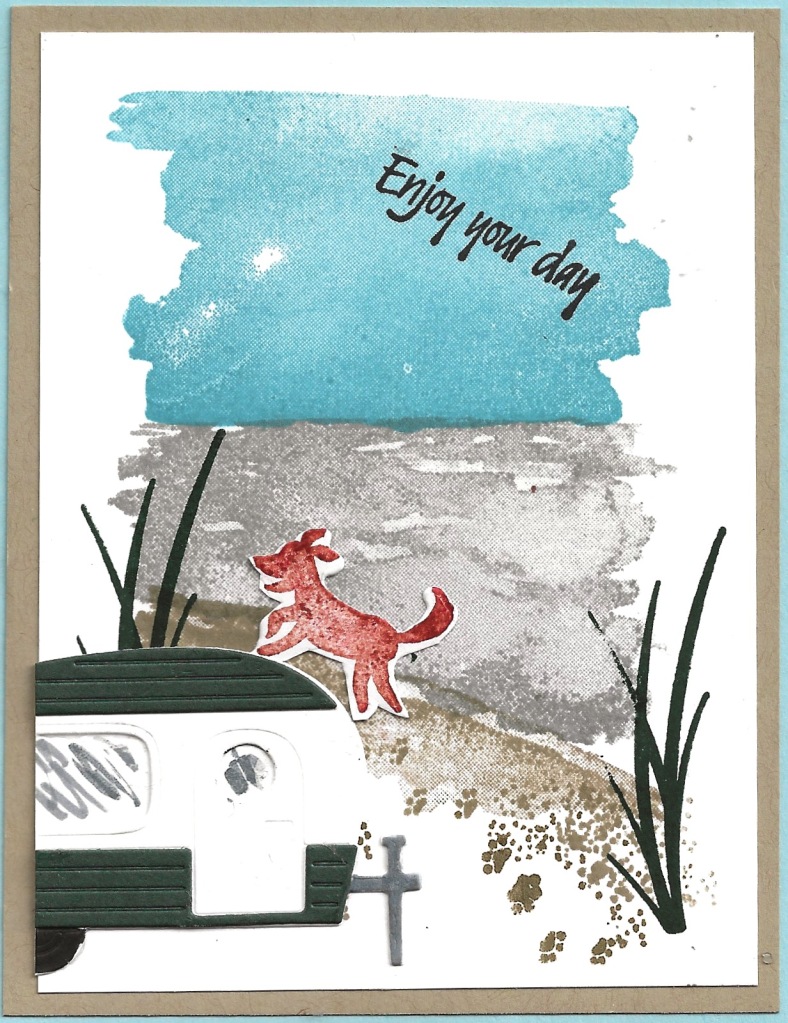
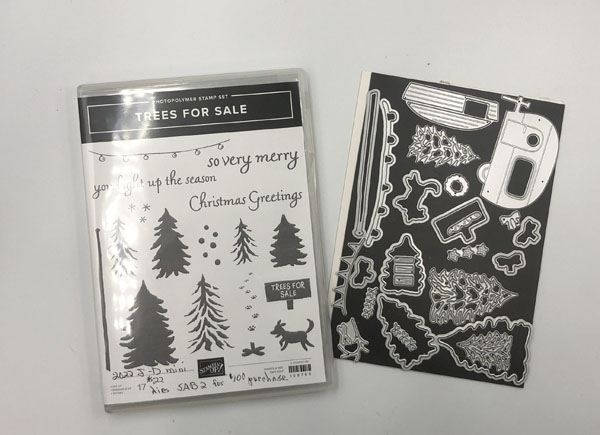
The Tree Lot Dies Go to the Beach in this last card featuring the Trees For Sale and Tree Lot Dies. The July Bundle of the Month is this combination of the Trees For Sale stamp set and the free Sale-a-Bration $100 level gift Tree Lot Dies. When you purchase the Trees For Sale and get the Tree Lot Dies from me during July, I will send you a free bundle of 5 tutorials to make the cards I have shared here on my blog and on my mailing list.
In making this card, I added the Oceanfront stamp set to the Tree Lot Dies to make a beach scene. The greeting comes from the Heron Habitat stamp set. My pooch sure is having fun running on the beach. Check out the previous cards I have shared using this ‘bundle’. You can find them here and here, and you can see some ideas the Stampin’ Up! concept artists stamped here.
Supplies for the Tree Lot Dies Go to the Beach card
Pool Party Cardstock 11″ x 4 1/4″ scored and folded at 5 1/2″ for card base
Crumb Cake Cardstock 5 1/2 ” x 4″
Basic White Cardstock 5″ x 3 3/4″, scraps for trailer and dog
Evening Evergreen Cardstock scrap
Tree Lot Dies (159938) Free with a $100 purchase
Multipurpose Liquid Glue
Stampin’ Seal
Paper Trimmer
Mini Stampin’ Cut & Emboss Machine
Here is the shopping cart with these supplies in my online store. You can remove the items you already have. You will need to add the Tree Lot Dies when you place your order.
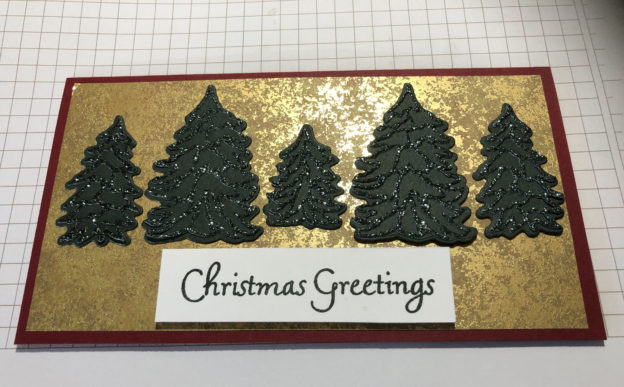
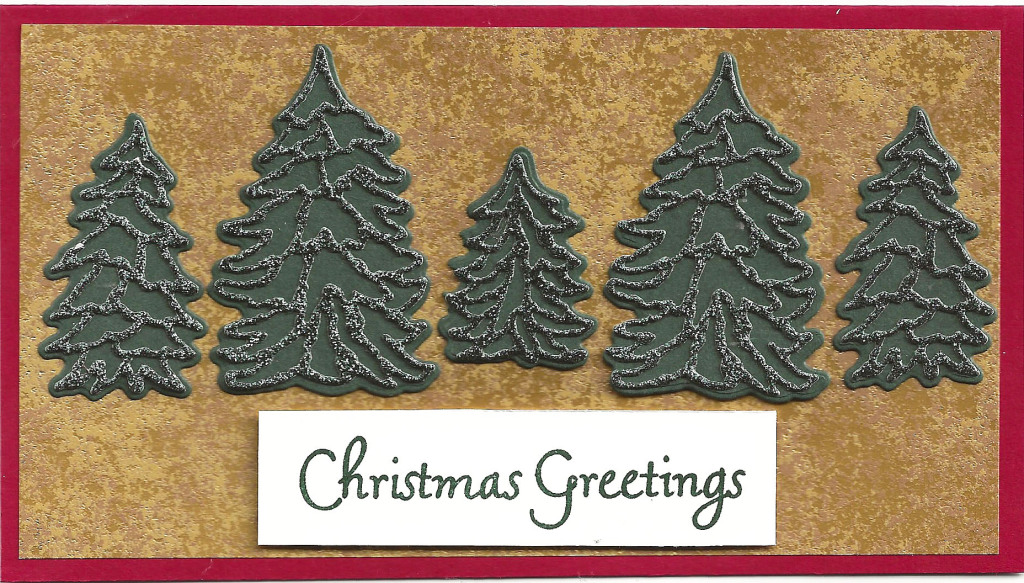
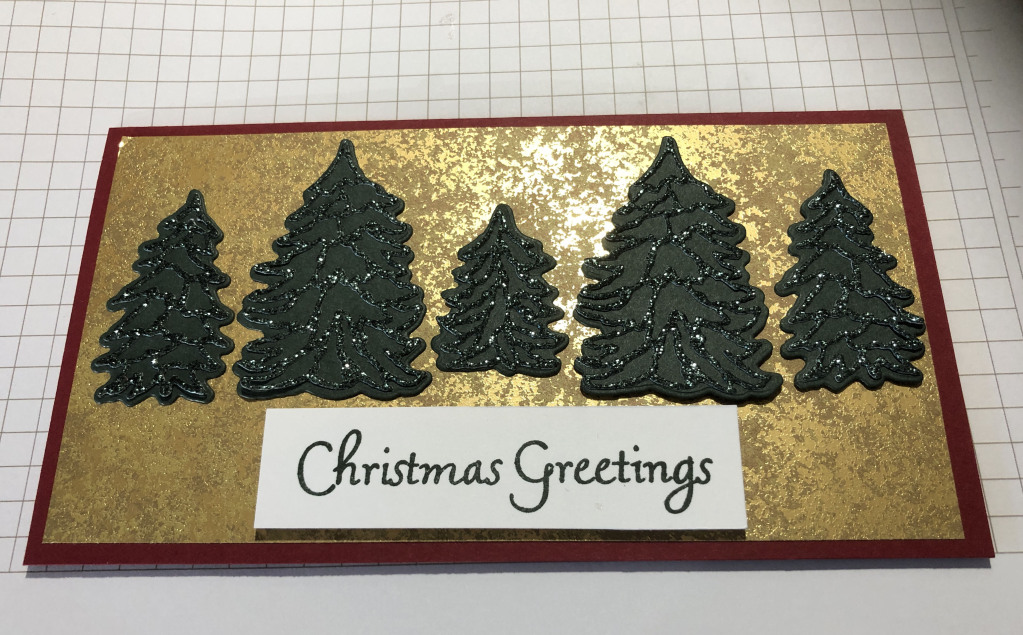
This Gleaming Trees For Sale Christmas card is another example of what you can do with my July Bundle of the Month. This ‘bundle’ consists of the Trees For Sale stamp set and the free Trees Lot Dies you can get with a $100 purchase during Sale-A-Bration. When you buy the Trees For Sale stamp set and get the Tree Lot Dies from me during July, I will send you a free bundle of 5 tutorials to use the ‘bundle’. You can see the bundle here and another card I have shared on my blog here.
The Trees For Sale stamp set and Tree Lot Dies can also be used to make beautiful cards. Today I combined the Evening Evergreen Glimmer paper and the beautiful Distressed Gold Specialty Paper with Cherry Cobbler, Evening Evergreen, and Basic White cardstock. Check out the glimmer and shine!
Supplies List for Gleaming Trees For Sale Christmas Card
Glimmer 12″ x 12″ Specialty Paper (159537) Evening Evergreen 4″ x 3″
Distressed Gold 12″ x 12″ Specialty Paper (159237) 6″ X 3 1/4″
Cherry Cobbler Cardstock (119685) 7″ x 6 1/4″ scored at 3 1/2 ” lengthwise and folded for card base
Basic White Cardstock (159276) scrap for greeting
Adhesive Sheets (152334) 4″ x 3″
Stampin’ Seal (152813)
Stampin’ Dimensionals (104430)
Paper Trimmer (152392)
Mini Stampin’ Cut & Emboss Machine (150673)
This link will take you to a shopping cart with all these supplies in it. You can remove any that you already have.
Tip for Using Detailed Dies
When using detailed dies like on the evergreen trees. Apply adhesive sheets to the back of your cardstock/glimmer paper/foil sheets before you die cut your images. It will make adhering the images much easier than trying to put small dots of liquid glue on them. In fact, I recommend that you have at least a 5 1/2″ x 4″ piece of each color cardstock backed with an adhesive sheet in your stash so it will be ready when needed.
Thank you for stopping by to read my blog. I’d love to have you first order the supplies to make this card for yourself and then to leave a comment so I know you have been by.
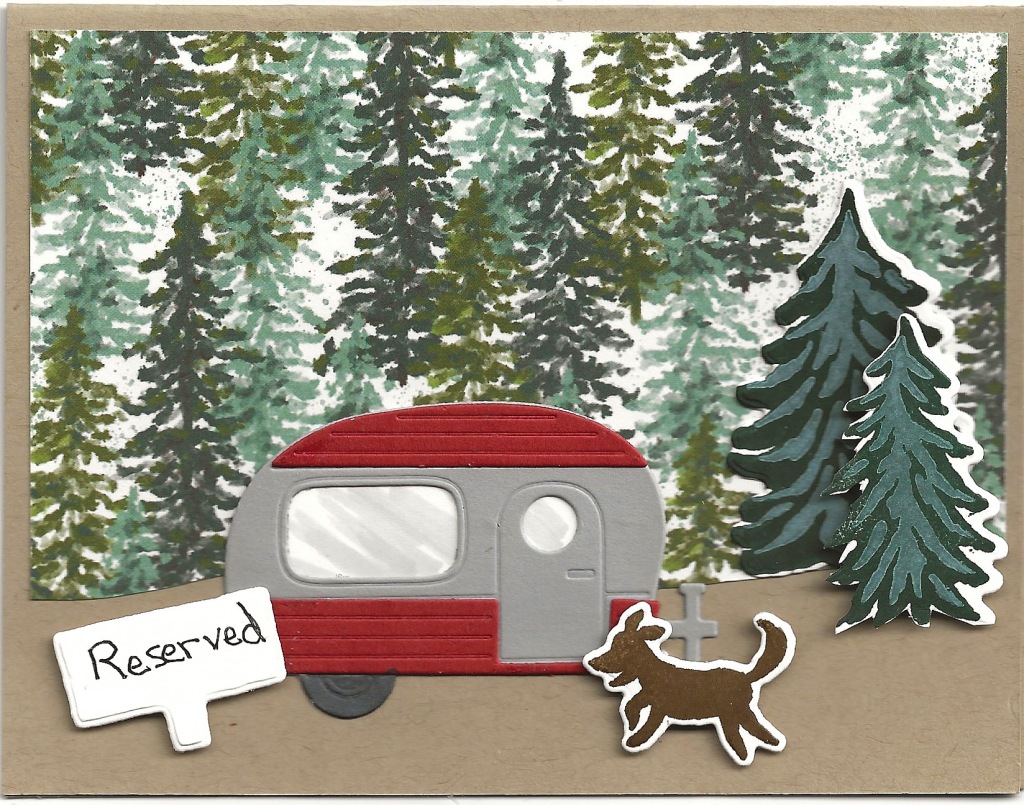
I had such fun creating this Trees For Sale with Trailer greeting card! I used the Trees For Sale stamp set and the coordinating Tree Lot Dies that are one of the free Sale-a-bration choices when you purchase $100 or more during Sale-A-Bration.
The background of this is one of the patterns in the Boughs of Holly Designer Series Paper. It is perfect for backgrounds like this. I hand printed the sign. I used Basic White cardstock that I lightly colored with a Smoky Slate marker to simulate a reflection on the glass for the windows of the trailer. The trees actually were a reject from another card I created with this combination of stamp set and dies. I stamped the solid trees on Basic White cardstock with Evening Evergreen ink. Then I stamped the details with Basic White ink, hoping for a solid white color. However, I like the end result as it blends nicely with the background. A bold solid white would have stuck out.
Supplies Used for the Trees For Sale with Trailer Card
Trees For Sale stamp set (158785)
Tree Lot Dies (159938)
Evening Evergreen Classic Stamp Pad (155576)
White Craft Stampin’ Ink (147277)
Soft Suede Classic Stamp Pad (147115)
Basic Black Stampin’ Blends (154943) Light
Smoky Slate Stampin’ Blends (154904) Light
Crumb Cake Cardstock (120953) 8 1/2″ x 5 1/2″
Basic White Cardstock (159276) scraps
Cajun Craze Cardstock (119584) scrap
Boughs of Holly Designer Series Paper (159600) 5 1/4″ x 4″ bottom cut by hand
Smoky Slate Cardstock (131202) scrap
Click here to be taken to the shopping cart in my online store. You can remove any supplies you already have.
During July, I am featuring this combination of the Trees For Sale and the Tree Lot Dies as my Bundle of the Month. Purchase the stamp set and get the free set of dies from me. I’ll send you a bundle of five tutorials for cards using that ‘bundle’. Check out the details in this post.
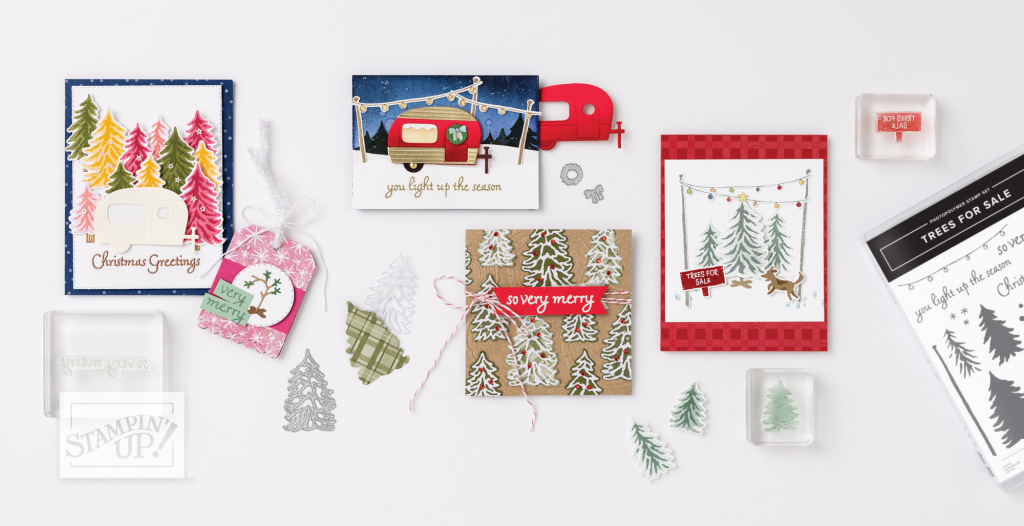
The fun July Bundle of the month is not quite a bundle. It is a combination of the Trees For Sale stamp set and the Free Tree Lot Dies. Order the Trees for Sale stamp set (159785) plus other supplies to come to a total of $100 for your order. Then choose the Free the Tree Lot Dies (159938) for your gift. If you order this combination from me during the month of July, I will send you a set of tutorials for 5 cards. Here are some of the cards that Stampin’ Up! concept artists have created with this combination.
I will be sharing cards I create with this bundle here on my blog. Tutorials for these cards will be included in the bundle of tutorials I send you.
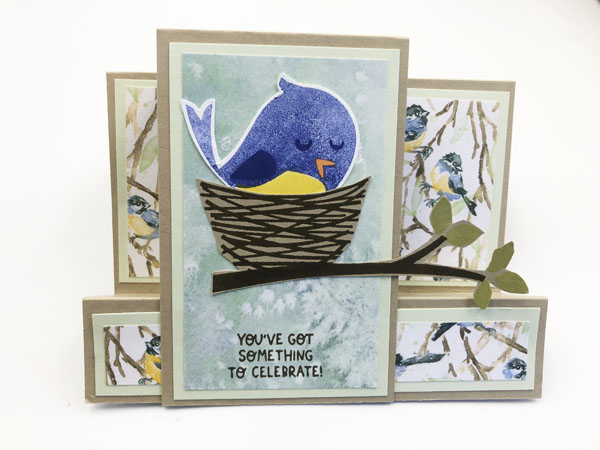
Making this Rings of Love Fancy Fold card is really quite easy! Start with a Crumb Cake cardstock base. Then add a layer of Soft Sea Foam cardstock and the beautiful Rings of Love designer series paper that will be free during Sale-a-bration for a $50 purchase.
I stamped the branch, leaves, and nest on crumb cake cardstock with Soft Suede and Parakeet Party ink and fussy cut them out. The bird was stamped on a scrap of Basic White cardstock using Starry Night ink stamped off once and the wing with full strength Starry Night ink. I stamped the belly with Daffodil Delight ink and colored the beak with Pumpkin Pie Stampin’ Blend. When I finished coloring the bird, I punched it out with the Songbird Builder Punch. Next I adhered the branch with the nest and the bird to the front of the narrow upright strip of cardstock. The finishing step was to stamp the greeting and then adhere this piece to the cardbase.
Supplies Used for Rings of Love Fancy Fold Card
Sweet Songbirds Bundle
Crumb Cake Cardstock – 8 1/2″ x 5 1/2″ scored at 1 1/4″ mountain fold), 2 1/2″ (valley fold), 5 1/2″ (mountain fold); 8 1/2″ x 2 3/4″ scored at 4 1/4″ (mountain fold); scrap fro nest and branch
Soft Sea Foam Cardstock 5 1/4″ x 2 3/4″, 5 1/4″ x 1″, 2 of 4″ x 2 1/2″
Basic White Cardstock scrap for bird
Rings of Love Designer Series Paper (free with $50 purchase during Sale-a-bration) 5″ x 2 1/2″, 5″ x 3/4″, 3 3/4″ x 2 1/4″
You can order these supplies here. What you don’t need can be removed from the shopping cart. The Rings of Love Designer Series Paper will be available July 1.
Check out this video of the Facebook Live I did demonstrating how I made this card.
What could be better than Awesome Free shipping Today Only! from Stampin’ Up! You now have the fairly new 2022-2023 Annual Catalog and the Last Chance Sale is still going on. This offer on orders of $75 or more will help you finish completing your wish list and give you the opportunity to stock up on basics like paper, adhesives. But it is for today only. Check out your supply of those items and place your order right now so you don’t miss out! Remember it is for orders of $75 or more. Now is the time to shop!
I’ve placed my order. Will you? I always appreciate your business.
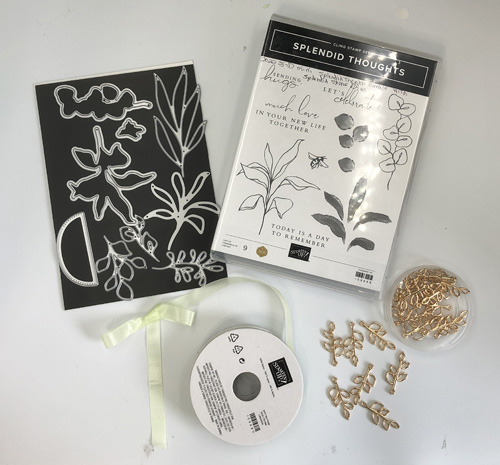
Here is a sneak peek at the beautiful Splendid Thoughts Suite. The stellar part of the suite is the Splendid Day Specialty Designer Series Paper. One side of each sheet of paper is embossed foil, gold, each design a different gorgeous color. I like to cut a 3″ square from each sheet, cut it in half diagonally and mount the squares showing the two sides on the cardboard that comes in the package.
As well as the Splendid Day Specialty Designer Series Paper, the Splendid Thoughts Suite includes the Splendid Thoughts Bundle, Soft Sea Foam seam binding ribbon, and Open Leaf Trinkets.
Sneak Peek of Beautiful Splendid Thoughts Suite Card
I cased a card by Christy Fulk that I saw on Facebook to make this card. The supplies and cutting measurements are listed below. Since the July – December mini catalog is not live yet (have to wait until July 1, sorry) I can’t give you links to the products in the suite. However, if you want to order this suite before July 1, join my team of demonstrators, start your own business, and have the privilege of pre-ordering new supplies. Contact me at sue@soggystamper.com or visit my demonstrator website for more information.
Splendid Day Specialty Designer Series Paper (159666) 5 1/2″ x 3″, 4″ x 3″
I also want to remind you that the January – July mini catalog shopping period ends June 30. While some of the product in this catalog carried on into the 2022-2023 Annual catalog, the rest of the products are on a last-chance basis with some discounted and some already sold out. this is your last chance to order them. Visit my online store to see what is discounted and what is still available. Be sure to order those items you have had your eye on before it’s too late!
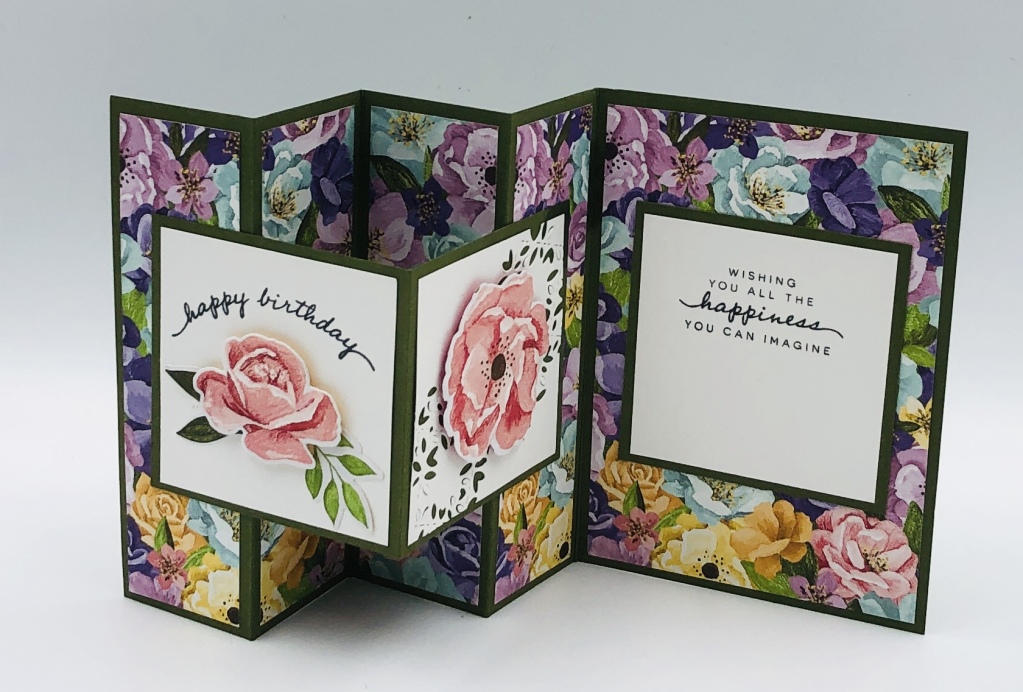
I am excited to share with you this beautiful WV fold card! WV you ask? The left side of the card forms a W while the two white panels with the roses on them forms a V. This is a very easy card to create and when you use one of Stampin’ Up!’s beautiful designer series papers such as this Hues of Happiness Designer Series Paper (158822), you end up with a gorgeous card!
Supplies Used for Beautiful WV Fold Card
Happiness Abounds Bundle
Mossy Meadow Cardstock – 11″ x 5 1/2″ scored at 1 3/4″, 3 1/2″, 5 1/4″, 7″; 6″ x 3″ scored at 3″, 3″ x 3″
Basic White Cardstock – 3 pieces 2 3/4″ xz 2 3/4″
Hues of Happiness Designer Series Paper – 4 pieces 5 1/4″ x 1 1/2″,5 1/4″ x 3, scraps of the design with the largest roses
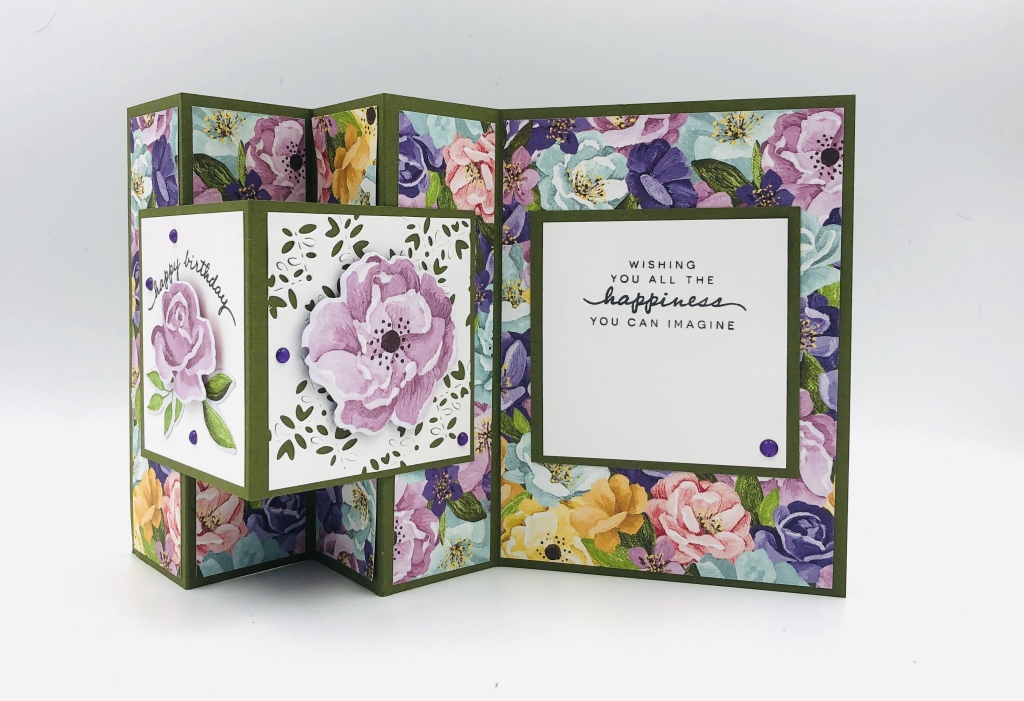
Most of the dies in this Happiness Abounds Bundle will cut out the flowers and leaves in the design with the large individual flowers. I the first card, I cut out pink flowers. In the card below I cut out purple flowers. Same designer series paper but different looking cards.
On the second card I added some bling from the Glossy Dots Assortment which is included in the Hues of Happiness Suite. You can order the supplies needed for this project beginning May 3 when the new 2022-2023 Annual Catalog goes live. I have created a shopping cart for you, just click here. You can easily deselect any product you already have. Watch the video of my FaceBook Live where I demonstrated making this card.
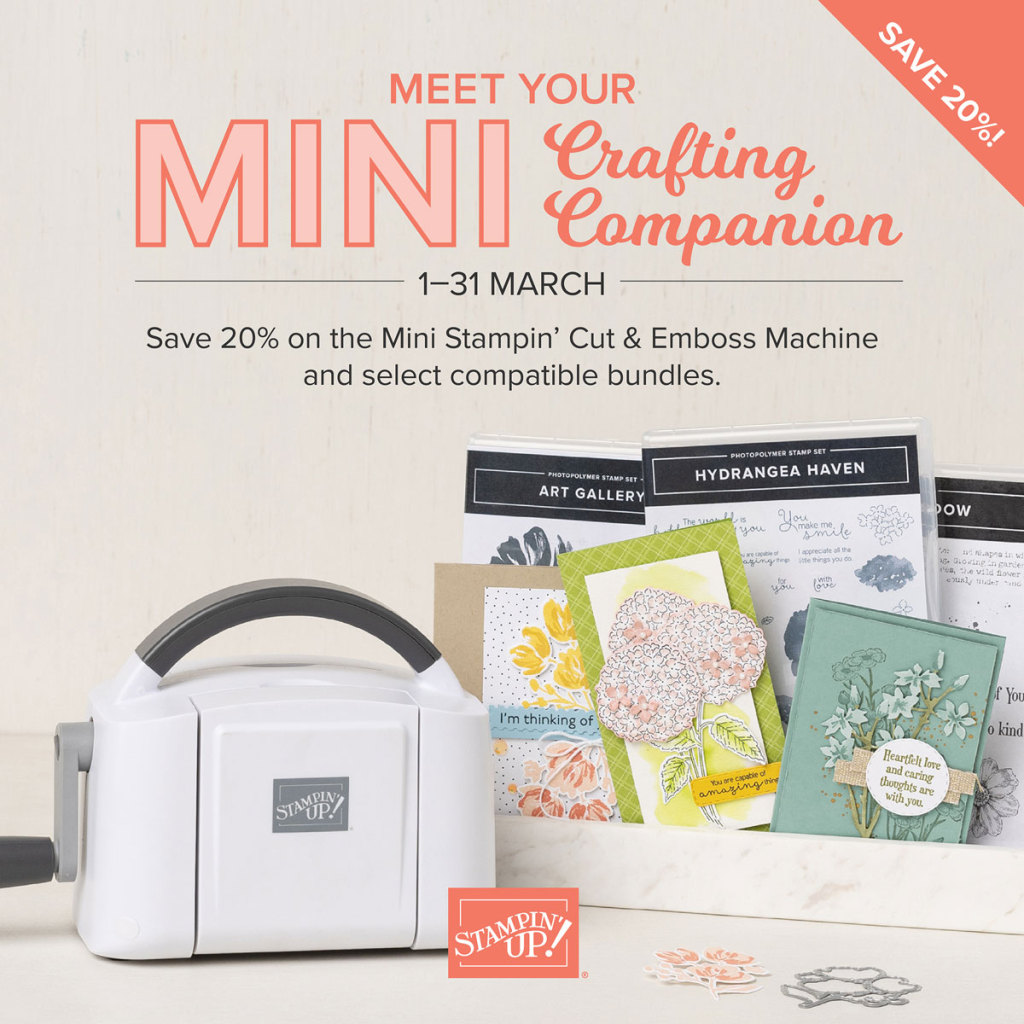
Today’s your last chance to get this great Mini Stampin’ Cut and Emboss machine and selected stamp/dies bundles at 20% off! This little die-cutting machine is the perfect size for a small crafting area as the platforms fold up taking less storage space. It is lightweight yet sturdy and most of our dies will fit on the cutting plates. an added incentive for buying it today is that the price is increasing with the new 2022-2023 Annual catalog.
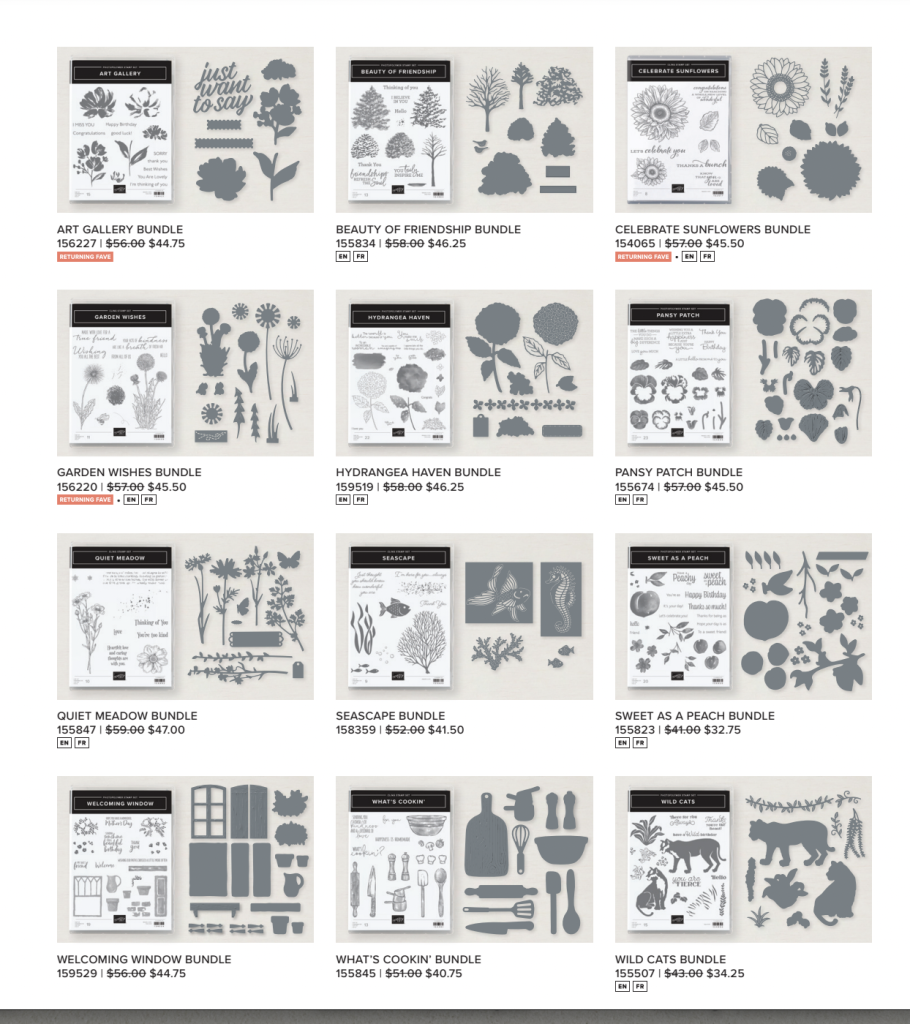
I don’t want you to miss out on getting these bundles either. Certainly some of them are on your wishlist and now is the time to get them. Check them out!
I have several of these bundles and want to share some of the cards I have made with them.
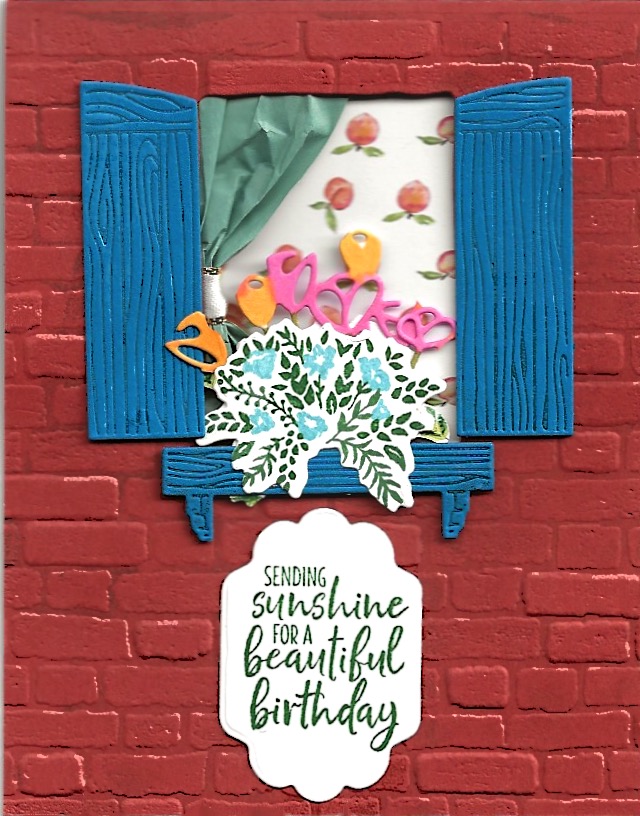
Welcoming Window Bundle
The first one is with the Welcoming Window bundle (159529) that I bought with this sale. I inked one side of the Brick & Mortar embossing folder (149643) to make it look aged. The dies for the shutters and window box were also inked for additional depth of the embossing. The curtain is a piece of cotton paper that was in the Eden’s Garden collection last fall.
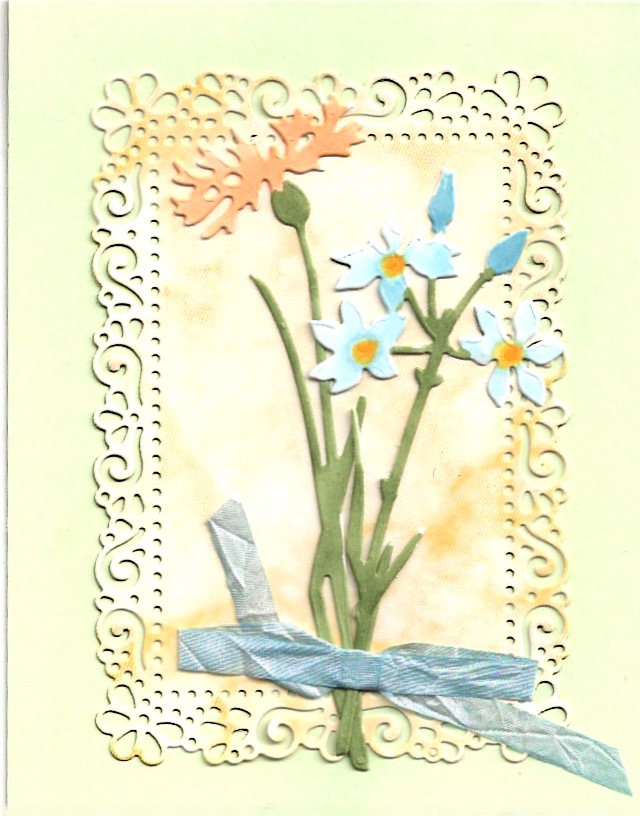
Quiet Meadow Bundle
The Quiet Meadow bundle (155847) is perfect for vintage and collage type cards. While the dies do not cut out any of the stamped images, they compliment the images. In the first card, I just used the dies cutting out two of the flowers from Basic White cardstock and coloring them with Stampin’ Blends. I cut a piece of designer series paper with one of the retiring Ornate Layers dies (152726) and used it as a subtle background. I colored a length of White 1/4″ Crinkled Seam Binding with a Balmy Blue Stampin’ Blend for the bow.
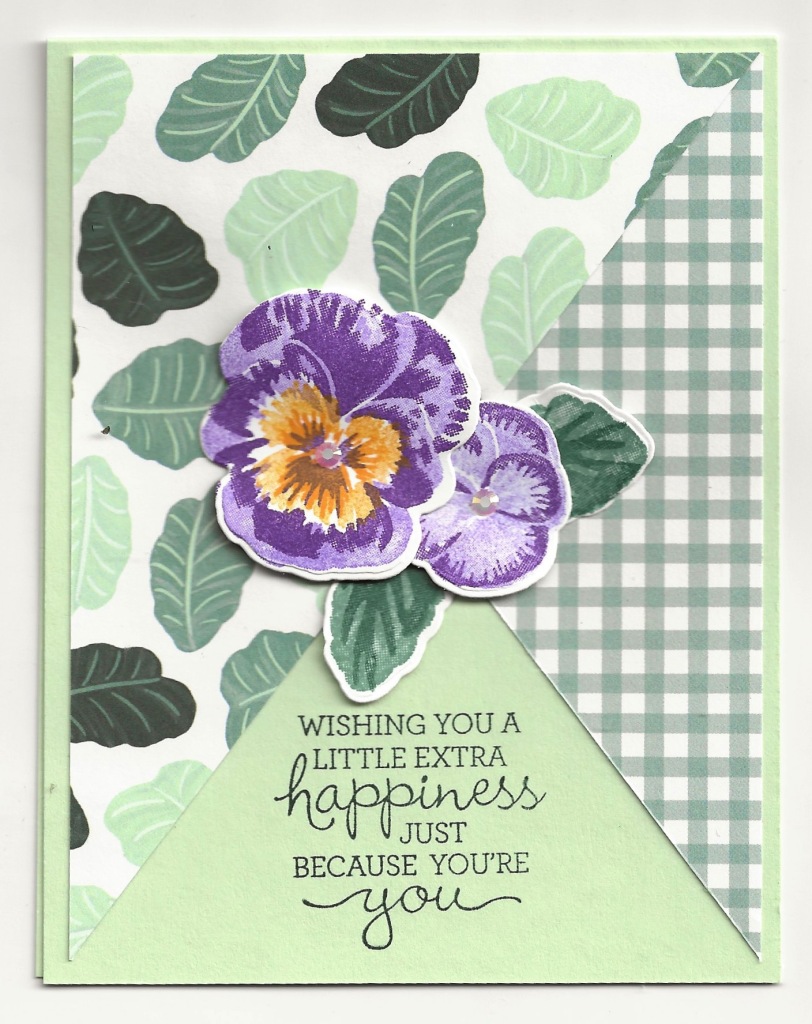
Pansy Patch Bundle
The last two cards I want to share with you are created with the Pansy Patch Bundle (155674). The first one uses one of the Pansy Petals designer series papers (155807) and stamped flowers die cut with the dies. Your creativity knows no limits when it comes to combining colors for these cheerful pansies. My second card features the dies to create three dimensions to the flowers. I used one of the Scalloped Contours dies (158356) to cut out a piece of the Pansy Petals designer series papers.
I hope you have enjoyed seeing these cards and that they will inspire you to buy a couple of the bundles today while they are on sale. Check out the sale ones here! I appreciate you ordering from me.
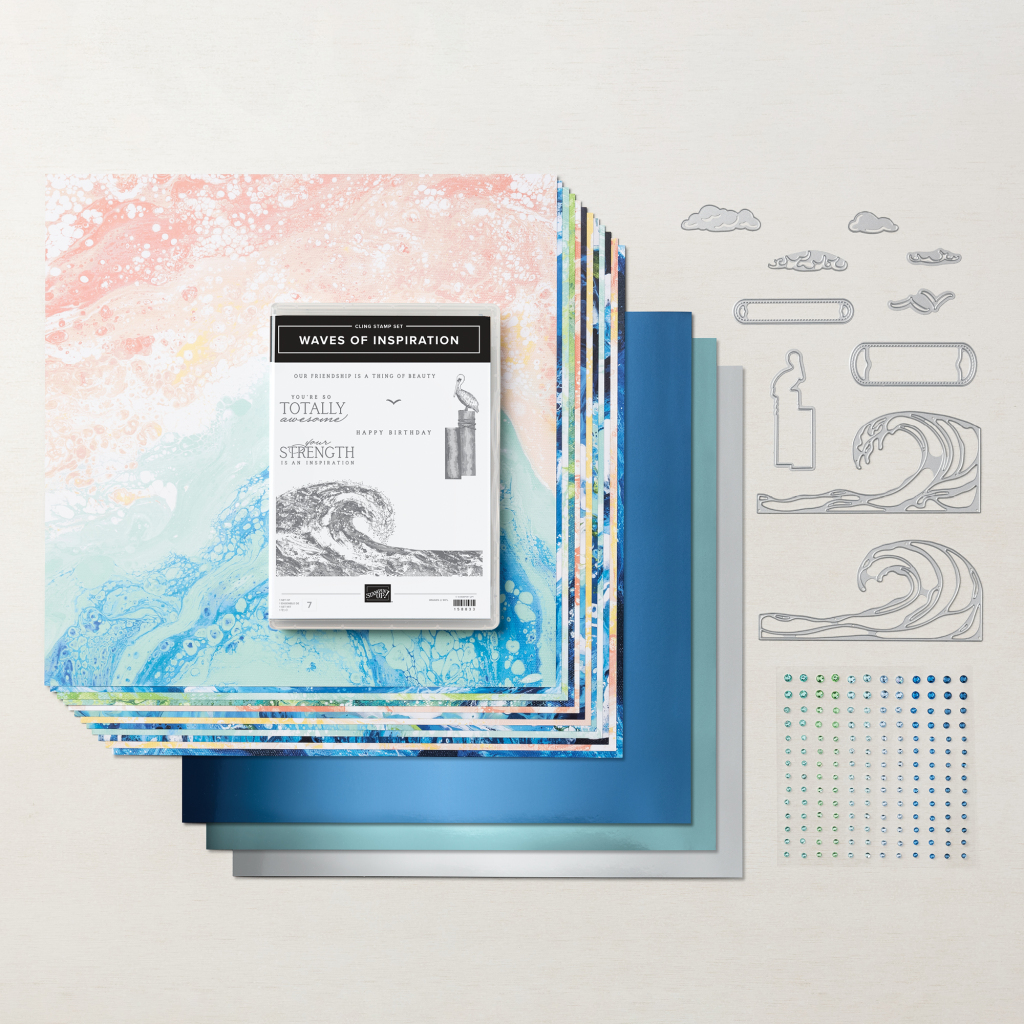
I created this Waves of the Ocean Tower Card to feature some of the beautiful products in the Waves of the Ocean Collection (161797). This collection is available now through May 2nd as long as product lasts. It includes a stamp and die bundle, beautiful designer series papers, Blue foil sheets, and some wonderful rhinestone Waves Basic Jewels. The Waves of Inspiration Bundle ()158841) does carry forward into the new 2022-2023 Annual catalog. The rest of the collection will retire May 2 if supplies last that long.
Supplies Used to Make the Waves of the Ocean Tower Card
Waves of Inspiration Stamp Set (158833)
Night of Navy Cardstock (100867) 8 1/4″ x 5 1/2″
Basic White Cardstock (159276) 2 pieces 5 1/4″ x 2″, scrap for greeting
Waves of the Ocean Designer Series Paper (159982) dark blue/blue-green design 4 pieces 5 1/4″ x 3/4″, one piece 4″ x 1 1/4″, 2 pieces 4″ x 3/4″
Blue Foils Specialty Paper (159983) – Coastal Cabana color 4 pieces 5 3/8″ x 7/8″, 1 piece 4 1/8″ x 1 3/8″, 2 pieces 4 1/8″ x 7/8″, 2 pieces 5 3/8″ x 2 1/8″ for the center sections, 1 1/4″ x 1 1/4″ for greeting mat
Gray Granite Classic Stampin’ Pad (147118)
Night of Navy Classic Stampin’ Pad (147110)
Pebbles Enamel Shapes (158141)
Click here to go to a shopping cart in my online store that has all these products already selected for you. If there are items in the cart you already have, you can uncheck them.
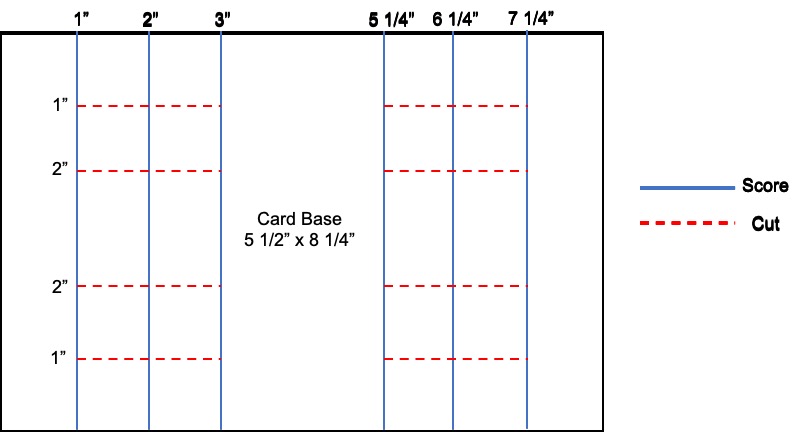
Thank you, Debbie Henderson and Mary Deatherage, for sharing this template. Now I’m passing it on to you. After cutting and scoring your card base, watch my video to see how to put it together.
Thanks for visiting my blog. I urge you to order these products soon as they are quite popular and may run out before May.
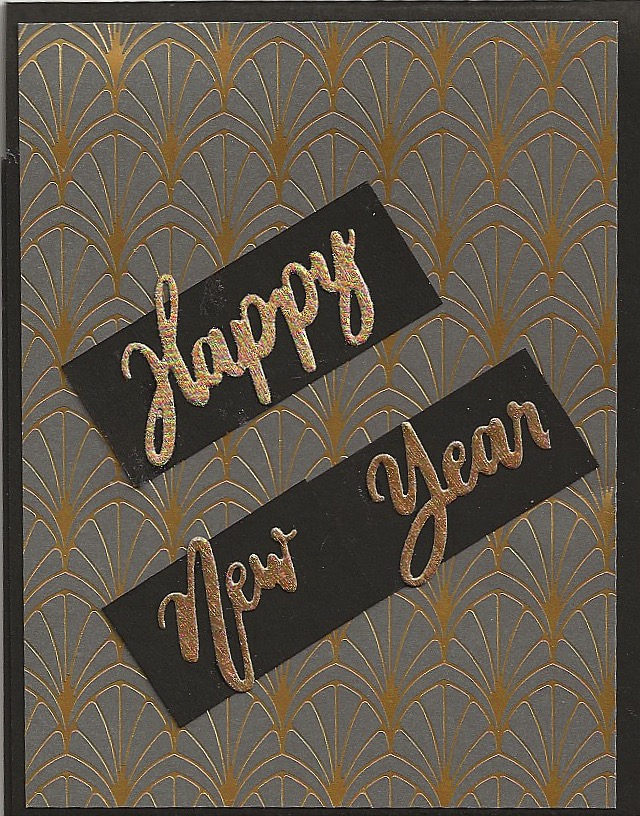
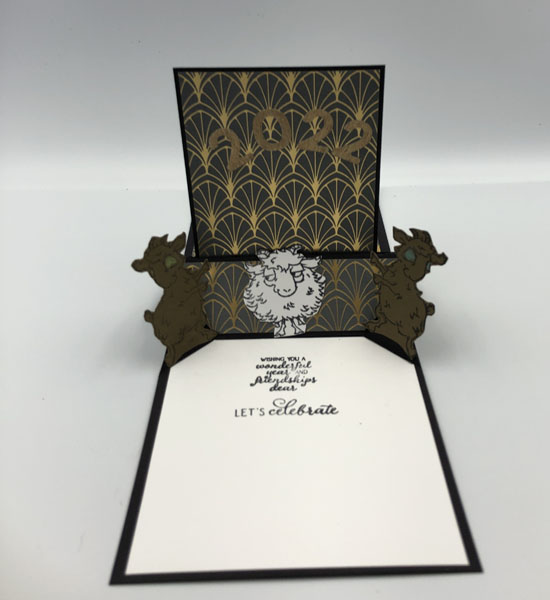
You know I love fancy fold cards and this fancy fold Happy New Year card is my favorite so far. It is a stage pop-up card I learned how to make from Heejung Hunsberger. Now the front of this card is lovely with the gorgeous Simply Elegant Specialty Designer Series Paper. But look at the inside! I love, love, love it!
I shared how to make this on last Saturday’s Facebook Live presentation and told the viewers that I would post the materials and cutting measurements on my blog so here goes.
Supplies Used for Fancy Fold Happy New Year Card
Stamp sets – Peaceful Deer, Way to Goat
Ink – Tuxedo Black Memento
Paper – Basic White Cardstock 4 1/4″ x 4″ and a scrap for goat, Basic Black Cardstock 11″ x 4 1/4″ scored at 5 1/2″; 12″ x 4 1/4″ scored at 4 1/2″, 6″, 7 1/2″; 5″ x 3 1/4″ scored at 1/2″ on short end Simply Elegant Specialty Designer Series Paper for pop-up panel 4 1/4″ x 3 1/8″; 4″ x 1 1/4″, 4 1/4″ x 4″ for inside of card front, 5 1/4″ x 4″ for card front Soft Suede Cardstock scraps for the dancing goats Accessories – Soft Pastels for eyeshadow on goats, Paper Snips, Paper Trimmer, Multipurpose Liquid Glue
To order these supplies click here to be taken to the shopping cart. You can delete any supplies you already have from the cart before checking out. Thanks for ordering from me.
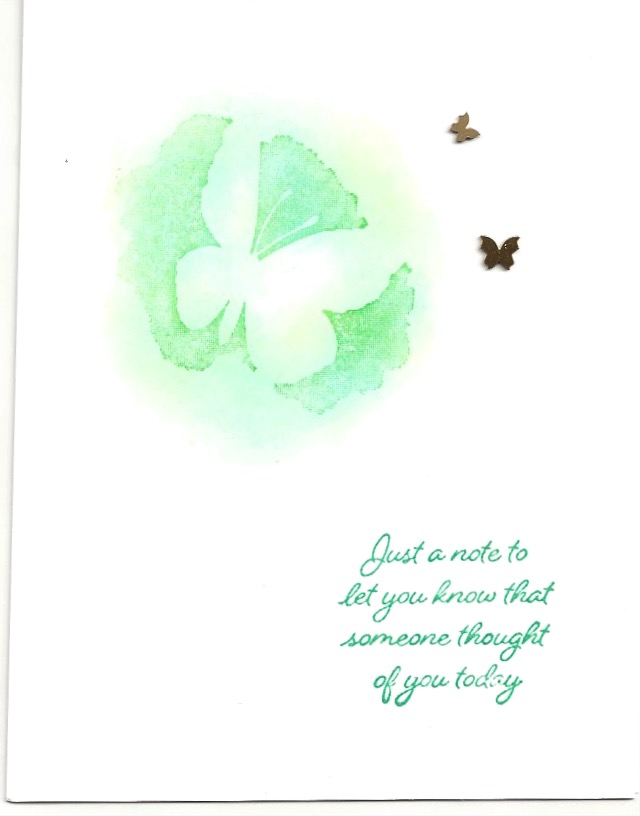
I created this Beautiful Amazing Silhouettes sneak peek for a couple of reasons. First, the weekly challenge on SUDSOL, an online group I belong to, was to create and share a Clean and Simple card. A Clean & Simple card is one where there is a lot of white space, space where there is no embossing, stamping, designer papers, or embellishments. A C & S card has minimal layers and clean lines.
I received this Amazing Silhouettes stamp set as a prize during the Stampin’ Up! OnStage at Home virtual convention this November and originally thought I would trade with someone for a different set. The style of this set just wasn’t my style. But I started thinking of ways to use this set and came up with the poppin’ pastels technique.
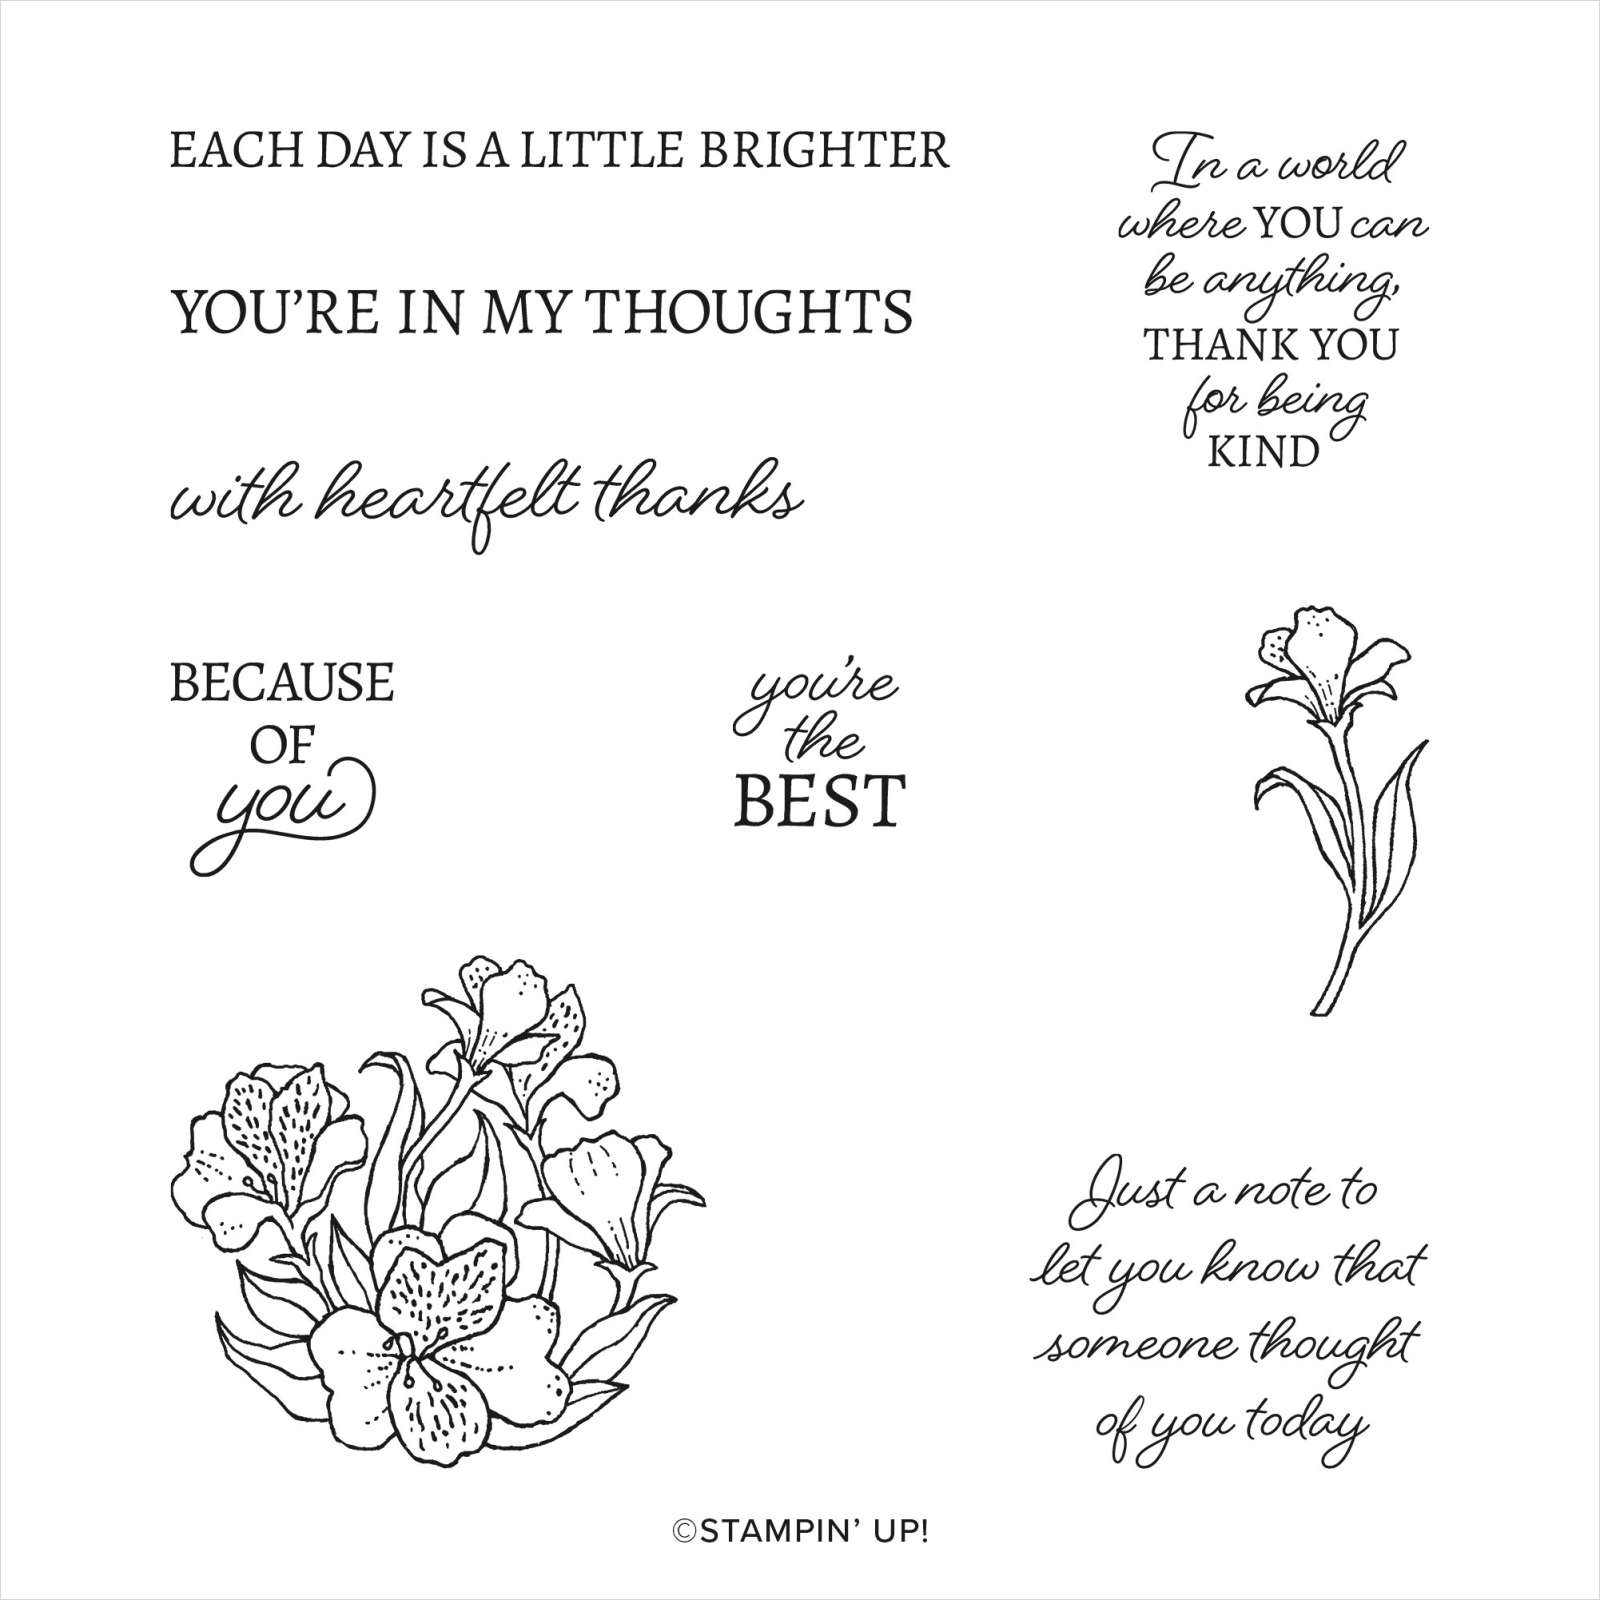
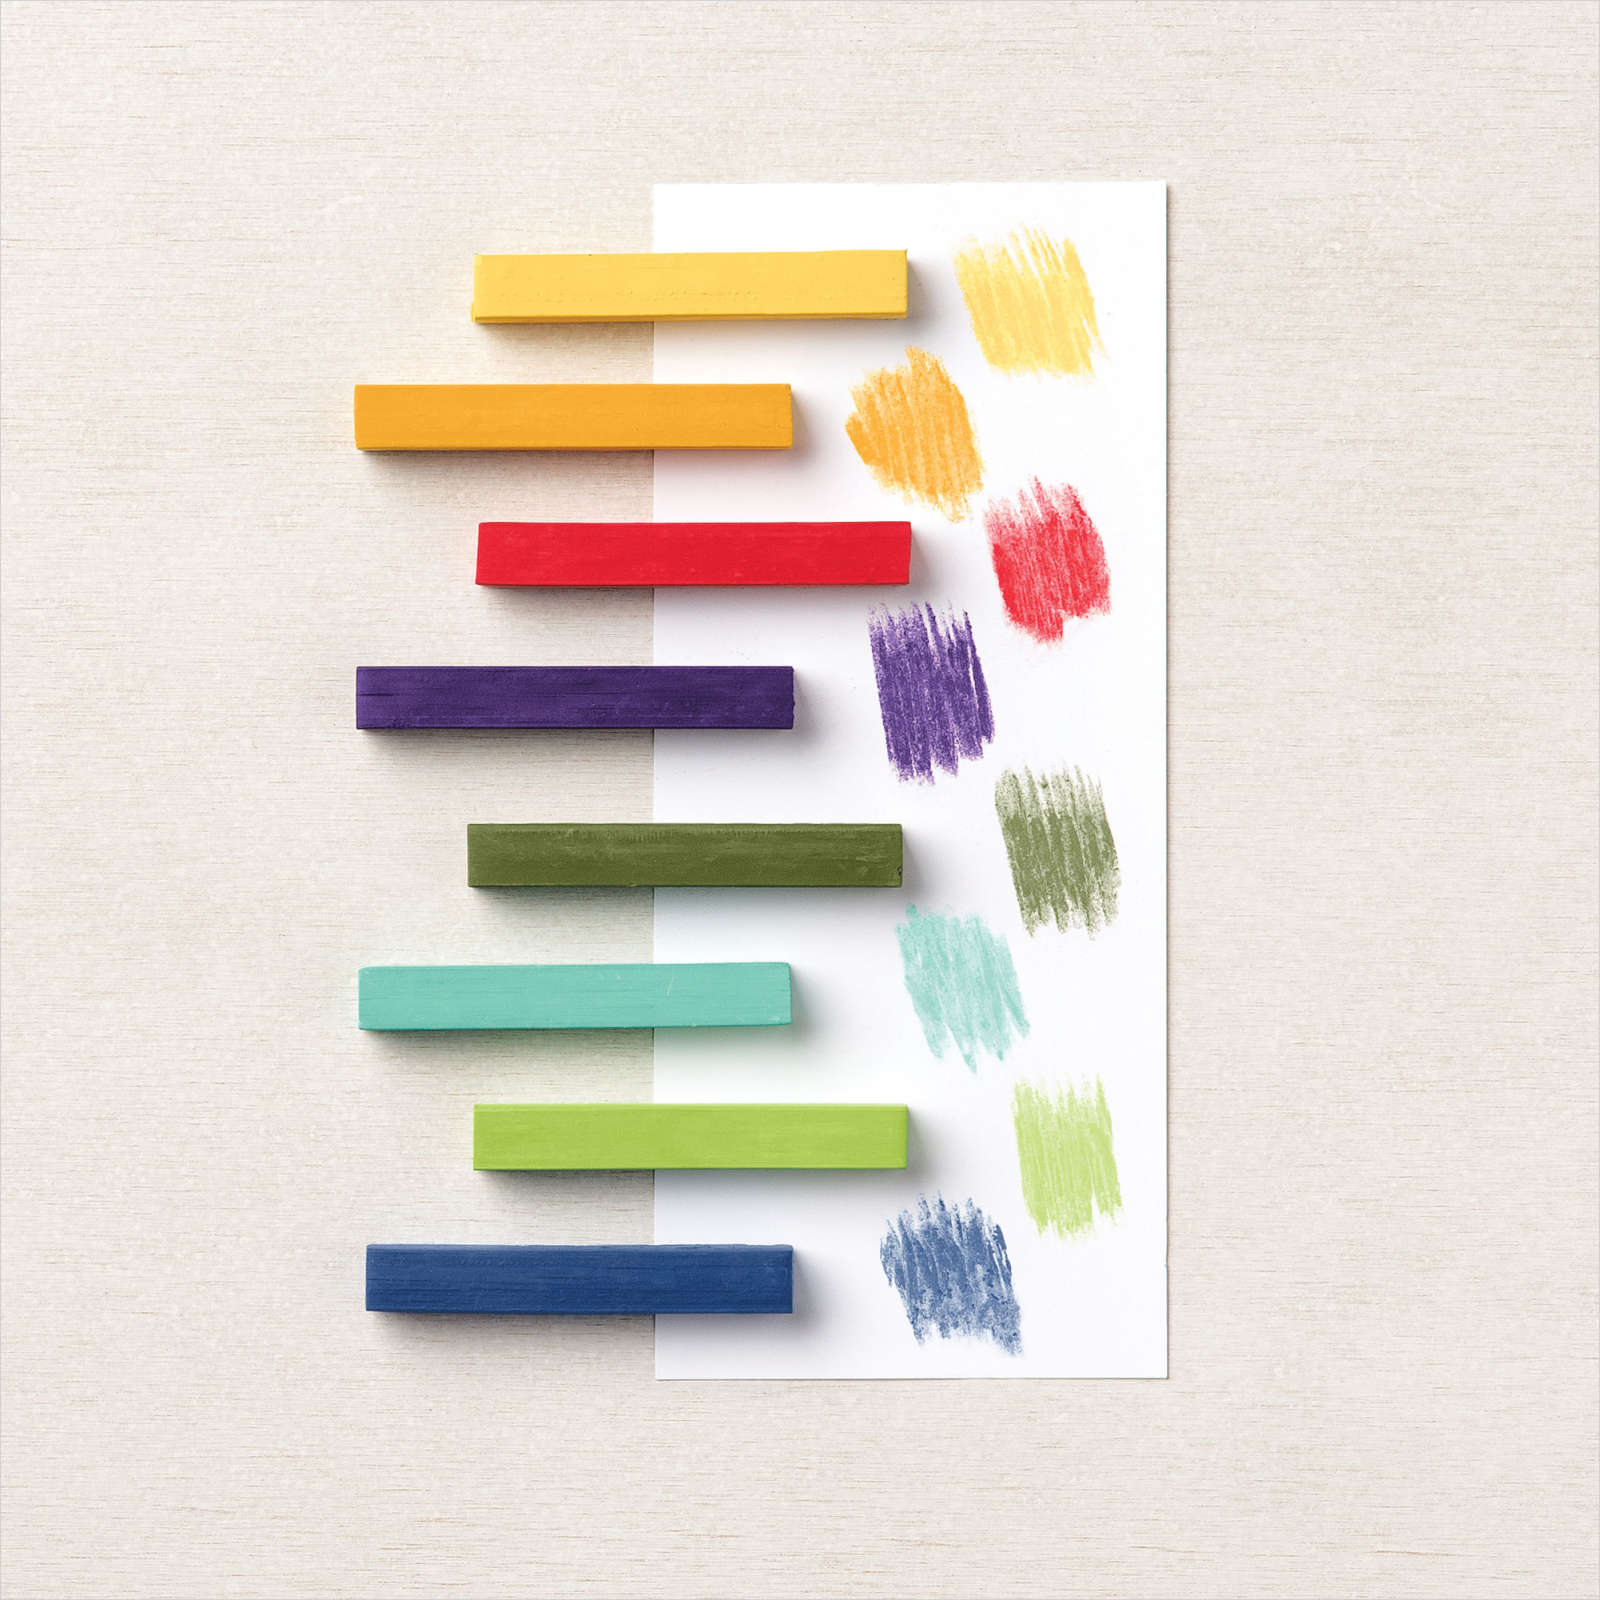
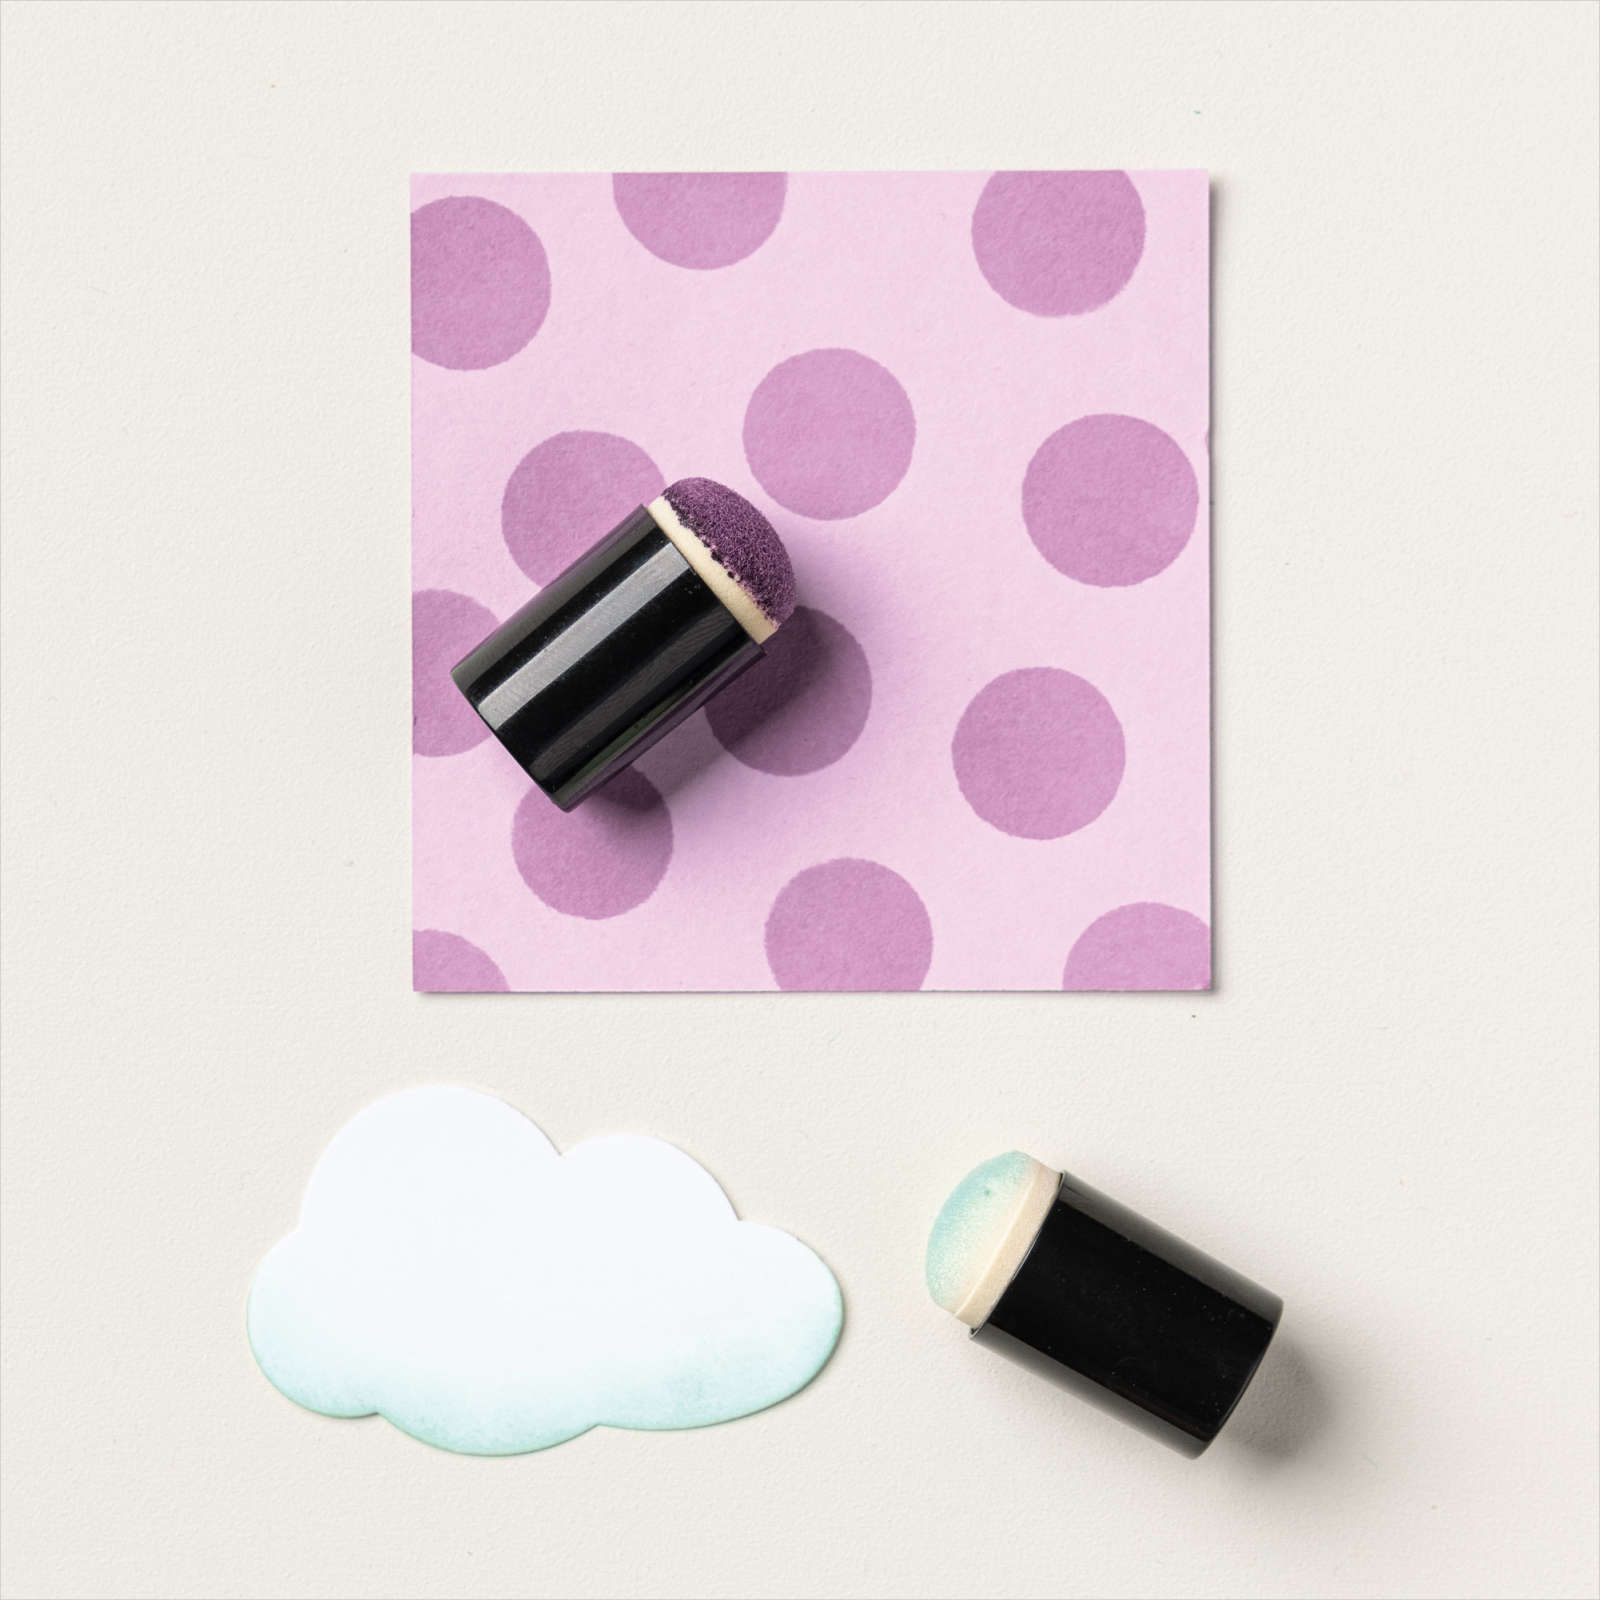
To do this technique, you stamp the image on cardstock with versamark ink. Then you use a sponge dauber, q-tip, or your finger to burnish soft pastels chalk into the ink. it’s an easy and lovely way to enhance an image. I think it is perfect for this butterfly. I added a couple of Brushed Brass Butterflies which were also a prize for accent. The greeting from Encircled in Friendship is stamped in Coastal Cabana ink.
Supplies used to make this Beautiful Amazing Silhouettes Sneak Peek
Amazing Silhouettes stamp set – available January 4, 2022 or now if you join my team as a demonstrator – demonstrators get to preorder the month before a catalog goes live
Encircled in Friendship stamp set
Versamark Ink
Coastal Cabana ink
Soft Pastels – Granny Apple Green and Coastal Cabana
Brushed Brass Butterflies – available in new January – July mini catalog
Basic White cardstock 11″ x 4 1/4″ scored and folded at 5 1/2″
Click on the images below to go to my online store to order them. The Amazing Silhouettes stamp set and brushed brass butterflies are not available until Jan 4 If you want them now, contact me about becoming a demonstrator on my team. I’d love to have you join me in this great business.