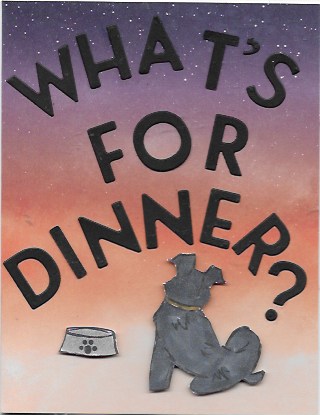
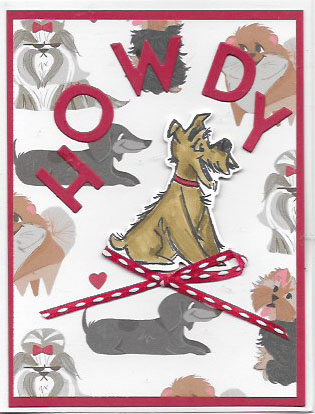
Here are two Happy National Dog Day cards. I created them with the Pampered Pets Bundle (154069) and the Playful Alphabet dies (152706). The first card base is one of the retired Summer Nights Add-on card bases that were available to expand the July Paper Pumpkin Kit. Where did I get the apostrophe you ask? One of the alphabet dies has a cedilla, Ç. I just cut off the squiggle from that character.
For the second Happy National Dog Day card, I used the same Pampered Pets bundle and Playful Alphabet dies. This time I used one of the designs from the Playful Pets Designer Series Paper for the background. We have two dachshunds so I of course had to be sure that the dachsies were not covered up! LOL!
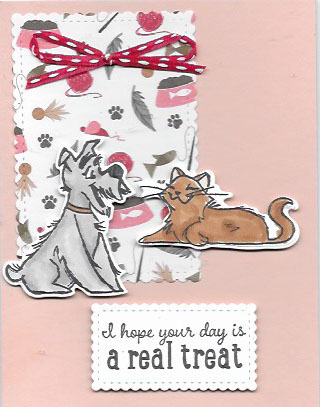
The Pampered Pets bundle also includes a couple of very cute cat images. On this card, the dog is wishing the cat a day that is a real treat. The smug look on the cat makes me smile every time I look at it.
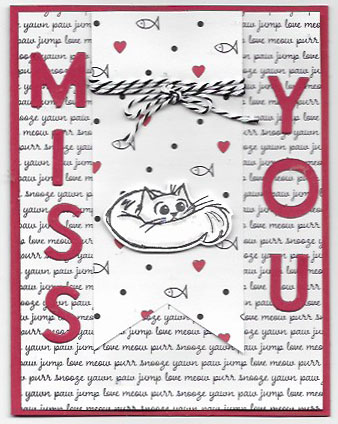
I was having so much fun with the Playful Alphabet dies and the Pampered Pets bundle that I had to make a fourth card using the last cat image. This cat looks like he is sad to me. It is the perfect image for a Miss You sentiment.
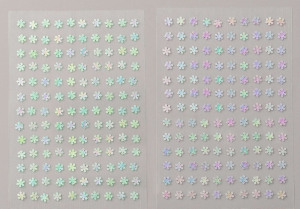
I’ll bet you are imagining all kinds of other cards you could make with the Playful Pets Suite of products. To order the supplies I used for these cards, click on the photos to go to the shopping cart on my online store. You will be able to delete any of the supplies you already have before checking out. Remember, this is my birthday month and I’m giving YOU a gift of the Snowflake Adhesive-backed Embellishments when you place an order this month.
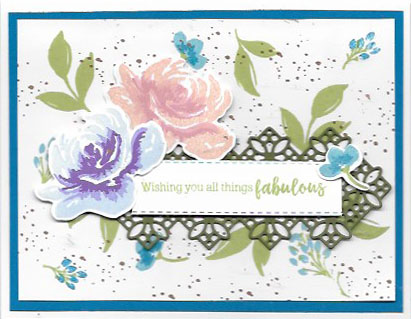
The stunning All Things Fabulous Bundle (154112) enables you to make beautiful floral cards and decorate 3D items. This bundle includes a set of 26 photopolymer stamps and is a 3-step stamp set. This gives you the ability to create a wonderful sense of depth to the flowers. With so many stamps, it is easy to get confused as to how to use them all. Let me share some things I have discovered to make it easier for you.
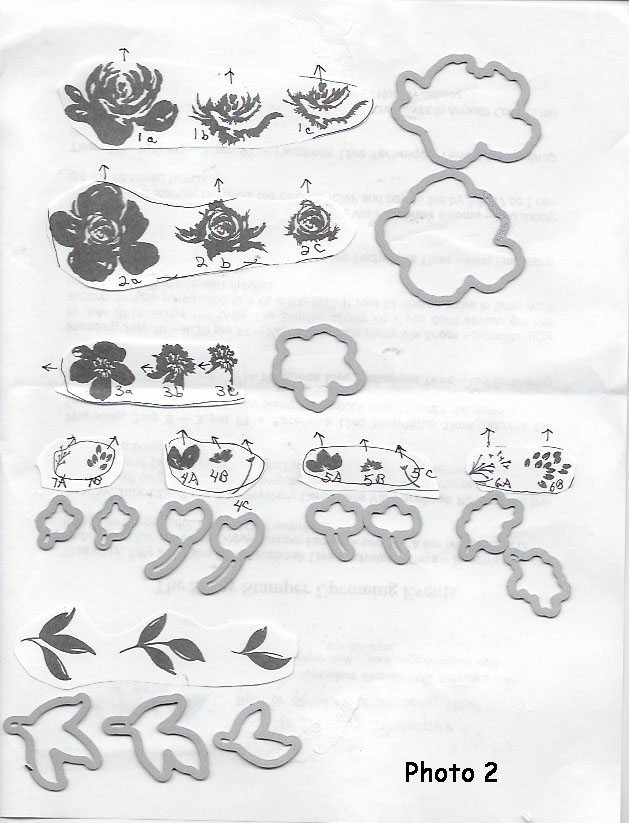
The stamp case insert has the three stamps for each flower
grouped together in a line. That is helpful. The clear plastic sheet the stamps
stick to not only has the stamped image of the stamp but also has the three
stamps to use labelled in very tiny, almost microscopic print along with an
arrow showing the direction the stamp faces to line up with each stamp of the
series. Honestly, I did not see the tiny print even after someone said it was
there. I thought the labelling was missing on my set. Finally, I was able to
see it when I got the light to reflect just right off the plastic sheet. I have
created a cheat sheet for you with the labeling and direction arrows
hand-written so even aging eyes like mine can see them. I also found
positioning the dies a little challenging at first so I have included the die
to use next to each set of stamps. I hope this cheat sheet will help you as
much as it has helped me. I keep it close by so I can see the positioning of
each stamp. See photo 2.
On a side note, I though 4a and 5a were leaves with 4b and
5b being flowers to nest with the leaves. After several tries, it dawned on me
that 4a and 4b were a two-step flower with 4c being the stem. The same is true
for 5a, 5b, and 5c.
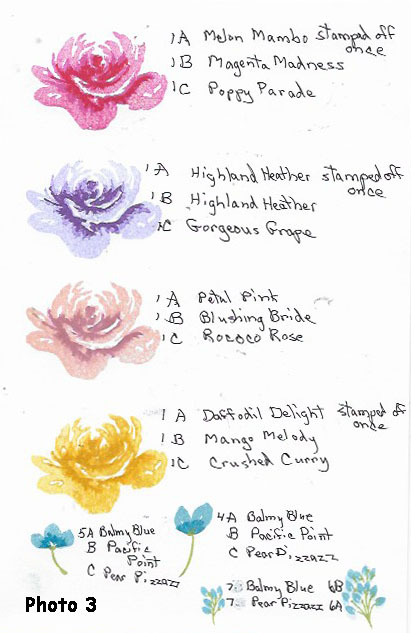
In 3-step stamping, ink the stamp with the least detail with
the lightest color stamp, the next greater detail with the next darker ink, and
the stamp with the greatest detail with the darkest ink. Sometimes it helps to
stamp off once one of the colors to create a nice gradation of depth of color.
Use the lines and spaces on each successive stamp in a series to guide in
placement of each stamp. Have fun experimenting with different color
combinations while practicing placement of the stamps. See photo 3 with some of
the combinations I really like.
TO MAKE THE STUNNING ALL THINGS FABULOUS BUNDLE CARD
Supplies: Stamp sets – All Things Fabulous, Forever Fern (speckles stamp)
Inks – Combo 1 for rose – Petal Pink, Blushing Bride, Rococo Rose Combo 2 for rose – Purple Posy (retired), Highland Heather*, Gorgeous Grape Combo for flower 5 – Balmy Blue, Pacific Point Pear Pizzazz, Cinnamon Cider *since Purple Posy ink is retired, use Highland Heather ink stamped off once for first layer
Cardstock – Whisper White 8 ½” x 5 ½” scored and folded for card base, 5” x 3 ¾”, scraps for large flowers and label; Pacific Point 5 ¼” x 4”, Mossy Meadow 5” x 2”
Instructions: 1. Adhere Pacific Point CS to card base with Stampin’ Seal 2. Randomly stamp small flowers and leaves on 5” x 3 ¾” Whisper White piece. Hint – Place all three leaf stamps on D acrylic block and only have to stamp it twice on this layer. 3. Fill in blank spaces with the speckles stamp using Cinnamon Cider ink. Then adhere this layer to card front. 4. Cut the Mossy Meadow CS out with the beautiful lattice die. Adhere it to the card front with a bit of Stampin’ Seal. 5. Stamp the greeting on Whisper White CS with Pear Pizzazz ink. 6.Use the next to smallest skinny rectangle to cut out the greeting. However, the label will be too wide and cover too much of the Mossy Meadow diecut. Make the label thinner by placing the die on the CS so that one edge of the die is close to the stamped image and run through the die-cutting machine. Place the resulting label back in the die matching the stitching on the ends and cutting off part of the width of the label. 7. Adhere the label to card front with Stampin’ Dimensionals. 8. Stamp the rose series of stamps that are open at the top on scraps of Whisper White CS once with the Combo 1 of inks and once with the Combo 2. Cut out with the matching die. Add to the card front with Stampin’ Dimensionals. 9. Stamp the flower 5 series with Balmy Blue and Pacific Point inks and cut out with die. Add to card front by corner of label with Stampin’ Mini Dimensional.
Order this stunning All Things Fabulous Bundle and follow along as I share different samples using this bundle in the next few blog posts. I will also be featuring it on this coming Friday’s FaceBook Live at 3 pm on my Soggy Stamper Facebook page.
A totally new Online store opening today! The time had come to update the Stampin’ Up! online store. It had become a legacy and almost a dinosaur as online stores go. Rather than just remodel the store, a completely new platform and design has been developed. The old online store closed today at 12:00 am and the new one opened for business at 7:00 am MDT.
You will love the new store! It has been designed with the new stamper in mind so it is much more intuitive. Some of the product names have been changed like patterned paper substituted for designer series papers. You may find other terms changed as you browse through the store. Images are larger so you can see details better. Another feature is a great sorting function. You can choose to just see stamps that are seasonal, for Christmas, etc.
All your information from the old store will be transferred to this store so you don’t have to enter your address, credit card number, etc. again. However, this is a totally new site with a new URL so any saved passwords and links will not work as they are tied to the old store. You will have to enter your password manually the first time you sign in to the new store. If you have forgotten your password, there is a place to click to get a new password.
When you click on an item, you will see a few cool items:
Large photos of the item and samples created with it on the left
On the right is an option to choose the quantity and a ‘Add to Basket’ button
In the upper right corner of every screen is a shopping basket icon. Just click on it to see what is in your basket.
just above the ‘Add to basket’ button is a small heart. When you click on this, you add the item to your wish list. The cool thing about this list is that you can send it to someone else who is interested in giving you a present. This wish list is saved and when you log in again, not only can you access it but you will be reminded of the items on the list.
If an item is in low supply or backordered, that is stated under the picture of the item on the pages that show all the items in that particular category. It lets you know upfront the status of the item.
As you continue to add items to your shopping basket, once you reach the total purchases that give you Stampin’ Benefits, a button appears that allows you to use the rewards to purchase the item.
In the upper right corner there will appear a gift icon. Clicking on this lets you know what gifts you will receive. Everyone who purchased at least $50 in July should see this icon which lets you know you have a coupon available to redeem in August.
On the right side is a turquoise button for giving feedback. Clicking on this button gives you the ability to give directly to Stampin’ Up! feedback on the product on the page, on a possible glitch on the page, a suggestion on how to make the page better, or to ask a question. Do use this feature as it helps Stampin’ Up! make this new online store even better.
Once you have finished shopping, checkout is easy. Click on the shopping basket icon. On the left side of the screen will be pictures, name of items, and prices in your shopping cart. On the right side is a large checkout button and places to enter coupon codes and host codes. Once you click on the checkout button, the next screen will give you a place to enter payment, review order, and place order.
I’m really excited about the new online store opening today. i love the bigger pictures and the wish list function in particular. I’m sure you will love it too! This is my birthday month and I am celebrating by giving YOU a package of adhesive-backed snowflakes when you place an order with me this month.
Go check out the new store…and do a little shopping while you are there. 🙂
Oh my, those Zany Zebras (152536) are so much fun! Aren’t they just the cutest? Last Friday I shared a #simplestamping card a child could make. Check it out! Today I’m sharing the card I made for a swap with an online demonstrator group. This card is quite a step up from the simple stamping one I shared on Friday.
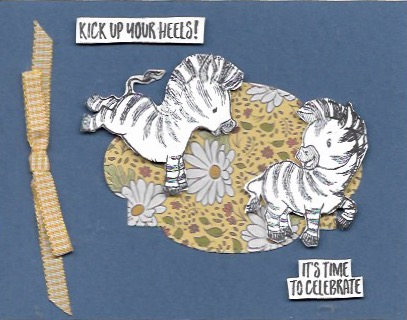
For this card I started with a Misty Moonlight cardstock base. Misty Moonlight is one of the beautiful new 2020-2022 In Colors. You can see the other colors here. I used one of the Stitched So Sweetly dies to cut out piece of Ornate Garden Specialty Designer Series Paper to serve as a background for the zebras. The zebras and greetings were stamped with Memento ink on Whisper White cardstock and hand cut out. Finally I added a bow from the Bumblebee 1/4″ gingham ribbon.
Supplies Used
Misty Moonlight cardstock, 8 1/2″ x 5 1/2″ folded in half for card base
Whisper White cardstock, scraps
Ornate Garden Specialty Designer Series Paper, scrap
Stitched So Sweetly Dies
Bumblebee 1/4″ Gingham Ribbon
Memento ink pad
Since those Zany Zebras are so much fun, I have fancy-fold card using them coming in another post this week. Check back on Friday. You won’t want to miss this post.
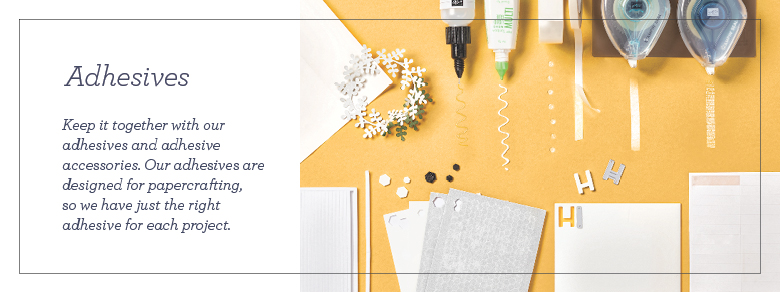
What’s up with all the adhesives on page 162 in the Annual catalog? There are so many that I don’t know what to use! Let me help you sort it out. The new Stampin’ Up! online store that England has been using for the last 6 months or so divides the adhesives up into three general categories.
Tapes for Basics
This category includes Stampin’ Seal and Stampin’ Seal +, our product to replace SNAIL adhesive. These two products have an ergonomic design that fits comfortably in your hand and applies a line of adhesive. The regular Stampin’ Seal is for adhering layers on cards while the Stampin’ Seal + is for 3D projects. Tear & Tape is another tape that creates an even tighter hold when joining two pieces of cardstock together in a 3D project. Here is a tip: When adhering a strip of ribbon to your project, lay the ribbon on a craft sheet and apply the Stampin’ Seal along the ribbon.
Glue for Embellishmenst
This category includes Multipurpose Liquid Glue, Fine-tip Glue Pen, and Mini-Glue Dots. These are perfect for adhering sequins, bows, and small die-cuts. I have a tip for this category too: When using Multipurpose Liquid Glue, use just small dots. A little goes a long way. I also suggest using the liquid glue to adhere layers when you need to adjust the position a bit as the glue takes a moment to set.
Foam for Dimension
The new 2020-2021 Annual catalog has a wonderful assortment of adhesive foam products to meet various creative needs. There are the Stampin’ Dimensional in both white and black and in mini size to add height to parts of your design. You can also purchase foam strips to support a long edge of a layer and to make shaker boxes. An exciting addition this year is the Foam Adhesive Sheets. Now you can adhere the foam to the back of a piece of cardstock of designer series paper and then die-cut an object like letters or hearts or… Then you just peel off the paper backing and stick the object down on your card front. No longer do you have to take time to put multiple Stampin’ Dimensionals on the item!
Other Adhesives
There are two other products on this page of adhesives that I want to point out. First is adhesive sheets. Like the Foam Adhesive Sheets, you can apply the adhesive sheet to the back of your cardstock before cutting an object out. Then remove the paper backing and adhere the die-cut to your project. Another way to use this and to conserve on the sheets is to lift the paper cover and stick a die-cut down on the sticky surface. Replace the covering paper and rub the die-cut to make sure all the sticky gets transferred to your die-cut. Then use a Take Your Pick to lift the die-cut off the adhesive sheet. This way you can use the sheet over and over again.
The second product I am really excited about solves the problem of having your old clear mount stamps not sticking to the acrylic blocks. This is the Cling Adhesive. Yes, now we can buy the wonderful cling used in the labels of our cling rubber stamps. You get a package of 168 strips that are 1 ¾” x ¾”. Just one strip is all that is needed to hold those older stamps to your blocks.
I hope this article has helped you
know what is up with all the adhesives Stampin’ Up! offers and guides you to
know when to use each of them. Contact me if you have any questions or need to
order them.
Stamping with kids is fun and can be challenging or it can be very gratifying. There are some things I have learned over the years that might help you enjoy the time spent with your kids.
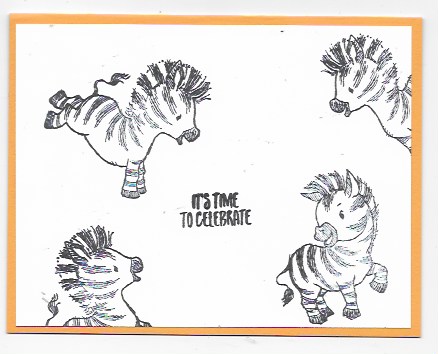
First you need to keep the projects simple. This card is a good example of this. I chose a stamp set that would appeal to children. This is the Zany Zebras stamp set (152536). The zebras are cute and don’t need to be colored in. You can fine other stamp sets that would appeal to kids on pages 94-99 of the 2020 – 2021 Annual catalog. I stamped the three different zebra images randomly on the Whisper White cardstock with Memento Ink and added a greeting in the middle. With kids I suggest they stamp the greeting first and then stamp the animals around it. That layer was then added to the card base of Mango Melody cardstock.
It is important to give the kids a brief lesson on how to use the stamps, ink pads, and adhesives. Show them to tap, tap, tap the stamp onto the ink pad rather than pressing down really hard. Teach them to close up the stamp pads as soon as they have finished using it to avoid getting ink all over everything. Show them how to clean the stamps as soon as they have used them by stamping off the excess ink onto scrap paper before washing them. This keeps your scrubber from getting filled with ink right away.
You may have a specific designed project for the kids to make but be prepared for them to do their own thing. I used to get so frustrated because the kids would totally cover the card with images ruining (in my mind) the composition by adding too much stuff. But you know what? They were having great fun and enjoying being creative! Isn’t that the purpose of introducing them to stamping?
Another thing I have learned when stamping with kids is to have a predetermined amount of product available for them to use. I had a class of girls that were about ten years old. The project included using self-adhesive rhinestones and I just put the package out on the table. I had intended them to each use only three rhinestones. However, they would have used the whole package if I hadn’t stopped them! Oops…lesson learned. Cut up the package into pieces containing the three rhinestones they are to use and give one to each stamper, then put the rest away.
Finally, relax! Stamping with kids is fun. It is a wonderful way to spend a rainy afternoon or when they are bored. The time spent together is well worth the effort and you are encouraging their creativity. I hope these point on stamping with kids help. Contact me for more ideas or answers to questions you may have.
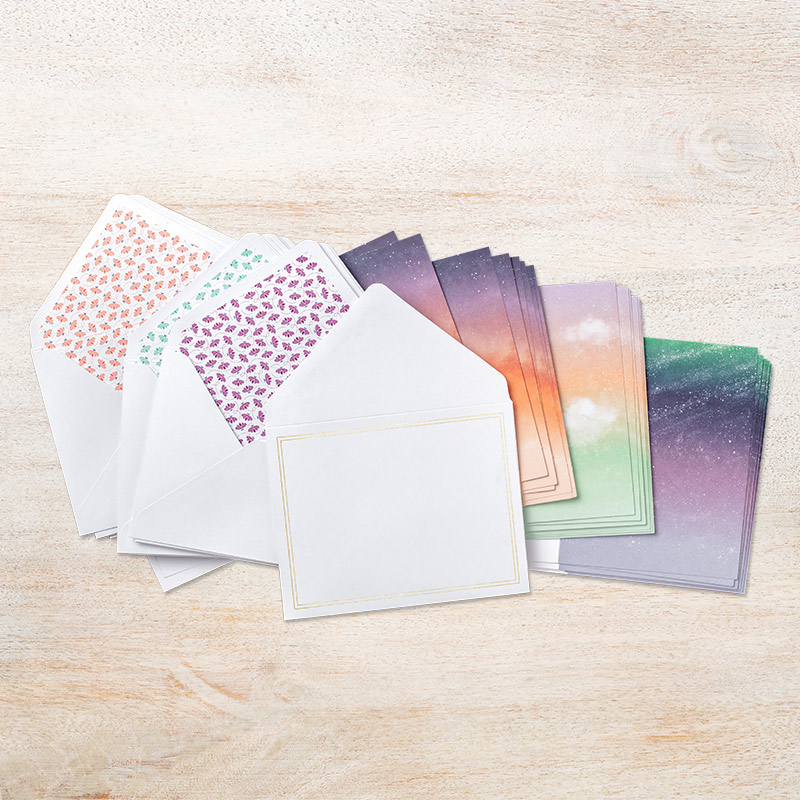
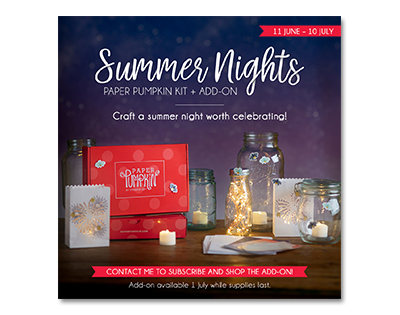
Just look at the colors in the pre-printed card bases for the beautiful Summer Nights Add-on that coordinates with the July Summer Nights Paper Pumpkin. These are available to purchase on a customer purchase for just $10 and will make 24 gorgeous cards using the stamps and extra supplies from the July Paper Pumpkin kit.
Look at what the Summer Nights Paper Pumpkin kit makes! In this exclusive fun-filled kit, you’ll unbox enough supplies to create nine postcard-style cards, coordinating envelopes, and die-cut tealight bags. But today is the last day to subscribe to the Paper Pumpkin to receive this kit! Click here now to subscribe.
Contact me or visit my online store to order the Summer Nights PP Add-on. To get the most for the $6.95 minimum shipping fee, add to your order to total at least $69.50 in product.
There are only two more days to subscribe to the Paper Pumpkin in order to receive the July kit. This is one kit you don’t want to miss out on. Celebrate the magic of summer nights with the Summer Nights Paper Pumpkin Kit! In this exclusive fun-filled kit, you’ll unbox enough supplies to create nine postcard-style cards, coordinating envelopes, and die-cut tealight bags. What’s even more spectacular about July’s kit is the add-on you can purchase along with it! The Summer Nights Add-On includes 24 card bases and envelopes in coordinating Summer Nights designs. This add-on is perfect for helping you expand the Summer Nights creative experience beyond the Paper Pumpkin kit. Between the add-on and the leftover supplies from your Summer Nights kit, you will be crafting a summer night worth celebrating all month long! But you must be a subscriber by July 10 to receive this month’s kit. That means there are only two more days to subscribe. Check out this video then Subscribe now!
The Summer Nights Add-on (154973) can be added to your order of other products. This month is Bonus Days. For every $50 you spend in product during July, you get a coupon code by email worth $5 to be used in August. So…put together an order of $50 or more including the Summer Nights Add-on and start collecting coupons! Either email me your order or click on the ‘Shop Now’ button. Remember you also can collect Soggy Stamper rewards for shopping with me. Check out the details and download your tracking sheet here.
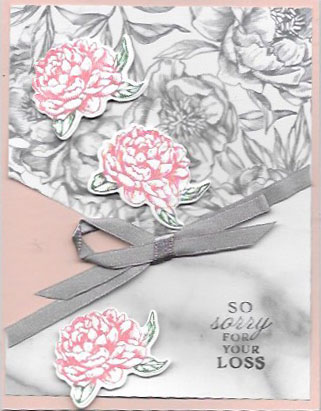
I chose one of the gray granite floral designs for this card. I cut a 5 1/4″ x 4″ piece of the dsp on the diagonal with the intention of just flipping one piece over and lining it up with the front side. Well….that didn’t work as the cut then went the wrong direction as you can see. This is one of those ‘happy’ mistakes because I like the way the card turned out better than I had planned. I debated about using one larger flower and covering the triangle where the card base shows but ended up with the three smaller flowers instead.
This Peony Garden Designer Series Paper has several designs that lend themselves beautifully to being colored in with Stampin’ Blends. However for this card I wanted to just have the three smaller flowers add the color.
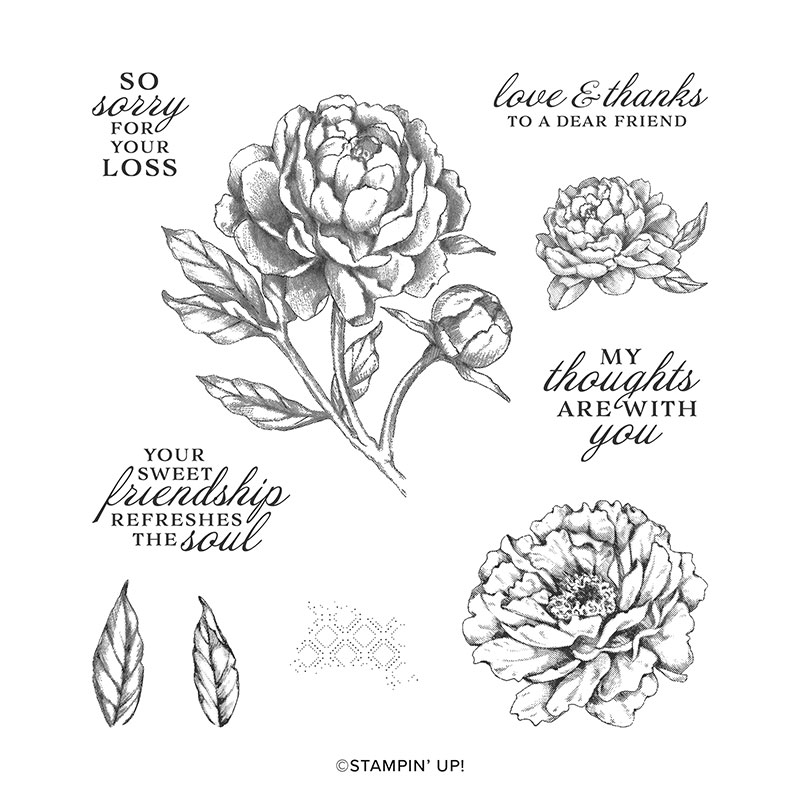
Two of the sayings in the Prized Peony stamp set speak to the passing of someone dear. This card is going to a long-time friend whose sister just passed away. The stamp for the inside says “My thoughts are with you.” I love it when a stamp set has a greeting for the front of the card and one for the inside.
Supplies to make this card
Petal Pink cardstock – 11″ x 4 1/4″ scored at 5 1/2″ and folded for card base
So I’m still loving the Peony Garden Suite. Have I convinced you to love it too? Then contact me or visit my online store to order the suite for yourself. Remember to use the host code when you order for a small gift from me and remember to keep track of your order on my Customer Appreciation sheet.
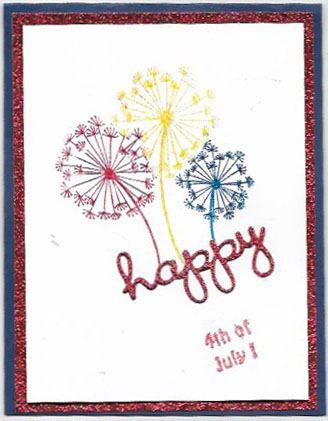
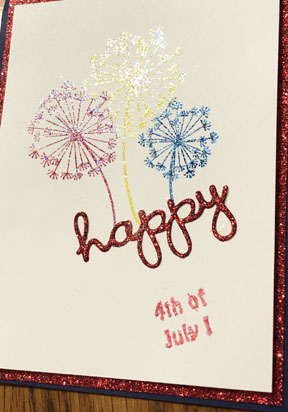
Here is my Happy Fourth of July Card for you. When you don’t have star stamps or dies, you have to be creative to make a Fourth of July card. This stamp set is Dandelion Wishes (151345) and the dandelion seed heads look a lot like mini fireworks to me. I stamped the image in Versamark…no, I first used markers to color the stamp and then stamped it in Versamark. Big mistake! I should have stamped first in Versamark and then colored with the markers as my Versamark pad got red, blue, and yellow ink on it. Anyways, I then put retired Iridescent Ice embossing powder on the image and heat embossed it. I also did this with the greeting. The glitter from the embossing powder doesn’t show up in the above photo but check out this close-up one.
You can use a similar technique to emboss an image in any color you want. First ink the stamp with Versamark and then ink with your desired color. Stamp the image and emboss with clear embossing powder.
Supplies To Make This Happy Fourth of July Card
Night of Navy Cardstock 11″ x 4 1/4″ scored at 5 1/2″ and folded for card base
Retired red glimmer paper 5 1/4″ x 4″
Whisper White Cardstock 5″ x 3 3/4″
Dandelion Wishes and retired More Great Greetings stamp sets
Versamark Ink and Pacific Point, Real Red, retired Pineapple Punch Stampin’ Write Markers
retired Iridescent Ice embossing powder, heat tool, Well-Written Dies (151816)
Stampin’ Seal, Stampin Dimensionals
So here’s to a great Fourth of July! Stay safe, keep your distance and mask up!
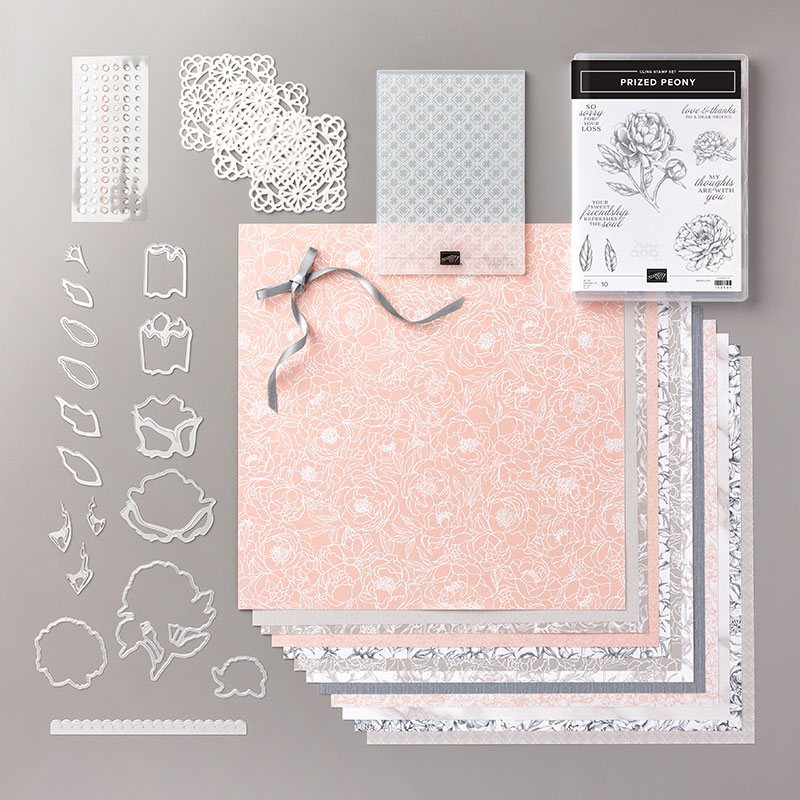
Today I’m sharing a card I have created with the Prized Peony Bundle (154056), part of the Peony Garden Suite. Last Friday I introduced you to this beautiful Peony Garden Suite (154129) and showed you all the components of this suite.
In addition to the wonderful Peony dies (152701) that cut out the pieces to make the beautiful 3-D peony flower, this bundle has a lovely Prized Peony stamp set (152504), a DisINKtive stamp that creates the illusion of depth with just one stamp. The Peony dies also include dies to cut out the stamped images.
Supplies for sample card
Soft Seafoam Cardstock (146988) 8 1/2″ x 5 1/2″ scored and folded at 4 1/4″ for card base
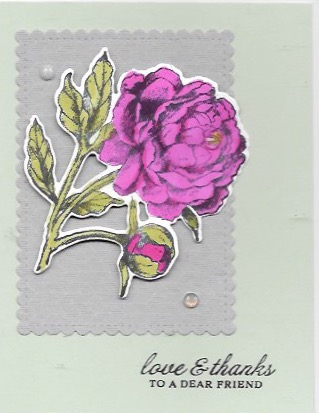
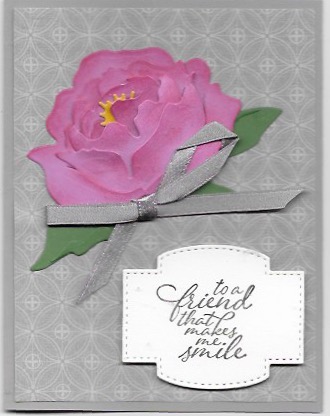
The Peony Garden Suite is my favorite suite of the 2020-2021 Annual Catalog. I created the card above with some of the products found in this suite. Yes, that is a 3-D flower which is so easy to make using the Peony dies (152701) included in this suite. Click on the photo to go to the bundle in my online store. By purchasing the bundle, you save 10%. The greeting is one of the stamps in the Prized Peony stamp set (152504). While this photo doesn’t show the shimmer of the soft Gray Granite ribbon (152463) very well, it is really a beautiful ribbon. Just look at all the beautiful components of this Peony Garden Suite!
Supplies Used to Create Card:
Gray Granite Cardstock 8 1/2″ x 5 1/2″ scored and folded at 4 1/4″ for card base
Light Gray subtle diamond pattern of Peony Garden designer Series Paper 5 1/4″ x 4″
Magenta Madness Cardstock 5 1/2″ x 4 1/4″ die-cut with peony dies then sponged with Magenta Madness ink
Mango Melody Cardstock scrap for the center of the flower
Garden Green Cardstock scraps for the leaf pieces then sponged with Garden Green ink when assembled
Whisper White Cardstock scrap for greeting die-cut with largest shaped die of Stitched So Sweetly Dies
Gray Granite ink to stamp greeting
You can easily see why the Peony Garden Suite is my favorite suite. I will show you more samples of cards and maybe a 3-D item made with this suite in the coming week. Check back here on Monday, Wednesday, and Friday. Contact me to order these supplies so you can create your own beauties. I’ll even include a free tutorial with your order.
Taking good care of your Stampin’ Blends is of utmost importance if you love them as much as I do. Since the Stampin’ Blends are alcohol-based inks, they will dry out much faster than a water based- marker when exposed to air. That is why the tops are extremely tight. When you are closing your markers, make sure you hear a “click” which will assure you that your marker is closed correctly. You may even want to press the end that you closed down on the table to be extra careful.
The caps have an interior well which is designed to keep the marker wet as long as possible. Make certain you have inserted the marker tip straight-on into the top. If not, you may mash the tip of the marker and blunt the tip. So, take time to close your markers correctly.
Do not leave your markers open for long periods of time. When coloring an image in which I am switching colors, I slide the tip loosely into the top case so they are not exposed to the air when I know I will be using that color several times.
There are two ends to your Stampin’ Blends. One end is a brush type nib and the other end is more like a pen to create find lines. There is a white line on each of the caps. One has a thicker line which goes to the brush type end and the thin line goes to the thin, pen type end. Make certain you are adding the correct top. There is also a picture on each end of the marker showing the thick and the thin ends of the marker.
When storing your Stampin’ Blends, make certain they are stored horizontally. The barrel is rectangular shaped to keep them from rolling and helps keep them from rolling away.
By taking good care of your Stampin’ Blends, they will have a much longer life.
Dreamy summer nights are coming in July if you subscribe to the Paper Pumpkin by July 10. This beautiful kit includes supplies to make nine postcards with coordinating envelopes and nine die-cut tealight bags. Imagine how pretty a dinner or picnic table would look with one of these tealight luminaries set at each place! In addition, you can order an add-on kit with 24 printed card bases and envelopes to fill all your need for cards for the rest of the year.
You may be wondering what a subscription to the Paper Pumpkin is all about. Stampin’ Up! started this subscription program seven years ago. Each month a stamp kit is mailed out to subscribers about the 15th of the month. Everything you need to create the darling projects in the kits is included except for scissors which are needed to cut ribbon.
In the Paper Pumpkin kits you will find an exclusive stamp set, preprinted card bases, die-cuts, glue dots, Stampin’ Dimensionals, an ink spot, embellishments, envelopes, and instructions. iWith your first kit you receive an acrylic block. You have the option to postpone receiving a kit one month and you can cancel your subscription at any time. The deadline to give notice in order to not receive that month’s kit is the 10th of the month.
When you subscribe to the Paper Pumpkin, I invite you to Join me in monthly Zoom Paper Pumpkin Parties . I scheduled the next one for July 20 at 6:30 pm Pacific Time. During this time we visit and enjoy each other while assembling our Paper Pumpkin kits. Contact me, sue@soggystamper.com, if you want an invitation to this party.
To create these dreamy summer nights you must subscribe to the Paper Pumpkin by July 10. Towards the end of this subscription period, there is a very good chance that the kits sell out! I advise you to subscribe now.
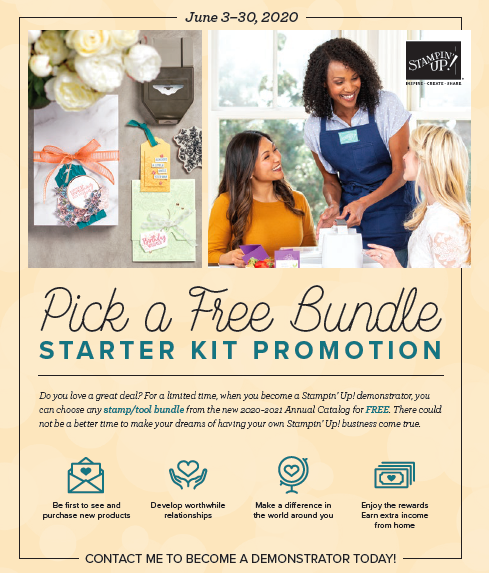
June is a great time to become a demonstrator and be your own boss. Here are a few reasons why:
Stampin’ Up! just released their new 2020-2021 Annual Catalog. This catalog contains so many new products and fresh ideas! Your friends and neighbors will have lots to be excited about.
You get to choose a free bundle in addition to the $125 worth of product you pick for your starter kit. A bundle is a stamp set and corresponding dies or punch that can be ordered with one order number. When you use this number you get a 10% discount on the two items.
You determine how much time you put into your business. You adjust the time to fit family and health needs. The only requirement to stay active as a demonstrator is to have sales (from customers or yourself) totaling $300 per quarter.
You can make edxtra money to help pay for children’s sports activities, music lessons, or whateve. How much you make depends on how hard you work your business and how well you manage the finances of your business.
You will get as much training and support as you want from me and Stampin’ Up!.
You will make long-time friends with your customers and other demonstrators.
These are some of the reasons why June is a great time to become a demonstrator. I would love to have a discussion with you about how starting your own business as a demonstrator can help you meet your goals. Give me a call and check out more information here.